background image

1

Start Here

MFC-8710DW

MFC-8910DW

Quick Setup Guide

USA/CAN Version 0

Thank you for choosing Brother, your support is important to us and we value your business. Your Brother product 
is engineered and manufactured to the highest standards to deliver reliable performance, day-in and day-out.

Please read the Product Safety Guide first, then read this Quick Setup Guide for the correct setup and installation 
procedure.
To view the Quick Setup Guide in other languages, please visit http://solutions.brother.com/.

1

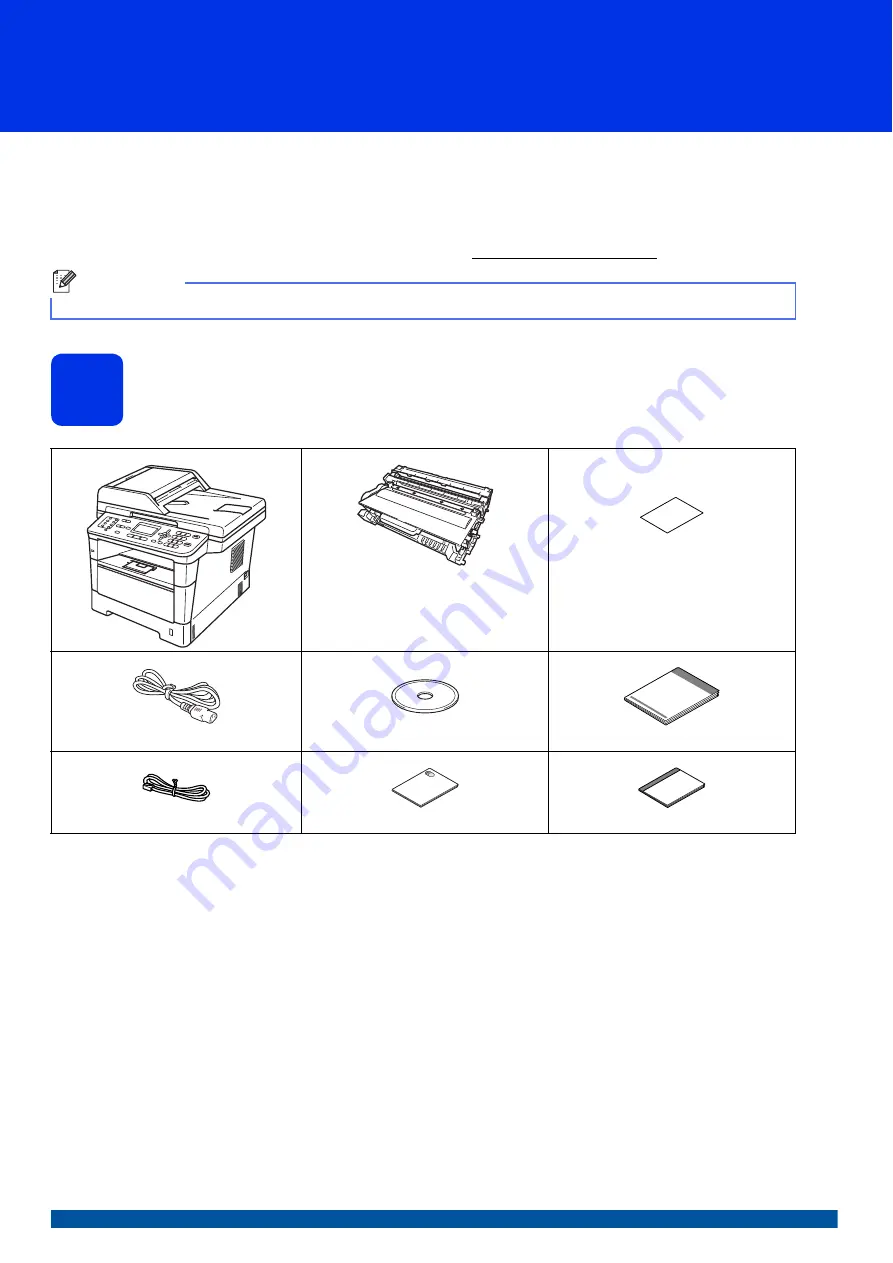
Unpack the machine and check the components

Note

Not all models are available in all countries.

Drum Unit and Toner Cartridge 

Assembly

(pre-installed)

Product Registration Sheet

(USA only)

AC Power Cord

Installer CD-ROM

Quick Setup Guide

Telephone Line Cord

Product Safety Guide

Basic User's Guide

Summary of Contents for MFC-8710DW

Page 1: ...ad the Product Safety Guide first then read this Quick Setup Guide for the correct setup and installation procedure To view the Quick Setup Guide in other languages please visit http solutions brother com 1 Unpack the machine and check the components Note Not all models are available in all countries Drum Unit and Toner Cartridge Assembly pre installed Product Registration Sheet USA only AC Power ...

Page 2: ... machine is heavy and weighs more than 39 7 lb 18 0 kg including paper To prevent possible injuries at least two people should lift the machine by holding it from the front and back If you use a Lower Tray DO NOT carry the machine with the Lower Tray as you may be injured or cause damage to the machine because it is not attached to the Lower Tray WARNING indicates a potentially hazardous situation...

Page 3: ... see Packing and shipping the machine in the Advanced User s Guide The interface cable is not a standard accessory Buy the appropriate interface cable for the connection you want to use USB or Network USB cable It is recommended to use a USB 2 0 cable Type A B that is no longer than 6 feet 2 meters DO NOT connect the interface cable at this time Connecting the interface cable is done during the MF...

Page 4: ...t the silica gel pack Please throw away If ingested seek medical attention immediately d Take out the drum unit and toner cartridge assembly e Remove the orange protective material from the drum unit and toner cartridge assembly f Hold the drum unit and toner cartridge assembly level with both hands and gently shake it from side to side several times to distribute the toner evenly inside the cartr...

Page 5: ... tray will cause paper jams The side to be printed on is face down The paper guides touch the sides of the paper so it will feed properly e Put the paper tray firmly back in the machine Make sure that it is completely inserted into the machine f Lift up the support flap a to prevent paper from sliding off the face down output tray Note For Legal or Folio size paper press the release button a in th...

Page 6: ...ardous electrical conditions on the telephone network by keeping the power cord connected to your machine when you connect it to a telephone line Similarly you can protect yourself when you want to move your machine by disconnecting the telephone line first and then the power cord Important DO NOT connect the interface cable yet Important The telephone line cord MUST be connected to the jack on th...

Page 7: ...ireless setup for Windows users will be covered in later steps Note If you are sharing one telephone line with an external telephone answering machine connect it as shown below Before you connect the external telephone answering machine remove the protective cap c from the EXT jack on the machine a Extension telephone answering machine not supported b External telephone answering machine c Protect...

Page 8: ...8 6 Choose your language if needed a Press Menu 0 0 b Press a or b to choose your language Press OK c Press Stop Exit ...

Page 9: ...tructions on setting up your machine using this service Will you be using a Telephone Answering Device on the same telephone line as your Brother machine Your external telephone answering device TAD will automatically answer every call Voice messages are stored on the external TAD and fax messages are printed Choose External TAD as your receive mode See the instructions below Will you be using you...

Page 10: ...K 02 Date Time XX XX 2012 Month 03 Enter OK Key e g Enter 0 3 for March d Enter the two digits for the day on the dial pad and then press OK 02 Date Time 03 XX 2012 Day 25 Enter OK Key e g Enter 2 5 for 25th e Do one of the following If you want to use the 24 hour clock press a or b to choose 24h Clock and then press OK Go to step f If you want to use the 12 hour clock press a or b to choose 12h C...

Page 11: ...to move the cursor to the right If you entered a character incorrectly and want to change it press d or c to move the cursor to the incorrect character then press Clear Press key One time Two times Three times Four times Five times 2 A B C 2 A 3 D E F 3 D 4 G H I 4 G 5 J K L 5 J 6 M N O 6 M 7 P Q R S 7 8 T U V 8 T 9 W X Y Z 9 For more details see Entering text in the Basic User s Guide Note If you...

Page 12: ...inting reports in the Advanced User s Guide 12 Set tone or pulse dialing mode Canada only Your machine comes set for a Tone dialing service If you have a Pulse dialing service rotary you need to change the dialing mode a Press Menu 0 4 b Press a or b to choose Pulse or Tone Press OK c Press Stop Exit 13 Set the telephone line compatibility If you are connecting the machine to a VoIP service over t...

Page 13: ...self forward one hour in the Spring and backward one hour in the Fall a Press Menu 0 2 2 b Press a or b to choose On or Off Press OK c Press Stop Exit 16 Set the Time Zone You can set the time zone not summer time but standard time on the machine for your location For example the time zone for Eastern Time in the USA and Canada is UTC 05 00 a Press Menu 0 2 3 b Press a or b to choose the time zone...

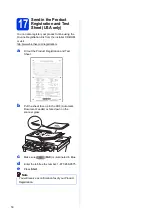
Page 14: ... ROM or visit http www brother com registration a Fill out the Product Registration and Test Sheet b Put the sheet face up in the ADF Automatic Document Feeder or face down on the scanner glass c Make sure FAX is illuminated in Blue d Enter the toll free fax number 1 877 268 9575 e Press Start Note You will receive a confirmation fax of your Product Registration ...

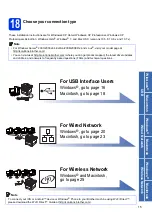
Page 15: ...del page at http solutions brother com You can visit us at http solutions brother com where you can get product support the latest driver updates and utilities and answers to frequently asked questions FAQs and technical questions For USB Interface Users Windows go to page 16 Macintosh go to page 18 For Wired Network Windows go to page 20 Macintosh go to page 23 For Wireless Network Windows and Ma...

Page 16: ...eens may differ depending on your operating system Note The installer CD ROM includes Nuance PaperPort 12SE This software supports Windows XP SP3 or greater XP Professional x64 Edition SP2 or greater Windows Vista SP2 or greater and Windows 7 Update to the latest Windows Service Pack before installing MFL Pro Suite Note If the Brother screen does not appear automatically go to My Computer Computer...

Page 17: ...ortant DO NOT cancel any of the screens during the installation It may take a few seconds for all screens to appear Note For Windows Vista and Windows 7 users when the Windows Security screen appears click the check box and click Install to complete the installation correctly Note If an error message appears during the software installation run the Installation Diagnostics located in Start All Pro...

Page 18: ...al Connection USB and then click Next Follow the on screen instructions d Choose your machine from the list and then click OK e When this screen appears click Next Important For users of Mac OS X 10 5 7 or lower upgrade to Mac OS X 10 5 8 10 7 x For the latest drivers and information for the Mac OS X you are using visit http solutions brother com Note If you want to add the PS driver BR Script3 pr...

Page 19: ... PageManager is installed OCR capability is added to Brother ControlCenter2 You can easily scan share and organize photos and documents using Presto PageManager a On the Brother Support screen click Presto PageManager and follow the on screen instructions Finish The installation is now complete ...

Page 20: ... close them The screens may differ depending on your operating system Note The installer CD ROM includes Nuance PaperPort 12SE This software supports Windows XP SP3 or greater XP Professional x64 Edition SP2 or greater Windows Vista SP2 or greater and Windows 7 Update to the latest Windows Service Pack before installing MFL Pro Suite Disable all personal firewall software other than Windows Firewa...

Page 21: ...e computer you must log on with Administrator rights Note If you want to install the PS driver BR Script3 printer driver choose Custom Install and then follow the on screen instructions Important DO NOT cancel any of the screens during the installation It may take a few seconds for all screens to appear Note If prompted choose your machine from the list and then click Next If your machine is not f...

Page 22: ... to use more than 5 PCs with Nuance PaperPort 12SE installed please purchase the Brother NL 5 pack which is a multiple PC license agreement pack for up to 5 additional users To purchase the NL 5 pack contact your authorized Brother dealer or contact Brother customer service Finish The installation is now complete Note XML Paper Specification Printer Driver The XML Paper Specification Printer Drive...

Page 23: ...con If prompted select your model c Choose Wired Network Connection Ethernet and then click Next Follow the on screen instructions d Choose your machine from the list and then click OK Important For users of Mac OS X 10 5 7 or lower upgrade to Mac OS X 10 5 8 10 7 x For the latest drivers and information for the Mac OS X you are using visit http solutions brother com Note If you want to add the PS...

Page 24: ... 23 Note You can find your machine s MAC Address Ethernet Address and IP Address by printing out the Network Configuration Report See Print the Network Configuration Report on page 41 If this screen appears click OK 1 Enter a name for your Macintosh in Display Name up to 15 characters long 2 If you want to use the machine s SCAN key to scan over the network you must check the Register your compute...

Page 25: ...et 3 Press 1 twice for Yes to accept the change Note To achieve optimum results with normal everyday document printing place the Brother machine as close to the wireless access point router as possible with minimal obstructions Large objects and walls between the two devices as well as interference from other electronic devices can affect the data transfer speed of your documents Due to these fact...

Page 26: ...cable not included If you are using Windows XP or using a network cable to connect your computer with your wireless access point router you need to know the SSID and Network Key of your wireless access point router before you proceed Please write down your wireless network settings in the area below Please do not contact Brother Customer Service for assistance without the wireless security informa...

Page 27: ...assist you in locating your network security settings Item Record the current wireless network settings SSID Network Name Network Key Security Key Encryption Key Note If you do not know this information SSID and Network Key you cannot continue the wireless setup How can I find this information SSID and Network Key 1 You should see the documentation provided with your wireless access point router 2...

Page 28: ...need to temporarily use a USB cable during configuration cable not included If you are using Windows XP or using a network cable to connect your computer with your wireless access point router you need to know the SSID and Network Key of your wireless access point router you wrote down in step 20 a on page 26 before you proceed Note If you use your machine in an IEEE 802 1x supported wireless netw...

Page 29: ... on page 38 Now go to page 38 Note If the list is blank check that the wireless access point router has power and is broadcasting the SSID and then see if the machine and the wireless access point router are within range for wireless communication Then click Refresh If your wireless access point router is set to not broadcast the SSID you can manually add it by clicking the Advanced button Follow ...

Page 30: ...Next appears press the WPS button on your wireless access point router and then press 1 Go to h g Enter the Network Key you wrote down in step 20 b on page 27 using the dial pad to choose each character or number To delete the characters you have entered press Clear For example to enter the letter a press the 2 key on the dial pad once To enter the number 3 press the 3 key on the dial pad seven ti...

Page 31: ...complete A four level indicator at the top right of your machine s LCD will show the wireless signal strength of your wireless access point router Note For Mobile Device users please go to the User s Guide for the application you are using e g Brother iPrint Scan or other applications for additional details on how to use your machine with the application To download the User s Guide for the applic...

Page 32: ...r appears press the WPS or AOSS button on your wireless access point router See the user s guide for your wireless access point router for instructions And then press OK This feature will automatically detect which mode WPS or AOSS your wireless access point router uses to configure your machine f A connection result message appears on the LCD and a WLAN report will automatically be printed If the...

Page 33: ...Error code Recommended Solutions TS 01 The wireless setting is not activated turn the wireless setting to ON If a LAN cable is connected to your machine disconnect it and turn the wireless setting of your machine to ON 1 On your machine press Menu 7 Network 2 WLAN 2 Setup Wizard 2 When WLAN Enable is displayed press a or b to choose On and press OK This will start the wireless setup wizard TS 02 T...

Page 34: ... settings Network Name SSID and Network Key on page 33 to confirm For ad hoc mode change the authentication and encryption methods of your computer for the wireless setting Your machine supports OPEN authentication method only with optional WEP encryption TS 05 The security information SSID Network Key is incorrect Reconfirm the SSID and security information Network Key If your router uses WEP enc...

Page 35: ...ou do not know how to operate your wireless access point router using WPS or AOSS see the documentation provided with your wireless access point router ask the manufacturer of your wireless access point router or ask your network administrator TS 08 Two or more wireless access points routers that have WPS or AOSS enabled are detected Confirm that only one wireless access point router within range ...

Page 36: ... move the cursor under the incorrect character and then press Clear Enter the correct character Repeating letters If you need to enter a character that is on the same key as the character before press c to move the cursor right before you press the key again Special characters and symbols Press l or 0 then press d or c to move the cursor to the special character or symbol you want Press OK to choo...

Page 37: ...have trouble with your network connection add UDP port 161 and 137 Important If there are any programs running close them The screens may differ depending on your operating system Note The installer CD ROM includes Nuance PaperPort 12SE This software supports Windows XP SP3 or greater XP Professional x64 Edition SP2 or greater Windows Vista SP2 or greater and Windows 7 Update to the latest Windows...

Page 38: ...s 7 users when the Windows Security screen appears click the check box and click Install to complete the installation correctly Note If an error message appears during the software installation run the Installation Diagnostics located in Start All Programs Brother MFC XXXX LAN where MFC XXXX is your model name Depending on your security settings a Windows Security or antivirus software window may ...

Page 39: ...oose your machine from the list and then click OK Important For users of Mac OS X 10 5 7 or lower upgrade to Mac OS X 10 5 8 10 7 x For the latest drivers and information for the Mac OS X you are using visit http solutions brother com Note If you want to add the PS driver BR Script3 printer driver please go to the Brother Solutions Center at http solutions brother com and visit FAQ s on your model...

Page 40: ...net Address and IP Address by printing out the Network Configuration Report See Print the Network Configuration Report on page 41 If this screen appears click OK 1 Enter a name for your Macintosh in Display Name up to 15 characters long 2 If you want to use the machine s SCAN key to scan over the network you must check the Register your computer with the Scan To function on the machine box 3 Click...

Page 41: ...ttings to the factory default To restore all network settings of the internal Print Scan server to the factory default please follow the steps below a Make sure the machine is not operating then disconnect all the cables from the machine except the power cord b Press Menu 7 0 c Press 1 to choose Reset d Press 1 to choose Yes The machine will restart re connect the cables once this is complete Note...

Page 42: ... using Windows double click the Brother CreativeCenter icon on your desktop to access our FREE web site with many ideas and resources for personal and professional use Mac users can access Brother CreativeCenter at this web address http www brother com creativecenter ...

Page 43: ...anel For more information about the consumables for your machine visit us at http www brother com original or contact your local Brother reseller For installing the SO DIMM Memory see Installing extra memory in the Advanced User s Guide Lower Tray Unit SO DIMM Memory LT 5400 You can increase the memory by installing one SO DIMM Small Outline Dual In line Memory Module The lower paper tray unit can...

Page 44: ...tioned in this manual has a Software License Agreement specific to its proprietary programs Any trade names and product names of companies appearing on Brother products related documents and any other materials are all trademarks or registered trademarks of those respective companies Compilation and Publication Under the supervision of Brother Industries Ltd this manual has been compiled and publi...

Reviews: