5-1
Confidential
CHAPTER 5 SERVICE FUNCTIONS
This chapter describes the maintenance mode and other service functions, which are exclusively
designed for the purpose of checks, settings and adjustments of the machine using the keys on the
control panel*.
* Models with touch panel use also the keys of the software keypad displayed on the touch panel. Only
when a key needs to be limited to the one on the control panel or on the touch panel, this chapter describes
a key, for example, as "the
Copy
key on the control panel" or "the
Scan
key on the touch panel." If a
description says just "the
5
key," you can use either the
5
key of the numerical keypad on the control panel
or the
5
key of the software keypad on the touch panel.
5.1
MAINTENANCE MODE
In the maintenance mode, you can update memory (EEPROM: electrically erasable programmable
read-only memory) contents for optimizing the drive conditions of the head/carriage unit or the paper
feed roller and paper ejection roller in the engine unit, if those units have been replaced, or for setting
the CIS scanner area, for example. You can also customize the EEPROM according to the shipment
destination of the machine concerned. In addition, you can perform operational checks of the LCD,
control panel PCB or sensors, perform a print test, display the log information or error codes, and
modify firmware switches (WSW).
5.1.1 How to Enter the End User-accessible Maintenance Mode
Basically, the maintenance-mode functions listed in
should be accessed by service
personnel only. However, you can allow end users to access some of these under the guidance
of service personnel (e.g., by telephone).
The user-accessible functions (codes 10 to 12, 46, 52, 53, 66, 75, 76, 80, 82, 87, 88, and 91) are
shaded
. Function code 10 accesses the firmware switches,
each of which has eight selectors. You should not allow end users to access all of those
selectors, but you can allow them to access user-accessible selectors which are
shaded
in the
firmware switch tables in the "Firmware Switches (WSW)" document separately issued.
The service personnel should instruct end users to follow the procedure given below.
(1)
Models without touch panel
Press the
Menu
,
Black Start
(
Mono Start
),
and
Menu
keys in this order.
TIP:
For models with numerical keypad, you may press the
Menu
,
Black Start
(
Mono
Start
), and
0
keys instead, in the same way as conventional models.
Models with touch panel
Press the
Menu
key on the touch panel (or the
Scan
and
Copy
keys on the control panel
simultaneously), the
Black Start
(
Mono Start
) key, and the
PHOTO
CAPTURE
key (or
the
Scan
and
Copy
keys simultaneously) in this order.
TIP:
For models with numerical keypad on the control panel, you may press the
Menu
key
on the touch panel
(or the
Scan
and
Copy
keys on the control panel simultaneously), the
Black Start
(
Mono Start
) key, and the
0
key on the numerical keypad instead, in the same
way as conventional models.
Summary of Contents for MFC-J6510DW
Page 15: ...xii Confidential ...
Page 16: ...xiii Confidential ...
Page 17: ...xiv Confidential ...
Page 18: ...xv Confidential ...
Page 19: ...xvi Confidential ...
Page 128: ...3 3 Confidential 3 2 PACKING For models with paper tray 2 ...
Page 273: ...4 13 Confidential EXIT Adjust Check Pattern 1 ...
Page 274: ...4 14 Confidential EXIT Adjust Check Pattern 2 ...
Page 275: ...4 15 Confidential EXIT Adjust Check Pattern 3 ...
Page 276: ...4 16 Confidential KEISEN2 LF300 EXIT ADJUST PATTERN ...
Page 278: ...4 18 Confidential KEISEN GAP EXIT ADJUST PATTERN Line 1 Line 2 Line 3 ...
Page 280: ...4 20 Confidential Vertical Alignment Check Patterns ...
Page 283: ...4 23 Confidential Left Right and Bottom Margin Check Pattern ...
Page 286: ...4 26 Confidential Print Pattern for Creating Head Calibration Data ...
Page 302: ...4 42 Confidential ADF Copy Chart C A B D ...
Page 312: ...5 8 Confidential Print Pattern for Creating Head Calibration Data ...
Page 314: ...5 10 Confidential Scanning Compensation Data List ...
Page 317: ...5 13 Confidential Nozzle Test Pattern ...
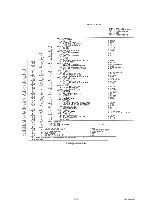
Page 320: ...5 16 Confidential Configuration List ...
Page 337: ...5 33 Confidential EXIT Adjust Check Pattern 1 ...
Page 338: ...5 34 Confidential EXIT Adjust Check Pattern 2 ...
Page 339: ...5 35 Confidential EXIT Adjust Check Pattern 3 ...
Page 340: ...5 36 Confidential KEISEN2 LF300 EXIT ADJUST PATTERN ...
Page 346: ...5 42 Confidential Vertical Alignment Check Pattern ...
Page 349: ...5 45 Confidential Left Right and Bottom Margin Check Pattern ...
Page 383: ...6 4 Confidential Power supply PCB 100 V series ...
Page 384: ...6 5 Confidential Power supply PCB 200 V series ...
Page 385: ...6 6 Confidential Wiring diagrams ...

