4-30
Confidential
4.2
IF YOU REPLACE THE MAIN PCB
Note:
If you replace the main PCB, it is necessary to make a backup of the machine information, user
setting information, and head calibration data into an external memory before starting disassembly of
the machine. After the completion of reassembling jobs, restore the backup data to the new main
PCB. For detailed procedure of the backup and restoration, refer to
"Backup of Machine Information (Function code 46) (User-accessible)"
"Updating of Head Property Data and Backup/Restoration of Head Calibration Data (Function code
68)."
Note:
For this series of machines, load programs onto the main PCB
twice
for basic programs and
local programs. That is, after replacement of the main PCB, load basic programs, customize the
EEPROM for the destination with Function code 74, and then load local programs.
<Operations>
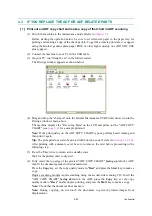
[ 1 ] Load update programs/data
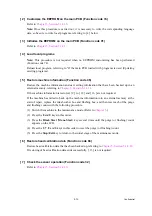
[ 2 ] Customize the EEPROM on the main PCB (Function code 74)
[ 3 ] Initialize the EEPROM on the main PCB (Function code 01)
[ 5 ] Restore machine information (Function code 46)
[ 6 ] Restore head calibration data (Function code 68)
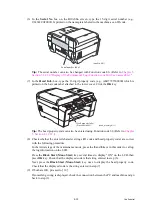
[ 7 ] Check the sensor operation (Function code 32)
[ 8 ] Set an ID code (change the serial number) and update the head property data
[ 9 ] Acquire white level data and set CIS scanner area (Function code 55)
[ 10 ] Update the paper feeding correction value (Function code 58)
[ 11 ] Align vertical print lines (Function code 65)
[ 12 ] Adjust margins in borderless printing (Function code 66)
[ 13 ] Create head calibration data and write it into flash ROM (Function code 02)
[ 14 ] Print out an ADF copy chart and make a copy of that chart in ADF scanning
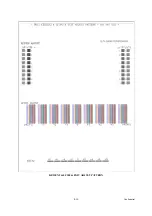
[ 15 ] Print out a total quality check pattern
[ 16 ] Adjust the touch panel (Function code 78) (For models with touch panel)
<Requirements>
(1) USB cable (one piece)
(2) Computer (Windows® XP/2000 or later)
(3) ID/head property configuration utility (BrUsbSn.exe)
(4) Download utility (FILEDG32.EXE)
(5) Maintenance driver (MaintenanceDriver.zip)
(6) Data files of print patterns
Summary of Contents for MFC-J6510DW
Page 15: ...xii Confidential ...
Page 16: ...xiii Confidential ...
Page 17: ...xiv Confidential ...
Page 18: ...xv Confidential ...
Page 19: ...xvi Confidential ...
Page 128: ...3 3 Confidential 3 2 PACKING For models with paper tray 2 ...
Page 273: ...4 13 Confidential EXIT Adjust Check Pattern 1 ...
Page 274: ...4 14 Confidential EXIT Adjust Check Pattern 2 ...
Page 275: ...4 15 Confidential EXIT Adjust Check Pattern 3 ...
Page 276: ...4 16 Confidential KEISEN2 LF300 EXIT ADJUST PATTERN ...
Page 278: ...4 18 Confidential KEISEN GAP EXIT ADJUST PATTERN Line 1 Line 2 Line 3 ...
Page 280: ...4 20 Confidential Vertical Alignment Check Patterns ...
Page 283: ...4 23 Confidential Left Right and Bottom Margin Check Pattern ...
Page 286: ...4 26 Confidential Print Pattern for Creating Head Calibration Data ...
Page 302: ...4 42 Confidential ADF Copy Chart C A B D ...
Page 312: ...5 8 Confidential Print Pattern for Creating Head Calibration Data ...
Page 314: ...5 10 Confidential Scanning Compensation Data List ...
Page 317: ...5 13 Confidential Nozzle Test Pattern ...
Page 320: ...5 16 Confidential Configuration List ...
Page 337: ...5 33 Confidential EXIT Adjust Check Pattern 1 ...
Page 338: ...5 34 Confidential EXIT Adjust Check Pattern 2 ...
Page 339: ...5 35 Confidential EXIT Adjust Check Pattern 3 ...
Page 340: ...5 36 Confidential KEISEN2 LF300 EXIT ADJUST PATTERN ...
Page 346: ...5 42 Confidential Vertical Alignment Check Pattern ...
Page 349: ...5 45 Confidential Left Right and Bottom Margin Check Pattern ...
Page 383: ...6 4 Confidential Power supply PCB 100 V series ...
Page 384: ...6 5 Confidential Power supply PCB 200 V series ...
Page 385: ...6 6 Confidential Wiring diagrams ...

