4-36
Confidential
[ 2 ] Customize the EEPROM on the main PCB (Function code 74)
Refer to
Note:
Once this procedure is carried out, it is necessary to write the corresponding language
data, so be sure to write local programs, referring to [ 4 ] below.
[ 3 ] Initialize the EEPROM on the main PCB (Function code 01)
Refer to
[ 4 ] Load local programs
Note:
This procedure is not required when no EEPROM customizing has been performed
(Function code 74).
Reload local program, referring to "If the main PCB loaded with programs is used (Updating
existing programs).
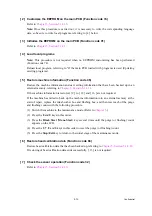
[ 5 ] Restore machine information (Function code 46)
Restore the machine information and user setting information that have been backed up in an
external memory, referring to
.
If the machine information is restored, [ 9 ] to [ 12 ] and [ 16 ] are not required.
If the machine has failed to back up the machine information into an external memory at the
start of repair, replace the ink absorber box and flushing box, and then reset each of the purge
and flushing counts with the following procedure.
(1) Switch the machine to the maintenance mode. (Refer to
(2) Press the
8
and
0
keys in this order.
(3) Press the
Black
Start
(
Mono Start
) key several times until the purge (or flushing) count
appears on the LCD.
(4) Press the
2
,
7
,
8
and
3
keys in this order to reset the purge (or flushing) count.
(5) Press the
Stop/Exit
key to return to the initial stage of the maintenance mode.
[ 6 ] Restore head calibration data (Function code 68)
Restore head calibration data that has been backed up, referring to
.
If restoring of head calibration data ends successfully, [ 13 ] is not required.
[ 7 ] Check the sensor operation (Function code 32)
Refer to
Summary of Contents for MFC-J6510DW
Page 15: ...xii Confidential ...
Page 16: ...xiii Confidential ...
Page 17: ...xiv Confidential ...
Page 18: ...xv Confidential ...
Page 19: ...xvi Confidential ...
Page 128: ...3 3 Confidential 3 2 PACKING For models with paper tray 2 ...
Page 273: ...4 13 Confidential EXIT Adjust Check Pattern 1 ...
Page 274: ...4 14 Confidential EXIT Adjust Check Pattern 2 ...
Page 275: ...4 15 Confidential EXIT Adjust Check Pattern 3 ...
Page 276: ...4 16 Confidential KEISEN2 LF300 EXIT ADJUST PATTERN ...
Page 278: ...4 18 Confidential KEISEN GAP EXIT ADJUST PATTERN Line 1 Line 2 Line 3 ...
Page 280: ...4 20 Confidential Vertical Alignment Check Patterns ...
Page 283: ...4 23 Confidential Left Right and Bottom Margin Check Pattern ...
Page 286: ...4 26 Confidential Print Pattern for Creating Head Calibration Data ...
Page 302: ...4 42 Confidential ADF Copy Chart C A B D ...
Page 312: ...5 8 Confidential Print Pattern for Creating Head Calibration Data ...
Page 314: ...5 10 Confidential Scanning Compensation Data List ...
Page 317: ...5 13 Confidential Nozzle Test Pattern ...
Page 320: ...5 16 Confidential Configuration List ...
Page 337: ...5 33 Confidential EXIT Adjust Check Pattern 1 ...
Page 338: ...5 34 Confidential EXIT Adjust Check Pattern 2 ...
Page 339: ...5 35 Confidential EXIT Adjust Check Pattern 3 ...
Page 340: ...5 36 Confidential KEISEN2 LF300 EXIT ADJUST PATTERN ...
Page 346: ...5 42 Confidential Vertical Alignment Check Pattern ...
Page 349: ...5 45 Confidential Left Right and Bottom Margin Check Pattern ...
Page 383: ...6 4 Confidential Power supply PCB 100 V series ...
Page 384: ...6 5 Confidential Power supply PCB 200 V series ...
Page 385: ...6 6 Confidential Wiring diagrams ...


