5-25
Confidential
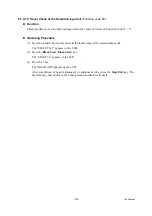
5.1.4.13 Transfer of Received FAX Data and Log Information
(Function code 53)
(User-accessible)
Function
This function transfers received FAX data and log information to another machine. It is useful
when the machine cannot print received data due to the printing mechanism defective.
This function also transfers the activity report, the communications list, and the equipment’ log
of the machine as fax data.
NOTE:
The number of files that can be transferred at a time is 99. To transfer 100 files or more,
carry out the following procedure more than one time.
TIP:
If there are both color and monochrome data in a file to be transferred, the monochrome
data will be transferred first. If the receiver machine does not support the color function, the
sender machine cannot transfer color data, resulting in an error.
TIP:
If using this function results also in an error, use Function code 46 to save received FAX
data into an external memory. (Refer to
.)
Operating Procedure
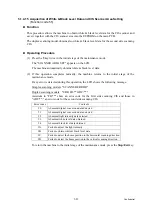
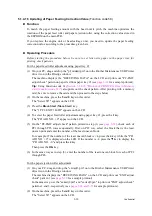
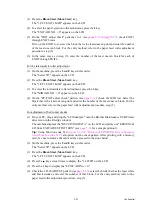
(1) Press the
5
and
3
keys in this order in the initial stage of the maintenance mode.
The "FAX TRANSFER" appears on the LCD.
(2) To check the number of received files, press the
1
key.
The "1.NO. OF JOBS" appears on the LCD.
Press the
OK
key, and the number of received files appears, just as "NO. OF JOBS: 10."
Pressing the
Stop/Exit
key returns the machine to the "FAX TRANSFER" state.
(3) Select data to transfer as follows.
To transfer the activity report only, press the
2
key.
The "2.ACTIVITY" appears.
To transfer received files (together with the activity report), press the
3
key.
The "3.DOCUMENTS" appears. Note that if there is no received file, the "NO
DOCUMENTS" appears.
To transfer the communication list for the latest communication, press the
4
key.
The "4.COM.LIST (NEW)" appears.
To transfer the communication list for the last three errors, press the
5
key.
The "5.COM.LIST (ERR3)" appears.
To transfer the equipment’s log, press the
6
key.
The "6.MNT77 LIST" appears.
To transfer the user setting information, press the
7
key.
The "7.USER SETTINGS" appears.
To transfer the caller ID history, press the
8
key.
The "8.CALLER ID HIST" appears.
To transfer the outgoing call history, press the
9
key.
The "9.OUTGOING CALL" appears.
To transfer the wireless LAN data, press the
0
key.
The "0.WLAN DATA" appears.
Summary of Contents for MFC-J6510DW
Page 15: ...xii Confidential ...
Page 16: ...xiii Confidential ...
Page 17: ...xiv Confidential ...
Page 18: ...xv Confidential ...
Page 19: ...xvi Confidential ...
Page 128: ...3 3 Confidential 3 2 PACKING For models with paper tray 2 ...
Page 273: ...4 13 Confidential EXIT Adjust Check Pattern 1 ...
Page 274: ...4 14 Confidential EXIT Adjust Check Pattern 2 ...
Page 275: ...4 15 Confidential EXIT Adjust Check Pattern 3 ...
Page 276: ...4 16 Confidential KEISEN2 LF300 EXIT ADJUST PATTERN ...
Page 278: ...4 18 Confidential KEISEN GAP EXIT ADJUST PATTERN Line 1 Line 2 Line 3 ...
Page 280: ...4 20 Confidential Vertical Alignment Check Patterns ...
Page 283: ...4 23 Confidential Left Right and Bottom Margin Check Pattern ...
Page 286: ...4 26 Confidential Print Pattern for Creating Head Calibration Data ...
Page 302: ...4 42 Confidential ADF Copy Chart C A B D ...
Page 312: ...5 8 Confidential Print Pattern for Creating Head Calibration Data ...
Page 314: ...5 10 Confidential Scanning Compensation Data List ...
Page 317: ...5 13 Confidential Nozzle Test Pattern ...
Page 320: ...5 16 Confidential Configuration List ...
Page 337: ...5 33 Confidential EXIT Adjust Check Pattern 1 ...
Page 338: ...5 34 Confidential EXIT Adjust Check Pattern 2 ...
Page 339: ...5 35 Confidential EXIT Adjust Check Pattern 3 ...
Page 340: ...5 36 Confidential KEISEN2 LF300 EXIT ADJUST PATTERN ...
Page 346: ...5 42 Confidential Vertical Alignment Check Pattern ...
Page 349: ...5 45 Confidential Left Right and Bottom Margin Check Pattern ...
Page 383: ...6 4 Confidential Power supply PCB 100 V series ...
Page 384: ...6 5 Confidential Power supply PCB 200 V series ...
Page 385: ...6 6 Confidential Wiring diagrams ...


