background image

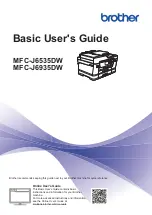
Basic User's Guide

MFC-J6535DW

MFC-J6935DW 


Brother recommends keeping this guide next to your Brother machine for quick reference.

Online User's Guide

This 

Basic User's Guide

 contains basic

instructions and information for your Brother
machine.
For more advanced instructions and information,
see the 

Online User's Guide

 at

solutions.brother.com/manuals

Summary of Contents for MFC-J6535DW

Page 1: ... guide next to your Brother machine for quick reference Online User s Guide This Basic User s Guide contains basic instructions and information for your Brother machine For more advanced instructions and information see the Online User s Guide at solutions brother com manuals ...

Page 2: ...our product online at www brother com registration By registering your product with Brother you will be recorded as the original owner of the product Your registration with Brother may serve as confirmation of the purchase date of your product if you lose your receipt may support an insurance claim by you in the event of product loss covered by insurance and will help us notify you of enhancements...

Page 3: ...ates To keep your machine s performance up to date check here for the latest firmware upgrade For Customer Service In USA www brother usa com support Self Service Email Chat 1 877 BROTHER 1 877 276 8437 1 901 379 1215 assistance via fax 1 877 268 9575 test your fax sending and fax receiving operations In Canada www brother ca support Self Service Videos Email Chat Facebook and Twitter Help Service...

Page 4: ...877 552 MALL 1 877 552 6255 1 800 947 1445 assistance via fax www brothermall com In Canada www brother ca Order Information Description Item Ink Cartridge Super High Yield black yellow cyan blue magenta red LC3029BK LC3029Y LC3029C LC3029M Prints approx 3000 pages black 1 Prints approx 1500 pages yellow cyan blue magenta red 1 Premium Plus Glossy Photo Paper Ledger size 20 sheets BP71GLGR Letter ...

Page 5: ...ATES IN THE USA AND SOME PROVINCES IN CANADA THE ABOVE EXCLUSION MAY NOT APPLY TO YOU IN NO EVENT WILL BROTHER S LICENSOR S BE LIABLE TO YOU FOR ANY CONSEQUENTIAL INCIDENTAL OR INDIRECT DAMAGES INCLUDING DAMAGES FOR LOSS OF BUSINESS PROFITS BUSINESS INTERRUPTION LOSS OF BUSINESS INFORMATION AND THE LIKE ARISING OUT OF THE USE OR INABILITY TO USE THE SOFTWARE EVEN IF BROTHER S LICENSOR HAS BEEN ADV...

Page 6: ...a wide variety of paper with quick exchange Mobile Connect Use Brother iPrint Scan to check the machine status and access various functions from mobile devices MFC J6935DW If your Android device supports Near Field Communication NFC you can print and scan just by touching your device to the NFC symbol on the control panel For more information see the Mobile Print Scan Guide for Brother iPrint Scan...

Page 7: ...int Scan Copy and Fax operations and basic machine maintenance See troubleshooting tips Printed In the box Online User s Guide This guide includes the additional contents of the Basic User s Guide In addition to information about the PC Print Direct Print Scan Copy Fax Internet services Mobile Functions and Brother ControlCenter operations useful information is included about using the machine on ...

Page 8: ...sic User s Guide Print from your mobile device Brother iPrint Scan Mobile Print Scan Guide Print using mobile functions Online User s Guide Print data downloaded from a cloud service Online User s Guide Fax Send and receive a fax Basic User s Guide Transfer a fax to your computer Online User s Guide Send and receive a fax using your computer Basic User s Guide Send and view a fax using your mobile...

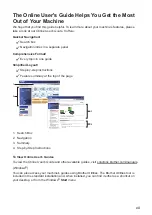
Page 9: ...mplified Layout Step by step instructions Feature summary at the top of the page 1 2 3 4 1 Search Box 2 Navigation 3 Summary 4 Step by Step Instructions To View Online User s Guides To view the Online User s Guide and other available guides visit solutions brother com manuals Windows You can also access your machine s guides using Brother Utilities The Brother Utilities tool is included in the sta...

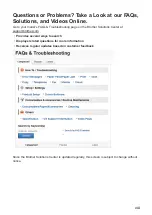
Page 10: ...hooting page on the Brother Solutions Center at support brother com Provides several ways to search Displays related questions for more information Receives regular updates based on customer feedback Since the Brother Solutions Center is updated regularly this screen is subject to change without notice viii ...

Page 11: ...ic Courier New Courier New font identifies messages shown on the machine s LCD Most of the illustrations in this User s Guide show the MFC J6935DW The screens in this User s Guide are for illustration purposes only and may differ from the actual screens For the Latest Driver Updates Go to your model s Downloads page on the Brother Solutions Center at support brother com to download drivers To keep...

Page 12: ...e Check Paper Size Setting 18 Recommended Print Media 19 Handle and Use Print Media 19 Load Documents 19 Load Documents in the Automatic Document Feeder ADF 19 Load Documents on the Scanner Glass 20 3 Print 22 Print from Your Computer 22 Print a Document Windows 22 Print a Document Macintosh 22 Various Printing 22 Print Photos Directly from a USB Flash Drive 23 Preview and Print Photos from a USB ...

Page 13: ...IP 33 Connection of an External Telephone Answering Device TAD 33 External and Extension Telephones 33 Fax Using Your Machine 34 Send a Fax 34 Fax Using Your Computer PC FAX 35 Send Faxes from Your Computer 35 Receive Faxes on Your Computer Windows only 36 A Routine Maintenance 37 Clean the Scanner 37 Check the Print Quality 37 Check the Print Alignment from Your Brother Machine 39 B Troubleshooti...

Page 14: ...ter Jam or Paper Jam 57 C Appendix 66 Enter Text on Your Brother Machine 66 Check the Machine Information 66 Reset Your Brother Machine 67 Reset Functions Overview 67 Supply Specifications 68 D Index 69 xii ...

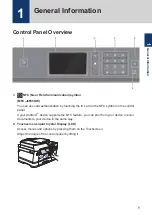
Page 15: ...ymbol on the control panel If your Android device supports the NFC feature you can print from your device or scan documents to your device in the same way 2 Touchscreen Liquid Crystal Display LCD Access menus and options by pressing them on the Touchscreen Adjust the angle of the control panel by lifting it 1 General Information 1 General Information 1 ...

Page 16: ... Mode the LED blinks 6 Power On Off Press to turn on the machine Press and hold down to turn off the machine The Touchscreen will display Shutting Down and will stay on for a few seconds before turning itself off If you have connected an external telephone or TAD it is always available If you turn off the machine using it will still clean the print head periodically to maintain print quality To pr...

Page 17: ...eady Screen Home Screen 1 provides access to Fax Copy and Scan operations Home Screen 2 2 7 1 5 3 4 6 Home Screen 2 provides access to additional features such as Web Apps and USB operations Home Screen 3 2 7 1 5 3 4 6 Home screen 3 provides access to LGR Copy Shortcuts 1 Date Time Displays the date and time set on the machine 2 Quiet Mode This icon appears when the Quiet Mode setting is set to On...

Page 18: ...ssing the Wireless Status button 5 Settings Press to access the Settings menu 6 Ink Displays the available ink volume Press to access the Ink menu When an ink cartridge is near the end of its life or having a problem an error icon is displayed on the ink color 7 Modes Fax Press to access Fax mode Copy Press to access Copy mode Scan Press to access Scan mode Web Press to connect the Brother machine...

Page 19: ...ize so the Touchscreen may show that more than one fax job has been received 10 Warning icon 10 The warning icon appears when there is an error or maintenance message press to view the details and then press to return to Ready mode IMPORTANT DO NOT press the LCD with a sharp object such as a pen or stylus It may damage the machine This product adopts the font of ARPHIC TECHNOLOGY CO LTD DO NOT tou...

Page 20: ...convenient access to all Brother applications installed on your computer 1 Do one of the following Windows Vista and Windows 7 Click Start All Programs Brother Brother Utilities Windows 8 Tap or click Brother Utilities either on the Start screen or the desktop Windows 8 1 Move your mouse to the lower left corner of the Start screen and click if using a touch based device swipe up from the bottom o...

Page 21: ...d Drivers Windows 1 Launch Brother Utilities 2 Click the drop down list and then select your model name if not already selected Click Tools in the left navigation bar and then click Uninstall Follow the instructions in the dialog box to uninstall the software and drivers 1 General Information 7 ...

Page 22: ... and Recycled paper only Adjust the paper guides Landscape orientation A5 A6 Photo Photo L Photo 2L Index card Envelopes Adjust the paper guides Portrait orientation Ledger A3 Legal Folio Mexico Legal India Legal Ledger A3 Legal Folio Mexico Legal India Legal Plain paper and Recycled paper only Extend the tray using the green slider then adjust the paper guides Portrait orientation 1 Tray 2 is ava...

Page 23: ...gal A5 A6 Photo Photo L Photo 2L Index card Envelopes 1 2 Adjust the MP tray paper guides Portrait orientation See the details in this chapter For more information about other paper sizes see the Online User s Guide Load Paper 2 Unfold the paper support flap 2 1 3 Change the paper size setting in the machine s menu if needed 2 Paper Handling 9 ...

Page 24: ...omputer Doing this enables the machine to automatically feed paper from the appropriate tray if Auto Tray Select has been set in the machine or printer driver These instructions describe how to load paper in Tray 1 The steps for Tray 2 are very similar MFC J6935DW 1 Pull the paper tray completely out of the machine as shown by the arrow MFC J6935DW When you load paper in Tray 2 remove the tray top...

Page 25: ... of the paper 1 6 Gently adjust the paper width guides 1 to fit the paper Make sure the paper guides touch the edges of the paper 1 7 Make sure the paper is flat in the tray and below the maximum paper mark 1 Overfilling the paper tray may cause paper jams 1 MFC J6935DW When you load paper in Tray 2 replace the tray top cover 8 Slowly push the paper tray completely into the machine 2 Paper Handlin...

Page 26: ...e settings if needed following the LCD instructions Load only one size and type of paper in the paper tray at a time When you load a different paper size in the tray you must change the Paper Size setting in the machine or the paper size setting on your computer Doing this enables the machine to automatically feed paper from the appropriate tray if Auto Tray Select has been set in the machine or p...

Page 27: ...lace 3 Gently press and slide the paper width guides 1 and then the paper length guide 2 to fit the paper size Make sure the triangular mark 3 on the paper width guide 1 and paper length guide 2 line up with the marks for the paper you are using 1 3 2 3 4 Fan the stack of paper well to avoid paper jams and misfeeds Always make sure the paper is not curled or wrinkled 2 Paper Handling 13 ...

Page 28: ...Gently adjust the paper width guides 1 to fit the paper Make sure the paper guides touch the edges of the paper 1 8 Make sure the paper is flat in the tray and below the maximum paper mark 1 Overfilling the paper tray may cause paper jams 1 MFC J6935DW When you load paper in Tray 2 replace the tray top cover 9 Slowly push the paper tray completely into the machine 14 ...

Page 29: ...he paper type and paper size Change the Paper Size and Paper Type settings if needed following the LCD instructions Load only one size and type of paper in the paper tray at a time When you load a different paper size in the tray you must change the Paper Size setting in the machine or the paper size setting on your computer Doing this enables the machine to automatically feed paper from the appro...

Page 30: ...and misfeeds Always make sure the paper is not curled or wrinkled You can load up to 100 sheets of plain paper 4 Gently load the paper in the MP tray with the printing surface face up Landscape orientation If you are having difficulty loading paper in the MP tray push the release lever 1 toward the back of the machine and then load the paper 1 16 ...

Page 31: ...MP tray paper guides to fit the paper 6 Pull out the paper support until it locks into place 7 Change the paper size setting in the machine s menu if needed Error and Maintenance Messages on page 41 Related Information 2 Paper Handling 17 ...

Page 32: ...er size options and then press the option you want 7 Press The machine ejects paper with the printed surface face up onto the paper tray at the front of the machine When you use glossy paper remove each sheet at once to prevent smudging or paper jams Error and Maintenance Messages on page 41 Related Information Change the Check Paper Size Setting If the Check Paper setting is set to On and you pul...

Page 33: ...cked Paper made with a short grain Load Documents Load Documents in the Automatic Document Feeder ADF The ADF can hold multiple pages and feeds each sheet individually Use paper that is within the sizes and weights shown in the table Always fan the pages before placing them in the ADF Document Sizes and Weights Length 1 5 8 to 17 0 in 148 to 431 8 mm Width 4 1 to 11 7 in 105 to 297 mm Paper Weight...

Page 34: ...cument 1 IMPORTANT DO NOT leave any documents on the scanner glass If you do this the ADF may jam Load Documents on the Scanner Glass Use the scanner glass to fax copy or scan one page at a time Document Sizes Supported Length Up to 17 0 in 431 8 mm Width Up to 11 7 in 297 mm Weight Up to 4 4 lb 2 kg To use the scanner glass the ADF must be empty 1 Lift the document cover 2 Place the document face...

Page 35: ...IMPORTANT If you are scanning a book or thick document DO NOT slam or press on the document cover 2 Paper Handling 21 ...

Page 36: ...tosh 1 From an application such as Apple TextEdit click the File menu and then select Print 2 Select Brother MFC XXXX where XXXX is the name of your model 3 Click Print 4 Complete your print operation Various Printing To use the various printing features click the printing properties or preferences button to change the printer setting Print on Both Sides of the Paper Automatically Print More Than ...

Page 37: ...enter the number of copies using the Touchscreen keyboard Press OK You can also press or on the Touchscreen or use the dial pad numbers 5 Press OK 6 Repeat the last three steps until you have selected all the photos you want to print 7 Press OK 8 Read and confirm the displayed list of options 9 To change the print settings press Print Settings When finished press OK 10 Press Start Print Settings O...

Page 38: ...pe up or down or press a or b to display the PDF file you want to print and then press it 4 Press to display the keyboard on the Touchscreen and then enter the number of copies using the Touchscreen keyboard Press OK You can also press or on the Touchscreen or use the dial pad numbers 5 Read and confirm the displayed list of options 6 To change the print settings press Print Settings When finished...

Page 39: ...es using the Touchscreen keyboard Press OK You can also press or on the Touchscreen or use the dial pad numbers Options Press to change the copy settings for the next copy only When you have finished changing settings press OK After you have finished selecting new options you can save them by pressing the Save as Shortcut button 5 Press Black Start or Color Start To stop copying press Other Copy O...

Page 40: ... Brother or use your favorite scanning application Scan Using ControlCenter4 Advanced Mode Windows Scan documents and save them to a folder on your computer as PDF files Select Advanced Mode as the mode setting for ControlCenter4 1 Load your document 2 Click the ControlCenter4 icon in the task tray and then click Open 3 Click the Scan tab 4 Click the File button The scan settings dialog box appear...

Page 41: ...er name If the LCD prompts you to enter a PIN use the LCD to enter the four digit PIN for the computer and then press OK 7 Do one of the following To change the settings press Options and then go to the next step Press Start to start scanning without changing additional settings The machine starts scanning If using the machine s scanner glass follow the LCD instructions to complete the scanning jo...

Page 42: ... Station ID 2 Press Fax 3 Enter your fax number up to 20 digits on the Touchscreen and then press OK 4 Press Name 5 Enter your name up to 20 characters using the Touchscreen and then press OK 6 Press Enter Text on Your Brother Machine on page 66 Related Information Telephone Line Interference VoIP If you are having problems sending or receiving a fax due to possible interference on the telephone l...

Page 43: ... to tell you to pick up the line The F T ring is a pseudo double ring made by your machine Manual Manual mode turns off all automatic answering functions unless you are using the Distinctive Ring feature To receive a fax in Manual mode lift the handset of the external telephone or press the Hook button in Fax mode When you hear fax tones short repeating beeps press the Start button in Fax mode and...

Page 44: ... as your Brother machine Your external telephone answering device TAD will answer every call automatically Voice messages are stored on the external TAD and fax messages are printed Select External TAD as your Receive Mode Will you be using your Brother machine on a dedicated fax line Your machine automatically answers every call as a fax Select Fax Only as your Receive Mode Will you be using your...

Page 45: ...all 20Secs 30Secs 40Secs or 70Secs 3 Press Even if the caller hangs up during the pseudo double ringing the machine will continue to ring for the set time Set the Number of Rings Before the Machine Answers Ring Delay When somebody calls your machine you will hear the normal telephone ring sound The number of rings is set in the Ring Delay option The Ring Delay setting sets the number of times the ...

Page 46: ...g the Touchscreen Press OK f Press OK to confirm To store another Address Book number repeat these steps 3 Press Change or Delete Address Book Names or Numbers 1 Press Fax Address Book Edit 2 Do one of the following Press Change to edit the names or fax or telephone numbers Swipe up or down or press a or b to display the number you want to change and then press it To change the name press Name Ent...

Page 47: ...o receive faxes automatically on one of the two numbers Voice Over Internet Protocol VoIP VoIP is a phone system that uses an Internet connection instead of a traditional telephone line Telephone providers frequently bundle VoIP with Internet and cable services Your Brother machine may not work with some VoIP systems For more information contact your VoIP provider Connection of an External Telepho...

Page 48: ...ant and then press Apply Address Book Select a number from the Address Book Press Address Book Do one of the following Select the number you want and then press Apply Press and then enter the first letter of the name and press OK Press the name you want to dial If the name has two numbers press the number you want Press Apply If the LDAP search is available the result will be shown on the Touchscr...

Page 49: ...on your computer as a standard fax and even attach a cover page For Windows For more information see the Online User s Guide PC FAX for Windows For Macintosh For more information see the Online User s Guide PC FAX for Macintosh 1 From your application select File and then Print The steps may vary depending on your application The Print dialog box appears 2 Select Brother PC FAX 3 Click Print The B...

Page 50: ...ou can set up PC Fax Receive you must install the Brother software and drivers on your computer Make sure your Brother machine is connected to your computer and turned on If your machine displays an error and is unable to print faxes from memory use PC FAX to transfer your faxes to a computer PC Fax Receive is not available for Macintosh 1 Do one of the following Windows Vista and Windows 7 Click ...

Page 51: ...e cloth moistened with water 2 1 3 Troubleshooting for Other Print Problems on page 51 Troubleshooting for Other Fax Problems on page 54 Related Information Check the Print Quality If faded or streaked colors and text appear or if text is missing on your printouts the print head nozzles may be clogged Print the Print Quality Check Sheet and look at the nozzle check pattern 1 Press Ink Improve Prin...

Page 52: ... cleaning procedure is finished the Touchscreen asks if you want to print the Print Quality Check Sheet again Press Yes and then press Start The machine prints the Print Quality Check Sheet again Check the quality of the four color blocks on the sheet again If you clean the print head and the print has not improved try installing a new Genuine Brother Brand replacement ink cartridge for each probl...

Page 53: ...nt or Advanced alignment 5 Load the selected paper size in the tray and then press Start The machine prints the Alignment Check Sheet A 6 For the A pattern swipe up or down or press a or b to display the number of the test print with the least visible vertical stripes 1 9 and then press it in the example number 6 is the best choice Press OK Repeat this step for the rest of the patterns When the pr...

Page 54: ...the machine and the computer or the wireless connection is set up on both the machine and your computer For network models The access point for wireless router or hub is turned on and its link button is blinking To find the error and the solution check the LCD or the machine s status in Status Monitor on your computer Using the LCD Using the Status Monitor 1 Follow the messages on the LCD 2 See th...

Page 55: ...lace the ink cartridges For more information see the Online User s Guide Replace the Ink Cartridges The machine will stop all print operations and you will not be able to use the machine until you install a new ink cartridge in the following cases If you unplug the machine or remove the ink cartridge If you select the Reduce Smudge option on the machine or in the printer driver If you select the S...

Page 56: ... off Distinctive Ring High Temperature After cooling the room allow the machine to cool down to room temperature Try again when the machine has cooled down Hub is Unusable Hubs including a USB flash drive with a built in hub are not supported Unplug the device from the USB direct interface Ink Absorber NearFull The ink absorber box or flushing box must be replaced soon Call Brother Customer Servic...

Page 57: ...craps at the end of this section Make sure the paper guides are set to the correct paper size Make sure the paper support is fully inserted into the machine See Related Information Paper is Jammed in the Front of the Machine at the end of this section Clean the paper pick up rollers For more information see the Online User s Guide Clean the Paper Pick up Rollers Low Temperature After warming the r...

Page 58: ...mory Receive For more information see the Online User s Guide Turn Off Memory Receive Print the faxes stored in the memory For more information see the Online User s Guide Print a Fax Stored in the Machine s Memory Out of Memory If a fax sending or copy operation is in progress Press or Quit or Close and wait until the other operations that are in progress finish and then try again Press Send Now ...

Page 59: ...ted properly Pull the paper tray out of the machine and remove the jammed paper or foreign object If you cannot find or remove the jammed paper see Related Information Printer Jam or Paper Jam at the end of this section Repetitive No Paper Fed Clean the paper pick up rollers For more information see the Online User s Guide Clean the Paper Pick up Rollers Repetitive Paper Jams Remove any foreign ob...

Page 60: ... Transfer Your Faxes or Fax Journal Report Unable to Scan XX Disconnect the machine from the power for several minutes and then reconnect it If you cannot print received faxes transfer them to another fax machine or to your computer For more information see the Online User s Guide Transfer Your Faxes or Fax Journal Report Unusable Device Disconnect device from front connector turn machine off then...

Page 61: ...etting on page 18 Telephone Line Interference VoIP on page 28 Document Jams on page 56 Printer Jam or Paper Jam on page 57 Paper is Jammed in the Front of the Machine on page 57 Remove Paper Scraps on page 65 Supply Specifications on page 68 Related Information Transfer Your Faxes or Fax Journal Report If the LCD shows Unable to Clean XX Unable to Initialize XX Unable to Print XX Unable to Scan XX...

Page 62: ...ty setting you entered may be incorrect Reconfirm the wireless network settings If you do not know this information ask your network administrator TS 04 Unsupported authentication encryption method has been detected on your wireless access point router Your wireless access point router is using an authentication encryption method that is not supported by the device Check that you are selecting the...

Page 63: ...ies Click the drop down list and select your model name if not already selected Click Scan in the left navigation bar and then click Scanners and Cameras Windows 8 and Windows 10 Launch Brother Utilities and then click the drop down list and select your model name if not already selected Click Scan in the left navigation bar and then click Scanners and Cameras b Click the Properties button c Click...

Page 64: ...ess connection setting is disabled Enable the WLAN connection and set up the wireless network connection The wireless access point cannot be detected Set up the wireless network connection again The wireless network is connected A three level indicator in the LCD displays the current wireless signal strength You can configure wireless settings by pressing the wireless status button If you cannot p...

Page 65: ...mation see the Online User s Guide Check the Print Alignment from Your Computer Windows or Check the Print Alignment from Your Computer Macintosh Change the print setting options For more information see the Online User s Guide Change the Print Setting Options When Having Printing Problems Printing appears dirty or ink seems to run If you are using photo paper make sure the glossy side of the phot...

Page 66: ...lastic above it See Related Information Clean the Scanner at the end of this section Dark lines appear at regular intervals Check and adjust the paper feed For more information see the Online User s Guide Correct the Paper Feed to Clear Vertical Lines Clean the Scanner on page 37 Check the Print Quality on page 37 Check the Print Alignment from Your Brother Machine on page 39 Related Information 5...

Page 67: ...t your telephone service provider for connection issues 2 Check the receive mode See Related Information Receive Modes Overview Choose the Correct Receive Mode 3 Try changing the compatibility settings You may be able to send and receive faxes by lowering the connection speed For more information see Related Information Telephone Line Interference VoIP If the problem still is not resolved turn the...

Page 68: ... as the Brother machine make sure your answering machine is set up correctly 1 Plug the telephone line cord directly from the telephone wall jack to your Brother machine s LINE jack 2 Remove the protective cap from your Brother machine s EXT jack and then plug the telephone line cord from your answering machine into the EXT jack 3 Set your answering machine to answer within four rings If you are h...

Page 69: ...e Make a copy to check your machine s scanner operation If the copy quality is not good clean the scanner See Related Information Clean the Scanner at the end of this section Vertical black lines when sending Black vertical lines on faxes you send are typically caused by dirt or correction fluid on the glass strip Clean the glass strip See Related Information Clean the Scanner at the end of this s...

Page 70: ...ent by pulling it upward 4 Close the ADF cover 5 Press IMPORTANT To avoid future document jams close the ADF cover correctly by pressing it down in the center Document is Jammed in the Bottom of the ADF Unit 1 Remove any paper that is not jammed from the ADF 2 Lift the ADF document support and remove the jammed paper 3 Press Document is Jammed inside the ADF Unit 1 Remove any paper that is not jam...

Page 71: ...ate and remove the jammed paper Error and Maintenance Messages on page 41 Related Information Paper is Jammed in the Front of the Machine If the LCD displays the following paper jam messages follow these steps Jam Front Rear Repeat Jam Front Rear Jam Front Repeat Jam Front Jam Front MP Tray Repeat Jam Front MP Tray 1 Unplug the machine from the AC power outlet 2 If the paper is loaded in the MP tr...

Page 72: ...as shown by the arrow 1 When finished continue with the next step 4 Slowly pull out the jammed paper 1 1 If your LCD error message was repeat paper jam messages for example Repeat Jam Front Rear do the following a Lift the Jam Clear Flap and remove the jammed paper b Make sure you look carefully inside 1 for any scraps of paper 1 When finished continue with the next step 58 ...

Page 73: ...med paper 1 out of the machine 1 If your LCD error message was repeat paper jam messages for example Repeat Jam Front Rear move the print head if necessary to take out any paper remaining in this area Make sure pieces of paper are not left in the corners of the machine 1 and 2 1 2 When finished continue with the next step B Troubleshooting 59 ...

Page 74: ...f the paper is jammed under the print head unplug the machine from the power source and then move the print head to take out the paper If ink gets on your skin or clothing immediately wash it off with soap or detergent 7 Gently close the scanner cover using the finger holds on each side 8 If your LCD error message was Jam Front Rear or Repeat Jam Front Rear do the following a Open the Jam Clear Co...

Page 75: ... Rear and you removed the paper support put it firmly back in the machine Make sure you fit the paper support into the channels 11 Slowly push Tray 1 completely into the machine 12 Reconnect the power cord If there is a repeat paper jam a small piece of paper may be stuck in the machine See Related Information Remove Paper Scraps Error and Maintenance Messages on page 41 Remove Paper Scraps on pag...

Page 76: ...tely out of the machine as shown by the arrow 2 When finished continue with the next step 4 If your LCD error message was Jam Rear Repeat Jam Rear Jam Tray2 or Repeat Jam Tray2 do the following a Open the Jam Clear Cover 1 at the back of the machine 1 b Slowly pull the jammed paper out of the machine c Close the Jam Clear Cover Make sure the cover is closed completely 5 If your LCD error message w...

Page 77: ...sition 1 7 Slowly pull the jammed paper 1 out of the machine 1 If your LCD error message was repeat paper jam messages for example Repeat Jam Rear move the print head if necessary to take out any paper remaining in this area Make sure pieces of paper are not left in the corners of the machine 1 and 2 1 2 When finished continue with the next step B Troubleshooting 63 ...

Page 78: ...the print head unplug the machine from the power source and then move the print head to take out the paper If ink gets on your skin or clothing immediately wash it off with soap or detergent 8 Gently close the scanner cover using the finger holds on each side 9 MFC J6535DW Slowly push Tray 1 completely into the machine MFC J6935DW Slowly push Tray 1 and Tray 2 if removed completely into the machin...

Page 79: ...locate and remove the jammed paper During the procedure you must insert the Maintenance sheet included with your machine into the machine in Landscape orientation through the opening as shown until you feel it grab the paper If you do not have the Maintenance sheet use one sheet of Letter or A4 size thicker paper such as glossy paper Error and Maintenance Messages on page 41 Paper is Jammed in the...

Page 80: ...it press d or c to highlight the incorrect character Press and then enter the correct character To insert a character press d or c to move the cursor to the correct place and then enter the character Press for each character you want to erase or press and hold to erase all the characters Set Your Station ID on page 28 Related Information Check the Machine Information Follow these instructions to c...

Page 81: ... information 3 Address Book Fax Address Book Fax resets the following settings Address Book Address Book and Setup Groups Programmed fax jobs in the memory Delayed Fax and Delayed Batch Transmission Station ID Name and Number Remote Fax Options Fax Forwarding and Paging USA and Canada only Report Transmission Verification Report Address Book and Fax Journal History Caller ID history and Outgoing C...

Page 82: ...C3029Y Super High Yield Cyan LC3029C Super High Yield Magenta LC3029M Black Approximately 3000 pages 1 Yellow Cyan and Magenta Approximately 1500 pages 1 For more information about replacement supplies visit us at www brother com pageyield 1 Approx cartridge yield is declared in accordance with ISO IEC 24711 If using Windows double click the Brother Creative Center icon on your desktop to access o...

Page 83: ...g Text 66 Error messages 41 F Fax F T ring time 31 ring delay 31 station ID 28 telephone line compatibility 28 Fax receive 29 Fax from computer 35 J Jams 56 document 56 paper 57 M Manual receive 29 N NFC Near Field Communication iv 41 P Paper check paper setting 18 how to load 8 Print 22 alignment check 39 quality check 37 R Receive Mode 29 30 S Scan 26 Supplies 68 T TAD Telephone Answering Device...

Page 84: ...print or scan problems 49 V Voice Mail 33 VoIP systems 28 33 W Warranty is in the box Notice of disclaimer iii Wireless LAN report 48 70 ...

Page 85: ... rue Hôtel de Ville Dollard des Ormeaux QC Canada H9B 3H6 Visit us on the World Wide Web www brother com These machines are approved for use in the country of purchase only Local Brother companies or their dealers will support only machines purchased in their own countries Made from 100 recycled paper excludes cover D009BX001 00 USA CAN Version 0 ...

Reviews: