Print from Your Computer
11
Windows
4
Create Labels with P-touch Editor
4
a
Connect the label printer and your computer with the included USB cable.
b
Double-click the P-touch Editor icon
on the desktop.
c
Create a new layout or open an existing layout.
d
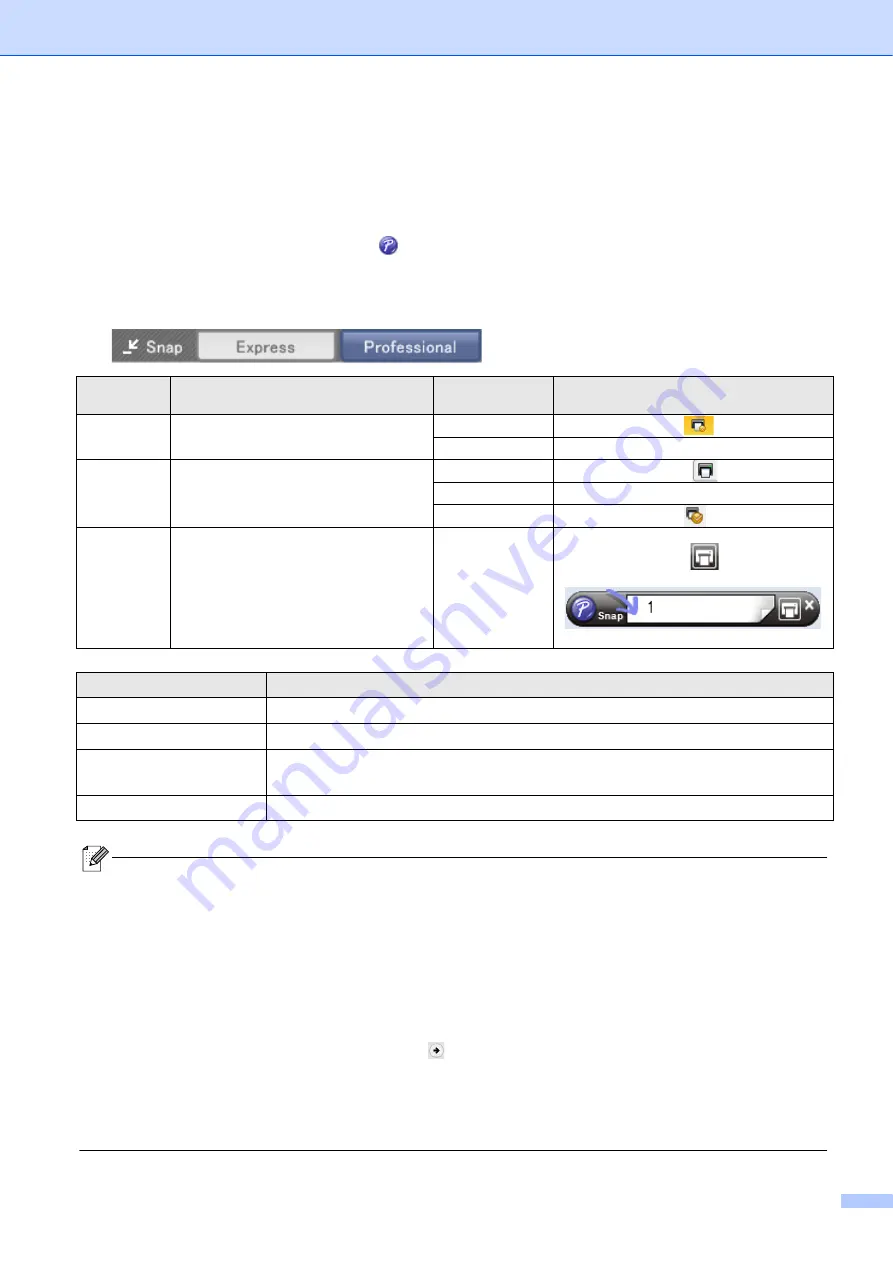
Select the mode as necessary:
Mode
Features
Print Settings
Change
How to Print
Express
This mode allows you to quickly create
layouts that include text and images.
Yes
Click the print icon
>
Yes
File
menu >
>
Professional
This mode allows you to create layouts
using a wide-range of advanced tools
and options.
No
Click the print icon .
Yes
File
menu >
>
Yes
Click the print icon
>
Snap
This mode allows you to create custom
layouts at any time by keeping the P-
touch Snap palette displayed on your
monitor.
• Screen Capture function
• Drag-and-Drop function
• Print Text function
No
Click the print icon .
Options
Functions (Multiple selection is possible for some options)
Auto Cut
Cuts each label automatically.
Chain Printing
Allows you to save tape by not cutting the last label.
Special tape
Feeds tape for manual cutting. Use for special tapes, such as Fabric Tapes and Extra
Strength Adhesive Tapes.
Mirror Printing
Print reverse.
• Press the Power Button twice quickly to feed and cut the tape.
• When the Auto Cut option is selected, the minimum print length is 0.98 in. / 25 mm.
• Before each initial print, the label printer feeds an approximately 1 in. / 25 mm of blank tape.
• We recommend not selecting the Auto Cut option when printing multiple labels less than 0.98 in. / 25 mm. This
will save tape.
• The
Cable Labeling Wizard
allows you to create layouts for electrical equipment management.
• This label printer does not support Bluetooth connections for computers.
To select the layout
- Double-click the layout icon.
- Select the layout icon, then click the arrow mark
.
To change the P-touch Editor startup settings
a
Click the
Tools
menu, and select >
Options
.
b
In the
Options
window, select
General
and select the startup setting you want from
Operations
.


