27
CONTENTS
MACHINE
KNOWLEDGE
EMBROIDERING
MAINTENANCE
ERROR
MESSAGE
TROUBLESHOOTING
PATTERNS
EMBROIDERING
USING A SMALL
FRAME
(OPTIONAL)
EMBROIDERING
USING A
EXTRA-SMALL
FRAME (OPTIONAL)
EMBROIDERING
USING A LARGE
FRAME
(OPTIONAL)
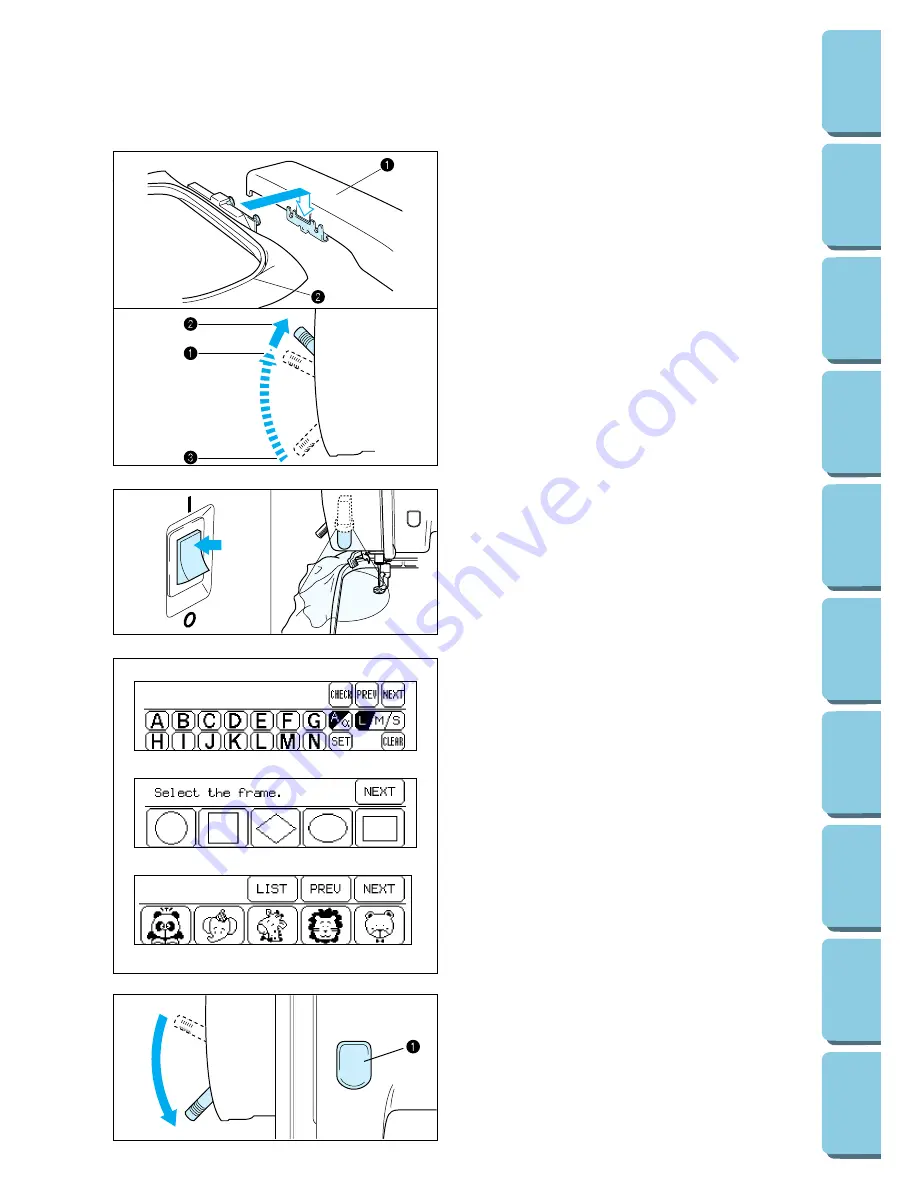
5. Select a pattern.
4. Turn on the power. The light will shine when
the power is turned on.
3. Place the fabric in the embroidery frame and
then attach the frame to the machine.
(See page 20 – 22)
1
Carriage (embroidery arm)
2
Embroidery frame
NOTE
Do not push down the carriage too hard as you
attach the hoop. Use caution so as not to move
the carriage sideways.
*
It is easier to move the embroidery frame
under the presser foot if the presser foot lever
is raised higher than its normal “up” position.
1
Normal presser foot lever “up” position
2
Presser foot lever pushed up
3
Presser foot lever down position
6. Lower the presser foot lever and press the
“START/STOP” button to start the machine.
1
“START/STOP” button


