67
CONTENTS
MACHINE
KNOWLEDGE
EMBROIDERING
MAINTENANCE
ERROR
MESSAGE
TROUBLESHOOTING
PATTERNS
EMBROIDERING
USING A SMALL
FRAME
(OPTIONAL)
EMBROIDERING
USING A
EXTRA-SMALL
FRAME (OPTIONAL)
EMBROIDERING
USING A LARGE
FRAME
(OPTIONAL)
EMBROIDERING USING A SMALL FRAME (OPTIONAL)
Embroidering items such as handkerchiefs and collars
ABC
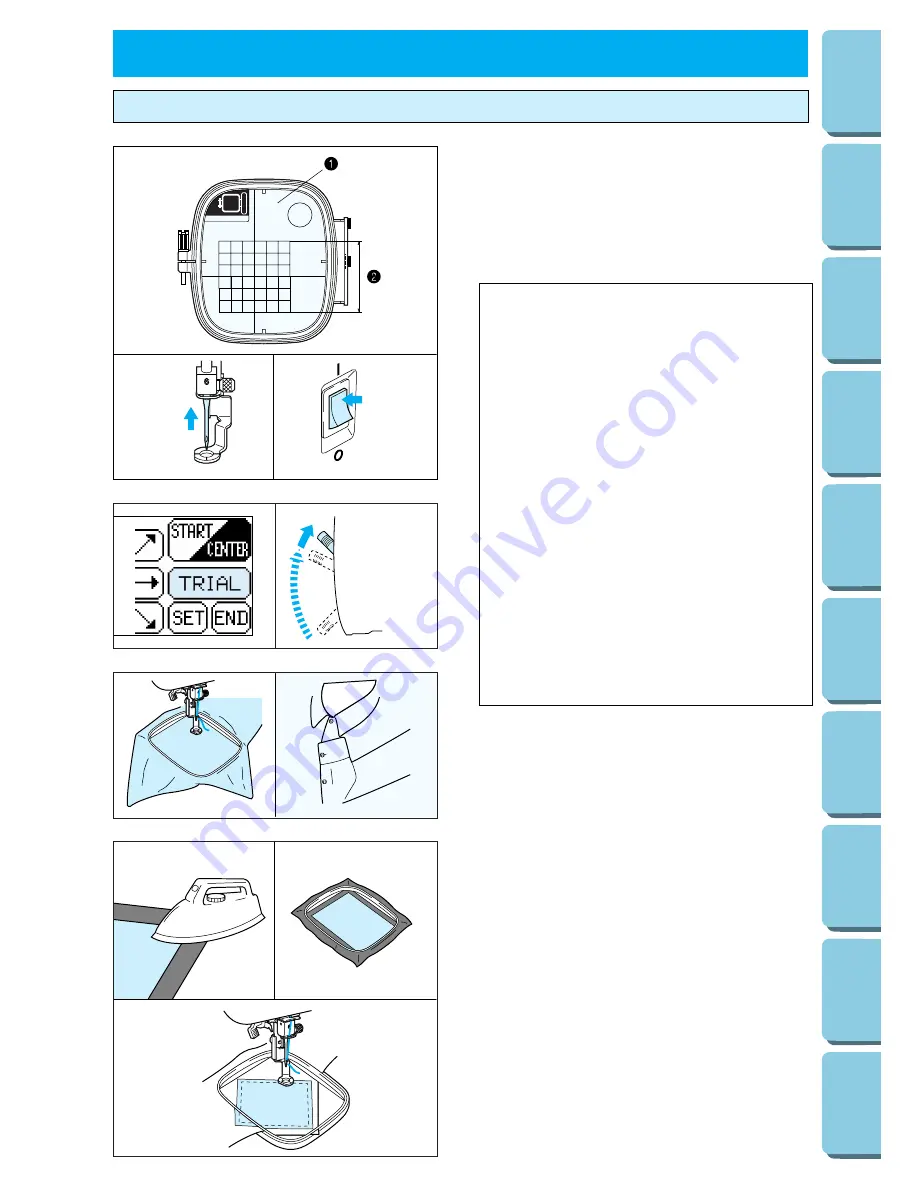
If the accessory frame is too large to hold the
fabric to be embroidered, you can use the
optional small frame.
1
Embroidery sheet
2
Embroidering range (Maximum)
Height: 70 mm (2-3/4”)
Width: 70 mm (2-3/4”)
CAUTION
Take note of the following when using the
small frame.
1. Always make sure that the initial setting
operation for the carriage (embroidery arm)
after the power is turned on — in other words,
the movement of the carriage (embroidery
arm) in order to set the position — is
completed before installing the small
embroidery frame.
2. If you do not change the position of the
pattern on the “LAYOUT” screen, check that
the embroidering area for the pattern selected
is within 70 mm (2-3/4”) in height and width by
touching the “LAYOUT” key. If it is, the pattern
can be embroidered correctly.
3. If you have changed the position of the
pattern using the arrow keys in the “LAYOUT”
screen, use the “TRIAL” function to check that
the pattern does not extend past the edges of
the frame before starting embroidering.
Before touching “TRIAL”, raise the needle and
the presser foot lever to their highest
positions.
Embroidering handkerchiefs and cuffs
Set the handkerchief into the small frame. You
can use the rotation function to move the needle
to the desired embroidering location.
Embroidering items which won’t fit into the
frame
For items which won’t fit into the frame, baste or
iron a piece of stabilizer fabric onto the part to be
embroidered, and then place the entire piece into
the frame together with the fabric to be
embroidered.


