148
Basic Design Center Operations
Step 3
Figure Handle Stage
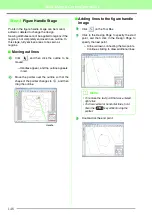
Points in the figure handle image can be moved,
added or deleted to change the design.
Sewing attributes cannot be applied to regions if the
region is not completely enclosed in an outline. In
this stage, fully enclose areas to be sewn as
regions.
■
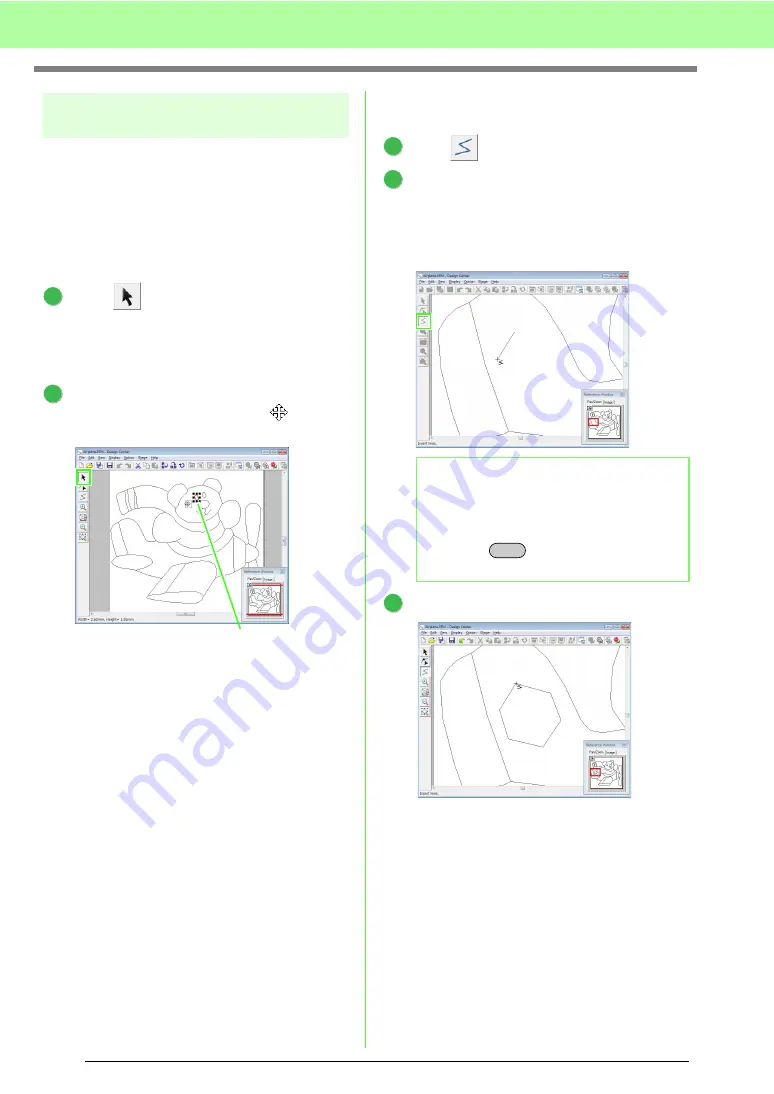
Moving outlines
Click
, and then click the outline to be
moved.
→
Handles appear, and the outline appears
in red.
Move the pointer over the outline so that the
shape of the pointer changes to
, and then
drag the outline.
■
Adding lines to the figure handle
image
Click
on the Tool Box.
Click in the Design Page to specify the start
point, and then click in the Design Page to
specify the next point.
→
A line is drawn connecting the two points.
Continue clicking to draw additional lines.
Double-click the end point.
1
2
Handle
b
Memo:
• To remove the last point that was entered,
right-click.
• To draw vertical or horizontal lines, hold
down the
key while moving the
pointer.
1
2
Shift
3
Summary of Contents for PE-Design 8
Page 1: ...Instruction Manual ...
Page 146: ...144 Arranging Embroidery Designs Layout Editing ...
Page 200: ...198 Managing Embroidery Design Files Design Database ...
Page 218: ...216 Creating Custom Stitch Patterns Programmable Stitch Creator ...
Page 244: ...242 Tips and Techniques ...
Page 269: ...English ...

