156
Specifying global stitch settings
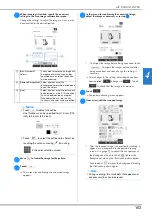
The same stitch settings can be changed at the same time for
multiple patterns of the same type.
a
Use
to select the stitch whose settings are to
be changed, and then touch
.
The same stitch type areas will be selected at the
same time.
b
Follow steps
b
through
d
in “Specifying individual
stitch settings” on page 154 to change the settings.
c
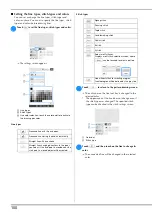
Touch
,
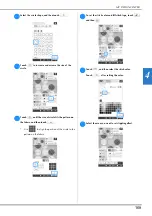
to display the embroidering
settings screen.
1
Touch
to check an enlarged view of the pattern.
2
Touch
to save the embroidery data.
Attaching the scanning frame
a
Prepare the desired drawing/illustration.
b
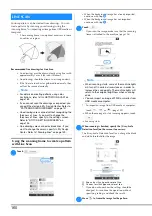
Position the paper to be scanned so that it is aligned
with the lower-left corner, securing the paper in place
with the magnets.
*
Place the magnets at six locations around the paper
to secure it, making sure that the line drawing is not
covered.
1
2
MY DESIGN CENTER WITH SCAN
Memo
• The scanning frame is an optional accessory in
some countries or regions.
CAUTION
• To avoid having the embroidery foot strike the
frame during the scanning process and
possibly causing injury, check the following:
the thickness of the fabric or paper, creases or
folds in the fabric or paper that may be rolled
up too close to the frame.
Memo
• Only one sheet of paper can be placed in the
scanning frame per scan.
Note
• The scanning area is 300 mm × 200 mm (approx.
11-3/4 inches × 7-7/8 inches). There are scan area
marks within the frame. Make sure that the paper is
placed within the mark. Any part of the image that
is outside the mark will not be scanned.
1
300 mm × 200 mm (approx. 11-3/4 inches × 7-7/8
inches) mark (maximum scanning field)
2
Scan area
3
Outside the scan area
2
3
1
1


