-12-
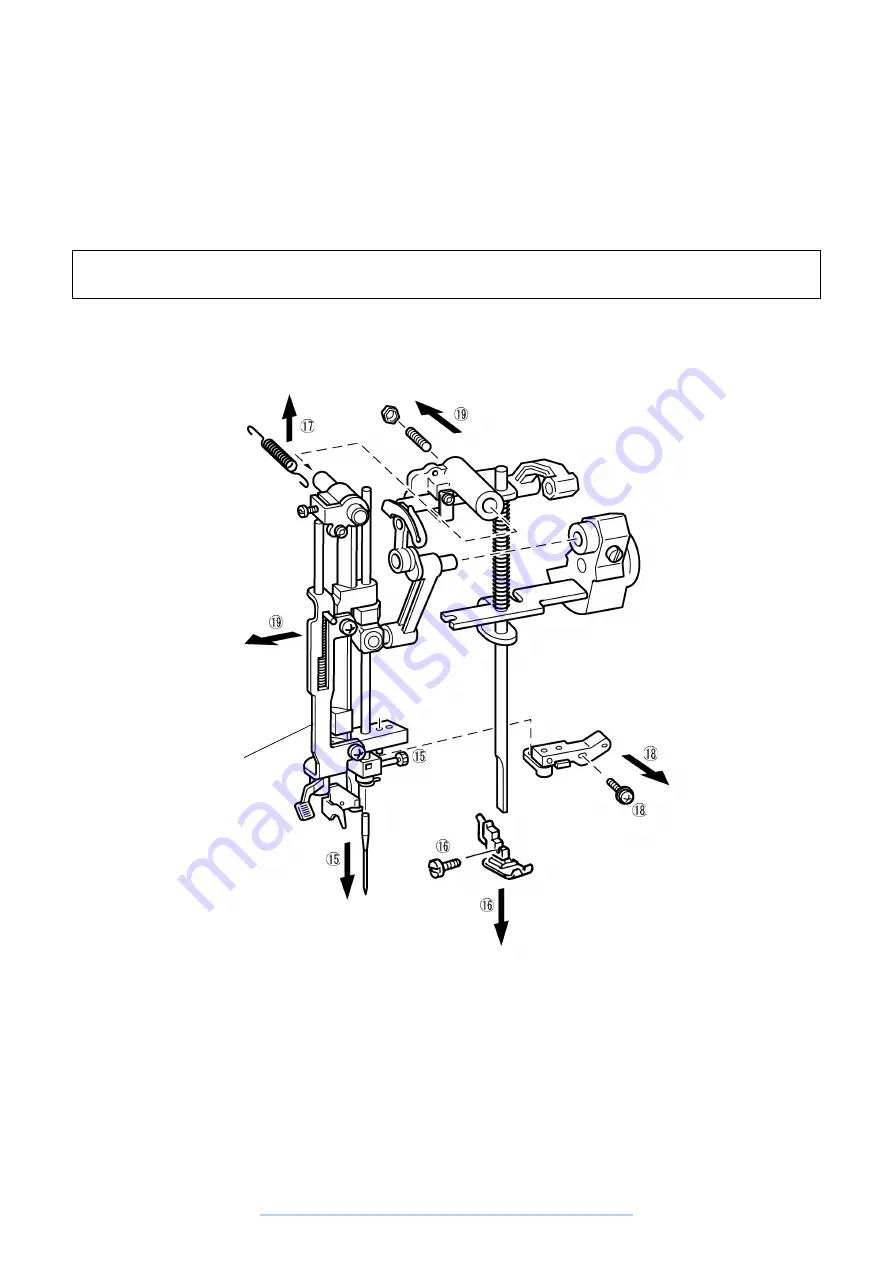
15. Loosen the setscrew for the needle, then remove the needle.
16. Remove the screws holding the presser holder, then remove the presser holder and the presser foot.
17. Remove the tension spring from the needle bar block assembly.
18. Remove the screws holding the needle bar supporter stud holder assembly, then remove the needle bar
supporter stud holder assembly.
19. Remove the needle bar block assembly, then remove the setscrew and lock nut.
Disassembly Point
19. Turn the needle bar block assembly slightly to the left side, then pull it forward to remove it.
Needle threader is not
used for PS53.
www.promelectroavtomat.ru
Summary of Contents for PS-53
Page 1: ... 7 2001 www promelectroavtomat ru ...
Page 4: ... 2 1 MECHANICAL CHART www promelectroavtomat ru ...
Page 8: ... 6 3 ELECTRONIC PARTS ARRANGEMENT CHART STAR240E STAR230E only www promelectroavtomat ru ...
Page 31: ... 29 2 LEAD WIRES ARRANGEMENT STAR240E STAR230E PS57 PS55 PS53 www promelectroavtomat ru ...
Page 77: ...STAR240E STAR230E PS 57 PS 55 PS 53 H1060212 www promelectroavtomat ru ...


