Chapter 1
6
c
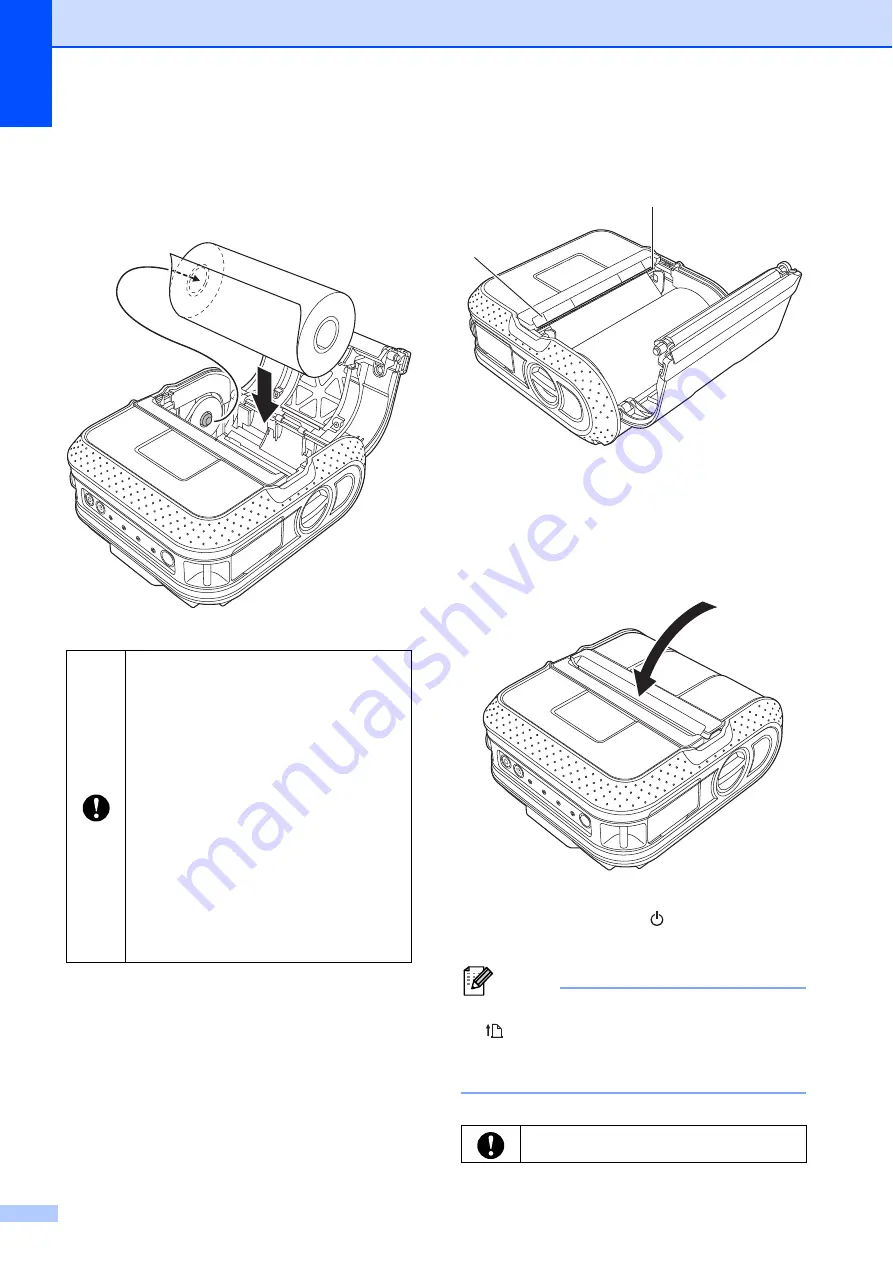
Insert an RD Roll into the RD Roll
compartment upside down with the
labels feeding from the bottom as
shown.
d
Align the RD Roll with the guide lines.
4 Guide lines
5 Tear bar
e
Close the RD Roll compartment by
pressing on the center of the cover.
f
Press and hold the (Power) button to
turn the printer on.
Note
When using die cut label, press the
(Feed) button after inserting the RD
Roll. The printer will position the label to
the correct starting position.
Make sure that the roll guide is
properly positioned to prevent the
RD Roll from moving sideways.
If the RD Roll is not inserted
correctly, the printer will not print on
the correct side of the paper or label.
When printing on die cut labels, set
the roll guide so that there is
0.08 inches (2 mm) of space on
both sides (0.16 inches (4 mm)
total) of the scale.
Example: When using a 4-inch wide
(101.6 mm) label, set the roll guide
to a width of 4.16 inches
(105.6 mm).
Use genuine Brother media.
5
4


