7
f
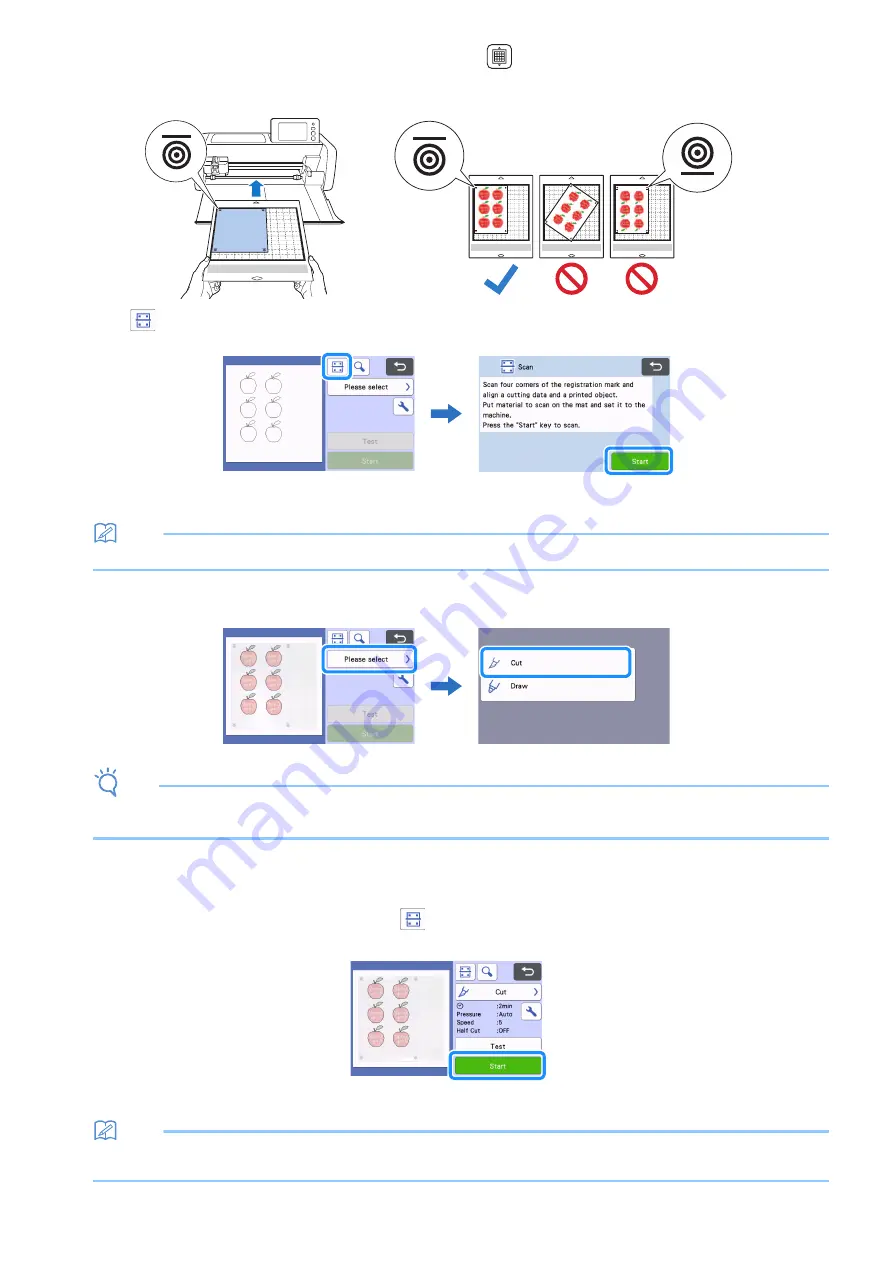
Attach the material to the appropriate cutting mat, and then touch
to load the mat into the machine.
Attach the material to the mat so that the horizontal line of the registration mark is at the top.
The machine will detect the registration marks and automatically correct the alignment of the cutting lines and the material.
g
Touch
in the preview screen to scan the material in order to check the position of the cutting lines.
The registration marks are detected, and the cutting lines are aligned with the printed image. Recommended for the first cut to verify if the
data is correct for the printed image.
Memo
• When not checking the position of the cutting lines, select “Cut” and continue with step
h
Check the position of the cutting lines, and then select “Cut” if the cutting lines and image are not significantly misaligned.
Note
• If the cutting lines and image are significantly misaligned, the retrieved data and printed image may be a wrong combination.
Check that the data retrieved in step
and the printed image are the correct combination.
i
Touch the “Start” key to start scanning and cutting.
• After the material is scanned to detect the registration marks, cutting starts.
• To perform test cutting, touch the “Test” key. Position the test cutting pattern so that it does not overlap the material or cutting lines. If
scanning was not performed in step
, be sure to touch
in the test cutting screen to scan the background, and then check the position
of the pattern.
j
When cutting is finished, feed out the mat, and then peel the material from the mat.
Memo
• If the cutting position is misaligned, refer to “Troubleshooting” on page 8.
• Depending on type or model of your printer, printed image may be distorted, and that may cause misalignment of the cutting position.


