Setting Up
1-41
1 —
2 —
3 —
4 —
5 —
6 —
7 —
8 —
?
!
9 —
CONTENTS
Index
6
6
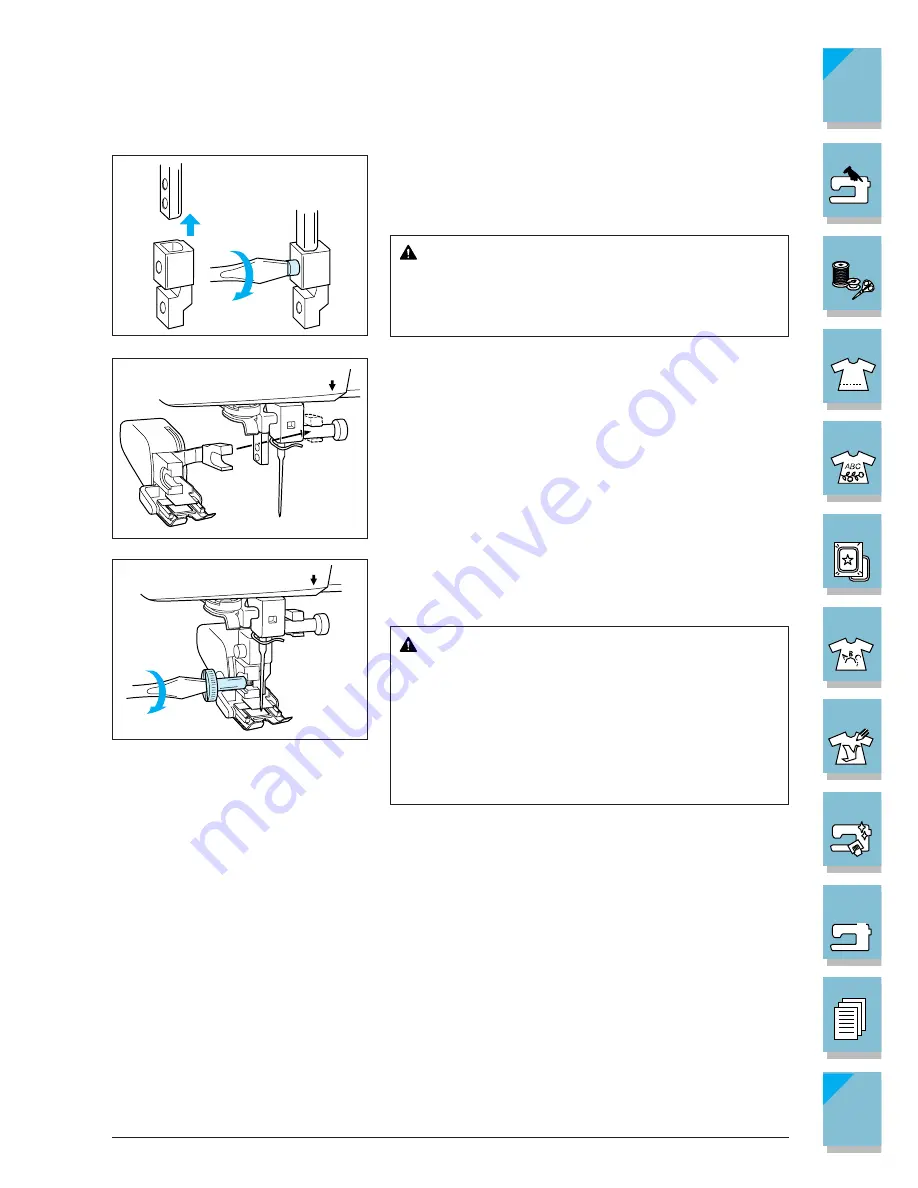
5. Set the low shank adapter for the walking foot that came
with your machine on the presser foot shaft, and push
it up as far as possible. Tighten the screw securely with
the screwdriver.
CAUTION
Use the screwdriver to tighten the screw securely.
If the screw is loose, the needle may strike the
presser foot and cause injury.
6. Set the operation lever of the walking foot so that the
fork surrounds the needle clamp, and set the walking
foot on the presser foot shaft.
7. Lower the presser foot lever, insert the screw (large)
for the walking foot, and tighten the screw securely
with the screwdriver.
CAUTION
• Use the screwdriver to tighten the screw se-
curely. If the screw is loose, the needle may
strike the presser foot and cause injury.
• Be sure to turn the balance wheel toward the
front of the machine to check that the needle
does not strike the presser foot. If the needle
strikes the presser foot, injury may result.
CAUTION
When sewing with the walking foot, sew at medium to
low speeds.
Summary of Contents for ULT-2003D
Page 1: ......
Page 34: ...Setting Up 1 23 1 2 3 4 5 6 7 8 9 CONTENTS Index Contents of Other Categories ...
Page 57: ...1 46 Setting Up 1 2 3 4 5 6 7 8 9 CONTENTS Index ...
Page 168: ...Sewing Character Decorative Stitches 4 25 1 2 3 4 5 6 7 8 9 CONTENTS Index More Examples ...
Page 293: ...7 16 My Custom Stitch 1 2 3 4 5 6 7 8 9 CONTENTS Index ...
Page 313: ...9 16 Troubleshooting 1 2 3 4 5 6 7 8 9 CONTENTS Index ...
Page 315: ...A 2 Appendix 1 2 3 4 5 6 7 8 9 CONTENTS Index ...
Page 321: ...ENGLISH 114 230 XC3200 001 0205 Printed in Japan ...


