-31-
3.
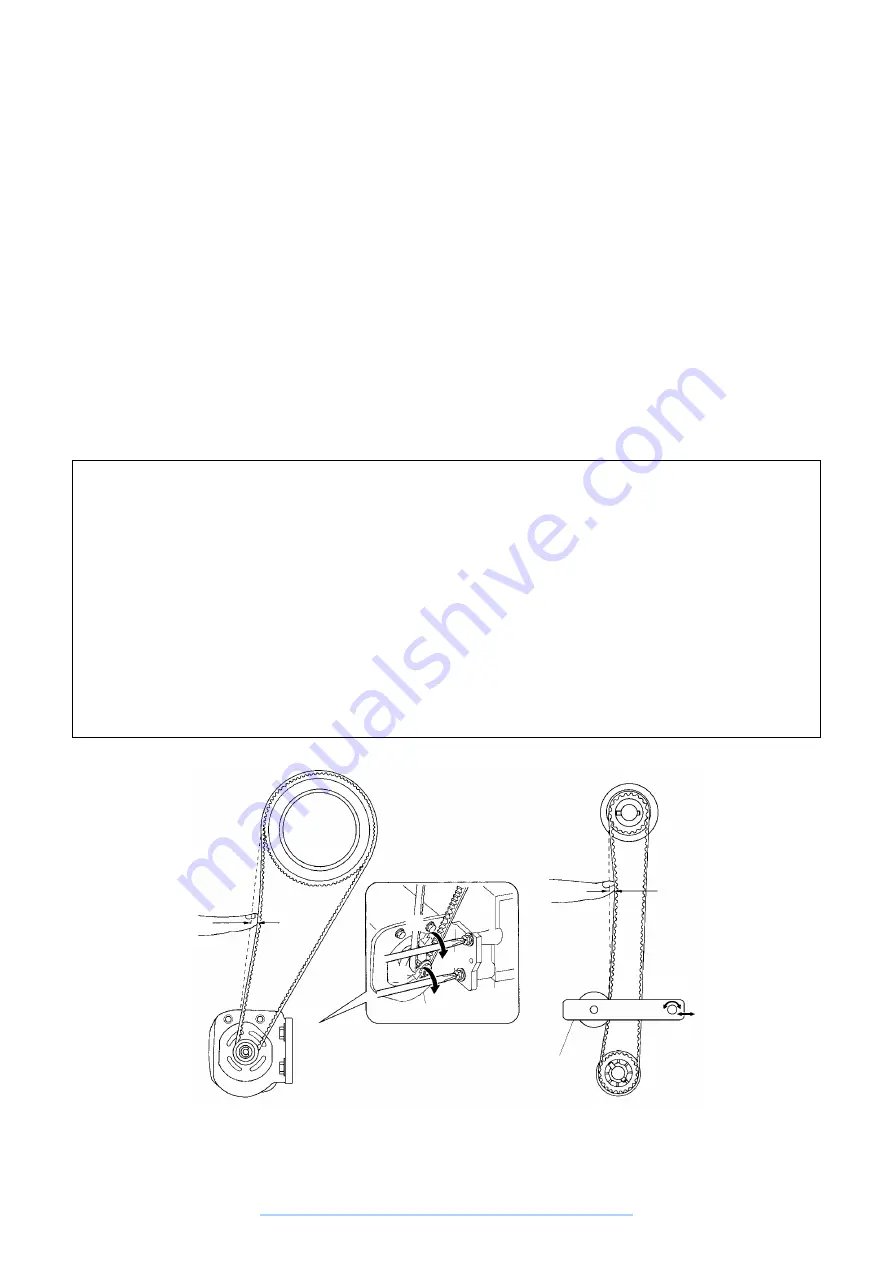
DRIVING BELT AND TIMING BELT TENSION
STANDARD
There should the 4-6 mm slack in the driving belt when the driving belt upper shaft pulley and motor pulley center
are pressed gently with a finger (Reference Figure 2N) with a force of approximately 200 g. There should be 3-4
mm slack in the timing belt when the timing belt upper shaft horizontal feed cam pulley and tension pulley center
are pressed slightly strongly with a finger (Reference Figure 3N) with a force of approximately 300 g.
ADJUSTMENTS
1.
Loosen the two screws holding the motor holder.
2.
Adjust the position of the motor holder to adjust the tension on the driving belt.
3.
Secure the motor holder with the two screws.
4.
Loosen the screw holding the tension pulley.
5.
Adjust the timing belt tension by moving the tension pulley assembly position forward and back.
6.
Secure the tension pulley assembly with the screw.
Adjustment Points
∗
Driving belt
*
Unplug the power cord before adjusting the driving belt. (This is done to avoid the possibility of electrical
shock.)
*
If the driving belt tension is not correctly adjusted, the problems below may occur.
1.
If the driving belt tension is too great, the torque may become excessive, causing the motor to rotate
slower and generate an irregular noise.
2.
If the driving belt tension is too low, the driving belt may jump and the upper shaft may not rotate smoothly
when sewing on denim and other thicker fabrics or overlapping fabrics and the motor may rotate unevenly
or the upper shaft may not rotate.
*
If the timing belt tension is too low, the belt may jump while sewing on denim and others thicker fabrics or
overlapping fabrics or the feed timing or the closeness of the needle and rotary hook assembly may
prevent sewing.
2N
(about 200 g)
4-6 mm
Motor holder
Driving belt
Tension pulley assembly
Timing belt
3-4 mm
3N
(about 300 g)
www.promelectroavtomat.ru
Summary of Contents for XL-6040
Page 1: ... 6 2001 www promelectroavtomat ru ...
Page 3: ... 1 I 1 MECHANICAL CHART 2 2 POWER TRANSMISSION CHART 3 www promelectroavtomat ru ...
Page 4: ... 2 1 MECHANICAL CHART www promelectroavtomat ru ...
Page 29: ... 27 2 LEAD WIRES ARRANGEMENT www promelectroavtomat ru ...
Page 61: ...XL 6060 Series XL 6050 Series XL 6040 Series H1040194 www promelectroavtomat ru ...


