background image


Assembly: 

1. 

The assembly should take place on a hardened, dry substrate. It is necessary to use appropriate tools for tightening the 
bolts: a screwdriver and a wrench (not included in the set). 

2. 

Make sure that all the bolts and nuts are tightened properly! Remain careful and do not use excess strength for tightening 
for tightening, as cast iron is a brittle material that is prone to cracking. 

3. 

Turn the bowl upside down for easier assembly. Connect the feet using the bolts included. Turn the bowl upside down once 
again, making it stand on the feet. 

4. 

Put the cover and the arm onto the bowl. Hook the side bands of the arm by the protruding elements of the bowl and tighten 
the stabilising bolts. Tighten the bowls manually, without using excess force, so as not to damage the cast iron. 

First use:  

1. 

After assembling the cauldron, wash it thoroughly in a mixture of warm water and white vinegar (50/50%). The purpose of 
that is removing the plant oil used for securing the surface of the cauldron after production. Next, dry the cauldron well, best 
using a paper towel. 

2. 

Prior to using the cauldron for the first time, it should be fired in a burning, previously prepared furnace. 

To this end: 

fill the cauldron with 1 litre of oil and place the cover on it, tightening it with bolts; 


hold the cauldron in the furnace in such a way that the flames heat up only the bottom of the cauldron, brining the oil gently 
to the boil; 


keep firing the cauldron for 15-20 minutes; 


afterwards, remove the cauldron from the furnace using protective gloves. Pay attention not to expose the cauldron to a 
drastic change in temperature (e.g. do not put it directly into the snow), as cast iron is very sensitive to sudden temperature 
changes; 


after cooling the cauldron down slightly (for about 10 minutes), carefully open the cauldron cover and spread the hot oil on 
the internal cauldron walls using a previously prepared cloth, e.g. wound onto a wooden ladle. 


leave everything to cool down fully, then drain the oil used for firing from the cauldron and wipe the oil remains carefully off 
the cauldron walls. 

After each use: 


Wash the product right after it cools down, but never soak it.  

In the event of any burnt food adhering to the product, do not use any aggressive surfactants. Instead, you can use sand, for example.  


Dry the cauldron carefully and apply a thin coating of edible oil onto the internal walls of the product.  


Store the product in a dry place. 

Unsuitable maintenance of the cauldron may lead to it becoming corroded. 

Corrosion may be caused by extended soaking, 

storage of wet cookware in cabinets, or storing acidic dishes in the cast iron cookware. 

If any rust stains appear, remove them with a wire scourer, sand, or caustic soda – scour the pot surface long enough to remove all 
traces of rust, without worrying about damaging the cauldron. After this stage, repeat the actions described in the “First use” section.  

Remember: 


Do not use any detergents for washing cast iron cookware and do not wash it in a dishwasher. 


Do not use cast iron cookware on glass and other fragile, easily damaged surfaces. 


When using cast iron cookware, use only wooden or silicone utensils in order not to damage the cast iron surface. 


When using the cookware, place it on stable surfaces only. 


When warming the cookware up, set the flame in such a way that it does not go above the lower edge. 


Cast iron is unfit for dry cooking  – it is always necessary to use oil, butter, or other fat. Heating a meal dry may lead to 
permanent damage to cookware. 


Do not cut the portion prepared directly on the cast iron surface – we recommend moving the dish to an appropriate vessel 
or board, and only then proceed with cutting. 


Do not use mixers or electric stirrers inside the cast iron cookware - it may lead to damaging the cast iron surface. 


Always put hot cast iron cookware onto wooden boards, silicone mats, or suitable pads. 


Never  put  hot  cast  iron  cookware  into  water  –  it  is  obligatory  to  wait  until  it  cools  down. A  sudden  change  in 
temperature may lead to permanent damage to cookware. 

Note! After each use, coat the internal walls of cast iron cookware with a thin layer of any edible oil. This will extend its 
lifetime. 

SAFETY GUIDELINES 


It is forbidden to use the product in a manner inconsistent with its intended use.  

Summary of Contents for 330501

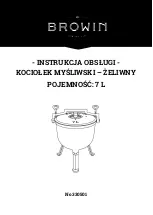
Page 1: ... INSTRUKCJA OBSŁUGI KOCIOŁEK MYŚLIWSKI ŻELIWNY POJEMNOŚĆ 7 L No 330501 ...

Page 2: ...OT CAST IRON Capacity 7 L GB 4 Bedienungsanleitung JAGDKESSEL AUS GUSSEISEN Fassungsvermögen 7 L DE 6 Руководство по эксплуатации КОТЕЛОК ОХОТНИЧИЙ ЧУГУННЫЙ Объем 7 л RU 7 Naudojimo instrukcija MEDŽIOTOJO KATILIUKAS KETAUS Talpa 7 L LT 9 Apkalpošanas rokasgrāmata MEDĪBU KATLS ČUGUNS Tilpums 7 L LV 10 ...

Page 3: ...y misy i dokręcić śruby stabilizujące Dokręcić ręcznie bez nadużywania siły aby nie uszkodzić żeliwa Pierwsze użytkowanie 1 Kociołek po złożeniu umyj dokładnie w ciepłej wodzie z dodatkiem octu białego 50 50 Ma to na celu pozbycie się oleju roślinnego użytego do zabezpieczenia powierzchni naczynia po produkcji Następnie kociołek dokładnie wysusz najlepiej przy użyciu papierowego ręcznika 2 Kociołe...

Page 4: ... drewniane deski maty silikonowe lub nadające się do tego celu podkładki Gorącego żeliwa nie wkładaj do wody koniecznie odczekaj aż garnek ostygnie Nagła zmiana temperatury może spowodować trwałe uszkodzenie naczynia Uwaga Po każdym użyciu posmaruj wewnętrzne ściany naczyń żeliwnych cienką warstwą dowolnego oleju jadalnego Wydłuży to ich żywotność WSKAZÓWKI DOTYCZĄCE BEZPIECZEŃSTWA Używanie urządz...

Page 5: ...he oil remains carefully off the cauldron walls After each use Wash the product right after it cools down but never soak it In the event of any burnt food adhering to the product do not use any aggressive surfactants Instead you can use sand for example Dry the cauldron carefully and apply a thin coating of edible oil onto the internal walls of the product Store the product in a dry place Unsuitab...

Page 6: ...n 2 Sichergehen dass alle Schrauben und Muttern korrekt eingeschraubt sind Vorsicht walten lassen und nicht mit übermäßiger Kraft einschrauben weil Gusseisen ein sprödes Material ist das zu Rissen neigt 3 Für eine leichtere Montage die Schüssel mit dem Boden nach oben drehen Die Füße mithilfe der beigefügten Schrauben einschrauben Die Schüssel erneut umdrehen und auf die Füße stellen 4 Auf die Sch...

Page 7: ...Butter oder Fett Das trockene Erhitzen des Gerichts kann das Gefäß dauerhaft beschädigen Die vorbereitete Portion nicht direkt auf der gusseisernen Oberfläche schneiden das Gericht in einen geeigneten Topf oder auf ein Brett legen Im Gefäß keine Mixer oder elektrische Mischer verwenden das kann die gusseiserne Oberfläche beschädigen Das heiße gusseiserne Gefäß immer auf Holzbretter Silikonmatten o...

Page 8: ...ало только его дно что приведет к деликатному кипению масла обжиг выполнять в течение 15 20 минут по истечении этого времени снять котелок с пламени костра используя защитные перчатки Не следует подвергать посуду резкому перепаду температуры например не ставить непосредственно на снег так как чугун очень чувствителен ко быстрым изменениям температуры после того как котелок немного остынет спустя 1...

Page 9: ...ется NAUDOJIMO INSTRUKCIJA MEDŽIOTOJO KATILIUKAS KETAUS Talpa 7 L Ketaus katiliukas puikiai tinka šeimos šventėms ir draugų susibūrimams Aukštos kokybės ketus ir paprasta konstrukcija suteikia galimybę ruošti jame daugybę skanių patiekalų ir tinkamai prižiūrimas katiliukas tarnaus ilgus metus Prispaudžiamas dangtis padeda greičiau paruošti patiekalus ir prireikia mažiau riebalų DĖMESIO Prieš prade...

Page 10: ...ną nustatyti taip kad nesiektų už indo apatinio krašto Ketus netinkamas gaminti sausuoju būdu naudoti aliejų sviestą arba taukus Sausai šildant patiekalą galima negrįžtamai sugadinti indą Paruoštos porcijos nepjaustyti ant ketaus paviršiaus patiekalą perdėti į tinkamą indą arba ant pjaustymo lentos ir tik tada pjaustyti Inde nenaudoti elektrinių plakiklių ar maišiklių galima pažeisti ketaus pavirš...

Page 11: ... uzmanīgi atveriet kazana vāku un noslaukiet trauka iekšējās sieniņas ar vēl karsto eļļu izmantojot iepriekš sagatavotu drānas salveti piemēram uztītu uz koka karotes ļaujiet visam pilnīgi atdzist tad uzmanīgi izlejiet no trauka eļļu rūpīgi noslaukot no tā sieniņām eļļas atlikumus Pēc katras lietošanas Trauku mazgājiet uzreiz tikko tas ir atdzisis tomēr tas nav jāmērcē Ēdiena piedegšanas gadījumā ...

Page 12: ...as pārtikas eļļas kārtiņu Tas pagarinās kalpošanas ilgumu DROŠĪBAS TEHNIKAS INSTRUKCIJAS Ir aizliegts ierīci izmantot neatbilstoši paredzētajiem mērķiem Izstrādājums nevar būt bērnu rotaļlieta Lietojot čuguna trauku ir jābūt īpaši piesardzīgiem čuguna īpatnība liels svars tādēļ jābūt uzmanīgiem lai nenomestu trauku Iepakojums un nolietotais izstrādājums ir utilizējami atbilstoši valsts kurā izstrā...

Page 13: ... towaru do naprawy 9 Gwarancja obejmuje wszelkie wady materiałowe i produkcyjne ujawnione w czasie normalnej eksploatacji zgodnie z przeznaczeniem sprzętu i zaleceniami podanymi na opakowaniu lub w instrukcji użytkowania Warunkiem udzielenia gwarancji jest użytkowanie sprzętu zgodnie z instrukcją 10 Zakres czynności naprawy gwarancyjnej nie obejmuje czyszczenia konserwacji przeglądu technicznego w...

Page 14: ...nej do produktu 15 W przypadku zakupu bezpośrednio u producenta reklamacje można składać bezpośrednio na stronie www browin pl w zakładce Zgłaszanie reklamacji lub za pośrednictwem drogi elektronicznej pod adresem reklamacje browin pl W przypadku zakupu u dystrybutora zaleca się dokonanie zgłoszenia za jego pośrednictwem Życzymy satysfakcji z użytkowania zakupionego produktu i zachęcamy do zapozna...

Page 15: ...15 BROWIN Sp z o o Sp K ul Pryncypalna 129 141 PL 93 373 Łódź tel 48 42 23 23 230 www browin pl ODWIEDŹ NAS NA ...

Reviews: