Broyce Control Ltd., Pool Street, Wolverhampton, West Midlands WV2 4HN. England
Tel: +44 (0) 1902 773746 Fax: +44 (0) 1902 420639 Email: sales@broycecontrol.com Web: www.broycecontrol.com
The information provided in this literature is believed to be accurate (subject to change without prior notice); however, use of such information shall be entirely at the user’s own risk
.
P9630-2-A
2
2
2
2
XXXXXX
P
•
SETTING & OPERATION
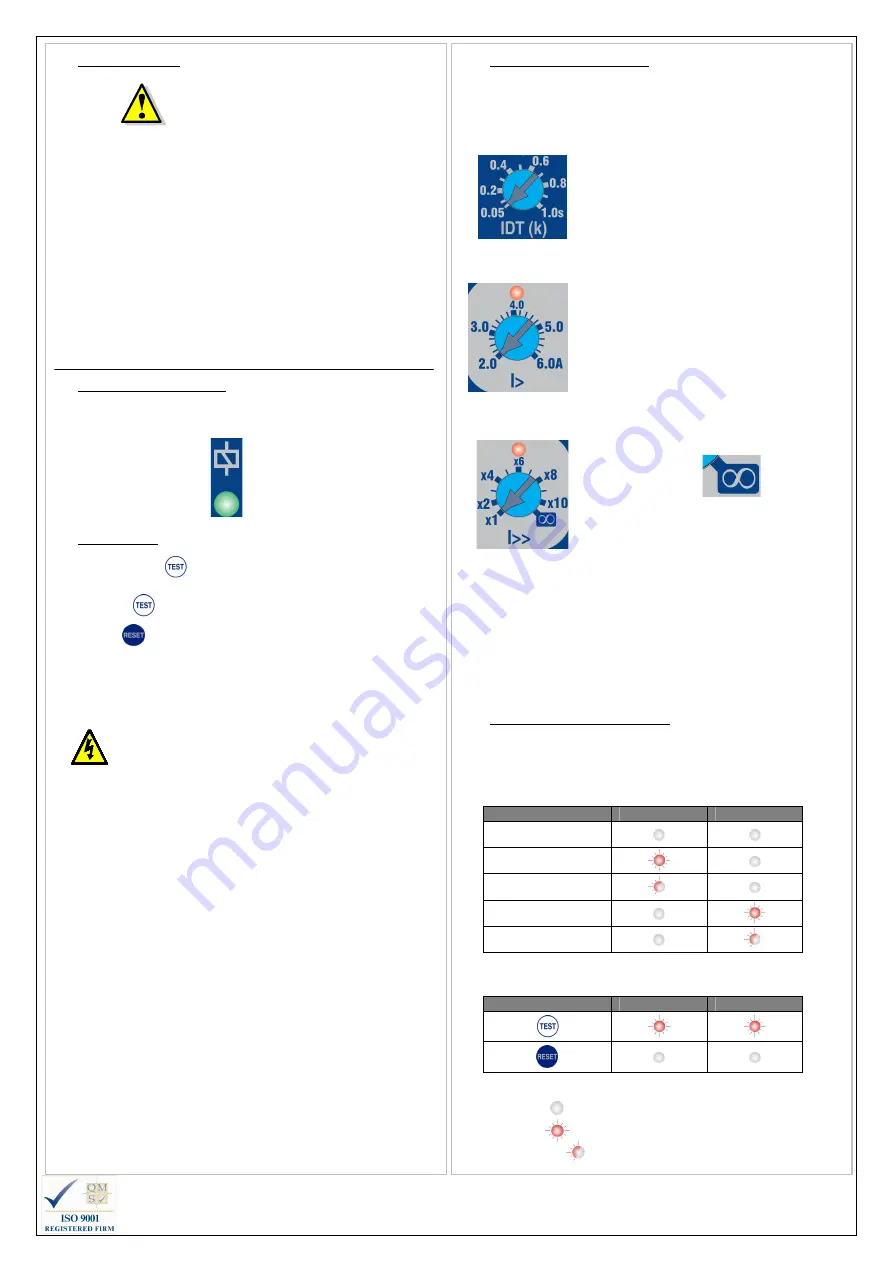
Setting of the P9630 is carried out using the 3 potentiometers located behind the
transparent cover.
1. IDT (k)
The adjustment for “IDT
“IDT
“IDT
“IDT (k)
(k)
(k)
(k)”””” (Time Multiplier)
defines the tripping characteristic when the “Low
“Low
“Low
“Low----set”
set”
set”
set”
threshold “I>”
“I>”
“I>”
“I>”
has been exceeded. The lower the
setting, the faster the response to tripping. The higher
the setting, the slower the response.
2. Low-Set Trip threshold (I>)
The adjustment for the
“Low
“Low
“Low
“Low----set”
set”
set”
set” can be set from 2
to 6A. When the threshold is exceeded due to an
Overcurrent condition, the corresponding red LED
above the adjustment illuminates indicating activity.
When tripping finally occurs, the red LED will then flash.
3. High-Set Trip threshold (I>>)
The adjustment for the
“High
“High
“High
“High----set”
set”
set”
set” can be set from
x1 to x10 then disable i.e.
The scale markings are multipliers of what has been
set on the “Low
“Low
“Low
“Low----set”
set”
set”
set” threshold. For example if the
“Low
“Low
“Low
“Low----set”
set”
set”
set” is set to 4A and “High
“High
“High
“High----set”
set”
set”
set” x8, this will be the
equivalent of 4 x 8 = 32A.
When the threshold is exceeded due to an
Overcurrent condition, the corresponding red LED
above the adjustment illuminates indicating activity.
When tripping finally occurs, the red LED will then flash.
If tripping occurs whereby the High-set level is exceeded, only the LED for the
High-set will illuminate/flash. This allows the user to clearly identify which threshold
was triggered causing the trip.
There is no delay associated with High-set therefore, tripping is instantaneous.
•
LED FUNCTION SUMMARY
The green LED will remain illuminated for as long as power is applied to the Aux.
connections (Terminals 1 and 2).
In response to an Overcurrent condition:
Status
I>
I>>
Normal
Low-set triggered
Low-set Tripped
High-set triggered
High-set Tripped
In response to Test and Reset button operation:
Button press
I>
I>>
Key:
LED off
LED on
LED flashing
•
INSTALLATION
•
BEFORE INSTALLATION, ISOLATE THE SUPPLY. THIS PRODUCT IS
DESIGNED TO CONNECT TO SEVERAL TYPES OF CIRCUITS.
ENSURE ALL ARE ISOLATED
•
Remove the P9630 from the packaging.
•
Lift the raised part of the side clip in order to remove from the housing. Carry
this out on each side.
•
Insert the P9630 into the panel cut-out and fit the side clips back on to the
housing.
•
Slide the clips towards the front of the unit until they come in to contact with
the reverse of the panel. The unit is now secured in place.
•
Connect wires to the rear terminals as required.
•
The P9630 is now ready for powering and setting.
The front window of the P9630 is supplied with a clear protective film which can be
removed as and when necessary.
•
NORMAL OPERATION
•
Apply power to the unit and the green “Power supply”
“Power supply”
“Power supply”
“Power supply” LED will illuminate.
•
TEST MODE
•
Press and hold the
button and the relay will energise.
Both the red “I>”
“I>”
“I>”
“I>”
and “I>>”
“I>>”
“I>>”
“I>>” LED’s will illuminate.
•
Release the
button and the relay will remain energised.
•
Press the
button to de-energise the relay. Both red LED’s will
extinguish.
Testing should be carried out on a regular basis to check the integrity of the
P9630.
DO NOT use this product to provide a means of isolating circuits in
order to work on when placed in the “TEST”
“TEST”
“TEST”
“TEST” mode. This should only be
done by means of operating isolators, circuit breakers or other
methods of removing power in this application.
Installation work must be carried
out by qualified personnel.


