background image

III OPERATION WARNINGS

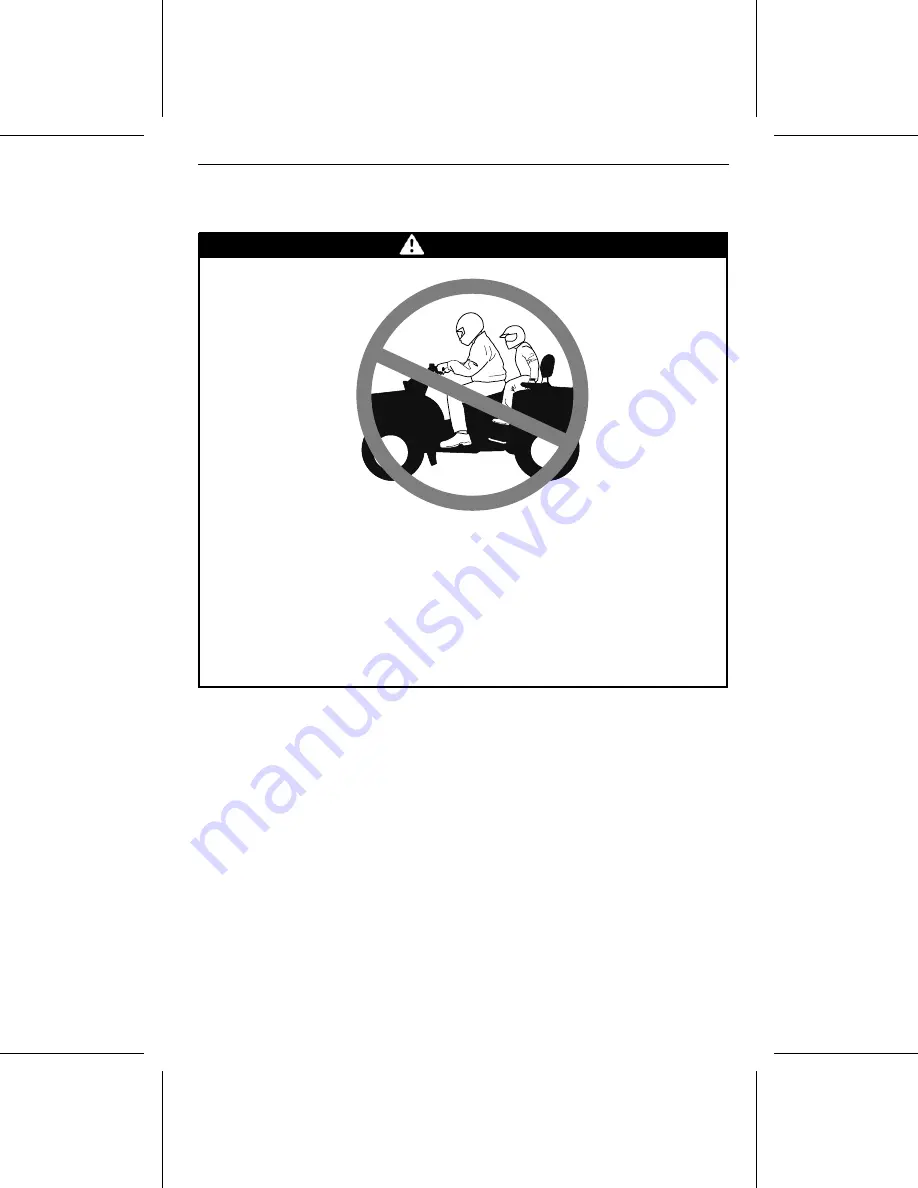
2-UP Models Only

WARNING

vmo2014-005-100

POTENTIAL HAZARD

Failure to respect the physical limitations of the passenger on 2-UP models.

WHAT CAN HAPPEN

A passenger that cannot completely lean his feet on footrests can be ejected
when riding on uneven terrain.

HOW TO AVOID THE HAZARD

The passenger must be capable of keeping his feet on the footrests and his
hands on grab handles at all times when he is seated on the vehicle.

________

A) SAFETY INFORMATION

_______

19

Summary of Contents for Can-Am 450 Series

Page 1: ...lt if you do not follow these instructions BEFORE YOU OPERATE THIS VEHICLE READ THIS OPERATOR S GUIDE ALL ON PRODUCT SAFETY LABELS AND WATCH THE SAFETY VIDEO NEVER OPERATE THIS VEHICLE WITHOUT PROPER INSTRUCTIONS Complete a certified training course DO NOT EXCEED VEHICLE SEATING CAPACITY FOR MAX MODELS NEVER CARRY MORE THAN ONE PASSENGER You increase your risk of losing control if you carry more t...

Page 2: ...in this Operator s Guide SAFETY VIDEO and on product safety labels could result in an injury including the possibility of death WARNING This vehicle may exceed the performance of other vehicles you may have ridden in the past Take time to familiarize yourself with your new vehicle The following trademarks are the property of Bombardier Recreational Products Inc In Finland products are distributed ...

Page 3: ... identification number EIN or vehicle identification number VIN is removed mutilated or altered in any way We strongly recommend that you take note of all the serial numbers on your vehicle and supply them to your insurance company 1 Vehicle Identification Number fvmo2016 002 009_a TYPICAL 1 VIN location 2 Engine Identification Number EIN vmr2015 005 001_a BACK OF 450 ENGINE 1 EIN Engine Identific...

Page 4: ...I VEHICLE IDENTIFICATION 2 _______________ ...

Page 5: ...be loaded up to 54 kg and 109 kg rear rack Check the ma ximum axle loads of the vehicle identi fication plate statutory plate Can am T3 tractor can tow a trailer on the road Check the trailer the maximum loads on the identification plate Check the national packages limits the use of a tractor trailer on the road Connect the trailer lights and set the slow moving vehicle triangle behind the trailer...

Page 6: ...s brp com Svenska Denna bok kan finnas tillgänglig på ditt språk Kontakta din återförsäljare eller gå till www operatorsguides brp com This operator s guide is regarded as part of the vehicle and should be re main with the vehicle when it is sold Congratulations on your purchase of a new Can Am ATV It is backed by the BRP warranty and a network of autho rized Can Am dealers ready to provide the pa...

Page 7: ...uaint the owner operator of a new vehicle with the various ve hicle controls maintenance and safe operating instructions It is indispens able for the proper use of the product After reading please keep this Opera tor s Guide with the vehicle If the ve hicle is resold please give the guide to the new owner for his awareness If you have any question regarding any topic whether or not it is covered i...

Page 8: ... or change specifications designs fea tures models or equipment without incurring any obligation upon itself This Operator s Guide and the SAFETY DVD should remain with the vehicle when it is sold While reading this Operator s Guide remember that WARNING Indicates a potential hazard that if not avoided could result in serious injury or death 6 _______________ ...

Page 9: ... SPECIAL SAFETY MESSAGES 13 European Community 16 III OPERATION WARNINGS 17 IV RIDING THE VEHICLE 45 1 Pre Ride Inspection 46 2 Riding Gear 48 3 Carrying a Passenger 49 4 Recreational Riding 50 5 Environment 50 6 Design Limitation 51 7 Off Road Operation 51 8 Riding Techniques 51 V MOVING LOADS AND DOING WORK 63 1 Working with your Vehicle 63 2 Carrying Loads 63 3 Loading the Cargo Racks 64 4 Haul...

Page 10: ...98 8 Trailer Hitch 98 9 Trailer Connector 99 10 Tool Kit 99 11 Recovery Hooks 99 12 Winch Models with Winch 100 13 License Plate Light 100 IV FUEL 101 1 Fuel Requirements 101 2 Vehicle Fueling Procedure 101 V BREAK IN PERIOD 103 1 Operation During Break In 103 VI BASIC PROCEDURES 104 1 Starting the Engine 104 2 Shifting the Transmission 104 3 Stopping the Engine and Parking the Vehicle 104 VII SPE...

Page 11: ...VT Air Filter 124 8 Gearbox Oil 570 Models 125 9 Throttle Cable 126 10 Spark Plugs 128 11 Battery 129 12 Fuses 130 13 Lights 131 14 Drive Shaft Boot and Protector 132 15 Wheel Bearing 133 16 Wheels and Tires 133 17 Steering 136 18 Suspension 136 19 Brakes 137 III VEHICLE CARE 139 Post Operation Care 139 Vehicle Cleaning and Protection 139 IV STORAGE AND PRESEASON PREPARATION 141 D TECHNICAL INFORM...

Page 12: ... WARRANTY FOR THE EUROPEAN ECONOMIC AREA THE COMMONWEALTH OF THE INDEPENDENT STATES AND TURKEY 2017 CAN AM ATV T3 174 H CUSTOMER INFORMATION I PRIVACY INFORMATION 180 II CONTACT US 181 North America 181 Europe 181 Oceania 181 South America 181 Asia 181 III CHANGE OF ADDRESS OWNERSHIP 182 IV MAINTENANCE RECORDS 189 10 ______________ ...

Page 13: ...A SAFETY INFORMATION ________A SAFETY INFORMATION _______ 11 ...

Page 14: ...mely flammable and highly explosive Fuel vapors can spread and be ignited by a spark or flame many feet away from the en gine To reduce the risk of fire or explo sion follow these instructions Use only an approved red gasoline container to store fuel Never fill a gasoline container on the vehicle An electrical static dis charge may ignite the fuel For refueling strictly adhere to in structions in ...

Page 15: ...eeds Always go at a speed that is proper for the terrain visibility and operating conditions and your experience Always go slowly and be extra careful when operating on unfamiliar terrain Al ways be alert to changing terrain conditions when operating this vehicle Never operate on excessively rough slippery or loose terrain until you have learned and practiced the skills necessary to control this v...

Page 16: ...ATV when operating in reverse Avoid stand ing up Your weight could shift forward against throttle lever causing an unex pected acceleration and may lead to a loss of control Never exceed the stated load limits for this vehicle including operator passen ger 2 UP models all other loads and added accessories Cargo should be prop erly distributed and securely attached Reduce speed and follow instructi...

Page 17: ... sit any where else than the designated passenger seat Never carry a passenger if you judge his ability or judgement insufficient to con centrate on the terrain conditions and adapt accordingly Never carry a passenger who has used drugs or alcohol or is tired or ill These slow reaction time and impair judgment Passenger must Be capable of resting his feet on the footrests and his hands on grab han...

Page 18: ...WARNING This vehicle is built for OFF ROAD purposes only It may be used for short distances on paved surfaces at reduced speed in order to move the vehi cle from an off road location to another Always refrain from speeding and substantially reduce vehicle speed when turning Always respect the road traffic laws even on a dirt or gravel road The front winch hook if applicable must be removed and sto...

Page 19: ...ruction WHAT CAN HAPPEN The risk of an accident is greatly increased if the operator does not know how to operate this vehicle properly in different situations and on different types of terrain HOW TO AVOID THE HAZARD Beginners and inexperienced operators should complete a training course They should then regularly practice the skills learned during the course as well as the operating techniques d...

Page 20: ...tion can lead to severe injury or death of the child Even though a child may be within the age group for which this vehicle is recommended he may not have the skills abilities or judgment needed to operate this vehicle safely and may be involved in a serious accident HOW TO AVOID THE HAZARD No one under 16 should operate this vehicle 18 _______A SAFETY INFORMATION _______ ...

Page 21: ...on 2 UP models WHAT CAN HAPPEN A passenger that cannot completely lean his feet on footrests can be ejected when riding on uneven terrain HOW TO AVOID THE HAZARD The passenger must be capable of keeping his feet on the footrests and his hands on grab handles at all times when he is seated on the vehicle ________A SAFETY INFORMATION _______ 19 ...

Page 22: ... reduces your ability to balance and control this vehicle Could cause an accident resulting in harm to you and or your passenger HOW TO AVOID THE HAZARD Never carry passenger Even with a long seat that provides unrestricted op erator movement it is not designed nor intended to carry passenger s 20 _______A SAFETY INFORMATION _______ ...

Page 23: ...in harm to you and or your passengers HOW TO AVOID THE HAZARD Never carry more than one 1 passenger Even with a long seat that pro vides unrestricted operator movement the vehicle is not designed nor intended to carry more than one 1 operator and one 1 passenger The passenger must use the designated passenger s seat when he is seated on the vehicle with feet firmly planted on footrests and always ...

Page 24: ...ing a passenger could Impair vehicle stability which could lead to a loss of control Result in injury to passenger s from impact on hard surfaces Cause an accident resulting in harm to you and or your passenger HOW TO AVOID THE HAZARD Never allow any passenger to sit on front or rear racks on this vehicle 22 _______A SAFETY INFORMATION _______ ...

Page 25: ...THE HAZARD If a road usage is allowed in your area operate your vehicle on paved sur faces only for short distance and for the only purpose of moving the vehicle from an off road usage to another Always operate your vehicle at low speed never exceed 40 km h 25 MPH and reduce the speed before making a turn Always respect all road traffic laws when operating your vehicle on public roads or streets _...

Page 26: ...njury or death in the event of an accident Riding without eye protection can result in an accident and increases the chances of a severe injury in the event of an accident Riding without protective gear increases the chances of severe injury in the event of an accident HOW TO AVOID THE HAZARD Always wear an approved helmet that fits properly You should also wear Eye protection goggles or face shie...

Page 27: ...er to fall off 2 UP models Could seriously affect your judgment Could cause you to react more slowly Could affect your balance and perception Could result in an accident or death HOW TO AVOID THE HAZARD The operator and the passenger 2 UP models should never use this vehi cle with drugs or alcohol ________A SAFETY INFORMATION _______ 25 ...

Page 28: ...n an accident HOW TO AVOID THE HAZARD Always travel at a speed which is appropriate for the terrain visibility and operating conditions and your experience On 2 UP models the vehicle handling stability and braking distance may be affected when riding with a passenger Safely reduce speed when riding with a passenger Allow greater distance for braking 26 _______A SAFETY INFORMATION _______ ...

Page 29: ...wheelies or jumps Do not try to show off WARNING POTENTIAL HAZARD Failure to inspect the vehicle before operating Failure to properly maintain the vehicle WHAT CAN HAPPEN Increases the possibility of an accident or equipment damage HOW TO AVOID THE HAZARD Always inspect your vehicle prior to ride to make sure the vehicle is in safe operating condition Always follow the maintenance schedule describ...

Page 30: ...m grab handles for the passenger 2 UP models or feet from the footrests during opera tion WHAT CAN HAPPEN Removing even one hand or foot can reduce your ability to control the vehi cle or could cause you to lose your balance and fall off the vehicle If you re move a foot from the footrests your foot or leg may come into contact with the rear wheels which could injure you or cause an accident HOW T...

Page 31: ...sult in the vehicle overturning passenger ejection 2 UP models or loss of control HOW TO AVOID THE HAZARD Go slowly and be extra careful when operating on unfamiliar terrain Always be alert to changing terrain conditions when operating the vehicle Do not forget on 2 UP models the operator is responsible for the safety of his passenger Safely reduce speed when riding with a passenger ________A SAFE...

Page 32: ...or passenger ejection 2 UP models HOW TO AVOID THE HAZARD Do not operate on excessively rough slippery or loose terrain until you have learned and practiced the skills necessary to control this vehicle on such terrain Always be especially cautious on these kinds of terrain Do not forget on 2 UP models the operator is responsible for the safety of the passenger In doubt disembark him before operati...

Page 33: ...r turning as described in this Operator s Guide Practice turning at low speeds before attempting to turn at faster speeds Do not forget on 2 UP models the operator is responsible for the safety of the passenger Never perform this maneuver with a passenger Always re member that the vehicle handling stability and braking distance may be af fected when riding with a passenger Do not turn at excessive...

Page 34: ... operate this vehicle on hills too steep for the vehicle or for your abili ties Practice without and with passenger 2 UP models on smaller hills before attempting larger hills Always remember that on 2 UP models even if this vehicle can climb some steep hills it is not recommended to climb such hills with a passenger al ways disembark him before attempting this maneuver Show good judge ment 32 ___...

Page 35: ...nsible for the safety of the passenger In doubt disembark him before climbing hill Always remem ber that the vehicle handling stability and braking distance may be affected when riding with a passenger Never climb hills with excessively slippery or loose surfaces Shift your weight forward operator and passenger on 2 UP models Never open the throttle suddenly or make sudden gear changes The vehi cl...

Page 36: ...k the terrain carefully before you start down any hill Do not forget on 2 UP models the operator is responsible for the safety of the passenger In doubt disembark him before going down hill Always re member that the vehicle handling stability and braking distance may be affected when riding with a passenger Shift your weight backward operator and passenger on 2 UP models Never go down a hill at hi...

Page 37: ...ever attempt to turn the vehicle around on any hill until you have mastered the turning technique as described in this Operator s Guide on level ground Be very careful when turning on any hill Avoid crossing the side of a steep hill if possible When crossing the side of a hill Always follow proper procedures as described further in this Operator s Guide Avoid hills with excessively slippery or loo...

Page 38: ...fter you have stopped Disembark on uphill side or to a side if pointed straight uphill passenger first on 2 UP models If you begin rolling backwards Operator and passenger 2 UP models must keep their weight uphill Never open the throttle suddenly or make sudden gear changes The vehicle could flip over backwards Never apply the rear brake while rolling backwards Apply the front brake gradually When...

Page 39: ...rea check for obstacles Never attempt to ride over large obstacles such as large rocks or fallen trees On 2 UP models the operator is responsible for the safety of his passenger In doubt disembark him before riding over obstacles Always remember that the vehicle handling and stability may be affected when riding with a passenger When you go over obstacles always follow proper procedures as describ...

Page 40: ... TO AVOID THE HAZARD Learn to safely control skidding or sliding by practicing at low speeds and on level smooth terrain On 2 UP models never slide or skid with passenger Always remember that the vehicle handling and stability may be affected when riding with a pas senger On extremely slippery surfaces such as ice go slowly and be very cautious in order to reduce the chance of skidding or sliding ...

Page 41: ...ccident HOW TO AVOID THE HAZARD Never operate this vehicle in fast flowing water or in deep water Check water depth and current before you attempt to cross any water Wa ter should not go above footrests Remember that wet brakes may have reduced stopping ability Test your brakes after leaving water If necessary apply them several times to let friction dry out the pads ________A SAFETY INFORMATION _...

Page 42: ...le or person behind the vehicle resulting in serious injury HOW TO AVOID THE HAZARD When you select reverse gear make sure there are no obstacles or people behind the vehicle When it is safe to proceed go slowly On 2 UP models take account that the passenger can obstruct your view 40 _______A SAFETY INFORMATION _______ ...

Page 43: ... improper or uneven tire pressure may cause loss of control tire blow outs tire to move around on its rim and increases the risk of an accident HOW TO AVOID THE HAZARD Always use the size and type of tires specified in this Operator s Guide for this vehicle Always maintain proper tire pressure as described in this Operator s Guide Always replace wheels or tires that are damaged ________A SAFETY IN...

Page 44: ...ories All parts and accessories added to this vehicle should be approved by BRP and should be installed and used according to instructions If you have questions consult an authorized Can Am dealer NEVER install a passenger seat 1 UP models or use the racks to carry a passenger Modification of the vehicle to increase speed and performance may violate the terms and conditions of your vehicle limited...

Page 45: ...er exceed the stated load capacity for this vehicle including operator and passenger 2 UP models as well as other loads and added accessories Cargo should be properly distributed and securely attached Reduce speed when carrying cargo or pulling a trailer Allow greater dis tance for braking Always follow the instructions in this Operator s Guide for carrying cargo or pulling a trailer ________A SAF...

Page 46: ...TIAL HAZARD Transporting flammable or dangerous material can lead to explosions WHAT CAN HAPPEN This can cause serious injury or death HOW TO AVOID THE HAZARD Never transport flammable or dangerous material 44 _______A SAFETY INFORMATION _______ ...

Page 47: ...r with the operational controls and the general opera tion of the vehicle before venturing into off road conditions Practice driving in a suitable area free of hazards and feel the response of each control Drive at low speeds Higher speeds require greater experience knowledge and suitable riding conditions Riding conditions vary from place to place Each is subject to weather conditions which may r...

Page 48: ...if your vehicle is included in any safety campaign We also urge you to visit your authorized BRP dealer in a timely manner if you become aware of any safety related campaigns See an authorized BRP dealer for available accessories you may require 1 Pre Ride Inspection WARNING Perform a pre ride inspection before each ride to detect any potential prob lem that could occur during operation The pre ri...

Page 49: ...ondition Check if operator seat is in place and properly latched Check if passenger seat is in place and properly latched 2 UP Models Seat s Check the passenger backrest and grab handles condition 2 UP Models If you transport a cargo respect the load capacity Ensure cargo is properly secured to the racks Cargo If you are pulling a trailer or another equipment Check hitch and trailer ball condition...

Page 50: ...r Brakes Drive forward slowly a few feet and apply brake lever and brake pedal individually The brakes must fully apply Lever and pedal must fully return when released Emergency engine stop switch Check that the emergency engine stop switch is working properly Ignition switch Check if ignition switch is working properly by restarting and stopping the engine 2 Riding Gear Actual weather conditions ...

Page 51: ...eat or use the racks to carry a passenger 2 UP Models This vehicle is designed specifically to carry an operator and ONE 1 passenger only The passenger must be seated on the designated passenger s seat and hold on to the grab handles at all times NEVER install other passenger s seat other than the one recommended by BRP Do not use the racks or their location to carry passenger s Carrying more than...

Page 52: ...e you ride tell someone where you are planning to travel and your expected time of return Depending on the length of your ride carry additional tools drinking water food and emergency equipment Find out where you can get additional gasoline and oil Be prepared for the possible conditions you may encounter First aid kit Adjustable wrench Mobile phone Knife Friction tape Flashlight A rope Colored le...

Page 53: ... takes a vehicle off road should always exercise the utmost care in selecting the safest path and keeping close watch on the terrain ahead of him On no account should the vehicle be operated by anyone who is not completely famil iar with the driving instructions applicable to the vehicle nor should it be operated on steep or treacherous terrain 8 Riding Techniques Information in this guide is limi...

Page 54: ... impact energy vmo2012 012 520 2 UP Models The passenger must keep his hands on the grab handles and his feet on footrests at all times The passenger must synchronize his movements with the operator Crossing Roads If you have to cross a road the lead driver should get off his vehicle then observe and give directions to the other riders The last person after crossing then assists the lead driver to...

Page 55: ...hen turning Do not turn the handlebar too far or too fast for your speed and environment Adjust steering inputs accordingly Slow down before entering a turn Avoid hard braking during a turn Avoid sudden or hard acceleration when turning even from a stop or low speed Never attempt donuts skids slides fishtails jumps or other stunts If vehicle starts to skid or slide steer in the direction of the sk...

Page 56: ...le is free of people or obstacles Proceed slowly and avoid sharp turns When riding on a 2 UP model take into account that the passenger can obstruct your view Disembark the passenger if necessary We recommend sitting on your ATV when operating in reverse Avoid standing up Your weight could shift forward against throttle lever causing an unexpected acceleration Obstacles Obstacles in the trail shou...

Page 57: ...ack the rear of the vehicle toward the top of the hill then drive downhill Always walk or dismount on the upside of the slope while keeping clear of the vehicle and its rotating wheels Do not try to hold on to the vehicle if it begins to topple Stay clear Do not ride over the crest of the hill at high speed Obstacles including sharp drop offs may exist vmo2012 012 526 2 UP Models The passenger mus...

Page 58: ... over the crest of the hill at high speed Obstacles including sharp drop offs may exist The passenger should get on the vehicle only when the vehicle has returned to a safe location V00A1XL Vehicle Behaviors Due to configuration this vehicle has excellent climbing ability so much so that it is possible to tip over before traction is lost For example it is common to encounter terrain situations whe...

Page 59: ... and or accelerate slightly to regain control Try to avoid steep inclines If you re not careful you could tip over when going down hills vmo2012 012 523 2 UP Models The operator is responsible for the safety of the passenger in doubt disembark the passenger before proceeding Always remember that the vehicle handling stability and braking distance may be affected when riding with a passenger The pa...

Page 60: ...most risky types of riding since it may drastically change the bal ance of the vehicle It should be avoided whenever possible However if it is nec essary to do so it is important that you ALWAYS keep your body weight on the up side of the slope and be prepared to dismount on that side should the vehicle begin to topple Avoid all objects or depressions that will intensify the raising of one side of...

Page 61: ...el the operator is responsible for the safety of the pas senger in doubt disembark the passenger before proceeding WARNING Avoid negotiating drop offs Reverse and select an alternate route Crossing Water Water can be a unique hazard If it is too deep the vehicle may float and topple Check the water depth and current before you attempt to cross any water Water should not go above the footrest Be wa...

Page 62: ...UP models Avoid rapid braking This again will possibly result in an uncontrolled slide and tip over of the vehicle Slush should be avoided at all times since it could block the operation or controls of the vehicle Riding on Snow Covered Surfaces When performing the pre ride inspection pay special attention to locations on the vehicle where snow and or ice accumulations may obstruct visibility of t...

Page 63: ...bearing surface of the four tire contact patches as compared to that of a snowmobile track and skis To maximize comfort and avoid frostbite always wear clothing and ATV protective equipment appropriate for the weather conditions you will be exposed to during your ride At the end of each ride it is a good practice to clean the vehicle body and all moving components brakes steering components drivel...

Page 64: ...sulting in operator and passenger ejection 2 UP models Again the best advice is to slow down and be watchful of the conditions When you ride with a passenger 2 UP models slow down even more In addition braking distance may be affected Remember that gunning the throttle or sliding may cause loose stones to be ejected rearwards into the path of another rider Never do it deliberately 62 _______A SAFE...

Page 65: ... and 2 3 of cargo weight in back and cannot interfere with your proper control Always be aware that the load may slide or fall off and create an accident Avoid loads that may protrude sideways and get snagged or caught in brush or other ob stacles Avoid covering and obstruct ing the headlights or taillight with the cargo WARNING The vehicle handling stability and braking distance are affected when...

Page 66: ...the vehicle Objects that are high may affect visibil ity for the driver and may act as projec tiles in case of an accident Loads that protrude sideways can get snagged or caught in bush branches or other ob stacles Avoid covering and obstruct ing the brake lights with the cargo Ensure no cargo protrudes outside the cargo rack and that cargo will not inter fere with your visibility or control of th...

Page 67: ...speed when pulling a trailer and turn gradually Avoid hills and rough terrain Never attempt steep hills Allow more distance for braking especially on inclined surfaces and when a passenger 2 up models is on board Be careful not to skid or slide If a trailer is used behind the vehicle make sure that its hitch is com patible with the one on the vehicle Make sure the trailer is horizontal with the ve...

Page 68: ...operly load the trailer so that tongue is always pushing on hitch support and not pulling on hitch ball NOTE Includes trailer and trailer load Ensure to properly load the trailer so that tongue is always pushing on hitch support and not pulling on hitch ball WARNING Stay clear from the area between tractor and trailed vehicle WARNING Strictly follow the instructions outlined in the operator s manu...

Page 69: ...erator s guide Improper ATV use can result in SE VERE INJURY or DEATH Follow all instructions and warnings Always wear ear protection Always use an approved helmet and protective gear Never carry passengers on 1 up models and NEVER carry more than one passenger on 2 up models Never use with drugs or alcohol 704903931 THIS ATV IS FOR RECREATIONAL USE OR UTILITY USE G GENERAL USE MODEL 704903931A 1 ...

Page 70: ...VI IMPORTANT ON PRODUCT LABELS 704903947 G GENERAL USE MODEL 704903947 2 UP MODELS 68 _______A SAFETY INFORMATION _______ ...

Page 71: ... The safety labels on your vehicle should be considered permanent parts of the ve hicle If missing or damaged they can be replaced free of charge See an autho rized Can Am dealer NOTE In the event of any discrepancy between this guide and the vehicle the safety labels on the vehicle have precedence over the labels in this guide fvmo2016 001 002_a TYPICAL 1 UP MODEL SHOWN ________A SAFETY INFORMATI...

Page 72: ...sult in SEVERE INJURY or DEATH Follow all instructions and warnings Always wear ear protection Always use an approved helmet and protective gear Never carry a passenger on 1 up models and NEVER carry more than one passenger on 2 up models Never use with drugs or alcohol 704903963 704903963B LABEL 1 1 UP MODELS 704903733 704903733A LABEL 1 2 UP MODELS 70 _______A SAFETY INFORMATION _______ ...

Page 73: ...opped before shifting lever ALWAYS apply foot brake to shift from Park P and Neutral N 704903970 704903970 LABEL 3 Label 4 WARNING Locate and read operator s guide NEVER carry a passenger on 1 up models and NEVER carry more than 1 passenger on 2 up models Passenger on 2 up models must always use an approved helmet and protective gear Passenger on 2 up models must NEVER ride after using drugs or al...

Page 74: ...the recovery hook to pull a load 704903955 704903955A LABEL 6 Label 7 WARNING Locate and read operator s guide Improper tire pressure or overloading can cause loss of control resulting in SEVERE INJURY or DEATH ALWAYS maintain proper tire pressure as shown On 1 up models NEVER exceed the load capacity of 235 kg 517 lb including weight of operator cargo accessories and trailer tongue weight On 2 up...

Page 75: ...rt distances on paved surfaces at reduced speed in order to move the vehicle from an off road location to another When driving this quadricycle on roads always refrain from speeding and substantially reduce vehicle speed when turning Failure to do so can cause a loss of vehicle control possibly resulting in serious injury or death Front Winch The front winch hook of the so equiped quadricycle must...

Page 76: ...CON EL ATV LA FALTA DE EXPERIENCIA PUEDE DAR ATV LA FALTA DE EXPERIENCIA PUEDE DAR LUGAR A LA OMISIÓN DE RIESGOS LUGAR A LA OMISIÓN DE RIESGOS IMPORTANTES IMPORTANTES WARNUNG MACHEN SIE SICH MIT DIESEM WARNUNG MACHEN SIE SICH MIT DIESEM ATV VERTRAUT UNERFAHRENE FAHRER ATV VERTRAUT UNERFAHRENE FAHRER KÖNNEN RISIKEN ÜBERSEHEN KÖNNEN RISIKEN ÜBERSEHEN ΠΡΟΕΙΔΟΠΟΙΗΣΗ ΕΞΟΙΚΕΙΩΘΕΙΤΕ ΜΕ ΑΥΤΟ ΠΡΟΕΙΔΟΠΟΙΗΣΗ...

Page 77: ...handle to the unlock position Align and insert glove box latching system into this vehicle s LINQ opening Turn handle to the lock position Close cover and verify if glove box is locked in position FOR MORE DETAILS REFER TO OPERATOR S GUIDE 704904442 LABEL 13 2 UP MODELS LOCATED UNDER PASSANGER SEAT 3 Compliance Labels These labels indicate vehicle s compli ance 704904067 LOCATION UNDER SEAT ON THE...

Page 78: ...VI IMPORTANT ON PRODUCT LABELS 704904810 LOCATION BEHIND THE OPERATOR S BACKREST 76 _______A SAFETY INFORMATION _______ ...

Page 79: ...B VEHICLE INFORMATION _______________ 77 ...

Page 80: ...9 vmo2015 005 052_b 1 Throttle Lever The throttle lever is located on the RH side of the handlebar The throttle lever controls the engine speed To increase or maintain vehicle speed press the throttle lever with your right thumb To decrease vehicle speed release the throttle lever vmo2015 005 020_a TYPICAL 1 Throttle lever 2 To accelerate 3 To decelerate 78 ______________ ...

Page 81: ...ngage brake lock Squeeze brake lever and maintain while moving lever lock Brake lever is now compressed and applying all brakes vmo2012 006 002_c TYPICAL 1 Brake lever lock 2 Press to apply brake locks NOTE Locking lever can be adjusted in several positions NOTICE Ensure when the brake lock is applied that the vehicle stays securely in place To release brake lock Squeeze brake lever Lever lock sho...

Page 82: ...005 005_a SHIFT LEVER LOCATION The shift lever is used to change the gearbox position The shift lever has 5 positions SHIFT LEVER POSITIONS POSITION GEAR P Park R Reverse N Neutral H High range forward L Low range forward vmo2012 012 036 TYPICAL SHIFT PATTERN The vehicle must be stopped and brakes applied prior to selecting any gear NOTICE This gearbox is not de signed to shift while vehicle is mo...

Page 83: ...ion Switch The ignition switch is located on the LH side of the central panel below the han dlebar 219001735 001_a IGNITION SWITCH POSITIONS 1 OFF 2 ON with light OFF The key can be inserted or removed in this position only In OFF position the electrical system of the vehicle is disabled The engine is shut down by turning the ignition switch to OFF position NOTE While the engine can be stopped by ...

Page 84: ...or high beams vmo2012 013 001_d 1 Low high beam headlight switch 2 Low beam 3 High beam Turn Signal Switch The turn signal switch is located on the LH side of handlebar vmo2012 013 001_b 1 Turn signal switch To activate the turn signals move the switch button on the right or the left side depending on which direction you picked Reposition the switch in the middle when the maneuver is com pleted Ho...

Page 85: ...dlebar vmo2012 013 001_a 1 Hazard warning button Device fitted to the vehicle that oper ates a simultaneous flashing of all the turn signals used when the vehicle is stationary to indicate that the vehicle is temporarily obstructing traffic Press the hazard warning button once to activate the device NOTE Hazard warning lights can be activated even when the vehicle elec trical system is shut down W...

Page 86: ...ther soft terrain Do not use the override for normal operation in reverse This would allow driving in reverse at excessive speeds and can increase the risk of losing con trol To engage the override function pro ceed as follows While the shift lever is set to REVERSE position 1 Ensure that the vehicle is stopped 2 Press and hold the override switch then press the throttle lever gradu ally NOTE When...

Page 87: ...en the switch is pushed downwards V07I0DY 4WD MODE TYPICAL The 2WD mode is engaged when the switch is pushed upwards The vehicle is then rear wheel drive only V07I0EY 2WD MODE TYPICAL 9 Shift Lever Lock The shift lever can be locked when the vehicle is parked and left unattended To unlock shift lever open protective cover insert key and turn it clockwise To lock shift lever turn key counter clockw...

Page 88: ...d if the shift lever is not placed in park posi tion when the mechanism is engaged While reading this Operator s Guide remember that WARNING Indicates a potential hazard that if not avoided could result in serious injury or death 86 ______________ ...

Page 89: ...beam indicator lamp 9 MPH Km h indicator lamp 1 Selector Button The selector button is used to navigate or change settings in the multifunction gauge 2 Transmission Position Display This display will show transmission po sition vmr2007 050 002_d 1 Transmission position DISPLAY FUNCTION P Park R Reverse N Neutral H High range L Low range 3 Main Screen The main screen is used to display nu merous fu...

Page 90: ...High Beam Indicator Lamp When this indicator is ON it indicates that high beam is selected on the headlights and that ignition key is in ON with lights position 9 KM H or MPH Indicator Lamp The proper lamp turns on to indicate the unit the speedometer uses 2 Multifunction Gauge Modes Speed Mode In this mode the main screen shows the speed of the vehicle either in km h or in mph vdd2008 001 084 RPM...

Page 91: ...g time between 2 places vsi2009 018 032 Press and HOLD the selector button for 2 seconds to reset the hour meter Engine Hour Meter EH The engine hour meter records engine running time vsi2009 018 033 Message Display Mode If an abnormal engine condition oc curs a message may scroll across the main screen in conjunction with a pilot lamp Refer to TROUBLESHOOTING section for details Fault Code Mode S...

Page 92: ...e Odometer Clock Trip meter resettable Trip Hour meter resettable Engine hour meter Press and release selector button to change the default display mode to the temporary mode vmr2007 050 002_c 1 Selector button The gauge will display the selected mode for 10 seconds then will return to the normal display mode While in a resettable mode push and HOLD selector button for 2 seconds to reset it 4 Gaug...

Page 93: ...h vs mph The speedometer odometer and trip meter are factory preset in miles but it is possible to change them to kilo meter reading Contact an authorized Can Am dealer Language Selection The gauge display language can be changed Refer to an authorized Can Am dealer for language availability and setup the gauge to your prefer ence While reading this Operator s Guide remember that WARNING Indicates...

Page 94: ...IPMENT NOTE Some vehicle safety labels are not shown on illustrations For information on vehicle safety labels refer to VEHICLE SAFETY LABELS subsection fvmo2016 001 003_c TYPICAL 1 UP MODEL 92 ______________ ...

Page 95: ...o seat as a passenger on this vehicle Seat Removal To remove the operator s seat push its latch upward This latch is located un derneath the rear of seat vmo2015 005 007_a 1 Seat latch Pull seat upward then rearward Con tinue lifting movement until you can release the front retaining device then completely remove seat _______________ 93 ...

Page 96: ...ion fvmo2016 001 004_a ADJUSTABLE BACK REST 1 Handle screw 2 Back rest adjustment lever 60 mm Seat with Backrest 2 UP Models A seat backrest is provided to ease op erator s operation fvmo2016 002 001_a ADJUSTABLE BACK REST 1 Back rest adjustment lever 60 mm 2 Open 3 Close 4 Adjustmet screw to adjust tilting force Secure that adjustment lever locking tab is in adjustment hole Seat Riser Bracket Ins...

Page 97: ...ator s seat to its place 6 1 Push seat down to latch fvbl2016 002 012_a 2 UP Models 7 Install passenger s seat to its place 2 Passenger s Seat 2 UP Models WARNING Never operate the vehicle without passenger s seat The passenger s seat is designed for a passenger only The integrated back rest supports his back during the ride fvmo2016 002 003_a 1 Passenger s seat 2 Integrated backrest _____________...

Page 98: ...cle anchor housings 3 Rotate downwards to engage the rear latch 4 Close the latch lever by pushing it rearwards to secure seat in posi tion 5 Check if the seat is firmly secured in position before using it vmo2015 007 012_a 1 Front pins WARNING It is of the upmost importance for the passenger s safety that you confirm that the passenger s seat is properly locked in position by pulling back and up ...

Page 99: ...RH and LH side of the vehicle be hind the operator footpegs vmo2013 007 010_a TYPICAL 1 Operator s LH footpeg 2 Passenger s LH footpeg WARNING Passenger must have both feet on footpegs at all time during vehicle operation 5 12 Volt Power Outlet Convenient for handheld spotlight or other portable equipment vmo2012 012 018_a 1 12 V power outlet Remove protective cap to use Always reinstall it after ...

Page 100: ...t for carry ing equipment and various other cargo They must never be used to carry a passenger fvmo2016 001 007_a TYPICAL 1 Front cargo rack 2 Rear cargo rack WARNING Never carry a passenger on a cargo rack Cargo must never interfere with the drivers line of sight or affect his ability to properly steer the vehicle Do not overload the vehicle Always ensure all cargo is prop erly secured and does n...

Page 101: ...sed if trailer is equipped with lights For towing refer to towing instructions label located at trailer hitch fvmo2016 001 005_a TYPICAL T3 MODEL 1 Towing instructions 2 Trailer hitch 3 Trailer connector 10 Tool Kit The tool kit is located under seat It contains tools for basic maintenance vmo2015 005 026_a 1 Tool kit 11 Recovery Hooks Convenient hook that can be use to re cover a stuck ATV fvmo20...

Page 102: ...unreel manually Unlock the cable using the handle then pull on the hook strap to unreel It is recommended to let the vehicle run while winching Do not stop vehi cle immediately after winching to let battery recharge Also when winching for more than 30 seconds it is recommended to in crease engine RPM in the range of 3000 RPM to increase charging power to the battery NOTE Make sure vehicle is in NE...

Page 103: ...lead to fuel phase separation and can result in engine performance problems or engine damage Recommended Fuel Use regular unleaded gasoline con taining MAXIMUM 10 ethanol The gasoline must have the following mini mum octane requirements MINIMUM OCTANE RATING Outside North America 95 E10 RON NOTICE Never experiment with other fuels Engine or fuel system damages may occur with the use of an inadequa...

Page 104: ...ller neck 8 Pour fuel slowly so that air can es cape from the tank and prevent fuel flow back Be careful not to spill fuel 9 Stop filling when the fuel reaches the bottom of filler neck Do not overfill WARNING Never top up the fuel tank before placing the vehicle in a warm area As temperature increases fuel ex pands and may overflow 10 Fully tighten fuel reservoir cap clockwise 11 Lock fuel tank c...

Page 105: ...ating However brief accelerations and speed variations contribute to a good break in NOTE It is normal that the engine will not operate at its maximum efficiency until the break in period is completed Brakes WARNING New brakes will not operate at their maximum efficiency until their break in is completed Use extra caution Belt A new belt requires a break in period of 50 km 30 mi During the break i...

Page 106: ...ft lever Otherwise damage to the transmission may oc cur Gradually press the throttle lever to increase engine speed and thus en gaging the continuously variable trans mission CVT At the opposite when the throttle lever is released the engine speed decreases 3 Stopping the Engine and Parking the Vehicle WARNING Avoid parking on steep slope as the vehicle may roll away WARNING Always put the vehicl...

Page 107: ...einstall the drain plug and secure it using the spring clamp NOTE Make sure hose is properly in serted on CVT cover nipple NOTICE See an authorized Can Am dealer to have the CVT in spected and cleaned 2 What to Do if Water is in the Air Filter Housing Remove the LH side panel Inspect the underneath the air filter housing to validate if water is present vmo2012 012 054_a TYPICAL 1 Air filter housin...

Page 108: ...il level and refill if necessary Check engine coolant level and refill if necessary Check gearbox oil level and refill if necessary Check rear final drive oil level and re fill if necessary Start engine If the oil pressure light stays on stop engine immediately See an authorized Can Am dealer Whenever the vehicle is turned over it should be inspected by an authorized Can Am dealer 4 What to Do if ...

Page 109: ...t cam Use tool from vehicle tool kit vmo2015 005 040_a 1 Adjustment cam 2 Softer adjustment 3 Firmer adjustment 2 Dynamic Power Steering DPS Assist Level Adjustment The Tri Mode Dynamic Power Steering DPS offers easy steering assistance to the rider The level of assistance will automatically adapt according to the vehicle s speed and rider s de mand in order to provide maximum steering power at lo...

Page 110: ...tive DPS mode 1 DPS mode display To change the DPS mode proceed as follows 1 Press and hold DPS button for 2 sec onds to go to the next setting 2 Release DPS button 3 Repeat until desired setting is se lected NOTE The DPS adjustment will not be possible if the vehicle transmission is set to REVERSE or if the ACS mode LTD model is displayed in the multi function gauge 108 ______________ ...

Page 111: ...ansporting The vehicle must be in its normal operating position on all four wheels V00A17Y Remember to Unload vehicle racks before trans portation Set shift lever to PARK position Set the brake lock Secure the vehicle by the front and rear tie down points vmo2015 005 012_a 1 Front tie down point location fvmo2016 001 010_a TYPICAL REAR TIE DOWN POINT LOCATION 1 Rear tie down point location NOTICE ...

Page 112: ...IX VEHICLE TRANSPORTATION This page is intentionally blank 110 ______________ ...

Page 113: ...C MAINTENANCE ______________ 111 ...

Page 114: ...itions NOTE Riding in a group in these conditions would increase even more the air filter maintenance 2 MAINTENANCE SCHEDULE LEGEND Operation in trail riding conditions Operation in severe riding conditions dusty or muddy or carrying heavy loads condition 3 MAINTENANCE SCHEDULE Make sure to perform proper maintenance at recommended intervals as indicated in the tables Some items of the maintenance...

Page 115: ...erify CVT drive belt and clean CVT pulleys Lubricate the one way bearing of the drive pulley The following must be performed at least once a year Change engine oil and filter Lubricate throttle cable Inspect and clean brake system Inspect battery condition Verify steering system for abnormal play Verify front differential and rear final drive oil level and look for contamination Verify gearbox oil...

Page 116: ...ce front differential oil Replace rear final drive oil Replace gearbox oil 570 only Inspect input and output shaft seals gearbox differential and final drive Clean vehicle speed sensor Clean and lubricate lower and upper steering column half bushings The following must be performed every 2 years Replace the brake fluid EVERY 12 000 KM 8 000 MI OR 5 YEARS whichever comes first EVERY 6 000 KM 4 000 ...

Page 117: ...rding to riding conditions Air filter maintenance must be in creased in frequency and oil must be added to the foam filter for the follow ing dusty conditions Riding on dry sand Riding on dry dirt covered surfaces Riding on dry gravel trails or similar conditions NOTE Riding in a group in these con ditions would increase even more the air filter maintenance Refer to AIR FILTER CLEANING AND OILING ...

Page 118: ...sed air into air filter chamber 4 Check air filter drain tube clean chamber If any debris or water are found refer to SPECIAL PROCEDURES subsection Investigate for contamination source vmr2012 010 017_b TYPICAL SOME PARTS REMOVED FOR CLARITY 1 Air filter drain tube Air Filter Cleaning and Oiling CAUTION Always wear ap propriate skin and eye protection Chemicals can cause a skin rash and eye injury...

Page 119: ... TYPICAL DRY NOTE A second application may be necessary for heavily soiled elements Foam Filter Oiling 1 Make sure filter is clean Refer to FOAM FILTER CLEANING 2 Spray AIR FILTER OIL P N 219 700 340 on the foam filter previously dried 219700340 AIR FILTER OIL P N 219 700 340 vbs2009 012 014 TYPICAL OIL THE FOAM FILTER 3 Let stand for 3 to 5 minutes 4 Remove any excess of oil that could transfer t...

Page 120: ... rear portion of console until studs engage with grommets vmo2015 005 021_a TYPICAL 1 Console 2 Studs and grommets 2 Engine Oil Engine Oil Level NOTICE Check level frequently and refill if necessary Do not over fill Operating the engine gearbox with an improper level may severely damage engine gearbox Wipe off any spillage NOTE While checking the oil level vi sually inspect engine area for leaks v...

Page 121: ...s engine If not available use 4 stroke SAE 5W40 engine oil that meets or exceeds the requirements for API service clas sification SJ SL SM or SN Always check the API service label certifica tion on the oil container it must contain at least one of the above standards Engine Oil Change Start and warm up engine Stop en gine Ensure vehicle is on a level surface Remove dipstick Clean the oil drain plu...

Page 122: ...and extension s RH footrest panel 1 Clean oil filter area 2 Remove oil filter cover 3 Remove oil filter vmr2015 008 002_a 1 Oil filter screw 2 Oil filter cover 3 O ring 4 Oil filter Oil Filter Installation 1 Check and clean the oil filter inlet and outlet area of dirt and other con taminations vmr2015 063 003_a 1 Inlet bore from the oil pump to the oil filter 2 Outlet bore to the engine oil provid...

Page 123: ...et the radiator cool down before clean ing NOTICE Be careful not to damage the radiating fins when cleaning Do not use any object tool that could damage the fins The fins are pur posely thin parts to allow efficient cooling WHEN RINSING USE LOW PRESSURE ONLY NEVER USE A HIGH PRESSURE WASHER See an authorized Can Am dealer to check the performance of the cooling system 5 Engine Coolant Engine Coola...

Page 124: ...available Distilled water and antifreeze solution 50 distilled water 50 antifreeze NOTICE Always use ethylene gly col antifreeze containing corrosion inhibitors specifically for internal combustion aluminum engines Engine Coolant Replacement Cooling System Draining Remove the gauge support Remove the coolant reservoir cap WARNING To avoid potential burns do not remove the pressure cap if the en gi...

Page 125: ...crew 2 Fill the cooling system until coolant comes out of the bleed screw s 3 Squeeze the top of the coolant hose between the radiator and coolant pump several times until all air is bled from the highest point of the hose 4 Install the bleed screw using NEW gasket ring and torque as per follow ing chart TIGHTENING TORQUE Bleed screws 5 0 N m 0 6 N m 44 lbf in 5 lbf in 5 Add coolant until system i...

Page 126: ...a well ventilated area and make sure the muffler is cool Place transmission on PARK position Remove the clean out plug of the muf fler vmo2015 005 037_a TYPICAL 1 Muffler 2 Clean out plug Block the end of the muffler with a shop rag and start engine Momentarily increase engine RPM several times to purge accumulated carbon out of the muffler Stop engine and allow muffler to cool Reinstall the clean...

Page 127: ...el ensure vehicle is on a level sur face 1 To access gearbox oil level plug re move the following parts Seat Console RH side panel and extension s RH footrest panel vmr2015 063 102_a 1 Oil level plug 2 Remove the gearbox oil level plug vmo2012 012 056_a 1 Drain plug 2 Oil level plug 3 Check oil level The oil should be level with the bottom of the oil level hole NOTICE Operating the gearbox with an...

Page 128: ...arbox oil as per your local environmental regulations Gearbox Oil Filling Procedure 1 Fill the gearbox through the oil level hole until the oil reaches the bottom of the oil level hole 2 Install the oil level plug with its O ring Tighten plug as per table OIL LEVEL PLUG Tightening torque 5 N m 0 6 N m 44 lbf in 5 lbf in 9 Throttle Cable Throttle Cable Lubrication The throttle cable must be lubrica...

Page 129: ...ector Remove the cable from the throttle lever housing NOTE Slide cable in clip slot and re move the end of cable from clip V07I0IY Remove the throttle body side cover vmo2006 007 032_a 1 Throttle body 2 Side cover screws Insert the needle of the lubricant can in the end of throttle cable adjuster CAUTION Always wear ap propriate skin and eye protection Chemicals can cause a skin rash and eye inju...

Page 130: ...free play Measure throttle free play at the tip of throttle lever vmo2015 005 020_b A 2 mm 079 in Tighten lock nut and reinstall protector With the shift lever on PARK position start the engine Check if the throttle cable is adjusted correctly by turning handlebar fully to the right then fully to the left If the engine RPM increases readjust the throttle lever free play 10 Spark Plugs Spark Plug A...

Page 131: ...ds by hand and tighten with a torque wrench and a proper socket SPARK PLUG TORQUE 20 N m 2 4 N m 15 lbf ft 2 lbf ft 11 Battery CAUTION Never charge a bat tery while installed in vehicle These vehicles are equipped with a VRLA battery Valve Regulated Lead Acid It is a maintenance free type battery there is no need to add water to adjust electrolyte level NOTICE Never remove the battery sealing cap ...

Page 132: ...roper rating A15E0KY 1 2 TYPICAL 1 Fuse 2 Check if melted NOTICE Do not use a higher rated fuse as this can cause severe dam age Front Fuse Box Location Pull upwards and front to remove the gauge support from its location vmo2015 005 019_a 1 Gauge support vmo2015 005 022_a 1 Front fuse box 2 Front fuse box cover NOTE Check inside fuse box cover to know fuses location NOTICE Do not store any object...

Page 133: ... 2 NO DESCRIPTION RATING F2 Dynamic power steering DPS 40 A 13 Lights Always check light operation after re placement Headlight Bulb Replacement NOTICE Never touch glass portion of a halogen bulb with bare fingers it shortens its operating life If glass is touched clean it with isopropyl al cohol which will not leave a film on the bulb 1 Remove cover 2 Unplug connector 3 Remove bulb vmr2015 050_01...

Page 134: ...allation is the reverse of the re moval procedure 14 Drive Shaft Boot and Protector Drive Shaft Boot and Protector Inspection Visually inspect drive shaft protectors and boots conditions Check protectors for damage or rub bing against shafts Check boots for cracks tears leaking grease etc Repair or replace damaged parts as necessary vmo2015 005 050_a TYPICAL FRONT OF VEHICLE 1 Drive shaft boots 2 ...

Page 135: ...sure below minimum It could cause the tire to dislodge from the rim Since tires are low pressure types a manual pump should be used Check pressure when tires are cold before using the vehicle Tire pres sure changes with temperature and altitude Recheck pressure if one of these conditions has changed For your convenience a pressure gauge is supplied in tool kit Although the tires are specifically d...

Page 136: ...ke lock Loosen lug nuts then lift vehicle Secure vehicle on jack stands Remove nuts then remove wheel Wheel Installation At installation it is recommended to apply anti seize lubricant on threads If tires are unidirectional make sure to install wheel according to tire rotation Carefully tighten nuts in a criss cross sequence then apply final torque TORQUE Wheel nut 100 N m 10 N m 74 lbf ft 7 lbf f...

Page 137: ...le move ment Always use when the vehicle is not in operation In some circum stances it may be necessary to rock the vehicle back and forth to move the gears in the transmission to allow the park to be engaged NOTE The PARK position is used as a mechanical parking brake fvmo2013 002 020 SHIFT PATTERN NOTICE Always completely stop the vehicle and apply the brake prior to moving the shift lever 3 Squ...

Page 138: ...warnings and operating instructions prior to use fvmo2013 001 010 TYPICAL FRONT UP POINT LOCATION NOTE Ensure that 4 WD is engaged and brake is locked fvmo2013 001 011 TYPICAL BACK UP POINT LOCATION 17 Steering Steering Inspection Tie Rods Inspect tie rod boots for cracks WARNING The tie rod must be replaced if the boot is cracked 18 Suspension Front Suspension Lubrication Lubricate front A arms a...

Page 139: ... check brake fluid in reservoirs for proper level NOTE A low level may indicate leaks or worn brake pads Front Brake Reservoir Turn steering in the straight ahead po sition to ensure reservoir is level Check the brake fluid level the reser voir is full when the fluid reaches of the top of window Visually inspect lever boot condition Check for cracks tears etc Replace if damaged vmo2012 012 046_a T...

Page 140: ...ge to the braking system do not use other brake fluid types Brake Inspection CAUTION The brakes can be very hot after prolonged use of the vehicle and can cause burns Wait for the brakes to cool down The brake inspection maintenance and repair should be performed by an authorized Can Am dealer However verify the following between visits to your dealer Brake fluid level Brake system for fluid leaks...

Page 141: ...nd Protection NOTICE Never use a high pres sure washer to clean the vehicle USE LOW PRESSURE ONLY like a garden hose Pay attention to certain areas where mud or debris can accumulate and po tentially cause wear interferences or promote corrosion Wash the vehicle with a soapy water solution NOTICE Never clean polypropy lene body parts with any petroleum base cleaning products as it will al ter the ...

Page 142: ...III VEHICLE CARE Compatible Cleaning Products MATERIAL TYPE COMPATIBLE CLEANING PRODUCT XPS ATV Wash P N 219 701 702 Polypropylene Soapy water vbs2012 006 001 SAFE FOR POLYPROPYLENE 140 ______________ ...

Page 143: ...le is not in use for more than 4 months proper storage is a ne cessity When using your vehicle after storage a preparation is required See an authorized Can Am dealer to have your vehicle prepared for either storage or the preseason ______________ 141 ...

Page 144: ...IV STORAGE AND PRESEASON PREPARATION This page is intentionally blank 142 ______________ ...

Page 145: ...D TECHNICAL INFORMATION ______________ 143 ...

Page 146: ...filter Replaceable cartridge Capacity oil change with filter 3 L 3 2 qt U S liq engine transmission EU countries For the summer season use XPS 4 stroke synth blend oil summer P N 619 590 109 For all seasons use XPS 4 stroke synthetic oil All climate P N 619 590 114 If not available use a 4 stroke SAE 5W 40 engine oil that meets the requirements for API service classification SJ SL SM or SN Lubrica...

Page 147: ...t U S liq TRANSMISSION 450 Type CVT Continuously Variable Transmission Engagement RPM 2000 RPM GEARBOX 450 Type Dual range HI LO with park neutral and reverse ELECTRICAL SYSTEM 450 Magneto generator output 500 W 6000 RPM Ignition system type IDI Inductive Discharge Ignition Ignition timing Not adjustable Quantity 1 Make and type NGK LMAR8D J or equivalent Spark plug Gap 0 7 mm to 0 9 mm 028 in to ...

Page 148: ...te light 1 x 10 W Fuses Refer to FUSES in the MAINTENANCE section FUEL SYSTEM 450 Fuel delivery Type Electronic Fuel Injection EFI 46 mm throttle body 1 injector per cylinder Fuel pump Type Electrical in fuel tank Idle speed 1250 RPM not adjustable Type Regular unleaded gasoline Fuel Minimum octane rating Outside North America 95E or higher Fuel tank capacity 20 5 L 5 4 U S gal Fuel remaining when...

Page 149: ...rear final drive oil Type Rear All other countries XPS synthetic gear oil 75W 140 P N 293 600 140 or a 75W140 API GL 5 synthetic gear oil Base Visco Lok auto locking front differential Front drive All models except Base Visco lok QE auto locking front differential Front drive ratio 3 6 1 Rear drive Bevel Straight gear final drive Rear drive ratio 3 6 1 CV joint grease Castrol CV joint grease P N 2...

Page 150: ...Quantity 2 Shock absorber Type Oil Preload adjustment type 5 positions cam BRAKES 450 Front brakes Type Dual 214 mm cross drilled disc brakes with hydraulic twin piston calipers Rear brake Type Single 214 mm cross drilled disc brake with hydraulic twin piston caliper Capacity 260 ml 8 8 U S oz Brake fluid Type DOT 4 Caliper Floating twin pistons 2 x 26 mm Brake pad material Organic Minimum brake p...

Page 151: ...lb TO 235 kg 517 lb 68 9 kPa 10 PSI UP TO 132 kg 290 lb 41 4 kPa 6 PSI Pressure Rear 2 UP FROM 132 kg 290 lb TO 272 kg 600 lb 68 9 kPa 10 PSI WHEELS 450 Base Steel Type All except base model Cast Aluminum Front 305 x 152 mm 12 x 6 in Rim size Rear 305 x 191 mm 12 x 7 5 in Wheel nut torque 100 N m 74 lbf ft DIMENSIONS 450 1 UP 211 cm 83 in Overall length 2 UP 231 cm 91 in Overall width 117 cm 46 in...

Page 152: ...I SPECIFICATIONS DIMENSIONS 450 1 UP 129 5 cm 51 in Wheelbase 2 UP 149 9 cm 59 in Front 97 4 cm 38 in Wheel track Rear 92 3 cm 36 in Ground clearance 26 7 cm 10 5 in 150 ______________ ...

Page 153: ... in Exhaust system Spark arrestor approved by USDA Forest Service Air filter Synthetic paper filter with foam LUBRICATION SYSTEM 570 Type Wet sump Replaceable cartridge oil filter Oil filter Replaceable cartridge Capacity oil change with filter 2 0 L 2 1 qt U S liq Engine oil Recommended For the summer season use XPS 4 stroke synth blend oil summer P N 293 600 121 For the winter season use XPS 4 s...

Page 154: ...ssion Engagement RPM 1800 RPM GEARBOX 570 Type Dual range HI LO with park neutral and reverse Capacity 450 ml 15 2 U S oz Gearbox oil Recommended XPS synthetic gear oil 75W 140 P N 293 600 140 or a 75W140 API GL 5 synthetic gear oil ELECTRICAL SYSTEM 570 Magneto generator output 500 W 6000 RPM Ignition system type IDI Inductive Discharge Ignition Ignition timing Not adjustable Quantity 2 Make and ...

Page 155: ...ht R10W Fuses Refer to FUSES in the MAINTENANCE section FUEL SYSTEM 570 Fuel delivery Type Electronic Fuel Injection EFI 46 mm throttle body 1 injector per cylinder Fuel pump Type Electrical in fuel tank Idle speed 1400 RPM not adjustable Type Regular unleaded gasoline Fuel Minimum octane rating Outside North America 92 RON or higher Fuel tank capacity 20 5 L 5 4 U S gal Fuel remaining when low fu...

Page 156: ...els except Base Visco lok QE auto locking front differential Front drive ratio 3 6 1 Rear drive Bevel Straight gear final drive Rear drive ratio 3 6 1 CV joint grease Castrol CV joint grease P N 293 550 062 Propeller shaft grease Propeller shaft grease P N 293 550 063 STEERING 570 1 UP 212 cm 83 in Turning radius 2 UP 239 cm 94 in Total toe vehicle on ground 2 5 mm 12 7 mm 1 in 5 in Camber angle v...

Page 157: ... brakes Type Dual 214 mm cross drilled disc brakes with hydraulic twin piston calipers Rear brake Type Single 214 mm cross drilled disc brake with hydraulic twin piston caliper Capacity 260 ml 8 8 U S oz Brake fluid Type DOT 4 Caliper Floating twin pistons 2 x 26 mm Brake pad material Organic Minimum brake pad thickness 1 mm 039 in Minimum brake disc thickness 4 0 mm 157 in Maximum brake disc warp...

Page 158: ...lb TO 235 kg 517 lb 68 9 kPa 10 PSI UP TO 132 kg 290 lb 41 4 kPa 6 PSI Pressure Rear 2 UP FROM 132 kg 290 lb TO 272 kg 600 lb 68 9 kPa 10 PSI WHEELS 570 Base Steel Type All except base model Cast Aluminum Front 305 x 152 mm 12 x 6 in Rim size Rear 305 x 191 mm 12 x 7 5 in Wheel nut torque 100 N m 74 lbf ft DIMENSIONS 570 1 UP 211 cm 83 in Overall length 2 UP 231 cm 91 in Overall width 117 cm 46 in...

Page 159: ...I SPECIFICATIONS DIMENSIONS 570 1 UP 129 5 cm 51 in Wheelbase 2 UP 149 9 cm 59 in Front 97 4 cm 38 in Wheel track Rear 92 3 cm 36 in Ground clearance 26 7 cm 10 5 in ______________ 157 ...

Page 160: ...with brakes 750 kg 1 653 lb Trailer without brakes 59 kg 130 lb Tongue capacity Trailer with brakes 75 kg 165 lb MODEL ALL TIRES Minimum tire thread depth 3 mm 118 in All models except PRO 635 x 203 x 305 mm AT25 x 8 x 12 in Front Pro 660 x 203 x 305 mm AT26 x 8 x 12in All models except PRO 635 x 254 x 305 mm AT25 x 11 x 12 in Tire size Rear Pro 660 x 254 x 305 mm AT26 x 10 x 12 in Axle No Tyres d...

Page 161: ...tationary 85 dB A Exterior sound level according to Annex VI to Directive 2009 63 EC 13 2 moving 79 dB A Driver perceived sound level according to Directive 2009 76 EC 90 dB A NOISE AND VIBRATION DECLARATION 570 model 13 1 stationary 81 dB A Exterior sound level according to Annex VI to Directive 2009 63 EC 13 2 moving 79 dB A Driver perceived sound level according to Directive 2009 76 EC 90 dB A ...

Page 162: ...I SPECIFICATIONS This page is intentionally blank 160 ______________ ...

Page 163: ...E TROUBLESHOOTING ______________ 161 ...

Page 164: ... be activated to prevent fuel injection and to cut ignition while cranking Proceed as follows Insert key in ignition switch and turn to ON position Move shift lever in park position Press completely and HOLD throttle lever Press the engine START button The engine should be cranked for 20 seconds Release engine START but ton Release throttle lever and start crank engine again to allow starting If i...

Page 165: ...VER BUT FAILS TO START 3 Engine is overheating CHECK ENGINE indicator light will turn on and HI TEMP will appear in the multifunction display Refer to ENGINE OVERHEATS 4 Air filter housing clogged or dirty Check air filter and clean if necessary Check deposits in air filter housing drain Check the position of the air intake tube 5 CVT dirty or worn out Contact an authorized Can Am dealer 6 Engine ...

Page 166: ...necessary Check deposits in air filter housing drain Check the position of the air intake tube 4 CVT dirty or worn out Contact an authorized Can Am dealer 5 Engine is under a protection limp home mode Check multifunction gauge display for messages Multifunction gauge CHECK ENGINE indicator lamp is on and display shows CHECK ENGINE or LIMP HOME contact an authorized Can Am dealer SHIFT LEVER IS HAR...

Page 167: ...ed to sustained severe steering conditions the assis tance provided by the DPS motor may be reduced to protect the system Once the load is reduced the normal steering assistance will return 2 CHECK ENGINE INDICATOR LAMP is ON and display shows CHECK DPS Seek service from an authorized Can Am dealer repair shop or person of your own choosing for maintenance repair or replacement ______________ 165 ...

Page 168: ...on ECM NOT RECOGNIZED Check engine Communication error between speedometer and engine control module ECM contact an authorized Can Am dealer CHECK DPS models with DPS Check engine Indicates that the DPS Dynamic Power Steering does not work properly See an authorized Can Am dealer MAINTENANCE REQUIRED 2 None Displayed in gauge when vehicle is due for a maintenance TPS FAULT PRESS OVERRIDE BUTTON TO...

Page 169: ...F SPARE PARTS ______________ 167 ...

Page 170: ...I CATALOGS You will find your Can Am ATV spare parts on our website at www epc brp com 168 ______________ ...

Page 171: ...G WARRANTY ______________ 169 ...

Page 172: ...TED IN LIEU OF ANY AND ALL OTHER WARRANTIES EX PRESSED OR IMPLIED INCLUDING WITHOUT LIMITATION ANY WARRANTY OF MERCHANTABILITY OR FITNESS FOR A PARTICULAR PURPOSE TO THE EXTENT THAT THEY CANNOT BE DISCLAIMED THE IMPLIED WARRANTIES ARE LIMITED IN DURATION TO THE LIFE OF THE EXPRESS WARRANTY INCIDENTAL AND CONSEQUENTIAL DAMAGES ARE EXCLUDED FROM COVERAGE UNDER THIS WARRANTY SOME JURISDICTIONS DO NOT...

Page 173: ... retail consumer or 2 the date the product is first put into use whichever occurs first and for a period of SIX 6 CONSECUTIVE MONTHS for private use or commercial use The repair or replacement of parts or the performance of service under this war ranty does not extend the life of this warranty beyond its original expiration date Note that the duration and any other modalities of the warranty cover...

Page 174: ...sonable access to the product and reasonable opportunity to repair it The customer must also present to the authorized Can Am ATV Distributor Dealer proof of purchase of the product and must sign the repair work order prior to starting the repair in order to validate the warranty repair All parts replaced under this limited warranty become the property of BRP Note that the notification period is s...

Page 175: ...n the event of a controversy or a dispute in connection with this limited warranty BRP suggests that you try to resolve the issue at the dealership level We recom mend discussing the issue with the authorized dealer s service manager or owner If the matter still remains unresolved contact BRP by filling out the customer con tact form at www brp com or contact BRP by mail at one of the addresses li...

Page 176: ...e 2 LIMITATIONS OF LIABILITY TO THE EXTENT PERMITTED BY LAW THIS WARRANTY IS EXPRESSLY GIVEN AND ACCEPTED IN LIEU OF ANY AND ALL OTHER WARRANTIES EX PRESSED OR IMPLIED INCLUDING WITHOUT LIMITATION ANY WARRANTY OF MERCHANTABILITY OR FITNESS FOR A PARTICULAR PURPOSE TO THE EXTENT THAT THEY CANNOT BE DISCLAIMED THE IMPLIED WARRANTIES ARE LIMITED IN DURATION TO THE LIFE OF THE EXPRESS WARRANTY INCIDEN...

Page 177: ...service work 4 WARRANTY COVERAGE PERIOD This warranty will be in effect from 1 the date of delivery to the first retail con sumer or 2 the date the product is first put into use whichever occurs first and for a period of TWENTY FOUR 24 CONSECUTIVE MONTHS for private use SIX 6 CONSECUTIVE MONTHS for commercial use or rental use The product is used commercially when it is used in connection with any...

Page 178: ...ountry 7 WHAT BRP WILL DO To the extent permitted by law BRP s obligations under this warranty are lim ited to at its sole discretion repairing parts found defective under normal use maintenance and service or replacing such parts with new genuine Can Am ATV parts without charge for parts and labour at any authorized Can Am ATV Distrib utor Dealer during the warranty coverage period under the cond...

Page 179: ...e manager or owner If the matter still remains unresolved contact BRP by filling out the customer con tact form at www brp com or contact BRP by mail at one of the addresses listed under the CONTACT US section of this guide In the EEA products are distributed and serviced by BRP European Distribution S A and other affiliates or subsidiaries of BRP 2016 Bombardier Recreational Products Inc All righ...

Page 180: ...mple or model Have the qualities that a buyer may legitimately expect considering the pub lic declarations of the seller the manufacturer of its representative including in advertising or labeling or 2 Have the characteristics mutually agreed upon as between the parties or be fit for the specific use intended by the buyer and brought to the attention of the seller and which accepted The action for...

Page 181: ...H CUSTOMER INFORMATION ______________ 179 ...

Page 182: ...ustomer list to distribute marketing and promotional information about BRP and related products To exercise your right to consult or correct your data or to be removed from the ad dressee list for direct marketing please contact BRP By E mail privacyofficer brp com By mail BRP Senior Legal Counsel Privacy Officer 726 St Joseph Valcourt QC Canada J0E 2L0 180 ______________ ...

Page 183: ...PARC Bâtiment B Route de la côte d Azur Le Canet 13590 Meyreuil France Ingvald Ystgaardsvei 15 N 7484 Trondeim Norway Isoaavantie 7 PL 8040 96101 Rovaniemi Formvägen 16 S 906 21 Umeå Sweden Avenue d Ouchy 4 6 1006 Lausanne Switzerland Oceania 6 Lord Street Lakes Business Park Botany NSW 2019 Australia South America Rodovia Anhanguera Km 104 Loteamento Techno Park Condominio Empresarial AZTech Aven...

Page 184: ...f ownership please join a proof that the former owner agreed to the transfer Notifying BRP even after the expiration of the limited warranty is very important as it enables BRP to reach the ATV owner if necessary like when safety recalls are initiated It is the owner s responsibility to notify BRP STOLEN UNITS If your personal ATV is stolen you should notify BRP or an autho rized Can Am dealer We ...

Page 185: ...III CHANGE OF ADDRESS OWNERSHIP ______________ 183 ...

Page 186: ...III CHANGE OF ADDRESS OWNERSHIP This page is intentionally blank 184 ______________ ...

Page 187: ...III CHANGE OF ADDRESS OWNERSHIP ______________ 185 ...

Page 188: ...III CHANGE OF ADDRESS OWNERSHIP This page is intentionally blank 186 ______________ ...

Page 189: ...III CHANGE OF ADDRESS OWNERSHIP NOTES ______________ 187 ...

Page 190: ...III CHANGE OF ADDRESS OWNERSHIP NOTES 188 ______________ ...

Page 191: ...Mileage km Hours Date Dealer no Notes For maintenance schedule refer to Maintenance Information section of this operator s guide SERVICE Serial number Signature Print Mileage km Hours Date Dealer no Notes For maintenance schedule refer to Maintenance Information section of this operator s guide SERVICE Serial number Signature Print Mileage km Hours Date Dealer no Notes For maintenance schedule ref...

Page 192: ...er no Notes For maintenance schedule refer to Maintenance Information section of this operator s guide SERVICE Serial number Signature Print Mileage km Hours Date Dealer no Notes For maintenance schedule refer to Maintenance Information section of this operator s guide SERVICE Serial number Signature Print Mileage km Hours Date Dealer no Notes For maintenance schedule refer to Maintenance Informat...

Page 193: ...er no Notes For maintenance schedule refer to Maintenance Information section of this operator s guide SERVICE Serial number Signature Print Mileage km Hours Date Dealer no Notes For maintenance schedule refer to Maintenance Information section of this operator s guide SERVICE Serial number Signature Print Mileage km Hours Date Dealer no Notes For maintenance schedule refer to Maintenance Informat...

Page 194: ...IV MAINTENANCE RECORDS 192 ______________ ...

Page 195: ...result in an injury including the possibility of death WARNING This vehicle may exceed the performance of other vehicles you may have ridden in the past Take time to familiarize yourself with your new vehicle The following trademarks are the property of Bombardier Recreational Products Inc In Finland products are distributed by BRP Finland Oy Can Am DPS Outlander Rotax TTI XPS This document contai...

Page 196: ...an result if you do not follow these instructions BEFORE YOU OPERATE THIS VEHICLE READ THIS OPERATOR S GUIDE ALL ON PRODUCT SAFETY LABELS AND WATCH THE SAFETY VIDEO NEVER OPERATE THIS VEHICLE WITHOUT PROPER INSTRUCTIONS Complete a certified training course FOR MAX MODELS NEVER CARRY MORE THAN ONE PASSENGER You increase your risk of losing control if you carry more than one passenger FOR 1UP MODELS...

Reviews: