background image

24

SERVICE SPECIFICATIONS AND SPECIAL TOOLS

SHOP AIDS

SHOP AIDS

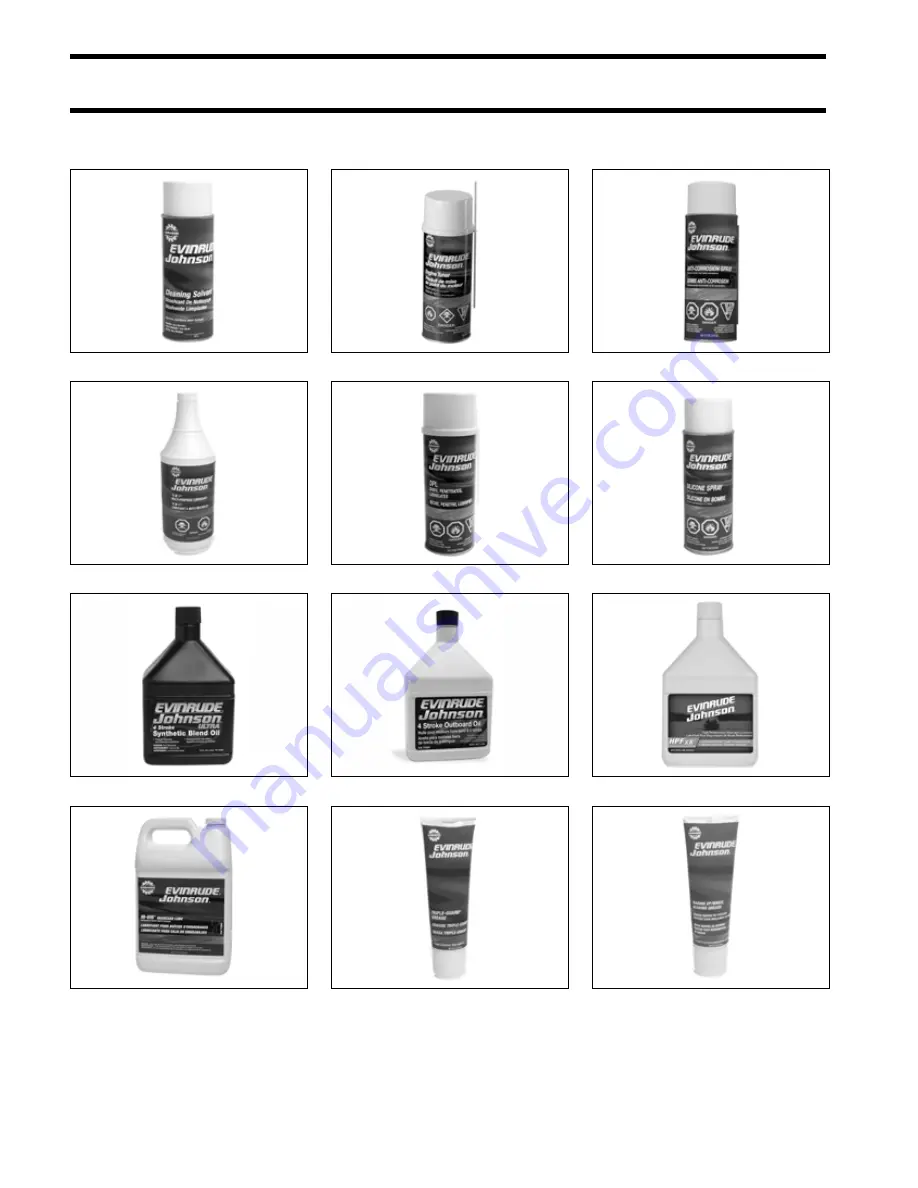
Cleaning Solvent P/N 771087 

“6 in 1” Multi-Purpose Lubricant P/N 777192

Ultra 4-Stroke Outboard Oil, P/N 775594

HI-VIS™ Gearcase Lube P/N 775605

Engine Tuner P/N 777185

D.P.L. Spray P/N 777183

4-Stroke Outboard Oil, P/N 775597

Triple-Guard® Grease P/N 508298

Anti-Corrosion Spray P/N 777193

Silicone spray P/N 775630

HPF XR™ Gear Lube P/N 778747

Extreme Pressure Grease™
P/N 508303

Summary of Contents for Johnson BJ25E4SUC

Page 1: ......

Page 2: ......

Page 3: ...Lubriplate is a registered trademark of Fiske Brothers Refining Company NGK is a registered trademark of NGK Spark Plugs U S A Inc NMEA is a registered trademark of the National Marine Electronics Association Oetiker is a registered trademark of Hans Oetiker AG Maschinen Packard is a registered trademark of Delphi Automotive Systems Permatex is a registered trademark of Permatex Plastigage is a re...

Page 4: ...ul and never rush or guess a service pro cedure Human error is caused by many factors carelessness fatigue overload preoccupation unfamiliarity with the product and drugs and alco hol use to name a few Damage to a boat and outboard can be fixed in a short period of time but injury or death has a lasting effect When replacement parts are required use Evinrude Johnson Genuine Parts or parts with equ...

Page 5: ...edly Avoid personal injury always support the outboard s weight with a suitable hoist or the tilt support bracket during service To prevent accidental starting while servicing disconnect the battery cables at the battery Twist and remove all spark plug leads The electrical system presents a serious shock hazard DO NOT handle primary or secondary ignition components while outboard is running or fly...

Page 6: ...PECIFICATIONS AND SPECIAL TOOLS 15 2 INSTALLATION AND PREDELIVERY 27 3 MAINTENANCE 47 4 ELECTRICAL 65 5 IGNITION SYSTEM 91 6 FUEL SYSTEM 103 7 POWERHEAD 123 8 MIDSECTION 171 9 GEARCASE 195 10 MANUAL STARTER 217 11 WIRE HOSE ROUTING 225 SAFETY S 1 INDEX Index 1 ...

Page 7: ...NG MODEL AND SERIAL NUMBERS 6 MODEL DESIGNATION 7 TYPICAL PAGE A 8 TYPICAL PAGE B 9 TYPICAL PAGE C 10 TYPICAL PAGE D 11 ABBREVIATIONS USED IN THIS MANUAL 12 UNITS OF MEASUREMENT 12 LIST OF ABBREVIATIONS 12 PRODUCT REFERENCE AND ILLUSTRATIONS 13 SYMBOLS 13 ELECTRICAL 13 VALUES 14 ...

Page 8: ...rial numbers are located on the starboard stern bracket and on the power head Model Number Start Shaft Steer J25R4SUR Rope 15 in Tiller BJ25R4SUC Rope 15 in Tiller J25RL4SUR Rope 20 in Tiller BJ25RL4SUC Rope 20 in Tiller J25TE4SUR Electric 15 in Tiller BJ25TE4SUC Electric 15 in Tiller J25TEL4SUR Electric 20 in Tiller BJ25TL4SUC Electric 20 in Tiller J25E4SUR Electric 15 in Remote BJ25E4SUC Electri...

Page 9: ... RUN or SUFFIX DESIGN FEATURES AP Advanced Propulsion B Blue Paint C Counter Rotation D Evinrude E TEC E Electric Start w Remote Steering F Direct Injection G Graphite Paint H High Output J Jet Drive M Military P Power Trim and Tilt R Rope Start w Tiller Steering S Saltwater Edition T Tiller Steering TE Tiller Electric V White Paint W Commercial Model 4 STROKE B J 25 R L 4 SU C ...

Page 10: ...me units appear as in lbs Use appropriate torque Tightening torque for a fastener Subsection title indicates beginning of the subsection Italic subheading above Service Chart indicates pertaining models Indicates list corresponding to applicable letter in exploded view of the Service Chart Exploded view of Service Chart assists in identifying parts and positions ...

Page 11: ...ressure hose through cover grommet with oil tank sending unit harness Route hose along battery cables toward the back of the powerhead Use tie straps to fasten in place If temperature gauge is to be used route sending unit wire through grommet with hose for water pressure gauge Follow the path of battery cables Provide adequate length to reach cylinder head Refer to installation instructions suppl...

Page 12: ...rmatex No 2 gasket sealant to inner exhaust housing flange Coat both sides of a new base gasket with Gasket Sealing Compound ALL MODELS Install a new base gasket on adapter To ensure proper sealing mating surfaces must be clean and free of oil grease and foreign matter Coat the driveshaft splines with Moly Lube Do not apply lubricant to end of driveshaft 39820 49557 1 Mount retainer screw 49556 1 ...

Page 13: ...e 38 A faulty electrical circuit or an inoperative pres sure switch activates service code 38 no oil sen sor feedback or lack of oil pressure and the EMM Service Code 39 If no oil pressure is detected during startup the EMM initiates an oil injector recovery mode to pressurize the system If inadequate oil pressure is still detected after the recovery mode is com pleted the EMM TYPICAL 1 Lower puls...

Page 14: ...op dead center AT air temperature sensor BPS barometric pressure sensor BTDC before top dead center CCA cold cranking amps CPS crankshaft position sensor DI Direct Injection ECU electronic control unit EMM engine management module ICOMIA International Council of Marine Industry Associations MCA marine cranking amps MWS modular wiring system NMEA National Marine Electronics Assoc NTC negative tempe...

Page 15: ...graphs and illustrations used in this man ual may not depict actual models or equipment but are intended as representative views for refer ence only Certain features or systems discussed in this manual might not be found on all models in all marketing areas All service technicians must be familiar with nauti cal orientation This manual often identifies parts and procedures using these terms SYMBOL...

Page 16: ...ance Ω is the sym bol for ohm the unit of measurement for resis tance Values When precedes a value on the meter face the reading should be less than or equal to the value shown When precedes a value on the meter face the reading should be greater than or equal to the value shown DR4205 DR4206 DR4207 ...

Page 17: ...PECIAL TOOLS TABLE OF CONTENTS TECHNICAL DATA 16 STANDARD TORQUE SPECIFICATIONS 18 TIGHTENING TORQUE IMPORTANT FASTENERS 18 TIGHTENING TORQUE GENERAL BOLT 19 SPECIAL TOOLS 20 ELECTRICAL IGNITION 20 FUEL AND OIL 21 GEARCASE 21 POWERHEAD 22 STARTER 22 UNIVERSAL 23 SHOP AIDS 24 ...

Page 18: ...nder V Displacement 32 8 cu in 538 cm3 Bore 2 80in 71 mm Stroke 2 68 in 68 mm Compression ratio 9 3 1 FUEL SYSTEM Carburetion One single throat carburetor float feed Main Jet 135 Main Air Jet 155 Pilot Jet 48 Low Speed Setting PRE SET 2 3 4 1 2 turns Starting Enrichment R Models Manual E Models Automatic Float Level Setting 13 5 2 mm Preferred Fuel Regular unleaded plus grade unleaded premium unle...

Page 19: ...90 Minutes Reserve Capacity or 50 Ampere Hour Tachometer Setting Requires Battery Charging 6 Pulse 12 Pole Fuse 20 A Electric start models COOLING Thermostat opens 136 to 144 F 58 to 62 C IGNITION Type Digital Capacitor Discharge RPM Limit 5500 RPM Spark Plugs NGK BKR6E 0 030 in 0 76 mm Ignition Timing 2 BTDC 1000 RPM GEARCASE Gear Ratio 11 23 2 09 1 Lubricant HPF XR Gearcase Lube Capacity 14 2 fl...

Page 20: ...6 mm 10 1 0 7 0 Thermostat cover bolt 6 mm 10 1 0 7 0 Flywheel bolt 16 mm 196 19 6 142 Starter motor mounting bolt 8 mm 23 2 3 16 5 Engine oil filter 14 1 4 10 0 Engine oil drain plug 12 mm 13 1 3 9 5 Power unit mounting bolt 8 mm 23 2 3 16 5 10 mm 50 5 0 36 0 Water pressure valve cover bolt 6 mm 10 1 0 7 0 Driveshaft housing bolt 8 mm 23 2 3 16 5 Upper mount bolt nut 10 mm 50 5 0 36 0 Upper mount...

Page 21: ...ked bolt 10 mm 22 35 2 2 3 5 16 0 25 5 5 mm 2 4 0 2 0 4 1 5 3 0 6 mm 6 10 0 6 1 0 4 5 7 0 8 mm 15 20 1 5 2 0 11 0 14 5 Stainless steel bolt 10 mm 34 41 3 4 4 1 24 5 29 5 5 mm 3 6 0 3 0 6 2 0 4 5 6 mm 8 12 0 8 1 2 6 0 8 5 8 mm 18 28 1 8 2 8 13 0 20 0 7 marked or marked bolt 10 mm 40 60 4 0 6 0 29 0 43 5 WARNING Torque wrench tightening specifications must be strictly adhered to Replace any locking ...

Page 22: ...rough local supplier DRC7265 Flywheel removal screws P N 5034235 002570 Flywheel holder P N 5034227 002605 CD Peak reading voltmeter P N 507972 49799 Wire harness adapter leads P N 342228 40269 Spark checker P N 508118 49798 Multimeter analog P N 501873 49793 Tachometer timing light P N 507980 49789 6 Pin connector test cord P N 5034231 002550 ...

Page 23: ... pressure test adapter P N 350930 002623 Gearcase filler P N 501882 49790 Gearcase pressure tester P N 507977 Stevens P N S 34 Gearcase vacuum tester P N 507982 Stevens P N V 34 49794 Dial indicator set Universal pinion bearing remover and installer kits P N 5005927 and P N 5005928 33974 Gearcase fill drain adaptor P N 772269 48642 Seal Installer P N 326545 23408 ...

Page 24: ...512 005938 Bearing remover P N 5034764 002646 Installer handle P N 345822 002575 Prop shaft remover P N 5034762 005937 Cylinder bore gauge P N 771310 45303 Crankshaft remover installer P N 5037487 005518 Gear alignment pin set P N 5037488 005516 Valve lifter adapter kit P N 5000899 002625 Valve spring compressor P N 346186 DRC50025 ...

Page 25: ...83 Puller Bridge P N 432127 23146 Puller jaws small P N 432131 replacement jaws P N 437952 23150 Puller jaws large P N 432129 replacement jaws P N 437954 23148 Puller jaws bearing P N 432130 replacement jaws P N 437953 23149 Slide hammer P N 391008 CO1577 Tie strap installation tool P N 323716 18105 Temperature gun P N 772018 45240 Universal Puller Set P N 378103 32885 ...

Page 26: ...icant P N 777192 Ultra 4 Stroke Outboard Oil P N 775594 HI VIS Gearcase Lube P N 775605 Engine Tuner P N 777185 D P L Spray P N 777183 4 Stroke Outboard Oil P N 775597 Triple Guard Grease P N 508298 Anti Corrosion Spray P N 777193 Silicone spray P N 775630 HPF XR Gear Lube P N 778747 Extreme Pressure Grease P N 508303 ...

Page 27: ...ubriplate 777 P N 317619 2 4 Fuel conditioner P N 775613 Needle Bearing Grease P N 378642 Power Trim Tilt and Power Steering Fluid P N 775612 Black Neoprene Dip P N 909570 Fuel System Cleaner P N 777184 Starter Bendix Lube P N 337016 Adhesive 847 P N 776964 Electrical Grease P N 504824 Carbon Guard P N 775629 ...

Page 28: ... P N 772666 ThreeBond 1104 P N 351052 ThreeBond 1207B P N 351053 Pipe Sealant with Teflon P N 910048 Locquic Primer P N 772032 Permatex No 2 P N 910032 Thermal Joint Compound P N 322170 1 Screw Lock P N 500417 Loctite Purple 222 equivalent 2 Nut Lock P N 500421 Loctite Blue 242 Equivalent 3 Ultra Lock P N 500423 Loctite Red 271 Equivalent 1 2 3 ...

Page 29: ...TEMS 34 OUTBOARD MOUNTING 35 OUTBOARD RIGGING 36 CONTROL CABLE IDENTIFICATION 36 CONTROL CABLE INSTALLATION 37 FUEL AND OIL 39 FUEL REQUIREMENTS 39 OIL REQUIREMENTS 40 RUNNING CHECKS 41 BREAK IN 10 HOURS 41 FUEL SYSTEM 42 EMERGENCY STOP SWITCH 42 OUTBOARD CONTROLS 42 START IN GEAR PREVENTION 42 TACHOMETER PULSE SETTING 42 WATER PUMP OVERBOARD INDICATOR 42 OPERATING TEMPERATURE 42 PROPELLER SELECTI...

Page 30: ... provided with the remote control Make sure the following items are checked Correct length control cables and wiring har nesses Proper type and quality of cables and wiring harnesses Correct routing of cables and harnesses Appropriate slack in front of the outboard for remote control cables Proper routing of cables to prevent kinking Positioning and securing of cables and har nesses along their le...

Page 31: ...inish this connection with a hex nut IMPORTANT Do not use wing nuts to fasten ANY battery cables Wing nuts can loosen and cause electrical system damage not covered under warranty Tighten all connections securely Apply Triple Guard grease to prevent corrosion Battery Cable Requirements Evinrude Johnson outboards are shipped with stranded copper battery cables for typical installa tions in which th...

Page 32: ...ti outboard applications require separate fuel tank pickups Install separate fuel hoses from the fuel tank to the outboards in multi out board applications Fuel System Primer Outboards require a priming system capable of refilling the fuel system after periods of non use Primer Bulbs Primer bulbs that meet the outboard s minimum inside diameter fuel line requirements are used on most outboards Ins...

Page 33: ...e transom and splash well area pro vide adequate clearances The top edge of the transom should be wide enough to allow full steering travel The ABYC standard for most single outboard installations is 33 in 84 cm Check cable and hose routing clearances Make sure there is clearance for mounting bolts and washers Check the inside area of the tran som for obstructions prior to drilling holes Water Flo...

Page 34: ...uld come close to matching the transom height of the boat Determine transom height by measuring from the top edge of the transom along the centerline Use a straightedge as a reference to extend the bottom of the boat Position the straightedge along centerline The distance from the top edge of the straightedge to the top edge of the transom is the actual transom height Transom Drilling Locations Us...

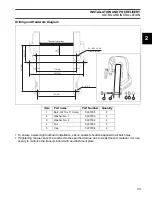
Page 35: ...rque cannot be reached to the specified torque due to weak transom material it is nec essary to reinforce the transom board with an attachment plate Transom top surface 50 2 0 176 6 9 240 9 4 82 3 2 164 6 5 217 8 5 20 M14 P2 0 Clamp screw 4 10 5 1 2 3 4 5 Item Part name Part Number Quantity 1 Bolt M 10 x 110 mm 5037005 2 2 Washer No 1 5037006 2 3 Washer No 2 5037164 2 4 Nut 5030054 2 5 Cap 5037004...

Page 36: ...cal Cables All Evinrude Johnson outboards equipped with tilt tubes are designed to be compatible with mechanical steering systems that meet ABYC Standard P 17 Single cable mechanical steering systems can be used on single or dual outboard installations if an ABYC approved steering link is used Dual cable mechanical steering helps provide firm steering control at high speeds Extend the output end o...

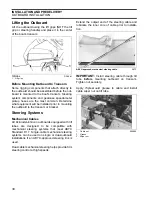
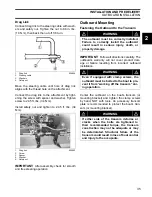
Page 37: ...correct outboard installation Center the outboard on the boat s transom or mounting bracket and tighten the clamp screws by hand NOT with tools An accessory transom plate is recommended to protect the boat s tran som or mounting bracket 1 Drag link 2 Steering cable 3 Washers 4 Safety nut 004824 1 Drag link 2 Screw 3 Spacer 4 Washer 5 Safety nut 005903 WARNING The outboard must be correctly install...

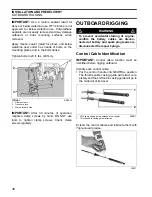
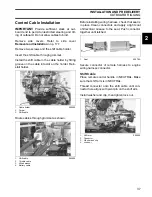
Page 38: ...heck clamp screws regularly OUTBOARD RIGGING Control Cable Identification IMPORTANT Control cable function must be identified before rigging outboard Identify each control cable Put the control handle into NEUTRAL position The throttle cable casing guide will retract com pletely and the shift cable casing guide will go to the midpoint of its travel Extend the control cables and lubricate them with...

Page 39: ...cables through grommet as shown Before installing wiring harness check that seal is in place Clean connectors and apply a light coat of Electrical Grease to the seal Push connector together until latched Secure connector of remote harness to engine wiring harness connector Shift Cable Place remote control handle in NEUTRAL Make sure that shift arm is in NEUTRAL Thread connector onto the shift cabl...

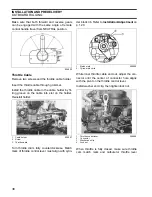
Page 40: ... Turn throttle drum fully counterclockwise Match mark of throttle control lever must align with cylin der block rib Refer to Installation Adjustment on p 120 While inner throttle cable end out adjust the con nector until the center of connector hole aligns with the pivot on the throttle control lever Install washer and clip then tighten lock nut When throttle is fully closed make sure throttle cam...

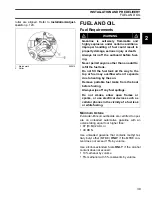
Page 41: ...10 ethanol by volume 5 methanol with 5 cosolvents by volume 1 Match mark 2 Roller 005910 WARNING Gasoline is extremely flammable and highly explosive under certain conditions Improper handling of fuel could result in property damage serious injury or death Always turn off the outboard before fuel ing Never permit anyone other than an adult to refill the fuel tank Do not fill the fuel tank all the ...

Page 42: ...nts and will remove moisture from the fuel system It can be used con tinuously and should be used during any period when the outboard is not being operated on a reg ular basis Its use will reduce spark plug fouling fuel system icing and fuel system component deterioration Evinrude Johnson Fuel System Cleaner will help keep fuel injectors in optimal operating condi tion Evinrude Johnson Carbon Guar...

Page 43: ...or 1 2 throttle only With easy planing boats use full throttle to quickly accelerate boat onto plane Immediately reduce throttle to one half as soon as the boat is on plane BE SURE boat remains on plane at this throttle setting Third hour of operation Run the engine in gear at various speeds up to 4000 RPM or 3 4 throttle only Balance of first 10 hours of operation Run the engine in gear at variou...

Page 44: ...D Attempt to restart the outboard Outboard should not start Pull shift lever back to NEUTRAL and restart out board Shift remote control lever to REVERSE Turn outboard OFF while lever control is in REVERSE Attempt to restart the outboard Outboard should not start Tachometer Pulse Setting Confirm accuracy of tachometer reading Adjust dial on back of tachometer to 6 pulse 12 pole setting Water Pump O...

Page 45: ...n the boat has a normal load in it Refer to TECHNICAL DATA on p 16 To compensate for changes in boat loading the engine s full throttle RPM must be verified peri odically IMPORTANT If the propeller blades have too much pitch the engine is operating below its nor mal range at full throttle power is being lost and powerhead damage could occur If the propeller blades have too little pitch the engine ...

Page 46: ... of wood between propeller blade and the anti ventilation plate Install the propeller nut and torque to 217 in lbs 24 5 N m If cotter pin holes in the propeller nut and propeller shaft are not aligned tighten the nut until they are in line Do not loosen Insert a new cotter pin through the propeller nut and shaft Bend its ends over the nut to secure the assembly IMPORTANT After fastening propeller ...

Page 47: ...lls to the left or right when its load is evenly distributed adjust the trim tab as follows With the remote control in NEUTRAL and the engine OFF loosen the trim tab screw If the boat pulled to the right move rear of the trim tab slightly to the right If the boat pulled to the left move rear of the trim tab slightly to the left Tighten the trim tab screw securely Test the boat and if needed repeat...

Page 48: ...46 INSTALLATION AND PREDELIVERY NOTES NOTES Technician s Notes Related Documents Bulletins Instruction Sheets Other ...

Page 49: ...UBRICATION 54 ENGINE OIL 54 ENGINE OIL FILTER 55 GEARCASE LUBRICANT 56 LINKAGES AND FITTINGS 57 SPARK PLUGS 58 VALVE CLEARANCE 58 MEASUREMENT 58 ADJUSTMENT 59 IDLE SPEED 60 IGNITION TIMING 60 STORAGE 61 FUEL SYSTEM TREATMENT 61 INTERNAL ENGINE TREATMENT 61 ADDITIONAL RECOMMENDATIONS 61 PRE SEASON SERVICE 62 CRANKCASE OIL 62 GEARCASE LUBRICANT 62 OPERATIONAL CHECKS 62 FUEL SYSTEM 62 SUBMERGED ENGIN...

Page 50: ... screws inspect and lubricate 1 D Every 60 days Every 30 in Saltwater Tilt lock pin inspect and lubricate 1 D Every 60 days Every 30 in Saltwater Throttle linkage inspect and lubricate 1 D Every 60 days Every 30 in Saltwater Steering bracket lubricate 1 D Every 60 days Every 30 in Saltwater Exhaust housing bushing 1 D Every 60 days Every 30 in Saltwater Lubrication and corrosion protection for met...

Page 51: ... of lube B 3 Propeller shaft inspect and lubricate D 3 Spark plugs replace 3 3 Decarbonize G 3 Water pump inspect and replace 3 1 Also recommended at 10 Hour Inspection 2 Replace every 100 hours or annually if Ultral 4 Stroke oil is not used 3 Emission related component A Evinrude Johnson Anti Corrosion Spray or Evinrude Johnson 6 in 1 Multi Purpose Lubricant B HPF XR Gearcase Lubricant C Power Tr...

Page 52: ...ds are equipped with sacrificial anodes Visually inspect anodes and metal components below water level Erosion of anodes is normal and indicates the anodes are functioning properly IMPORTANT Anodes that are not eroding may indicate that the anodes are not properly grounded Anodes and the mounting screws must be clean and tight for effective corrosion protec tion STARBOARD Cylinder Head Anode 00552...

Page 53: ... the mounting screws Install the anode and test again Bonding Wires Check bonding wires for breaks corrosion or other damage Clean wire terminals with solvent Replace if necessary Metallic Component Protection Protect metal components on outboards from cor rosion Use the following products to minimize corrosion Anti Corrosion Spray provides a heavy waxy coating to protect components 6 in 1 Multi P...

Page 54: ... outboard at IDLE only for at least five minutes IMPORTANT To prevent damage do not run outboard above fast idle Water must flow from the water pump indicator If it does not shut off the outboard and repair as needed Shut OFF the outboard Leave the outboard in VERTICAL DOWN position long enough for the water to drain from the powerhead completely Remove outboard from tank and install propeller Wat...

Page 55: ...ilter If water or sediment is found clean as follows Disconnect inlet hose and outlet hose from fuel filter Remove filter from bracket Remove cap then drain and clean filter Install cap and secure with clamp Connect hoses and secure with clamps Start engine and check for fuel leaks 005528 005529 005530 1 Inlet hose 2 Outlet hose 005531 1 Cap 005532 WARNING Failure to check for fuel leakage could a...

Page 56: ...e and insulate to prevent shorts or spark arcing LUBRICATION Engine Oil Oil Level Check Place outboard upright on a level surface Remove the oil level dipstick filler cap and wipe clean Reinsert dipstick fully into filler hole then remove to check oil level IMPORTANT Do not screw dipstick in to check oil level Oil level should be between full level Max line and low level Min line If oil is low add...

Page 57: ... oil drain plug Tighten plug to 114 in lbs 13 N m IMPORTANT Do not re use gasket once removed Always use a new gasket Pour recommended oil into oil filler opening then install filler cap Start the engine and allow it to run for several min utes at idle speed Turn off engine and wait for approximately two minutes Remove the oil dipstick and check oil level If oil is low add recommended oil to full ...

Page 58: ... strap can be used to check lubricant level Examine drained lubricant for excessive metal fragments and for any indication of water in oil cloudy or milky appearance Lubricant that is black in color with a burnt odor indicates worn overheated oil Pressure and vacuum check gear cases with apparent leaks Repair all leaks Refer to INSPECTION AND MAINTENANCE SCHEDULE on p 48 for service frequency and ...

Page 59: ...e points shown Throttle cable Throttle cable NSI cable Propeller shaft Swivel bracket Clamp screw Steering bracket WARNING When servicing the propeller always shift the outboard to NEUTRAL position and twist and remove all spark plug leads so the engine cannot be started accidentally ...

Page 60: ...VALVE CLEARANCE Measurement Remove side covers Refer to side cover Removal and Installation on p 177 Remove recoil starter rope start models Refer to starter REMOVAL on p 219 Remove flywheel cover electric start models Remove spark plugs Remove eight screws and port stbd cylinder head covers Rotate the flywheel clockwise to bring each piston to Top Dead Center TDC on compression stroke IMPORTANT R...

Page 61: ... IMPORTANT The valve clearance specification is for COLD engine condition Adjustment Loosen valve adjusting lock nut while holding pivot nut Turn pivot nut to bring valve clearance within specification Tighten lock nut to 95 in lbs 11 N m while hold ing pivot nut Recheck valve clearance Tighten the cylinder head cover screws to 88 in lbs 10 N m IMPORTANT Do not re use cylinder head cover gasket Al...

Page 62: ...has stabilized If idle speed is out of specification adjust as fol lows Turn the throttle stop screw Clockwise Engine speed increases Counterclockwise Engine speed decreases IGNITION TIMING IMPORTANT Before checking ignition timing make sure idle speed is adjusted within specifica tion Start and warm the engine Connect a shop tachometer and timing light to the no 1 cylinder Check the ignition timi...

Page 63: ... to dis tribute the fogging oil throughout the cylinders Install and torque the spark plugs If outboard is equipped with a portable fuel tank disconnect fuel hose from outboard and tank IMPORTANT DO NOT restart outboard until it goes back into service If the outboard is removed from boat examine all loosened and removed hardware Replace dam aged or missing parts with genuine Evinrude Johnson parts...

Page 64: ...recovery Immediate service can mini mize the corrosive affect that air has on the pol ished surfaces of the crankshaft connecting rods and internal powerhead bearings IMPORTANT If outboard cannot be started or serviced immediately it should be resubmerged in fresh water to avoid exposure to the atmosphere Engine Dropped Overboard Not Running Disconnect battery cables at the battery Rinse powerhead...

Page 65: ...les and install new spark plugs Reinstall all removed or disconnected parts Run the outboard below 1500 RPM for one half hour Change oil and filter again Engine Dropped Overboard Running Follow the same procedures as Engine Dropped Overboard Not Running However if there is any binding when the flywheel is rotated it may indicate a bent connecting rod and no attempt should be made to start the outb...

Page 66: ...64 MAINTENANCE NOTES NOTES Technician s Notes Related Documents Bulletins Instruction Sheets Other ...

Page 67: ...L PRESSURE CAUTION SYSTEM 67 OVERHEAT CAUTION SYSTEM 67 OIL PRESSURE CAUTION SYSTEM TESTS 67 OIL PRESSURE SWITCH SERVICE 68 TEMPERATURE SENSOR TESTS 69 BATTERY CHARGING SYSTEM 70 INSPECTION 71 REMOVAL AND INSTALLATION 73 ELECTRIC STARTER SYSTEM 74 OPERATION 74 TROUBLESHOOTING 76 INSPECTION 77 STARTER MOTOR SERVICE 79 ...

Page 68: ...ill be automatically lowered to approxi mately 3000 RPM by intermittent ignition If the operator decreases engine speed to less than approximately 5500 RPM within 10 sec onds the over revolution caution control will be cancelled During operation of the over revolution caution control the caution lamp is ON To cancel the over revolution caution control close the throttle to reduce engine speed belo...

Page 69: ...t caution system activates when the cylinder wall temperature is higher than 230 F 110 C Caution lamp turns ON Buzzer sounds remote models Engine speed is reduced to approximately 2000 RPM through intermittent ignition signals To cancel the overheat caution control Cylinder wall temperature must be reduced to less than 185 F 85 C and Engine speed must be reduced to 1500 RPM or lower Oil Pressure C...

Page 70: ... battery Pink wire to battery positive Black wire to battery negative If lamp does not light replace lamp Oil Pressure Switch Service Removal Loosen screw and disconnect blue lead wire from oil pressure switch Remove the oil pressure switch Installation Installation is reverse order of removal with spe cial attention to the following steps Before installing oil pressure switch wrap threads with se...

Page 71: ...d temperature change over time Remove the temperature sensor from the engine Connect an ohmmeter to sensor lead wires Place the sensor s tip in water and gradually heat the water while monitoring changes in resistance Sensor resistance should be as follows 32 F 0 C 5 3 to 6 6 kΩ 77 F 25 C 1 8 to 2 3 kΩ 122 F 50 C 0 73 to 0 96 kΩ 167 F 75 C 0 33 to 0 45 kΩ 1 Temperature sensor 005557 1 1 Thermomete...

Page 72: ...o charge the battery Manual start models Electric start models B W W B W B Y R W Y R B R Magneto Fuse 20 A Option Receptacle plug Y tube R tube Battery 12 V Rectifier Regulator Battery charge coil 12 V 80 W M R B B W W B R R R Y R Y R Y Y Y Y R W Y G R 1 To starter button Tiller handle model PTC heater Magneto Starter motor Fuse 20 A Battery 1 Battery charge coil 12 V 120 W To ignition switch Remo...

Page 73: ...tart models If measurement is out of specification replace the battery charge coil Battery Charge Coil Resistance Disconnect battery charge coil wires from rectifier Connect Ohmmeter test probes to battery charge coil lead wires as shown Battery charge coil resistance 0 27 to 0 41 Ω 80 W coil 0 24 to 0 36 Ω 180 W coil If measurement is out of specification replace the battery charge coil Tester pr...

Page 74: ...n replace the rectifier and regulator Fuse Remove the fuse from fuse case Inspect the fuse and replace with a new 20 amp fuse if needed Tester probe Red Tester probe Black Black White Yellow 1 Red Yellow 2 Yellow 3 Black 7 11 2 4 2 4 2 3 7 11 White 0 Yellow 1 160 240 2 4 400 600 400 600 2 4 Red 160 240 2 4 400 600 400 600 2 4 Yellow 2 Yellow 3 0 004721 Red Yellow 1 Yellow 3 Yellow 2 White Black 1 ...

Page 75: ...ical parts Disconnect battery cables at the battery Twist and remove all spark plug leads Battery Charge Coil Remove flywheel screws and battery charge coil Refer to COMPONENT SERVICING on p 99 Rectifier and Regulator Remove the screws securing the rectifier and reg ulator Disconnect lead wire connectors Installation Installation is reverse order of removal with spe cial attention to the following...

Page 76: ...tic switch main contacts to close and engine cranking to take place When the engine starts the pinion over running clutch protects the armature from excessive speed until the starter button is opened at which time the torsion spring causes the pinion to disengage W R W R B Br Br Br Br W R R R R R R W R W R W R W R B Br Br W R R R R R R R R Y G Y G Y G Y G Y G Y G Y G Y G Y G 1 2 Magnetic switch Pu...

Page 77: ...R R R R R Y G Y G Y G Y G Y G Y G Y G Y G Y G Y G Y G Y G B 1 2 Remote Models Magnetic switch Pull in coil Hold in coil Plunger Shift lever Ring gear Pinion over running clutch Starter motor Fuse 20A Battery Starter relay Movable contact Stationary contact Neutral switch Ignition switch ...

Page 78: ...k neutral switch Refer to page 77 Check ignition switch Refer to page 77 Check starter button Refer to page 77 Check starter relay Refer to page 77 Check wiring system and connections be tween starter relay and ignition switch or starter button Remove starter motor from engine Does starter motor turn under no load condi tions by connecting battery terminal to M terminal of starter motor and batter...

Page 79: ...ral switch lead wire Check continuity between lead wires while operat ing the shift lever of remote control If out of specification Check switch position adjustment Replace neutral switch IMPORTANT After installing neutral switch check for proper function Starter Motor Relay Remove CDI unit Pull out relay and relay holder from electric parts holder then remove relay holder from starter Key Positio...

Page 80: ...en check continuity between ter minal 1 and 2 when 12 V is applied Measure resistance between relay terminals 3 and 4 Starter motor relay solenoid coil resistance 145 to 190 Ω If any of the above measurements are out of spec ification replace starter motor relay 1 Starter relay 005568 005569 1 004731 12 V Power Continuity Applied Yes Not Applied No 004732 ...

Page 81: ...rews securing starter motor and bracket Lift up and remove bracket Lift up starter motor then remove nut positive battery cable and positive battery charge cable from the magnetic switch B terminal of starter motor Disconnect the red lead wire from starter motor magnetic switch S terminal 1 Flywheel 005570 1 Starter motor band screw 005571 1 1 Starter motor bracket screws 2 Bracket 005572 1 Nut 2 ...

Page 82: ...h a clean cloth IMPORTANT Before disassembling starter motor put match marks at three locations A B and C to avoid any possible alignment mistakes Remove nut from magnetic switch then discon nect the connecting wire Remove two screws securing magnetic switch Remove the magnetic switch Remove screws long through bolts and rear cover Remove thrust washer with screwdriver 004741 1 Nut 2 Connecting wi...

Page 83: ...lanetary gears and internal gear Remove the center bracket with shift lever pin ion and pinion shaft from front housing Remove the shift lever Push the pinion stopper down then pry off the stopper ring 1 Brush spring 2 Brush holder 004746 1 Yoke 2 Armature 004747 1 Center cover plate 2 Planetary gears 3 Internal gear 004748 1 Center bracket 2 Shift lever 3 Pinion 4 Pinion shaft 5 Front housing 004...

Page 84: ...enter bracket Inspection and Servicing Armature and Commutator Inspect the commutator surface If gummy or dirty clean with 500 grit emery cloth WARNING Wear safety glasses when disassembling and assembling stopper ring 1 Pinion stopper 2 Stopper ring 3 Pinion 004751 1 E ring 004752 1 Pinion shaft 2 Washers 3 Rubber ring 004753 1 Commutator 004754 ...

Page 85: ...to 0 8 mm Service limit 0 01 in 0 2 mm If measurement exceeds service limit cut to spec ified depth IMPORTANT Remove all particles of mica and metal with compressed air Check for continuity between the commutator and the armature core shaft Replace armature if con tinuity is indicated Check for continuity between adjacent commuta tor segments Replace armature if no continuity is indicated 004755 1...

Page 86: ...cification replace the brush holder Brush Spring Inspect brush spring for wear damage or other abnormal conditions Check the brush spring tension Standard 3 3 to 4 0 lb 15 to 18 N Replace if necessary Shift Lever Inspect shift lever for wear Replace if necessary 1 Brush 004759 1 Base plate 004760 Tester probe connection Continuity Brush holder positive to brush holder negative No Brush holder posi...

Page 87: ...necessary Inspect spline teeth for wear or other damage Inspect pinion for smooth movement Replace if necessary Gear Inspect planetary gears and internal gear for wear damage or other abnormal conditions Replace if necessary Pinion Shaft Pinion Shaft Bush Inspect pinion shaft for wear damage or other abnormal conditions Replace if necessary Inspect pinion shaft bushing for wear or other damage Rep...

Page 88: ...r wear or other damage Replace if necessary Armature Shaft Bushing Inspect bushing for wear or other damage Replace if necessary Plunger Inspect plunger for wear or other damage Replace if necessary Magnetic Switch Push in plunger and release The plunger should return quickly to its original position Replace if necessary 004767 004768 004769 1 Plunger 004770 ...

Page 89: ...tinuity across magnetic switch S terminal and coil case If no continuity replace coil Place plunger against a flat surface and push the magnetic switch down With switch held down check for continuity between terminal B and ter minal M If no continuity replace the magnetic switch and or plunger 1 S terminal 2 M terminal 3 B terminal 004771 004772 004773 ...

Page 90: ...avoid breaking brushes 7 N m 0 7 kg m 5 1 lb ft 5 5 N m 0 55 kg m 4 0 lb ft 1 Nut 2 Screw 3 Magnetic switch 4 Gasket 5 Spring 6 Plunger 7 Torsion spring 8 Rubber packing 9 Shift lever 10 Front housing 11 Screw 12 Through bolt 13 Rear cover 14 Thrust washer 15 Brush holder 16 Yoke 17 Armature 18 Center cover plate 19 Internal gear 20 Planetary gear 21 Pinion shaft 22 Pinion 23 E ring 24 Washer 25 C...

Page 91: ...hile connected as above with plunger out dis connect negative lead from terminal M Check that plunger and pinion remain out If plunger and pinion return inward replace mag netic switch Plunger and Pinion Return Test Disconnect negative lead from switch motor body Check that plunger and pinion return inward If plunger and don t return inward replace magnetic switch WARNING When performing the follo...

Page 92: ...n moving out Check that ammeter indicates 90 A at 11 V Installation Installation is reverse order of removal with spe cial attention to the following steps Place starter motor in position then install two dowel pins and motor bracket Tighten starter and bracket screws to 16 5 ft lbs 23 N m Check wire routing Refer to WIRE ROUTING on p 229 004777 1 Dowel pins 005575 005576 1 1 ...

Page 93: ... SERVICE CHART 92 OPERATION 93 TROUBLESHOOTING 94 IGNITION TESTS 95 POWER SOURCE COIL STATOR 95 CRANKSHAFT POSITION SENSOR 96 IGNITION COIL 97 CDI UNIT 98 SPARK PLUG CAP 98 ENGINE STOP SWITCH 98 COMPONENT SERVICING 99 REMOVAL 99 INSTALLATION 101 NOTES 102 ...

Page 94: ... sensor 6 Screw 7 Charge coil Stator 8 Bolt 142 lb ft 196 N m Crankshaft NOTE Clean flywheel and crankshaft mating surfaces with cleaning solvent F F H A Triple Guard Grease B Gasket Sealing Compound C Adhesive 847 D Moly Lube F Blue Nut Lock H Outboard Lubricant R DPL Penetrating Lube W HPF XR Gear Oil 005571 ...

Page 95: ...n varies from 2 BTDC to 27 BTDC based on engine speed Engine stop switch Power source coil CKP sensor No 1 CKP sensor No 2 Neutral switch Oil pressure switch Cylinder temp sensor Condenser Ignition coil No 1 Ignition coil No 2 Caution lamp Caution buzzer Battery 12V Tachometer CPU GND 1 Power source circuit Charging circuit 2 Power source circuit 3 Noise filter circuit 1 4 Noise filter circuit 2 5...

Page 96: ...heck spark plug cap for any evidence of high tension leak Check spark plug cap resistance Cap resistance 8 12 kΩ Check power source coil resistance Refer to page 95 Coil resistance 20 0 31 0 Ω Check the crankshaft position sensor Refer to page 96 OK OK OK OK OK No or weak sparks No or weak sparks Sparks Check ignition timing by using timing light 2 BTDC at 1000 RPM Sparks NO Out of Spec NO Out of ...

Page 97: ...ent is out of specification replace power source coil Resistance Test Disconnect power source coil lead wire connector from CDI unit Connect ohmmeter to coil lead wires as shown Power source coil resistance 20 0 to 31 0 Ω If measurement is out of specification replace power source coil WARNING Always disconnect the battery cables at the battery before beginning resistance tests Tester probe connec...

Page 98: ... 3 6 V or over If measurement is out of specification replace power source coil Resistance Test Disconnect sensor lead wire connector from CDI unit Connect ohmmeter test probes to coil lead wires as shown Pulser coil resistance White black 148 to 222 Ω Brown black 148 to 222 Ω If measurement is out of specification replace the crankshaft position sensor Sensor Tester probe connection Red Black No ...

Page 99: ...ment is out of specification replace the ignition coil Secondary Resistance Test Remove the spark plug caps from the high ten sion leads Connect ohmmeter test probes black primary lead and to the high tension lead as shown Secondary ignition coil resistance 4 8 to 7 2 kΩ If measurement is out of specification replace the ignition coil Tester probe connection Red Black Orange Black 005575 Tester pr...

Page 100: ...t of specification replace power source coil Spark Plug Cap Resistance Test Measure spark plug cap resistance Spark plug cap resistance 8 to 12 kΩ If measurement is out of specification replace the spark plug cap Engine Stop Switch Check continuity between stop switch Blue Red and Black leads as follows Igniton coil Tester probe connection Red Black No 1 Test cord gray wire Black Ground No 2 Test ...

Page 101: ...ee bolts and flywheel cover Remove manual starter if applicable Refer to starter REMOVAL on p 219 Use Flywheel Holder P N 5034227 and Screws P N 5034235 to loosen the flywheel bolt 2 3 turns IMPORTANT Do not remove flywheel bolt at this time to avoid damage to crankshaft when using flywheel puller WARNING Before removing ignition parts Disconnect battery cables at the battery Twist and remove all ...

Page 102: ...ts handle and tighten pressing screw until fly wheel releases Remove the flywheel nut washer flywheel and key Disconnect the 6 pin wiring harness connector from CDI unit Remove bolt securing the ignition coil ground wire Disconnect ignition coil lead connectors 1 Universal puller 2 Screw and washer set 005585 1 Flywheel bolt 2 Washer 3 Flywheel 4 Key 005586 1 2 005587 1 Coil ground lead 005588 1 I...

Page 103: ...f crankshaft position sensor screws and tighten screws securely Clean flywheel and crankshaft mating surfaces with cleaning solvent Apply outboard lubricant to flywheel bolt and washer before installing Use Flywheel Holder P N 5034227 and Screws P N 5034235 to hold the flywheel Tighten bolt to 142 ft lbs 196 N m Final Assembly Check Perform the following checks to ensure proper and safe operation ...

Page 104: ...102 IGNITION SYSTEM NOTES NOTES Technician s Notes Related Documents Bulletins Instruction Sheets Other ...

Page 105: ...LERATOR PUMP 106 AUTO ENRICHENER SYSTEM 107 MANUAL STARTER SYSTEM 108 CARBURETOR SERVICE 109 REMOVAL 109 DISASSEMBLY 110 CLEANING AND INSPECTION 112 ASSEMBLY 114 INSTALLATION 116 FUEL PUMP 117 REMOVAL 117 INSPECTION 117 INSTALLATION 117 INTAKE MANIFOLD SERVICE 118 REMOVAL 118 INSTALLATION 119 THROTTLE CONTROL 120 INSTALLATION ADJUSTMENT 120 NOTES 122 ...

Page 106: ...ream These ports serve as air passages As the pilot screw is turned clockwise screwed in the mixture A F will become leaner As the screw is turned counterclockwise screwed out the mixture will become richer The throttle stop screw adjusts idling trolling speed When the stop screw is turned clockwise screwed in the speed raises and when turned counterclockwise screwed out the speed lowers Fuel inle...

Page 107: ...e optimum mixture ratio A F is maintained raising engine speed smoothly Mid High Speed When the throttle valve opens further and engine speed rises fuel passes through the main jet and enters the main nozzle in which it is mixed with air supplied from the main air jet before sprayed into the main bore 1 Pilot jet 2 Pilot air jet 3 Pilot outlet 4 Bypass port 5 Pilot screw 6 Throttle valve AIR FUEL ...

Page 108: ...dicated by the arrow with spring force causing the plunger to be depressed Because the lower check valve closes due to pressure fuel inside the accelerator pump chamber forces the upper check valve open causing fuel to be sprayed to the main bore through the acceleration nozzle When the throttle lever returns the accelerator pump lever moves in the opposite direction of the arrow which causes the ...

Page 109: ...art of the fuel pipe and mixes again with air coming through a passage extending from main bore The two successive mixings of fuel with air are such that proper fuel air mixture for starting is produced when the mixture is sprayed out through outlet port into the main bore When the engine is cold The auto enrichener passage is open when the thermo wax is at atmospheric temperature When the engine ...

Page 110: ...t of float chamber The mixture rich in fuel content reaches starter plunger and mixes again with the air coming through a passage extending from main bore The two successive mixings of fuel with air produce the proper fuel air mixture for starting when the mix ture is sprayed out through starter outlet port into the main bore 1 Float chamber 2 Starter jet 3 Fuel pipe 4 Float chamber 5 Starter plun...

Page 111: ... models Unscrew the starter cable lock nut then remove starter cable with starter plunger Remote models Disconnect the auto enrichener lead wire con nector Remove two screws securing plate Remove two screws securing carburetor Remove plate outlet tube carburetor gasket insulator and gasket Detach fuel hose from carburetor inlet 1 Starter cable lock nut 2 Starter cable 3 Starter plunger 005597 0055...

Page 112: ...guard Remove the four screws securing the top cover then remove the cover and gasket IMPORTANT On carburetors with covered pilot screw DO NOT remove the cover and adjust pilot screw 1 Screws 2 Auto enrichener 3 Heater guard 005606 005607 1 Top cover 004659 1 Top cover 2 Gasket 3 Pilot screw cover 004660 ...

Page 113: ... four screws securing the float cham ber then remove the chamber and gasket Remove the float pin screw Remove float float pin and needle valve 1 Float chamber 004661 1 Gasket 004662 1 Float pin screw 004663 1 Float 2 Float pin 3 Needle valve 004664 ...

Page 114: ...ing tank Strong cleaners might damage components or remove sealing com pounds Flush all carburetor holes and passages with a small syringe filled with isopropyl alcohol Blow passages and carburetor dry with compressed air of not more than 25 psi 172 kPa When drying passages direct the flow of shop air opposite to the direction of fuel flow IMPORTANT Wire or small drill bits must not be used to cle...

Page 115: ... found replace assembly Inspect the float Inspect the auto enrichener needle valve If bro ken tip or wear is found replace the auto enrichener Connect the auto enrichener leads to a 12 V bat tery Check that the PTC heater area is heated 5 minutes after battery has been connected IMPORTANT Do not attempt to disassemble the auto enrichener 004669 004670 004671 004672 1 PTC heater 004674 ...

Page 116: ... Float chamber 16 Drain screw 17 O ring 18 U ring 19 Top cover 20 Screw 21 Cable holder 22 Cable guide 23 Cable sealing cap 24 Starter valve 25 Spring 26 O ring 27 Drain hose 28 Clip 29 Heater guard 30 Screw 31 Starter assy 32 Clip 33 Cap 34 Plunger 35 Spring 36 Starter knob assy 23 22 2126 25 24 31 30 29 20 19 18 36 1 4 5 2 3 14 16 17 15 20 28 27 35 34 32 33 11 10 8 7 9 6 1213 Electric models Rop...

Page 117: ...tall the float with float pin and needle valve Secure float pin with screw IMPORTANT After installing float inspect for smooth movement of float Measure and adjust float height Float height 13 5 2 mm Check that accelerator pump plunger operates smoothly and together with throttle lever 004675 004676 1 Float height 004677 004676 ...

Page 118: ...n lbs 10 N m Tiller models Install starter cable with starter plunger then tighten the starter cable lock nut securely Perform the following checks to ensure proper and safe operation All parts removed have been returned to their original positions No fuel leakage is evident when fuel system is pressurized 1 Insulator gasket 2 Insulator 3 Carburetor gasket 4 Projection 005602 1 Outlet tube 2 Plate...

Page 119: ...mp Inspect fuel pump for leaks cracks or damage Installation Installation is reverse order of removal with spe cial attention to the following steps IMPORTANT Before installing fuel pump rotate the crankshaft to bring the No 1 top cylinder pis ton to Top Dead Center on a compression stroke Tighten fuel pump bolts 88 in lbs 10 N m 1 Fuel filter 005609 1 Inlet hose 2 Outlet hose 3 Screws 4 Fuel pump...

Page 120: ...arburetor assembly Refer to CAR BURETOR SERVICE on p 109 Remove the fuel filter from filter bracket Remove two screws securing rectifier regulator Disconnect rectifier lead wire connectors Remove screw throttle drum with throttle cables and throttle cam Remove two screws and cable bracket Remove six screws and intake manifold 1 Fuel filter 2 Rectifier 3 Rectifier screws 005364 2 3 3 1 1 Throttle d...

Page 121: ... mani fold gaskets are shaped differently Tighten manifold screws 220 in lbs 25 N m Install rectifier regulator and fuel filter Install carburetor Refer to CARBURETOR SER VICE on p 109 Install recoil starter or flywheel cover 005637 1 Manifold screws 005638 WARNING After servicing the fuel system check for leaks Failure to check for fuel leakage could allow a leak to go undetected resulting in fir...

Page 122: ...sition Install throttle control cables 3 to throttle drum 4 and cable holder 5 Turn lock nut 6 in appropriate direction to install inner cable with no sag Tighten the lock nut to secure throttle cable to cable bracket Rotate the throttle control grip from fully closed position to fully open position several times With the throttle control grip at full close make sure the match mark a on throttle c...

Page 123: ...le brackets 5 Align the match mark b on interlink throttle lever 4 with the cylinder block rib C and hold this position Align the match mark a on the throttle cam 6 with the center of throttle lever roller 7 then hold this condition unmoved and turn the cable lock nuts 8 so as to removed play on inner cables Tighten the lock nuts securely ...

Page 124: ...122 FUEL SYSTEM NOTES NOTES Technician s Notes Related Documents Bulletins Instruction Sheets Other ...

Page 125: ...133 OIL PUMP 135 DISASSEMBLY 135 INSPECTION 135 ASSEMBLY 135 CYLINDER HEAD 136 REMOVAL 136 DISASSEMBLY 138 CLEANING INSPECTION 139 ASSEMBLY 143 INSTALLATION 146 CRANKSHAFT PISTONS AND CAMSHAFT 149 DISASSEMBLY 149 CLEANING INSPECTION 151 ASSEMBLY 159 THERMOSTAT SERVICE 166 REMOVAL 166 INSPECTION 167 INSTALLATION 167 COOLING SYSTEM DIAGRAM 168 ENGINE LUBRICATION DIAGRAM 169 NOTES 170 ...

Page 126: ...IONS Item Unit Data 25 HP CYLINDER HEAD CAMSHAFT Cylinder head distortion Limit mm in 0 05 0 002 Cam height IN STD mm in 32 921 33 081 1 2961 1 3024 Limit mm in 32 821 1 2922 EX STD mm in 32 921 33 081 1 2961 1 3024 Limit mm in 32 821 1 2922 ...

Page 127: ...outside diameter IN STD mm in 5 465 5 480 0 2152 0 2157 EX STD mm in 5 450 5 465 0 2146 0 2152 Valve guide protrusion IN STD mm in 14 2 0 5591 EX STD mm in 12 5 0 4921 Valve stem deflection IN LIMIT mm in 0 014 0 006 EX LIMIT mm in 0 018 0 007 Valve stem runout IN EX LIMIT mm in 0 05 0 002 Valve head radial runout IN EX LIMIT mm in 0 08 0 003 Valve head thickness IN STD mm in 1 0 0 0394 LIMIT mm i...

Page 128: ...028 2nd STD mm in 0 35 0 50 0 0138 0 0197 Limit mm in 1 00 0 039 Piston ring free end gap 1st STD mm in Approx 8 0 0 3150 Limit mm in 6 4 0 2520 2nd STD mm in Approx 10 0 3937 Limit mm in 8 0 0 3150 Piston ring to groove clearance 1st STD mm in 0 030 0 070 0 0012 0 0028 Limit mm in 0 12 0 005 2nd STD mm in 0 020 0 060 0 0008 0 0024 Limit mm in 0 10 0 004 Piston ring groove width 1st STD mm in 1 02...

Page 129: ...od big end inside diameter STD mm in 39 015 39 025 1 5360 1 5364 Crank pin outside diameter STD mm in 38 990 39 000 1 5350 1 5354 Crank pin out side diameter difference Limit mm in 0 010 0 0004 Connecting rod big end side clearance STD mm in 0 07 0 30 0 0028 0 0118 Limit mm in 1 0 0 0394 Connecting rod big end width STD mm in 21 95 22 05 0 8642 0 8681 Crank pin width STD mm in 44 170 44 220 1 7390...

Page 130: ...tion greater than 14 psi 100 kPa between cylinders check for Excessively worn cylinder wall Worn piston Worn or stuck piston rings Poor seating of valves Ruptured or damaged cylinder head gasket Install all parts that were removed 005554 WARNING Disconnect the safety lanyard from the emergency stop switch prior to cranking the engine This will prevent any residual fuel from the cylinders from bein...

Page 131: ...shift into forward gear and increase speed to 3000 RPM Pressure should read 28 to 43 psi 200 to 300 kPa at 3000 RPM IMPORTANT The values shown are guidelines only not absolute service limits If oil pressure is lower or higher than specification consider the following causes Low oil pressure Clogged oil filter Leakage from oil passages Defective oil pump Defective oil pressure regulator Damaged o r...

Page 132: ...ead covers Remove screws and two ignition coils then dis connect primary lead wire connectors Disconnect temperature sensor wire connector and neutral switch wire connector Disconnect stop switch wire connector and oil pressure switch wire Remove screw and wire clamp WARNING To prevent accidental starting of engine while servicing twist and remove spark plug leads 1 Cylinder head cover 2 Cover scr...

Page 133: ...ING on p 99 Disconnect all engine wiring harness connectors from CDI unit and remove CDI unit from electric parts holder Remove two screws and electric parts holder Remove electric starter Refer to Starter Motor Service on p 79 Remove screws and wire clamps 005584 1 CDI unit 005642 1 Holder screws 005643 1 1 005572 1 Clamp 005644 1 ...

Page 134: ...ATION Remove twelve powerhead mounting screws and two nuts Remove two screws securing front panel to crank case Lift powerhead from oil pan Loosen clamp and remove oil strainer 005645 005646 005647 005648 005649 1 Oil strainer 005650 1 ...

Page 135: ...Coat the driveshaft splines with Moly Lube Do not apply lubricant to end of driveshaft Lower the powerhead on to oil pan If necessary rotate crankshaft to align crankshaft and drive shaft splines Apply Gasket Sealing Compound to mounting screws Install and tighten 12 screws and two nuts as follows 8 mm 16 5 ft lb 23 N m 10 mm 36 ft lb 50 N m 1 Oil strainer 2 Clamp 005650 1 Dowel pins 2 Gasket 0056...

Page 136: ...n p 223 Install fuel system components Refer to FUEL SYSTEM on p 103 Confirm correct wire and hose routing Refer to WIRE HOSE ROUTING on p 225 Fill crankcase with recommended engine oil Refer to Engine Oil on p 54 Install side covers Refer to side cover Removal and Installation on p 177 Check for fuel oil or water leaks IMPORTANT To avoid permanent powerhead damage instruct operator to repeat the ...

Page 137: ...xcessive wear or damage Replace as necessary Assembly Apply a thin coat of engine oil to inner and outer rotors inside surfaces of oil pump case and plate Install outer and inner rotors in pump case IMPORTANT Punch marks on rotors must face rotor plate Install rotor plate and tighten screws 88 in lbs 10 N m 1 Oil pump rotor plate 005655 1 Inner rotor 2 Outer rotor 005656 005657 1 2 1 1 Punch marks...

Page 138: ...nt plate Remove oil pump Refer to OIL PUMP on p 135 Loosen and remove valve adjusting lock nuts then remove pivot nuts and rocker arms IMPORTANT Mark each rocker arm for reas sembly in its original location Remove push rods Remove screws and push rod guide 1 Starter motor band 005660 005661 1 Lock nuts 2 Pivot nuts 3 Rocker arms 005662 1 Push rod 2 Guide screws 3 Pushrod guide 005663 1 2 3 2 1 ...

Page 139: ...e be sure rocker arms have been removed before removing bottom half of crankcase Place spacer from Crankshaft Remover Installer Kit P N 5037487 on crankshaft as shown Install Crankshaft Remover then lift and remove the bottom crankcase by turning bolt 1 Thermostat cover 2 Oil gallery plate 005664 1 Thermostat 005665 1 Idle gear shaft nut 2 Stud 005666 1 2 1 1 2 2 1 Bottom crankcase 005667 1 Spacer...

Page 140: ... attachment from Valve Lifter Adaptor Kit P N 5000899 and tweezers to remove valve cot ters while compressing valve spring IMPORTANT Mark each valve and valve spring for reassembly in its original location Starboard Cylinder Head 005670 Port Cylinder Head 005671 1 Valve spring compressor 2 Attachment 005680 1 Valve cotters 2 Attachment A 3 Tweezers 004509 1 2 ...

Page 141: ...scuff or nick metal surfaces Inspect intake and exhaust ports combustion chambers head surface and valve seat If cracks or other damage are found replace cylin der head Check for cylinder head warpage using a piece of bar stock or machinist s straightedge and a feeler gauge set Measure distortion across six locations Cylinder head warpage must not exceed 0 002 in 0 05 1 Cotters 2 Retainer 3 Spring...

Page 142: ...r damaged Inspect push rods Replace if bent or worn Valve Valve Guide To check valve guide to valve stem clearance measure the following Valve stem outside diameter IN 0 2152 to 0 2157 in 5 465 to 5 480 mm EX 0 2146 to 0 2152 in 5 450 to 5 465 mm Valve guide inside diameter IN 0 2165 to 0 2170 in 5 500 to 5 512 mm EX 0 2165 to 0 2170 in 5 500 to 5 512 mm 005674 005675 005676 005677 004525 Valve gu...

Page 143: ...n 0 14 mm EX 0 007 in 0 18 mm If measurement exceeds service limit replace valve If measurement still exceeds service limit with new valve replace valve guide Inspect valve stem end face for pitting and wear If necessary valve stem end may be resurfaced Use caution when resurfacing do not grind away stem end chamfer When chamfer has been worn away replace valve Measure valve stem runout If measure...

Page 144: ...Blue Install valve into valve guide Put valve lapper on valve Rotate valve while gently tapping valve contact area against seat Repeat until a continuous pattern in the Prussian Blue is seen Measure valve seat contact width Service limit 0 04 to 0 05 in 1 1 to 1 3 mm If measurement exceeds service limit repair valve seat Refer to Valve Seat Servicing on p 144 1 Valve head thickness 004530 1 Valve ...

Page 145: ...to 28 2 lbs 111 to 128 N for 1 24 in 31 5 mm Service limit 22 5 lbs 102 N for 1 24 in 31 5 mm Assembly Valve Guide Replacement IMPORTANT Be careful not to damage cylinder head when replacing valve guide Drive valve guide out toward valve spring side IMPORTANT Do not reuse valve guide once it has been removed Always use a new valve guide oversize when assembling Ream valve guide hole with 10 5 mm r...

Page 146: ...ced Both intake and exhaust valve seats have three chamfer angles IN 30 45 60 EX 30 45 75 Use 45 cutter to reface valve seat IMPORTANT Turn cutter clockwise never counterclockwise Measure valve seat contact width Refer to Valve Valve Guide on p 140 If width is too high wide reface valve seat using 30 cutter If width is to low narrow reface valve seat using 60 cutter intake or 75 cutter exhaust IMP...

Page 147: ...tween seat and valve If any leaks occur inspect valve seat and face for burrs Valves Apply Nut Lock to threads of rocker arm pivot bolts Install pivot bolts and tighten 16 5 ft lbs 23 N m Install valve spring seat Apply oil to valve stem seal and push seal onto valve guide IMPORTANT Do not re use valve stem seal once removed Always install a new valve stem seal Apply oil to stem seal valve guide b...

Page 148: ...to install valve cot ters Make sure valve cotters are properly seated in groove Installation IMPORTANT Do not re use gasket Always use a new gasket Insert dowel pins and place a new cylinder head gasket into position on cylinder block Position cylinder head on cylinder block Apply engine oil to cylinder head screws 1 Wide spiral area 2 Narrow spiral area 3 Valve 4 Valve spring 5 Retainer 6 Cotters...

Page 149: ...efer to Idle Gear on p 164 Place bottom crankcase into position Install 8 mm and 10 mm screws from Crankshaft Remover Installer Kit P N 5037487 in positions shown Tighten each screw gradually and evenly until they bottom IMPORTANT Crankcase and cylinder block surfaces should always be held parallel Tap four corners of crankcase with a rubber hammer while gradually tightening screws When special to...

Page 150: ...usting lock nuts on to pivot bolts IMPORTANT Reassemble each rocker arm in its original location Adjust valve clearance Refer to VALVE CLEAR ANCE on p 58 Install crankcase front plate and screws Install oil pump components Refer to OIL PUMP on p 135 Install powerhead Refer to powerhead REMOVAL AND INSTALLATION on p 130 1 Idle gear shaft nut 2 Stud 005666 1 Thermostat cover 2 Oil gallery plate 0056...

Page 151: ...ylinder head assemblies Refer to cylinder head Removal on p 136 Remove the idle gear and camshaft Remove the four tappets Remove connecting rod screws and caps Push piston and connecting rod out through the top of cylinder bore IMPORTANT Mark cylinder number on all con necting rods and pistons for proper reassembly 1 Camshaft 005697 1 Tappets 005698 1 1 005699 005700 ...

Page 152: ...aller Kit P N 5037487 as shown Push crankshaft out by turning bolt Remove oil filter and oil pressure switch Remove shaft and washer from idle gear Remove circlip washer and no 1 gear Remove the spring plate 1 Circlips 2 Piston pin 3 Connecting rod 4 Piston 5 Piston rings 004566 005701 1 Oil pressure switch 005702 1 Shaft 2 Washer 005703 1 Circlip 2 Washer 005704 1 2 1 1 2 ...

Page 153: ...i tions are found replace camshaft Use a micrometer to measure the cam height If measurement is outside service limit replace camshaft Inspect decompression parts rope start models If abnormal movement is found replace camshaft 1 No 1 gear 2 Spring plate 005705 1 Circlip 2 Washer 005706 1 No 1 gear 2 Spring plate 005707 1 2 2 1 1 2 1 Cam height 005708 Cam Height Specifications Standard Service Lim...

Page 154: ...sing a surface plate and 400 grit wet sandpaper Move the cylin der in a figure eight pattern when sanding Check water jackets for clogs or obstructions Measure the cylinder bore in the thrust and axial directions at two depth positions 1 and 2 The difference between the two depth measure ments is the cylinder bore taper The difference between the axial and transverse measurements is the cylinder b...

Page 155: ...n pin Subtract the piston skirt measurement from the cylinder bore measurement to determine clear ance Cylinder bore Standard 2 7953 to 2 7961 in 71 000 to 71 020 mm Piston skirt diameter Standard 2 7941 to 2 7949 in 70 970 to 70 990 mm Piston to cylinder clearance Standard 0 0008 to 0 0016 in 0 020 to 0 040 mm Service limit 0 0039 in 0 100 mm If measurement exceeds service limit replace the pisto...

Page 156: ...0 mm Service limit 1st ring 0 005 in 0 12 mm 2nd ring 0 004 in 0 10 mm If measurement exceeds service limit replace the piston and or piston ring Measure piston ring end gap with piston ring in the lowest position of cylinder bore If measurement exceeds service limit replace piston ring Piston ring end gap standard 1st ring 0 0047 to 0 0106 in 0 12 to 0 27 mm 2nd ring 0 0138 to 0 0197 in 0 35 to 0...

Page 157: ...mm Service limit 0 7079 in 17 980 mm Piston pin hole diameter Standard 0 7089 to 0 7092 in 18 006 to 18 014 mm Service limit 0 7098 in 18 030 mm Piston pin to piston pin hole clearance Standard 0 0002 to 0 0007 in 0 006 to 0 019 mm Service limit 0 0016 in 0 040 mm If measurement exceeds service limit replace the piston pin and or piston Connecting Rods Measure the connecting rod small end inside d...

Page 158: ... Connecting rod big end side clearance Standard 0 0028 to 0 0118 in 0 07 to 0 30 mm Service limit 0 0394 in 1 0 mm Measure the crank pin outside diameter in the thrust and axial directions at two positions as shown Check for the following Difference of the measurements at two posi tions Taper Difference between the thrust and axial mea surements Out of round Crank pin outside diameter Standard 1 5...

Page 159: ...ting rod inside diameter Standard 1 5360 to 1 5364 in 39 015 to 39 025 mm Measure connecting rod big end oil clearance as follows Clean the surfaces of rod cap and crankpin Place a piece of Plastigage on crank pin parallel to the crankshaft Avoid placing Plastigage over the oil hole Install connecting rods and caps to crankpin with marks as shown IMPORTANT Do not rotate connecting rod with Plastig...

Page 160: ...ceeds service limit replace connecting rod and or crankshaft Crankshaft Measure crankshaft runout using V blocks and a dial indicator If measurement exceeds service limit replace crankshaft and or crankcase Crankshaft runout Service limit 0 002 in 0 05 mm Inspect timing gear Replace crankshaft if dam aged or worn Oil Seals and Bearings Visually check the oil seals in the cylinder block and bottom ...

Page 161: ...w parts Upper Oil Seal and Bearing Remove upper oil seal from cylinder block Drive the bearing down and out Apply engine oil to outer surface of bearing Drive bearing into upper cavity until it bottoms on shoul der Apply engine oil to outer surface of oil seal Drive seal into position with lip spring side facing inward Do not contact seal to bearing Lower Oil Seal and Bearing Use a slide hammer an...

Page 162: ...d area of seal plate Install bearing with seal plate facing outside Drive bearing into cavity until it bottoms on shoul der Piston and Connecting Rod Apply engine oil to piston pin piston pin bore and connecting rod Fit connecting rod to piston and insert piston pin through piston and rod Install piston pin circlips with gap facing either up or down 005732 005733 1 Hatched area 2 Seal plate 005734...

Page 163: ...de rails IMPORTANT When installing spacer do not allow ends to overlap in the groove Install 2nd ring and 1st ring on piston with N mark toward the top of piston IMPORTANT 1st and 2nd ring differ in shape as shown Starboard Cylinder 1 Up mark 2 Connecting rod mark 3 Circlip gap 005736 Port Cylinder 1 Up mark 2 Connecting rod mark 005737 1 Spacer 2 Side rail 004598 1 3 2 1 2 1 Incorrect 2 Correct 0...

Page 164: ...rank pin Use Crankshaft Remover Installer P N 5037487 to pull crankshaft into position Piston to Cylinder Apply engine oil to piston and cylinder walls Place piston and connecting rod assembly into cylinder bore from cylinder head side IMPORTANT Position the up mark O on pis ton toward the flywheel 1 1st Ring 2 Oil ring lower side rail 3 2nd Ring 4 Oil ring upper side rail 5 Piston O mark 004602 0...

Page 165: ...rews Tighten screws in two stages 1st step 52 in lbs 6 N m Final step 105 in lbs 12 N m Camshaft Timing Gear Fit the spring plate on the no 2 gear so that the pin contacts the end of the spring plate Install the no 1 gear on the no 2 gear so that the pin contacts the other end of the spring plate Install washer and circlip 1 Dowel pin 005742 005743 1 Spring plate 2 No 2 gear 3 Pin 005744 1 No 1 ge...

Page 166: ...t P N 5037488 through the holes in both gears as shown Install camshaft in cylinder block Idle Gear Fit the scissors gear spring plate on the no 2 gear as shown Install the no 1 gear on the no 2 gear so that the pin fits into the half round hole on the end of the spring plate Install washer and circlip 1 Tappets 005698 1 Alignment pin 005747 005748 1 1 1 Spring plate 005749 1 No 1 gear 2 Pin 3 Spr...

Page 167: ...n both gears as shown Install the idle gear Check that aligning marks on all three gears match as shown Install cylinder heads and bottom crankcase Refer to Installation on p 146 When bottom crankcase has been installed check that marks on idle gear and camshaft are still in alignment Remove alignment pin tools 1 Shaft 2 Washer 005703 005759 1 Alignment pin 005760 2 1 1 1 Alignment marks 005761 1 ...

Page 168: ...er to Engine Oil on p 54 IMPORTANT To avoid permanent powerhead damage instruct operator to repeat the original outboard break in procedure as described in the Operator s Guide before putting outboard back into normal service THERMOSTAT SERVICE Removal Remove the flywheel Refer to COMPONENT SERVICING on p 99 Remove the carburetor Refer to CARBURETOR SERVICE on p 109 Remove thirteen screws thermost...

Page 169: ...thermometer in container and heat water Observe water temperature when thermostat valve opens and releases thread Thermostat operating temperature Standard 136 to 144 F 58 to 62 C Installation Install thermostat thermostat cover and oil gallery plate Tighten screws 88 in lbs 10 N m Install the carburetor Refer to CARBURETOR SERVICE on p 109 Install the flywheel Refer to COMPONENT SER VICING on p 9...

Page 170: ...water passages and thermostat The cooling system cools both the powerhead and exhaust If overheating occurs inspect the cooling system for blockage corrosion or damage 005765 OIL PAN OIL PAN PILOT WATER HOLE WATER TUBE WATER PUMP CYLINDER BLOCK THERMOSTAT CYLINDER BLOCK When open STBD CYLINDER HEAD PORT CYLINDER HEAD WATER PRESSURE VALVE WATER INTAKE DRIVE SHAFT HOUSING PROPELLER EXHAUST OUTLET WA...

Page 171: ...ery A pressure regulator relief valve is positioned between the oil pump and oil filter to maintain oil pres sure at a constant level From the main gallery oil flow is directed through either drilled internal passages or splashed to those surfaces requiring lubrication 005766 OIL FILTER PRESSURE REGULATOR OIL PAN OIL PUMP OIL JET OIL JET CRANK PIN OIL STRAINER No 1 CRANKSHAFT BEARING No 2 CRANKSHA...

Page 172: ...170 POWERHEAD NOTES NOTES Technician s Notes Related Documents Bulletins Instruction Sheets Other ...

Page 173: ...172 SIDE COVER 177 REMOVAL AND INSTALLATION 177 DRIVESHAFT HOUSING AND OIL PAN 177 REMOVAL 177 DISASSEMBLY 179 CLEANING AND INSPECTION 180 ASSEMBLY 181 STERN BRACKET 184 DISASSEMBLY 184 INSPECTION 188 ASSEMBLY 188 STEERING HANDLE 193 REMOVAL 193 INSTALLATION 194 ...

Page 174: ...anel 11 Bolt 12 Pin 13 Hook 14 Screw 15 Grommet 16 Hose 17 Clip 18 Cushion 19 Shaft 20 Lever 21 Hook 22 Latch 23 Bolt 24 Washer 25 Washer 26 Washer 27 Pin 28 Bush 29 Screw 30 Cable grommet 31 Side cover seal 32 Side cover cushion 33 Protector 34 Upper mount seal STBD 35 Upper mount seal PORT 33 34 9 31 35 29 22 20 27 19 28 21 26 25 24 23 5 4 7 17 16 17 1 30 8 6 14 12 32 32 11 2 3 10 15 18 13 ...

Page 175: ...eal ring 19 Water pressure valve cover 20 Bolt 21 Gasket 22 Water flash plug 23 Upper mount cover STBD 24 Upper mount cover PORT 25 Bolt 26 Upper mount bolt 27 Washer 28 Upper thrust mount 29 Upper mount 30 Nut 31 Oil seal 22 21 23 28 27 26 31 20 19 18 17 29 28 30 1 3 4 6 2 8 9 10 11 13 15 16 7 5 30 28 24 25 29 28 27 26 12 14 50 N m 5 0 kg m 36 2 lb ft 50 N m 5 0 kg m 36 2 lb ft A F F 005769 A Tri...

Page 176: ... bracket 42 Lower thrust mount 43 Lower mount cover 44 Bolt 45 Nut 46 Lower reverse thrust mount 47 Lower side mount 48 Lower mount 49 Lower side cushion 50 Washer 51 Lower mount bolt 52 Water tube 53 Grommet 54 Bolt 54 53 52 53 35 37 51 50 41 47 38 48 42 36 40 33 32 34 39 43 44 47 46 45 64 N m 6 4 kg m 46 3 lb ft 49 F 005770 A Triple Guard Grease F Blue Nut Lock ...

Page 177: ...asher 14 Nut 15 Tilt lock pin 16 Spring 17 Stopper 18 Anode 19 Bolt 20 Steering bracket 21 Washer 22 Bush 23 Seal 24 Washer 25 Shim 26 Key 27 Lower mount bracket 28 Circlip 29 Swivel bracket 30 Bush 31 Nipple 32 Bush 33 Release lever 34 Bolt 35 Tilt stopper arm 36 Steering adjuster 37 Spring 38 Washer 39 Cover 40 Bolt 41 Anode 42 Bolt 43 Pin 44 Release link 45 Spring 46 Bolt 47 Shallow water drive...

Page 178: ...r handle cover 3 Bolt 4 Spacer 5 Shim 6 Wave washer 7 Handle grip 8 Handle rod 9 Pin 0 Adjuster A Bush B Spring C Stopper D Washer E Screw F Throttle cable G Washer H Bush I Emergency engine stop switch A A A A A A A F F F 005768 A Triple Guard Grease F Blue Nut Lock ...

Page 179: ...f removal DRIVESHAFT HOUSING AND OIL PAN Removal Remove the powerhead Refer to Powerhead Removal on p 130 Remove the gearcase Refer to Gearcase REMOVAL AND INSTALLATION on p 200 Remove E clip and pull clutch rod out from clutch arm Remove the clutch rod then slide front panel away from oil pan Remove screw and bonding wire from driveshaft housing 005772 1 Water hose 005773 005774 1 1 E clip 2 Clut...

Page 180: ...ushion lower side mounts lower mount and lower thrust mount Remove two upper mount nuts and driveshaft housing with oil pan Remove upper mount screws and washers 1 Cover screw 2 Mount cover 005777 005778 1 Washer 2 Lower side cushion 3 Lower side mount 4 Lower mount 5 Lower thrust mount 005779 WARNING When removing the upper mount nuts driveshaft housing must be firmly sup ported 1 Upper mount nut...

Page 181: ...e upper mounts and upper thrust mounts Remove six screws and oil pan Remove three screws water pressure valve cover and valve Remove screw and anode cover with anode 1 Pins 2 Cover seal 005782 1 Screws 2 Mount cover 005783 1 Upper mount 2 Upper thrust mount 005784 1 Screws 2 Oil pan 005785 1 Screw 2 Valve cover 3 Water pressure valve 005786 1 Screw 2 Cover 3 Anode 005787 ...

Page 182: ...aged Before checking the driveshaft or oil pan housings for distortion thoroughly clean the top and bottom mating surfaces and remove all sealer and corro sion Check the driveshaft and oil pan housings for dis tortion Place the housing on a surface plate Use a dial indicator to check the flatness by measuring the run out on the top edge of the housing The maximum allowable run out is 0 009 in 0 22...

Page 183: ...d to mating sur faces of driveshaft housing and oil pan Install the oil pan on the driveshaft housing and tighten six screws 36 ft lbs 50 N m Install water pressure valve seal ring and pres sure valve cover Tighten cover screws securely Install the upper thrust mounts to upper mounts 1 Grommet 2 Water tube 3 Screw 005797 1 Dowel pins 2 Apply Gasket Sealing Compound 005798 1 Oil pan to driveshaft h...

Page 184: ...ock to cover screw threads and tighten cover screws 198 in lbs 23 N m Starboard Side Mount Install the upper mount assembly into oil pan Install mount cover with arrow facing forward Be sure retaining pin on oil pan fits into retaining pin hole on the mount Apply Nut Lock to cover screw threads and tighten cover screws 198 in lbs 23 N m 1 Retaining pin 2 Retaining pin hole 005802 005803 1 Retainin...

Page 185: ...uts 36 ft lbs 50 N m Lower Mount Assemble the lower side mounts lower side cush ion and lower thrust mount to lower mount Arrow on mount must face forward when installed Place lower mount assembly into driveshaft hous ing with arrow facing forward Install lower mount screw and washer Apply Nut Lock to screw threads and tighten nut 46 ft lbs 64 N m 1 Pins 2 Cover seal 005782 005781 1 Upper mount nu...

Page 186: ...g and tighten screw securely STERN BRACKET Disassembly Remove driveshaft housing oil pan assembly Refer to Removal on p 177 Remove the two screws securing tiller handle bracket and tiller handle tiller models Remove two screws securing steering friction adjuster plate tiller models Remove circlip and lower mount bracket from the steering shaft 005809 005810 005811 005812 ...

Page 187: ...pward to remove from swivel bracket Remove washer upper bushing and steering adjuster plate Remove swivel bracket seal and lower bushing 1 Circlip 2 Lower mount bracket 3 Key 4 Shim 5 Washer 005813 1 Steering friction screwr 2 Cover 3 Washer 4 Spring 005814 1 Steering bracket 2 Washer 3 Bushing 4 Steering adjuster plate 005815 1 Seal 2 Bushing 005816 ...

Page 188: ...appropriate tool to bend lock tab away from tilt tube nut Remove nut and washer from clamp bracket shaft Remove tilt lock pin nut lower clamp bracket bolt and spacer 1 Nut 005817 1 Nut 2 Washer 3 Washer 4 Lever 5 Plate 6 Friction plate washer 7 Friction adjuster plate 8 Friction plate washer 005818 1 Screw 2 Tilt support 005819 1 Lock tab 005820 1 Washer 2 Nut 005821 1 Tilt lock pin 2 Nut 3 Bolt 4...

Page 189: ...s from each side of swivel bracket Remove screws and tilt support arms from clamp brackets Remove release lever and bushings Remove small spring two screws and shallow drive arm 1 Port clamp bracket 005823 1 Starboard clamp bracket 2 Bracket shaft 3 Swivel bracket 4 Bushing 005824 1 Screw 2 Tilt support arm 005825 1 Release lever 2 Bushings 005826 1 Spring 2 Screws 3 Shallow drive arm 005827 ...

Page 190: ...ry Assembly Assembly is reverse order of disassembly with special attention to the following steps Apply Nut Lock to threads of shallow drive arm screws Install arm and tighten screws 160 in lbs 18 N m Install arm spring as shown Apply Triple Guard grease to clamp bracket shaft and bushings 1 Reverse lock springs 005828 1 Release arm pin 2 Release link 005829 1 Cotter pin 2 Washer 3 Pin 4 Reverse ...

Page 191: ...board clamp bracket release lever bushings and swivel bracket Install clamp bracket shaft into the starboard clamp bracket with hole placed as shown Install PORT clamp bracket and washer Loosely install clamp bracket shaft nut 1 Screw 2 Tilt support arm 005825 1 Release link 2 Release lever 005833 1 Bushings 2 Swivel bracket 005834 1 Clamp bracket shaft 2 Starboard clamp bracket 3 Release lever 4 ...

Page 192: ...ilt support arms Apply Nut Lock to screw threads and tighten 160 in lbs 18 N m Assemble the steering friction adjuster set in the following order tiller models IMPORTANT Install the top washers with the rough faces facing each other 1 Spacer 2 Clamp bracket bolt 3 Washer 4 Nut 005838 005839 1 Screw 2 Tilt support 005819 1 Friction plate washer 2 Friction adjuster plate 3 Friction plate washer 4 Pl...

Page 193: ... swivel bracket The bushing outside face is tapered install the smaller diameter first IMPORTANT Make sure that steering adjuster is placed between upper bushing and swivel bracket housing Install lower bushing and seal on swivel bracket The bushing outside face is tapered install the smaller diameter first IMPORTANT Install seal with lip spring side facing down 1 Nut 005841 1 Steering adjuster pl...

Page 194: ...l washer and shim then insert key into groove on steering bracket shaft Align key with channel in lower mount bracket and install bracket Install circlip to retain bracket After completing stern bracket assembly apply Triple Guard grease at each grease fitting 1 Steering bracket shaft assembly 005845 005846 1 Washer 2 Shim 3 Key 005847 1 1 Lower mount bracket 2 Circlip 005848 005849 005850 1 ...

Page 195: ...and cable bracket Disconnect emergency stop switch wire Remove two screws and tiller handle cover Remove tiller handle and throttle cable assembly Remove two screws and handle bracket WARNING To avoid accidental starting of engine while servicing twist and remove all spark plug leads 1 Lock nuts 005789 1 Throttle cables 005790 005791 1 Tiller handle cover 2 Tiller handle assembly 005792 1 Handle b...

Page 196: ... screws 36 ft lbs 50 N m Install bushing washer wave washer shim and spacer on tiller handle Apply Nut Lock to threads of handle cover screws Install handle cover and tighten screws 198 in lbs 23 N m Install and adjust throttle cables Refer to OUT BOARD RIGGING on p 36 Check wire and cable routing Refer to WIRE HOSE ROUTING on p 225 005794 1 Bushing 2 Washer 3 Wave washer 4 Shim 5 Spacer 005795 00...

Page 197: ...Y 204 PROPELLER SHAFT BEARING HOUSING COMPONENTS 206 SHIFT ROD COMPONENTS 207 PINION BEARING 207 CLEANING AND INSPECTION 208 ASSEMBLY 209 PINION BEARING 209 FORWARD GEAR 209 PINION GEAR AND DRIVESHAFT 210 DRIVESHAFT OIL SEAL HOUSING 210 SHIFT ROD SHIFT CAM ASSEMBLY 211 PROPELLER SHAFT 212 PROPELLER SHAFT BEARING HOUSING 212 SHIMMING ADJUSTMENTS 214 SHIM WASHER POSITIONS 214 FORWARD GEAR PINION GEA...

Page 198: ...t 23 Bolt 24 Grommet 25 Water pump case 26 Pump case inner sleeve 27 Water pump impeller 28 Key 29 Seal ring 30 Under panel 31 Gasket 32 Nut 33 Washer 34 Stud bolt 1 2 4 5 6 7 8 9 18 20 19 10 3 3 23 19 20 15 16 17 22 21 11 14 13 12 32 33 34 28 24 25 26 27 29 30 31 23 N m 2 3 kg m 16 6 lb ft 10 N m 1 0 kg m 7 2 lb ft 10 N m 1 0 kg m 7 2 lb ft 11 N m 1 1 kg m 8 0 lb ft A A A C B A Triple Guard Greas...

Page 199: ...peller shaft 58 Washer 59 Reverse gear 60 Shim 61 O ring 62 Bearing 63 Propeller shaft bearing housing 64 Bearing 65 Oil seal 66 Bolt 67 Stopper 68 Propeller bush 69 Propeller 70 Spacer 71 Washer 72 Nut 73 Pin 35 40 41 42 43 44 45 46 67 68 70 71 73 72 69 36 37 38 39 47 48 49 50 51 18 N m 1 8 kg m 13 0 lb ft 24 5 N m 2 5 kg m 18 0 lb ft 10 N m 1 0 kg m 7 2 lb ft 52 54 53 56 61 60 59 55 63 57 64 62 ...

Page 200: ... for metal chips The presence of metal fuzz can indicate normal wear of the gears bearings or shafts within the gearcase Metal chips can indicate extensive internal damage Inspection Inspect the lubricant for water contamination Water in the lubricant can cause a milky appear ance however normal aeration can also cause the same appearance WARNING When servicing the propeller always shift the outbo...

Page 201: ...ase with HPF XR gearcase lube through the drain fill hole until it appears at the oil level hole Filling the gearcase too quickly can cause air pockets and the gearcase may not fill completely Clean plug seal area and install the lubricant level plug and new seal then the lubri cant drain fill plug and new seal Tighten them to a torque of 114 in lbs 13 N m LEAK TEST Drain lubricant before testing ...

Page 202: ...ve four gearcase retaining screws Remove gearcase from the exhaust housing and place in a suitable holding fixture WARNING To prevent accidental starting while ser vicing twist and remove all spark plug leads During service the outboard may drop unexpectedly Avoid personal injury always support the outboard s weight with a suitable hoist or the tilt support bracket during service 1 Cotter pin 2 Pr...

Page 203: ...ound to the threads of the gearcase retaining screws Install screws and tighten to a torque of 198 in lbs 23 N m Clutch Adjustment Connect the clutch rod and shift rod in the follow ing sequence Screw the clutch rod connector on the clutch rod to the end of its thread Screw the lock nut on the shift rod to the end of its thread Locate the shift cam at NEUTRAL position by moving shift rod up or dow...

Page 204: ...up and off the driveshaft Remove the impeller impeller key and plate Dis card gasket Inspection Inspect the impeller vanes for cuts cracks tears or excessive wear Replace if necessary Inspect the pump case and inner sleeve for cracks distortion or corrosion Replace if neces sary Inspect plate Replace if cracked distorted or cor roded 1 Nuts 2 Housing 005860 1 Impeller 2 Key 3 Plate 4 Gasket 005861...

Page 205: ... of inner sleeve Install sleeve into housing Make sure that tab on sleeve is located in groove of pump case Apply a light coat of Triple Guard grease to the inside of inner sleeve Install the pump case while rotating driveshaft clockwise to flex the impeller vanes in the correct direction Install nuts and washers and tighten the four pump housing nuts to 97 in lbs 11 N m 1 Gasket 2 Plate 3 Key 4 I...

Page 206: ...eller shaft bearing housing retaining screws Use Slide Hammer P N 391008 and Prop Shaft Remover P N 5034762 to pull out the propeller shaft bearing housing assembly Hold the pinion nut securely with a 12 mm wrench Use Driveshaft Socket P N 5037512 to loosen the pinion nut Remove two screws and shift rod guide stopper Lift out the shift rod cam assembly WARNING Wear safety glasses to avoid personal...

Page 207: ...p shim and bearing Remove the pinion gear and shim If forward gear bearing is replaced the race must be replaced 2 jaw puller P N 432129 can be used with a plate obtained locally to remove the bearing race from the gearcase housing Remove the driveshaft collar 1 Driveshaft seal housing screws 005871 1 Driveshaft oil seal housing 2 Driveshaft assembly 005872 005881 1 Forward gear 2 Thrust washer 3 ...

Page 208: ... shifter push pin and return spring Use Puller Bridge P N 432127 and Small Puller Jaws P N 432131 to remove oil seals Use 2 jaw puller and plate assembly P N 432129 to remove reverse gear bearing Use Bearing Removal tool P N 5034764 to press bearing from housing 1 Propeller shaft bearing housing 2 Reverse gear backup shim 3 Reverse gear 4 Thrust washer 005875 1 Push rod 2 Spring 005876 1 Pin 00587...

Page 209: ...gs using Universal Pinion Bear ing Remover and Installer kits P N 5005927 and P N 5005928 Assemble tools as shown Set rod remover assembly in gearcase Drive bearing down into the gear area 1 Pin 2 Cam 3 Spacer 4 Magnet 005879 005880 1 1 4 x 20 x 1 2 hex head screw 2 1 in O D x 1 4 I D Flat washer 3 Pilot plate P N 5000009 4 Rod P N 326582 5 Remover Installer P N 5034763 6 1 4 x 20 x 1 1 14 hex hea...

Page 210: ...Severe spline wear might indicate an exhaust housing or gearcase has been dis torted by impact damage Water intake screen must be clear If screen can t be cleaned it must be replaced All internal components must be visually inspected for signs of wear distortion chipping metal transfer pitting galling and discoloration due to improper lubrication Water pump check impeller for wear crum bling and h...

Page 211: ...position by gently striking the installer shaft until the washer contacts the spacer Forward Gear Apply gear oil to the forward gear Place the for ward gear bearing and back up shim in position and install the gear in the gearcase 1 1 4 x 20 x 1 2 hex head screw 2 1 in O D x 1 4 I D Flat washer 3 Spacer P N 350932 4 Flat washer 1 5 mm thick obtain locally 5 Pilot plate P N 5000009 6 Rod P N 326582...

Page 212: ...pply Nut Lock to threads of pinion nut Install nut on driveshaft and tighten to 13 ft lbs 18 N m Driveshaft Oil Seal Housing IMPORTANT Check and adjust shimming before installing seals in housing Refer to SHIM MING ADJUSTMENTS on p 214 When shimming is correct remove seal housing for final installation of seals Apply DPL to the outer casing of two driveshaft housing oil seals Use seal installer to...

Page 213: ...n the shift rod and install pin Attach magnet and spacer to shift rod Attach the shift cam to shift rod and insert pin Install the shift rod assembly in the gearcase with the stepped face of the cam facing the propeller Install guide stopper in the gearcase and secure with screws 004405 1 Gasket 2 Triple Guard grease 005925 1 Driveshaft seal housing screws 005871 Direction of Water Pump 1 O Rings ...

Page 214: ...ing Housing IMPORTANT Check and adjust shimming before installing seals and o rings in bearing housing Refer to SHIMMING ADJUSTMENTS on p 214 Propeller Shaft Bearing Apply HPF XR gearcase lubricant to the bearing Using Bearing Installation Tool P N 5034774 with lettered side of bearing facing tool carefully press bearing into housing Bearing is properly installed when tool flange seats against hou...

Page 215: ...n lbs 10 N m Check and adjust backlash Refer to SHIMMING ADJUSTMENTS on p 214 When shimming is correct remove bearing hous ing for final installation of seals and o rings Apply DPL to the outer casing of two new propel ler shaft bearing housing oil seals Use Seal Installer P N 326545 to press seals one at a time into the housing The lipped portion of the seals should face toward the propeller Appl...

Page 216: ...klash reduce back up shim thickness If there is too much backlash increase back up shim thickness Driveshaft Thrust Play Connect a dial indicator to driveshaft as shown To check driveshaft thrust play push forward gear inward Slowly push driveshaft completely down ward Hold shaft in and set dial gauge pointer to zero Slowly pull upward to read the maximum thrust play 0 016 to 0 023 in 0 4 to 0 6 m...

Page 217: ...gear shim thickness Slightly increase pinion gear shim thickness If pattern is too low Increase forward gear shim thickness Slightly decrease pinion gear shim thickness IMPORTANT Damage and chipping of forward and pinion gear may result if tooth pattern is not correct IMPORTANT Recheck driveshaft thrust play if shimming has been adjusted Pinion Gear Reverse Gear Recheck driveshaft thrust play agai...

Page 218: ...PORTANT Maintain the forward gear thrust washer at standard thickness 1 5 mm and adjust only the reverse gear thrust washer Assemble a Dial Indicator to the propeller shaft Push propeller inward Hold shaft in and set dial gauge pointer to zero Slowly pull shaft outward and read the maximum thrust play on the dial If play is too large increase reverse gear thrust washer thickness If play is too sma...

Page 219: ...NUAL STARTER 217 10 MANUAL STARTER TABLE OF CONTENTS SERVICE CHART 218 REMOVAL 219 DISASSEMBLY 220 INSPECTION 221 ASSEMBLY 222 INSTALLATION 223 NEUTRAL START INTERLOCK NSI 224 INSTALLATION ADJUSTMENT 224 ...

Page 220: ...l 2 Bolt 3 Friction plate 4 Friction spring 5 E ring 6 Ratchet Pawl 7 Ratchet guide 8 Return spring 9 Recoil spring 0 NSI cable A Spring B Recoil case C Spring D Reel stopper E Rope F Grip G Upper cover H Flame arrester I Rope guide J Seal K Bolt 005615 ...

Page 221: ...o starter case Remove three screws securing recoil starter Remove starter WARNING Avoid accidental starting of engine while servicing twist and remove all spark plug leads Wear safety glasses while disassembling and assembling manual starters to avoid personal injury caused by rewind spring tension 1 Lock nut 2 NSI cable 3 Cable bracket 005616 1 Clutch shaft plate 005617 1 1 Breather hose 005618 1...

Page 222: ...ve the e ring ratchet pawl ratchet guide and return spring Remove the recoil spring IMPORTANT Do not remove the recoil spring unless replacement is necessary It should be visually inspected in its assembled position 1 Reel 005621 1 Screw 2 Friction plate 3 Spring 005622 1 3 2 1 1 E ring 005623 1 Ratchet pawl 2 Ratchet guide 3 Return spring 005624 1 Recoil spring 005625 1 1 2 3 1 ...

Page 223: ... IMPORTANT If any part is worn excessively cracked defective or damaged it must be replaced Inspect the ratchet pawl stopper arm and all springs Inspect the reel and recoil case Inspect the recoil rope Inspect the recoil spring 1 NSI cable 2 Recoil case 3 Stopper spring 4 Reel stopper 005626 1 Reel stopper 005627 1 3 2 4 1 005628 ...

Page 224: ...pring pocket in the recoil case Carefully transfer the recoil spring from the base to the case Secure the outer end of recoil spring on boss in recoil case Install return spring ratchet guide and ratchet 1 Reel stopper 2 Stopper spring 3 NSI cable 005626 004643 3 2 1 1 Recoil spring boss 005625 WARNING Because of the coiled tension in the recoil spring wear safety glasses and hand pro tection when...

Page 225: ... Lock to screw and tighten securely After assembly guide rope into notch in reel and rotate reel approximately five turns counterclock wise until the spring is tensioned INSTALLATION Installation is reverse order of removal with spe cial attention to the following steps Check that all removed parts are installed Check the neutral start interlock function 1 E ring 005623 005629 1 Reel 2 Reel groove...

Page 226: ...the adjustment nut to align the center of the cam with the match mark on the recoil starter case Pull the recoil starter and make sure that the starter does not work when the shift lever is in FORWARD or REVERSE position Tighten the adjustment nut Apply Triple Guard grease to the inner cable cable end and cam WARNING If the NSI cable is removed or not adjusted properly there is a high risk of bein...

Page 227: ...WIRE HOSE ROUTING 225 11 WIRE HOSE ROUTING TABLE OF CONTENTS WIRING DIAGRAMS 226 ROPE START MODELS 226 TILLER ELECTRIC MODELS 227 REMOTE ELECTRIC MODELS 228 WIRE ROUTING 229 FUEL WATER HOSE ROUTING 233 ...

Page 228: ... N ON F R OFF CYLINDER TEMP SENSOR OIL PRESSURE SWITCH PULSER COIL 1 PULSER COIL 2 RECTIFIER REGULATOR FUSE 20A W W W W B B BATTERY 12V 40AH or OVER B PLUG R TUBE Y TUBE W W W B O Bl B O Bl Bl Br Br B P O Y R Y R W G O B B B Y Y B B B P B P B Br B B G B R Bl R B Bl R B Lg W Lg W Bl R B R B B Br W Bl B B B BATTERY CHARGE COIL CONDENSER CHARGE COIL WIRE COLOR B Black Bl Blue Br Brown G Green O Orang...

Page 229: ... 1 PULSER COIL 2 RECTIFIER REGULATOR PTC HEATER FUSE 20A O Bl B B R O Bl Bl Br Br B P O Y Y Y R Y R W G O B B B Y R Y B Y G B P B P B Br B B G B R Bl R B Bl R B Lg W Lg W Bl R B R Y G B B B Br W Bl Bl B B B R R R R B B R R BATTERY CHARGE COIL CONDENSER CHARGE COIL WIRE COLOR B Black Bl Blue Br Brown G Green O Orange P Pink R Red W White Y Yellow B R Black Red Bl R Blue Red Lg W Light green White W...

Page 230: ...R STARTER MOTOR RELAY W W W NEUTRAL SWITCH N ON F R OFF W Bl R B Bl B Br Y B Y G B P B P Br B B B R R R R B STARTER MOTOR Y R Y R RECTIFIER REGULATOR Y Y Y Y B G B R B B Bl Bl Br Br B P O W G Lg W Bl R Bl B Y B B R Br W O O B B B Lg W B B Bl O Bl B B WIRE COLOR B Black Bl Blue Br Brown G Green Gr Gray O Orange P Pink R Red W White Y Yellow B R Black Red Bl B Blue Black Bl R Blue Red Lg W Light gre...

Page 231: ...lamp Ignition coil I CKP sensor Ignition coil Stator leads should be passed through under CKP sensor Recoil starter model Put lighting coil lead wires into electric parts holder Clamp Clamp 1 Ign coil lead Clamp Battery charge power source coil Fuse case assembly 2 CKP sensor CDI unit 2 CKP sensor Blue tube Clamp ...

Page 232: ...OUTING WIRE ROUTING Neutral switch Oil pressure switch Cover the oil pressure switch with cap Clamp Clamp Cylinder temp sensor Clamp Fix the stop switch lead and neutral switch lead R model Stop switch lead wire Clamp ...

Page 233: ...HOSE ROUTING WIRE ROUTING 11 Stator GND lead Wire harness GND lead Electric parts holder Fuse case assembly Electric parts holder Fuse case assembly CDI unit Caution lamp lead wire Starter motor relay and holder ...

Page 234: ...WIRE ROUTING Starter motor band Positive battery cable Caution lamp Starter switch Starter motor Nagative battery cable Clamp Fix the wiring harness starter motor lead wire starter switch lead wire and caution lamp lead wire ...

Page 235: ...tabs to avoid contact with other parts Check that hoses do not contact rods and levers during either engine operation or standstill Extreme care should be taken not to cut abrade or cause any other damage on hoses Care should be taken not to cause hoses to be compressed excessively by any clamp when fit ted Clip Clamp Fuel hose protector Connector to fuel filter ...

Page 236: ...234 WIRE HOSE ROUTING FUEL WATER HOSE ROUTING s Fuel hose protector Connector to fuel filter Fuel hose Fuel pump to carburetor Fuel hose protector Fuel filter to fuel pump Fuel filter Fuel pump Clamp ...

Page 237: ...S 6 OUTBOARD FUEL ELECTRICAL SYSTEM AND SAFETY S 8 OUTBOARD MOUNTING SYSTEM AND SAFETY S 11 OUTBOARD HYDRAULIC TILT TRIM SHOCK ABSORPTION SYSTEM AND SAFETY S 13 OUTBOARD EMERGENCY STOP SYSTEM AND SAFETY S 14 SUMMING UP S 16 MARINE PRODUCTS AND THE SAFETY OF PEOPLE WHO FIX THEM S 17 HANDLING OUTBOARDS S 17 HANDLING LEAD ACID BATTERIES S 21 GASOLINE HANDLE WITH CARE S 22 HAZARDOUS PRODUCTS S 23 SAFE...

Page 238: ...S 2 ...

Page 239: ...self but also to protect the people around you It is impossible for this manual to cover every potentially hazardous situation you may encounter However your understanding and adherence to the recommendations contained in this manual and use of good judgment when servicing outboards will help promote safety Always be alert and careful a good foundation for safety First A word about parts Plain par...

Page 240: ...FORWARD or REVERSE propeller still powered turning unknown to operator or outboard will START in gear and boat will move suddenly boat will move opposite to direction wanted by operator How can loss of shift control be minimized When rigging or after servicing Read understand and follow manufacturer s instructions Follow warnings marked closely Assemble parts carefully Make adjustments carefully T...

Page 241: ...to STOP propeller What could happen If Operator cannot slow down the outboard or shift into NEUTRAL gear stop propeller Operator could panic and lose control of boat How can loss of speed control be minimized When rigging or after servicing Read understand and follow manufacturer s instructions Follow warnings marked closely Assemble parts carefully Make adjustments carefully Test your work Do not...

Page 242: ...heel and ends here at the trim tab on the outboard What could happen If steering system comes apart boat might turn suddenly and circle Persons thrown into the water could be hit If steering jams operator may not be able to avoid obstacles Operator could panic If steering is loose boat may weave while operator tries to steer a straight course With some rigs at high speed loose steering could lead ...

Page 243: ... weaken Tilt outboard into boat then turn it transom mounted steerer stop to stop Be aware that raising or lowering outboard on transom can change a set up which was OK earlier If moved up or down even one half inch run test again to make sure steering parts are free and clear During this procedure steering parts Must not bind and Must not touch other boat outboard or accessory parts in transom ar...

Page 244: ...akage must be eliminated Stray electric sparks must be avoided What could happen When not boating fuel leaking in car trunk or van or place where portable tank is stored base ment or cottage could be ignited by any open flame or spark furnace pilot light etc When boating fuel leaking under the engine cover could be ignited by a damaged or deteriorated electrical part or loose wire connection makin...

Page 245: ...ition as shown in manual Screws Nuts Washers Tighten firmly these keep clamps in position and ends of wires from sparking Where lock washers are called for use them Spark Plug Boots Not torn or cracked Fully pushed onto spark plug Spark Plugs Avoid rough handling that could crack ceramic part of plug Sparks may jump across outside of plug All Connections Clean Tight Prevents sparks Electric Cable ...

Page 246: ...der engine cover If tank cap has an air vent valve make sure it is closed Whenever possible remove hose from outboard and from tank Store hose around ears of tank This way gasoline is trapped in tank and not in the hose where it might leak onto the floor if the hose deteriorates If gasoline tank is stored indoors do not put it in a room having an appliance with a pilot light or where electrical ap...

Page 247: ...t s transom Outboard may S L I D E on transom Boat may turn and be hard to steer Outboard may T I L T on transom Boat may turn and be hard to steer If outboard hits something solid and does not stay on the transom boat occupants may be injured from the outboard or its parts entering the boat Boat s transom could break away Outboard may be lost overboard Boat may SINK The mounting system includes o...

Page 248: ...rd may come loose Mount on flat surface only Use shims to make surface flat Use bolts nuts and washers supplied with outboard They are usually special and will not rust or weaken Check for a high speed blow to the lower unit OR I was backing up and I think the outboard may have hit a tree or something Check for a slow heavy squash to the outboard Look for damaged parts and loosened nuts and bolts ...

Page 249: ... suddenly Boat may SINK At high speeds sudden trimming in too far may dive boat under water or spin it around Read understand and follow manufacturer s instructions Follow warnings marked closely Test your work whenever possible If oil leaks are seen in service areas determine source Keep reservoir filled If outboard is hydraulic tilt trim model always return rod to hole position determined by boa...

Page 250: ... and ends here in the ignition system on the powerhead What is most important The emergency stop system must STOP the engine when the clip is removed or the lanyard pulled from the emergency stop key switch If switch fails If lanyard is caught engine will keep running engine will keep running when clip is pulled from the switch ...

Page 251: ...run into something How can failure of the emergency stop system be minimized When rigging or after servicing Read understand and follow manufacturer s instructions Follow warnings marked closely Assemble parts carefully Inspect lanyard for cuts or fraying clip for wear Replace with original parts Do not substitute Locate control box and other items in area to keep lanyard from being caught ALWAYS ...

Page 252: ... Reading and understanding instructions Re reading warnings marked Putting parts together correctly Making correct adjustments Testing your work And making sure Worn or damaged parts are replaced Replaced parts are like originals in every way Customer is told of things which need attention But do you really want the alternative ...

Page 253: ...ht hit you as it swings If engine does not have fixed lifting bracket and you use Universal Puller P N 378103 and Lifting Eye P N 321537 or Lifting Eye and Adapter Assembly P N 396748 use only the special hardened screws and washers from the set Outboard can drop suddenly if hoist or engine stand are in poor shape or too small for the job Make sure shop aids have extra capacity and keep them in go...

Page 254: ... remember loose clothing open shirt sleeves neckties hair jewelry rings watches bracelets hands and arms can be caught by the spinning flywheel Handling high voltage parts like spark plugs and coils can shock you and may cause you to recoil into the rotating flywheel When you do things that turn the flywheel like Off season storage fogging oiling of outboard Removing propeller with a powered tool ...

Page 255: ...aust fumes from the engine or other boats provide proper ventilation shut off the engine when not needed and be aware of the risk of backdrafting and conditions that create CO accu mulation In high concentrations CO can be fatal within minutes Lower concentrations are just as lethal over long periods of time DANGER DO NOT run the engine indoors or without adequate ventilation or permit exhaust fum...

Page 256: ...t Do not allow anyone near a propeller even when the engine is off Blades can be sharp and the propeller can continue to turn even after the engine is off Always shut off the engine when near people in the water Eyes need protection when Grinding Spraying cleaners and paints Chiseling Tip When steel on steel use plastic or brass type hammers They don t chip off as easily as steel hammers Protect e...

Page 257: ...ger leads 3 Always charge in a well ventilated area Charging causes acid solution to give off hydrogen gas through the vents in the caps Make sure vents are open If clogged pressure inside may build Battery may EXPLODE While charging or discharging remember No smoking No flames No sparks DO NOT check battery charge by placing metal objects across posts You will make sparks and serious burns are po...

Page 258: ...atches cigarettes blow torches welders Electric motors with unsealed cases Electric generators with unsealed cases Light switches Appliance pilot lights or electric ignitors furnace dryer water heaters Loose wires on running outboards Other variables which may ignite fumes How many of these are in your repair area 20 Parts Air By Volume 1 Part Gasoline Gas Fumes If the air around you is calm the p...

Page 259: ...ere to use How to give First Aid Have recommended First Aid materials on hand should an emergency arise How to dispose of can It s all on the back of the can or bottle label And remember Little children are very curious and will try to taste everything so keep containers away from children ...

Page 260: ...nual as a whole and this Safety section in par ticular contain essential information to help prevent personal injury and damage to equipment and your customers 6 Have you received training related to common shop safety practices to protect your self and others around you 7 When replacement parts are required will you use Evinrude Johnson Genuine Parts or parts with equivalent characteristics inclu...

Page 261: ...n n n n n n n n n n n n n n n n n n n n n n n n n n n n n n n n n n n n n n n n n n n n n n n n n n n n n n n n n n n n n n n n Cable Hose and Wire Routing 37 Camshaft Inspection 151 Carburetor Operation 104 Service 109 Caution System 66 Charging System Description 70 Service 73 Tests 71 Clutch Adjustment 201 Compression Testing 128 Control Cable Routing 28 Cooling System Description 52 Diagram 16...

Page 262: ... n n n n n n n n n n n n n n n n n n n n n n n n n n n n n n n n n n n n n Idle Adjustment 60 RPM 16 Ignition Operation 93 Servicing 99 Tests 95 Wire Routing 229 Wiring Diagrams 226 Inspection Schedule 48 L n n n n n n n n n n n n n n n n n n n n n n n n n n n n n n n n n n n n n n n n n n n n n n n n n n n n n n n n n n n n n n n n n n n n n n n n n n n n n n n n n n n n n n n n n n n n n n n n n...

Page 263: ... Start Protection 42 Operating Temperature 42 Water Pump Overboard Indicator 42 S n n n n n n n n n n n n n n n n n n n n n n n n n n n n n n n n n n n n n n n n n n n n n n n n n n n n n n n n n n n n n n n n n n n n n n n n n n n n n n n n n n n n n n n n n n n n n n n n n n n n n n n n n n n n n n n n n n n n n n n n n n n n n n n n n n n n n n n n n n n Safety S 1 Serial Number Location 6 Shim...

Page 264: ...e Spring Compressor P N 346186 138 146 Torque Specifications Standard 18 Trim Tab Adjustment 45 Troubleshooting Electric Start 76 Ignition 94 V n n n n n n n n n n n n n n n n n n n n n n n n n n n n n n n n n n n n n n n n n n n n n n n n n n n n n n n n n n n n n n n n n n n n n n n n n n n n n n n n n n n n n n n n n n n n n n n n n n n n n n n n n n n n n n n n n n n n n n n n n n n n n n n n ...

Page 265: ......

Reviews: