42
HYPERION User Manual
Bruker Optik GmbH
Overview 3
➣
Important note:
This aperture is situated in the IR beam path. For this reason, do not
forget to open this aperture completely before starting a spectroscopic measurement.
3.8
Light path selector lever
Knurled ring under-
neath the condenser
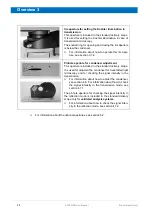
Figure 3.13: Operating element of the aperture for setting Koehler illumination in transmission mode
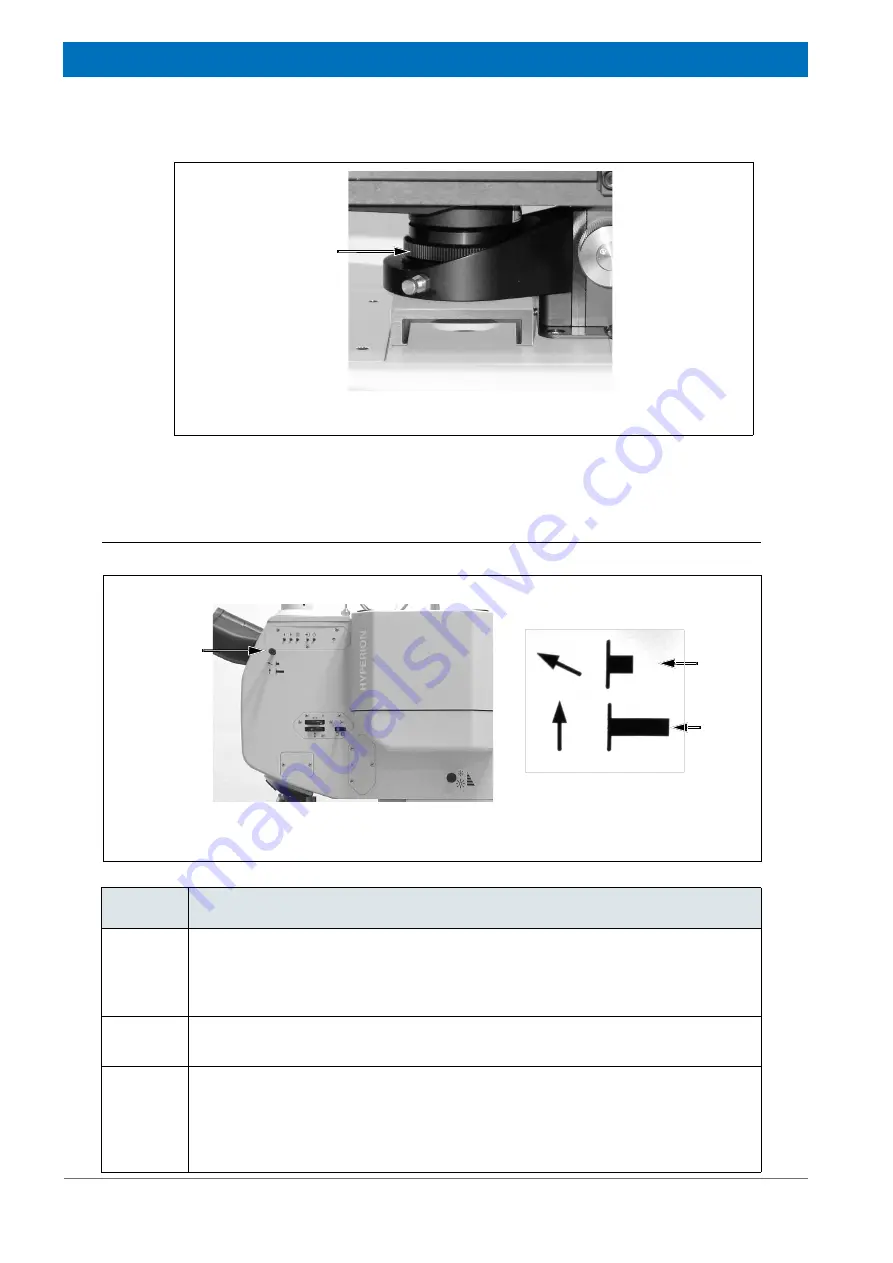
Figure 3.14: a) Right microscope side - Light path
selector lever
A
B
C
b) Icon legend
Fig. 3.14
Component and explanation
A
Light path selector lever:
Using this lever, the visible light is routed either to the
binocular or to the video camera.
The possible lever positions and their meaning are illustrated in the legend below
the light path selector lever. (See B and C in fig. 3.14.)
B
If the lever is pushed in completely
, the light is routed to the binocular. In this
case, the sample can be viewed only by looking through the binocular.
C
If the lever is pulled out completely
, the light is routed to the video camera. In this
case, the video image of the sample can be viewed on the LCD monitor at the front
side of the microscope and the PC monitor using the OPUS/VIDEO software pro-
gram. (Refer also to OPUS/VIDEO Manual.)
Note:
The microscope variant HYPERION 1000 is not equipped with a LCD monitor.
Summary of Contents for HYPERION
Page 1: ...HYPERION User Manual I 24319 ...
Page 56: ...54 HYPERION User Manual Bruker Optik GmbH Overview 3 ...
Page 148: ...146 HYPERION User Manual Bruker Optik GmbH Repair and Maintenance 6 ...
Page 168: ...166 HYPERION User Manual Bruker Optik GmbH Specifications A ...
Page 172: ...170 HYPERION User Manual Bruker Optik GmbH Measurement parameters B ...
Page 174: ...172 HYPERION User Manual Bruker Optik GmbH Spare parts and consumables C ...
Page 175: ...173 Bruker Optik GmbH HYPERION User Manual D System diagram ...
Page 176: ...174 HYPERION User Manual Bruker Optik GmbH System diagram D ...


