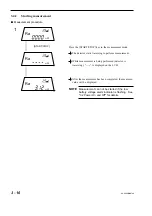
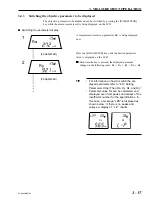
background image

3 - 9

No. 99MBB079A

3. MEASUREMENT OPERATION

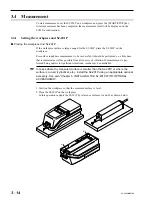
2. Mount the SJ-201P on the calibration stage.

3. Set the SJ-201P so that the detector traversing direction is perpendicular to the cutter mark

of the precision roughness specimen.

SJ-201P

SJ-201P

Precision roughness 
specimen

Cutter mark

Detector

Detector traversing 

direction

Detector

90

°

Summary of Contents for 148 460

Page 1: ...Rüegger Tools Ltd P O Box CH 8010 Zürich Tel 41 44 736 63 63 Fax 41 44 736 63 00 www brw ch sales brw ch 148 460 MITUTOYO SURFTEST SJ 201P surface roughness tester No 99MBB079A1 SERIES No 178 2008 08 29 Manual ...

Page 2: ...injury or death WARNING Indicates a potentially hazardous situation which if not avoided could result in serious injury or death CAUTION Indicates a potentially hazardous situation which if not avoided may result in minor or moderate injury or property damage The following signs indicate specific warnings or prohibited actions or indicate a mandatory action Alerts the user to a specific hazardous ...

Page 3: ...TE A note emphasizes or supplements important points of the main text A note supplies information that may only apply in special cases e g Memory limitations equipment configurations or details that apply to specific versions of a program TIP A tip is a type of note that helps the user apply the techniques and procedures de scribed in the text to their specific needs It also provides reference inf...

Page 4: ... to a room heater or in the direct sunlight Store the instrument where the temperature can be controlled between 10 and 40 C When mounting the detector to the drive unit take care not to apply excessive force to the drive unit Before connecting detaching the connector or connecting cable turn the power off by auto sleep function The stylus tip is machined precisely Take care not to break it Before...

Page 5: ... 3 3 2 Performing calibration 3 11 3 4 Measurement 3 14 3 4 1 Setting the workpiece and SJ 201P 3 14 3 4 2 Starting measurement 3 16 3 4 3 Switching the objective parameter to be displayed 3 17 3 4 4 Detector retraction procedure 3 18 3 5 Daily Care 3 20 3 5 1 Storage of SJ 201P 3 20 3 5 2 Recharging the built in battery 3 20 4 MODIFYING THE MEASUREMENT CONDITIONS 4 1 4 1 Switching the Cutoff Leng...

Page 6: ...measurement results or saved data 6 25 6 5 Connecting with a Personal Computer 6 28 7 REPLACEMENT OF THE BUILT IN BATTERY PACK 7 1 7 1 Purchasing a Built In Battery Pack 7 1 7 2 Replacing the Built In Battery Pack 7 2 8 TROUBLESHOOTING 8 1 9 PRODUCT SPECIFICATIONS 9 1 9 1 Detector 9 1 9 2 Drive Unit 9 1 9 3 Display Unit 9 2 9 3 1 Compatible surface roughness standard 9 2 9 3 2 Measured profiles an...

Page 7: ...s Rz JIS 10 19 10 5 5 Maximum two point height of the profile Ry DIN ANSI 10 20 10 5 6 Maximum height of the profile Rz DIN ISO ANSI 10 20 10 5 7 Maximum profile peak height Rp DIN ISO New JIS 10 20 10 5 8 Total height of the profile Rt 10 20 10 5 9 Mean width of the profile elements Sm JIS ISO DIN 10 21 10 5 10 Peak count Pc JIS ISO DIN 10 21 10 5 11 Material ratio of the profile mr 10 22 10 5 12...

Page 8: ...No 99MBB079A MEMO vii ...

Page 9: ...e The vertical stylus displacement during the trace is processed and digitally displayed on the liquid crystal display of the SJ 201P 2 The vertical stylus displacement produced during tracing the workpiece surface is converted into electrical signals 4 The calculation results measurement results are displayed on the LCD 3 The electrical signals are subject to various calculation processes 1 The d...

Page 10: ... using various surface roughness parameters Auto sleep function to save power If the SJ 201P is not used for more than 30 seconds it is automatically turned off even if AC power is being supplied SJ 201P measurement conditions are however retained Large size LCD and external output functions Measurement results are displayed on the large easy to view LCD unit These measure ment results can also be...

Page 11: ...nt in your SJ 201P package Ra Ry Rmax 9 9μm 3 05μm 120μin 390μin Display unit Drive detector unit Drive unit Detector Carrying case No 12BAA304 Connection cable 1m 40 No 12BAA303 AC adapter No 526688 100V No 526688A 120V No 526688D 230V No 526688E 240V Precision roughness specimen with case No 178 601 mm No 178 602 mm inch Phillips screwdriver No 538612 Calibration stage No 353134 Standard accesso...

Page 12: ... 9 8 7 1 E 8 8 6 6 2 5 C A V 0 4 2 r o t c e t e D 0 9 3 8 7 1 5 9 3 8 7 1 t i n u e v i r D 0 3 2 8 7 1 y a l p s i D 3 4 2 8 7 1 8 4 2 8 7 1 3 4 2 8 7 1 8 4 2 8 7 1 IMPORTANT Only use the supplied AC adapter for this instrument Otherwise not only the adapter but that equipment it is used with may be damaged SJ 201P optional accessories Depending on the shape of the workpiece it may be necessary ...

Page 13: ...ve detector unit The drive detector unit is designed to be removable from the display unit Depending on the shape of the workpiece it may be easier to perform measurement without mounting the drive detector unit to the display unit Display unit Drive detector unit Drive unit Detector TIP For information about attaching and detaching the drive detector unit refer to 1 4 Attaching and Detaching the ...

Page 14: ...tional Nosepiece mounting screws Stylus Side view Display unit cover The top cover of the display unit slides to allow access to the setting modification keys underneath C U R V E F I L T E R T O L C U S T C U T O F F R E M O T E C A L S T D R A N G E n E N T M O D E E S C P O W E R D A T A S T A R T S T O P P A R A M E T E R Cover Display unit ...

Page 15: ...ame B Cutoff length C Number of sampling lengths D Low battery voltage alarm E GO NG judgment result F Objective parameter name G Calculation result measurement result H Unit of measurement Names of each key POWER DATA key Power Data key START STOP key Start Stop key PARAMETER key Parameter key CAL STD RANGE key Calibration Standard Range key n ENT key n Enter key CUTOFF key Cutoff Increment key R...

Page 16: ...nector cap RS 232C connector AC adapter connector Built in battery on off switch Drive detector unit retaining plate Drive detector unit retaining pin Drive detector unit connection plug Rear of the display unit View with rear cover of display unit removed If the drive detector unit connection plug is being placed in the storage position neatly fit the cable in the groove of the display unit Botto...

Page 17: ...ompleted with the SJ 201P it is recommended that the detector be detached from the drive unit and stored in a safe place to prevent damage caused by such as a blow etc IMPORTANT Always hold the detector body if it is being attached or detached If the tip or stylus is held during attachment or detachment the detector may be damaged Drive unit Detector IMPORTANT Never touch the stylus otherwise it m...

Page 18: ... attempt inserting the detector in the drive unit if it is in detector retraction state The connector at the recess of the detector guide way in the drive unit may not be located with the detector 1 Press the POWER DATA key if in auto sleep state 2 If OFF is displayed on the LCD press the START STOP key to release the detector retraction state If OFF is not displayed proceed to step 3 TIP Refer to...

Page 19: ...e arrow 1 erect the drive detector unit in the direction indicated by the arrow 2 2 Pull out section B from the drive detector unit retaining pin on the display unit and lift it in the direction indicated by the arrow 3 U N L O C K UNLOCK Drive detector unit retaining plate Drive detector unit retaining pin A B Position of the drive detector unit retaining pin 1 2 3 IMPORTANT Do not hold the detec...

Page 20: ... unit retaining pin 2 Lower the drive detector unit in the direction indicated by the arrow 2 while pressing it in the direction indicated by the other arrow 1 until it is caught by the hook on the drive unit retaining plate U N L O C K UNLOCK Drive detector unit retaining plate Drive detector unit retaining pin Position of the drive detector unit retaining pin 1 2 ...

Page 21: ...e drive detector unit connection plug from the socket connector at the rear of the drive unit Connector Section to be held Drive detector unit connection plug Drive unit Display unit cable 1 Connecting the display unit cable After confirming the orientation of the socket connector pin positions at the drive unit and that of the drive detector unit connection plug pin positions insert the plug into...

Page 22: ...4 No 99MBB079A 1 4 4 Using the connection cable To operate the drive detector unit separately from the display unit use the connection cable as shown below Display unit Connection cable Drive detector unit ...

Page 23: ...plug into the drive unit connector while firmly holding section B Disconnecting the connection cable plug While holding the section A slide A towards B then pull out the plug Connecting the drive detector unit connection plug Confirm the orientation of the mating connector and plug then connect the connector and the plug while firmly holding section C Disconnecting the drive detector unit connecti...

Page 24: ...ector unit being connected via connecting cable to the display unit housed in the case Strap Lid Upper lid Opening the upper lid Open the upper lid as shown below and the LCD display of the display unit is located permitting operation of the primary operation keys When not in use close the upper lid for safekeeping P O W E R D A T A S T A R T S T O P P A R A M E T E R Upper lid ...

Page 25: ...y unit in the case to the external drive detector unit Window for connecting cable Window for RS232C cable Window for AC adapter and SPC cable Housing accessories Accessories of SJ 201P can be stored in position as specified below Space for detectors 4 pcs For housing standard and optional detectors and extension rod Space for calibration stage and precision roughness specimen ...

Page 26: ...1 18 No 99MBB079A MEMO ...

Page 27: ... modes including the measurement mode calibration mode condition setting mode RS 232C communication mode and detector retraction mode Measurement mode In this mode the SJ 201P can start and stop measurement calculate measurements parameters and switch display contents save measurement results print data and output SPC data Calibration mode Sets the calibration value prior to measurement and perfor...

Page 28: ...rameter setup mode CUS Parameter calculating condition setup mode PAR Traversing speed setup mode TSP Pre travel post travel length setup mode TRA RS 232C baud rate setup mode SPD Sets measurement result outputs to be saved outputted as SPC data printed Sets the saved data to be called or deleted Sets the print items Sets the vertical magnification of printed profiles Measurement result output set...

Page 29: ...C 2 3 2 S R D P S C S E E D O M e d o m g n i t t e s t u p t u o t l u s e r t n e m e r u s a e M K A D C S E E D O M e d o m g n i t t e s e t e l e d l l a c a t a d d e v a S R M R C S E E D O M e d o m g n i t t e s m e t i t n i r P N R P C S E E D O M e d o m g n i t t e s n o i t a c i f i n g a m l a c i t r e V R E V C S E E D O M e d o m g n i t t e s n o i t a c i f i n g a m l a t n ...

Page 30: ...g mode VER Shifting the digit place for entering a numeric value Moving to the calibration mode Switching the cutoff length Switching the number of sampling lengths switching to the arbitrary evaluation length input mode if the number of sampling lengths is set Accepting the entered numeric value if a numeric value is entered Switching objective parameter of display Moving to the measurement range...

Page 31: ...R DATA START STOP PARA METER CAL STD RANGE CURVE FILTER TOL CUST CUTOFF REMOTE n ENT MODE ESC POWER DATA START STOP PARA METER PARA METER Detector retraction cancel Default value restoration default value restoration mode INI OFF ON if the power is off auto sleep if the power is off auto sleep POWER DATA START STOP POWER DATA START STOP with the power off auto sleep RMT REMOTE Move to the RS 232C ...

Page 32: ...ied from 3 00 to 2 95 NOTE Do not press the n ENT key before the numeric value has been entered Only press the n ENT key to terminate numeric value entry and accept it at that point in time No specific digit place is selected but the whole digits can be the objective for an increment CUTOFF or 1 2 n ENT m m μ μ Remains in the calibration mode ready for the entry of a numeric value 03 00 flashes Pr...

Page 33: ...ready for the entry of a numeric value 03 00 flashes Press the REMOTE key once The digit in the second decimal places flashes Press the CUTOFF key five times The digit in the second decimal place changes to 5 Press the REMOTE key once The digit in the first decimal place flashes Press the CUTOFF key nine times The digit in the first decimal place changes to 9 Press the REMOTE key once The digit in...

Page 34: ...No 99MBB079A 7 6 CUTOFF or 5 n ENT m μ m μ Press the key once The digit in the units position changes to 2 Confirm that the correct value is displayed then press the n ENT key The entered value is accepted ...

Page 35: ...ng the drive unit detector and cable connection etc according to the feature of the workpiece to be measured Modify the measurement conditions as necessary For information about measurement conditions that can be modified refer to the next page Calibration is a means of adjusting the detector gain so that the SJ 201P can yield correct measurements This can be easily performed by measuring a suppli...

Page 36: ...t g n e l l e v a r t t s o p l e v a r t t o n n a c s h t g n e l e s e h t f i r e v e w o H N O o t t e s y l l a u s u s i g n i t t e s o t d e g n a h c e b n a c g n i t t e s e h t e c a p s d e t i m i l e h t o t e u d d e c a r t e b F F O 4 4 e u l a v n o i t a r b i l a C 0 0 3 μm 8 1 1 μ n i e c n e r e f e r n o i s i c e r p e h t f o e u l a v e h t o t g n i d r o c c a t e s e...

Page 37: ...erence value precision roughness specimen With the SJ 201P adjustment of the difference between the measured value and reference value gain adjustment can be easily achieved by calibration measurement Calibration should be performed periodically according to how much and in which conditions the SJ 201P is used If the instrument is used for the first time or if the detector is mounted replaced cali...

Page 38: ...emoved the rear cover of the display unit take care and do not connect the AC adapter plug to the SPC or RS232C connector Instrument failure will result Do not turn on off the battery switch with the AC adapter connected to the SJ 201P This can cause the battery to be overcharged Only turn on off the battery switch if the AC adapter has been disconnected 1 Turn on the battery switch prior to the c...

Page 39: ...Phillips screwdriver 2 Remove the rear cover 3 Turn on the battery switch 4 Replace the rear cover and the two screws removed in step 1 Two screws Rear cover Battery switch OFF ON 5 Press the POWER DATA key CAL STD RANGE CURVE FILTER TOL CUST CUTOFF REMOTE n ENT MODE ESC POWER DATA START STOP PARA METER POWER DATA key ...

Page 40: ...power to the SJ 201P will be automatically turned off by the auto sleep function if no key operation is performed for a specified period of time The measurement conditions are retained when the power is turned off by the auto sleep function The measurement results will also be retained if the battery switch is on If this is the case the measurement results will be displayed on the LCD the next tim...

Page 41: ...S R f f o d e n r u t e b d l u o h s P 1 0 2 J S e h t f o r e w o p e h T e c a l p e k a t t o n s e o d p e e l s o t u A E T O M E R e h t g n i s s e r p y b r e h t i e d n a m m o c n o i t a c i n u m m o c a a i v r o y e k e d o m n o i t c a r t e r r o t c e t e D 0 3 r o f d e m r o f r e p s i n o i t a r e p o y e k o n f i f f o d e n r u t y l l a c i t a m o t u a s i r e w o p ...

Page 42: ... correct mea surements can not be obtained 3 3 1 Calibration preparation Use the supplied precision roughness specimen for calibration NOTE The precision roughness specimen supplied for the SJ 201P has been calibrated in accordance with the New JIS JIS B0601 1994 If calibration needs to be performed with a standard other than the supplied precision roughness specimen it must only be done after the...

Page 43: ...n the calibration stage 3 Set the SJ 201P so that the detector traversing direction is perpendicular to the cutter mark of the precision roughness specimen SJ 201P SJ 201P Precision roughness specimen Cutter mark Detector Detector traversing direction Detector 90 ...

Page 44: ...3 10 No 99MBB079A 4 Confirm that the detector is parallel to the measured surface 90 Front view of detector Side view of detector Measured surface Measured surface Detector Detector ...

Page 45: ... R h t g n e l f f o t u C 1 m m 5 2 s h t g n e l g n i l p m a s f o r e b m u N 5 e g n a r t n e m e r u s a e M o t u A r e t l i f e l i f o r p d e r u s a e M s d n e p e d 0 5 c P e l i f o r p R h t g n e l l e v a r t t s o p l e v a r t e r P N O NOTE If the SJ 201P needs to be calibrated with a standard other than the supplied precision roughness specimen the default calibration condi...

Page 46: ...ent from that marked on the precision roughness specimen modify the calibration value If the calibration value does not require modification proceed to the next step TIP If the SJ 201P is being calibrated for the first time 3 00 μm 118 μin will be displayed See also 2 2 Key Operation to Enter Nu meric Values The calibration value to be set is the Ra value marked on the specimen To cancel the numer...

Page 47: ...wer On and Off for details When the calibration measurement has been completed the measured value will be displayed Press the n ENT key The calibration factor is updated completing the entire calibration operation NOTE If CAL Err appears perform calibration measurement again If the same error persists refer to Chapter 8 TROUBLESHOOTING Ra If BAT Err appears charge the battery with the AC adapter S...

Page 48: ... it should be performed on a firm base that is insulated as well as possible from all sources of vibration If measurement is per formed being subject to significant vibrations results may be unreliable TIP In cases where the measured surface is smaller than the SJ 201P or where the surface is curved cylindrical etc install the SJ 201P using an appropriate optional accessory See also Chapter 5 INST...

Page 49: ... Confirm that the stylus is in proper contact with the measured surface In addition confirm that the detector is parallel to the measured surface 90 Front view of detector Side view of detector Measured surface Measured surface Detector Detector ...

Page 50: ...ode The detector starts traversing to perform measurement While measurement is being performed detector is traversing is displayed on the LCD After the measurement has been completed the measured value will be displayed NOTE Measurement can not be started if the low battery voltage alarm indicator is flashing See 3 2 Power On and Off for details ...

Page 51: ...now Press the PARAMETER key until the desired parameter value is displayed on the LCD Each time the key is pressed the displayed parameter changes in the following order Ra Ry Rz Rq Ra TIP For information on how to switch the dis played parameter refer to 4 10 Setting Parameters Other Than Ra Ry Rz and Rq Parameter value Rz can be calculated and displayed even from peaks and valleys of the insuffi...

Page 52: ...ernal force This may cause breakage of the drive unit Retracting the detector Path of detector Detector Drive unit Retracted position Detector retraction procedure m μ 2 1 START STOP POWER DATA NOTE The retraction function will not work while the power is on When the power is off press the POWER DATA key while holding down the START STOP key This retracts the detector During retraction will be dis...

Page 53: ...n press the START STOP key The detector returns to the position it was in before retraction started While the detector is being moved will be dis played on the LCD As the detector is restored to its previous position the string of disappears gradually If the detector is completely released from retraction the measurement mode is entered ...

Page 54: ...f the battery switch is turned to off in the auto sleep mode TIP For information on how to detach the drive detector unit and the separation of the two refer to 1 4 Attaching and Detaching the Drive Detector Unit Selecting a suitable storage place Store the SJ 201P in a suitable place where the temperature can be maintained in a range between 10 C and 40 C The service life of the built in battery ...

Page 55: ...or does not turn on in this case TIP If almost all the battery power is exhausted it takes about 16 hours to fully recharge it Recharging the battery The battery switch must be on to recharge the battery If the switch is off remove the rear cover by loosening the specified screws and turn the switch on Two screws Rear cover Battery switch OFF ON 1 Connect the AC adapter to the wall outlet 2 Remove...

Page 56: ...pter is connected to the display unit while it is off auto sleep mode proceed to step 3 below 3 Press the POWER DATA key CAL STD RANGE CURVE FILTER TOL CUST CUTOFF REMOTE n ENT MODE ESC POWER DATA START STOP PARA METER POWER DATA key The low battery voltage alarm indicator turns on Recharging starts and the low battery voltage alarm indicator turns on If fully charged the low battery voltage alarm...

Page 57: ...ess parameter based on the New JIS Old JIS DIN ISO and ANSI standards Refer to Chapter 10 REFERENCE INFORMATION for measurement conditions to be set according to the surface roughness standard 4 1 Switching the Cutoff Length The cutoff length can be switched to either 0 8 2 5 or 0 25mm 03 1 or 01 Display and operation keys CAL STD RANGE CURVE FILTER TOL CUST CUTOFF REMOTE n ENT MODE ESC POWER DATA...

Page 58: ...s pressed the displayed cutoff length changes as follows 0 8 2 5 0 25 0 8 mm 03 1 01 03 in TIP For information on how to set the evaluation length to an arbitrary length refer to 4 3 Setting the Evaluation Length to an Arbitrary Length If the cutoff length has been set to 0 8 03 either 0 5 mm s 02in s or 0 25 mm s 01in s can be selected as the traversing speed See also 4 11 Modifying the Traversin...

Page 59: ...e set on the SJ 201P by switching the number of sampling lengths to either 1 3 5 or L If L is selected the evaluation length can be set as desired within the range between 0 3mm 01 and 12 5mm 49 Display and operation keys CAL STD RANGE CURVE FILTER TOL CUST CUTOFF REMOTE n ENT MODE ESC POWER DATA START STOP PARA METER Ra m μ n ENT key Number of sampling lengths 1 3 5 or L ...

Page 60: ...Each time the n ENT key is pressed the displayed number of sampling lengths changes in the following order 1 3 5 L 1 The L indicates that the input wait state has been entered for an arbitrary evaluation length In this stage an evalua tion length can be entered See also 4 3 Setting the Evaluation Length to an Arbitrary Length Returns to the step in which the number of sampling lengths was selected...

Page 61: ... arbitrary evaluation length and cutoff length if the roughness profile R is specified refer to 9 3 3 Cutoff length sampling length number of sampling lengths and sampling interval Display and operation keys CAL STD RANGE CURVE FILTER TOL CUST CUTOFF REMOTE n ENT MODE ESC POWER DATA START STOP PARA METER Ra m μ REMOTE CUTOFF or key L is displayed in place of the number of sampling lengths and the ...

Page 62: ...the method used to enter a numeric value refer to 2 2 Key Operations to Enter Numeric Values Confirm the displayed value and press the n ENT key This accepts the entered value If the n ENT key is pressed for a length that is out of range it will be automatically corrected to either of the following then set If the setting value is less than the lower limit 0 3 mm 01 is set If the setting value is ...

Page 63: ...travel length and post travel length allowing the measurement to be performed in the limited range The pre travel post travel length is factory set to ON IMPORTANT Generally the pre travel post travel length should be set to ON If it is set to OFF errors in the calculated value may result depending on the workpiece TIP For more information about the traversing length refer to 10 4 Traversing Lengt...

Page 64: ...el length setup mode is entered Press the CUTOFF key or key Each time the key is pressed the display toggles between On and OFF On Includes the pre travel and post travel lengths in the traversing length OFF Does not include the pre travel and post travel lengths in the traversing length Press the n ENT key This accepts the switched setting The measurement mode is restored ...

Page 65: ...r 10μm 14000 4000 2000 or 400μin Generally it should be set to Auto since a highly sensitive narrow measurement range may easily cause an over range error Display and operation keys CAL STD RANGE CURVE FILTER TOL CUST CUTOFF REMOTE n ENT MODE ESC POWER DATA START STOP PARA METER n ENT key Measurement range setup mode CAL STD RANGE key Display of the measurement range ...

Page 66: ... the LCD Each time the key is pressed the display changes as follows Auto 350 100 50 10 μm Auto 14000 4000 2000 400 μin After the desired range is displayed press the n ENT key This accepts the selected measurement range The measurement mode is restored TIP If the MODE ESC key is pressed before the n ENT key has been pressed the selected measurement range is canceled and the measurement mode is re...

Page 67: ...isplay to confirm the currently set surface roughness standard Display and operation keys CAL STD RANGE CURVE FILTER TOL CUST CUTOFF REMOTE n ENT MODE ESC POWER DATA START STOP PARA METER n ENT key Surface roughness standard setup mode CAL STD RANGE key Display of the current surface roughness standard Correspondence between the surface roughness standards and their notations on the display s s e ...

Page 68: ...D Each time the key is pressed the display changes as follows oJIS nJIS dIn ISO AnSI Press the n ENT key if the desired Standard is selected This accepts the selected surface roughness standard The measurement mode is restored TIP If the MODE ESC key is pressed before the n ENT key has been pressed the selected surface roughness standard is canceled and the measurement mode is restored Changing a ...

Page 69: ...ofile can be changed to either primary profile P profile R profile or DIN4776 Display and operation keys CAL STD RANGE CURVE FILTER TOL CUST CUTOFF REMOTE n ENT MODE ESC POWER DATA START STOP PARA METER n ENT Key CURVE FILTER TOL CUST Key Measured profile setting mode Measured profile display CUTOFF Key Key ...

Page 70: ... profile d DIN4776 Press the CUTOFF key or key until a measured profile desired to be set is displayed Each time either key is pressed the measured profile is switched in the order of P r d When the measured profile to be set is displayed press the n ENT key to load the measured profile The SJ 201P returns to the measurement mode TIP If the MODE ESC key is pressed before loading the measured profi...

Page 71: ...o filter TIP For information about the measured profile and filter definitions refer to 10 2 Assessed Profile and Applicable Filters NOTE If changing the roughness standard note that the filter is automatically changed according to a selected roughness standard Display and operation keys CAL STD RANGE CURVE FILTER TOL CUST CUTOFF REMOTE n ENT MODE ESC POWER DATA START STOP PARA METER n ENT Key CUR...

Page 72: ...PC50 2cr 2RC75 Pc75 PC75 Press the CUTOFF key or key until a filter desired to be set is displayed Each time either key is pressed the filter to be set is switched in the order of Pc50 2cr Pc75 When the filter to be set has been set press the n ENT key to load the filter The SJ 201P returns to the measurement mode TIP If the MODE ESC key is pressed before loading the filter the selected filter wil...

Page 73: ...judg ment for parameters other than those currently set cancel the setting of this function for either of the two by setting the upper limit to zero then set this function to the objective parameter This function is valid only for parameters that can be displayed on the LCD TIP For information about the method used to set the parameters refer to 4 10 Setting Parameters Other Than Ra Ry Rz and Rq D...

Page 74: ...arameter for which the GO NG judgment function is to be set If there is no need to switch from the current parameter proceed to the next step without pressing the PARAMETER key The currently flashing parameter changes While the desired parameter is flashing press the n ENT key The objective parameter of the GO NG judgment is accepted Enter the upper limit TIP For information on how to enter a nume...

Page 75: ...lue is accepted and the display remains in the input wait state for a lower limit Enter the lower limit NOTE Here if 00 00 or 0000 is accepted as the lower limit the GO NG judgment according to the lower limit is not performed Confirm the limit value displayed then press the n ENT key This accepts the entered value To continue setting the GO NG judgment function for other parameters return to step...

Page 76: ...ameter setup can the necessary parameters be set so they are calculated and displayed As a result of parameter selection the time required to calculate the measurement result is reduced and operation of the parameter related keys such as those for switching the param eter display can be simplified NOTE If the Pc Sm or mr parameters are set the count level and slice level which are the calculating ...

Page 77: ...o r p y r a m i r P P e l i f o r p s s e n h g u o R R e l i f o r p 6 7 7 4 N I D a R a R a P a R y R y R y P y R z R z R z P z R q R q R q R q P q R t R t R t R t P t R p R p R p R p P p R m S m S m S m S P m S R S S S S P S R c P c P c P c P P c P R r m r m r m r m P r m R z 3 R z 3 R z 3 R z 3 P z 3 R k R k R k p R k p R k v R k v R 1 r M 1 r M 2 r M 2 r M 1 A 1 A 2 A 2 A o V o V Display and ...

Page 78: ... times The parameter setup mode is entered Press the n ENT key Press the PARAMETER key until the desired parameter symbol is displayed on the LCD If the desired parameter symbol is displayed press the n ENT key Press the CUTOFF or key Each time the key is pressed the display toggles between On and OFF On Calculates and displays the parameter OFF Does not calculate and display the parameter ...

Page 79: ...m the displayed content then press the n ENT key The setting content is accepted Switch to another parameter TIP If the PARAMETER key is pressed after the settings for all the necessary parameters have been made the measurement mode is restored To return to the measurement mode press the MODE ESC key ...

Page 80: ...ey Parameter calculating condition setup mode The displayed parameters follow S I J d l O I S N A O S I N I D S I J w e N y r a m i r P P e l i f o r p e l i f o r p s s e n h g u o R R y r a m i r P P e l i f o r p e l i f o r p s s e n h g u o R R C R 2 5 7 C P 0 5 C P C R 2 5 7 C P 0 5 C P a R a R a R a P a R a R a R y R y P y R y R y R z R z P z R z R z R q R q R q R q R q P q R q R q R t R t ...

Page 81: ...n ENT key Specify the unit of the count level for Pc or Sm Each time the CUTOFF or key is pressed the unit of the level toggles between and μm μin Here the explanation assumes that is used as the unit of the level Enter the count level The permissible range is as follows 1 to 99 at 1 increments 0 1 to 100 0 μm at 0 1 μm increments or 5 4000 μin at 1 μin increments TIP For information on how to ent...

Page 82: ...arameter mr Enter the slice level This value should be between 1 to 99 and at 1 increments TIP For information on how to enter a numeric value refer to 2 2 Key Operation to Enter Numeric Values After the desired value is specified press the n ENT key This accepts the entered value The measurement mode is restored ...

Page 83: ...mm s Relationship between the cutoff length sampling length and traversing speed h t g n e l f f o t u C h t g n e l g n i l p m a s h t g n e l y r a r t i b r A d e e p s g n i s r e v a r T 1 0 m m 5 2 0 3 0 1 0 m m 2 1 L 5 0 L s 1 0 s m m 5 2 0 3 0 m m 8 0 2 1 5 0 m m 0 4 L 5 1 L s 2 0 s m m 5 0 r o s 1 0 s m m 5 2 0 1 m m 5 2 0 4 5 1 m m 5 2 1 L 9 4 L s 2 0 s m m 5 0 Display and operation key...

Page 84: ...ress the MODE ESC key until the traversing speed setup mode is entered Press the CUTOFF key or key Each time the key is pressed the display toggles between 0 5 and 0 25 mm s 02 and 01 in s If the desired speed is displayed press the n ENT key This determines the traversing speed The measurement mode is restored ...

Page 85: ...onditions to those under which the new roughness specimen is evaluated In this case modify the cutoff length number of sampling lengths and filter settings accord ingly NOTE This operation should not be performed unless absolutely necessary Display and operation keys CAL STD RANGE CURVE FILTER TOL CUST CUTOFF REMOTE n ENT MODE ESC POWER DATA START STOP PARA METER Ra n ENT key MODE ESC key Calibrat...

Page 86: ...r key Each time the key is pressed a cutoff length of either 2 5 0 25 or 0 8 mm 1 01 or 03 inches appears Press the n ENT key if the desired cutoff length appears The selected cutoff length is accepted Press the CUTOFF key or key Each time the key is pressed the number of sampling lengths either 1 3 or 5 appears Press the n ENT key if the desired number of sampling lengths appears The selected num...

Page 87: ...S 6 CUTOFF or 7 n ENT 8 5 Ra Ra Ra Ra m μ Press the CUTOFF key or key Each time the key is pressed the filter either Pc75 Pc50 or 2rc appears Press the n ENT key if the desired filter appears The selected filter is accepted The measurement mode is restored ...

Page 88: ...onditions will erase all the measurement conditions set up by the user TIP For information about the default values refer to 3 1 Overall Measurement Flow List of measurement conditions that can be modified Display and operation keys CAL STD RANGE CURVE FILTER TOL CUST CUTOFF REMOTE n ENT MODE ESC POWER DATA START STOP PARA METER Default value restoration mode Press POWER DATA while holding down ST...

Page 89: ...ATA 1 Power off state auto sleep Ra m μ In the power off state auto sleep mode press the POWER DATA key while holding down the START STOP and PARAMETER keys All the settings on the SJ 201P will be reset to their defaults While restoration is being performed will be displayed The measurement mode is restored ...

Page 90: ... inch REMOTE n ENT MODE ESC POWER DATA START STOP PARA METER m Ra μ mm inch key Unit of measurements Operating procedure m Ra m Ra in Ra 2 3 1 mm inch mm inch μ μ μ Now it is set to the metric mm system Press the mm inch key The metric system changes to the inch system The displayed value is automatically converted If the mm inch key is pressed again the unit of measure ments is switched to metric...

Page 91: ...orkpiece with a measured surface smaller than the size of the SJ 201P Support feet Used to measure a workpiece which is smaller than the drive detector unit Dimensions and application example Use the support feet on the drive detector unit to adjust it to the required height as shown below 8 5 335 53 2 087 30 5 1 200 Workpiece Drive unit Support feet No 12AAA216 Detector Unit mm inch ...

Page 92: ...the edges of the drive unit 2 Align the drive detector unit so it is parallel to the measured surface 3 After alignment fix the support feet by tightening the clamp screw clockwise TIP See also 3 4 1 Setting the workpiece and SJ 201P Guide groove Detector Drive unit Support feet Clamp screw ...

Page 93: ...or flat surface Nosepiece for flat surface Workpiece Support feet SJ 201P φ15 591 33 1 299 R 9 5 3 7 4 Attaching the nosepiece for flat surface NOTE When attaching the nosepiece to the drive detector unit exercise care so that it does not interfere with the detector body 1 Fit the SJ 201P detector into the slot of the nosepiece 2 Using the supplied Allen wrench tighten the two screws specified Det...

Page 94: ...sepiece for cylinder Support feet φ15 591 33 1 299 160 Workpiece Attaching the nosepiece for cylinder NOTE When attaching the nosepiece to the drive detector unit exercise care so that it does not interfere with the detector body 1 Fit the SJ 201P detector into the slot of the nosepiece 2 Using the supplied Allen wrench tighten the two screws specified Detector Drive unit Nosepiece for cylinder No...

Page 95: ...unit can not be placed Dimensions and application example Drive unit Adapter for vertical application Workpiece Hold down by hand 3 5 138 56 2 205 23 906 Unit mm inch Attaching the adapter for vertical application 1 Put the detector through the hole of the adapter 2 Using the supplied Allen wrench tighten the two screws specified Detector Drive unit Adapter for vertical application No 12AAA219 Scr...

Page 96: ... extension rod is installed measurement is not possible to perform with the stylus facing up Dimensions and application example Unit mm inch φ9 φ 354 50 1 968 Detector Workpiece Extension rod Drive unit Attaching the extension rod 1 Insert the extension rod into the drive unit 2 Attach the detector to the extension rod Detector Extension rod 50 mm 2 No 12AAA210 Drive unit ...

Page 97: ...ctor unit can not be held by hand Dimensions and application example Unit mm inch A 8mm or 3 8 20 787 17 669 φA φ23 φ 906 Magnetic stand Adapter for magnetic stand Drive detector unit 12 472 6 236 Attaching the adapter for magnetic stand 1 Attach the adapter for magnetic stand to the rear of the drive detector unit 2 Using the supplied Allen wrench tighten the two screws specified Drive unit Screw...

Page 98: ...d application example Unit mm inch A x B 9 mm x 9 mm or 1 4 x 1 2 A 55 5 2 185 21 827 Adapter for the Height Gage Drive unit Workpiece Height Gage Nosepiece for flat surface B Attaching the adapter for the Height Gage 1 Attach the adapter to the rear of the drive unit 2 Using the supplied Allen wrench tighten the two screws specified Drive unit A B Adapter for the Height Gage No 12AAA222 A x B 9 x...

Page 99: ...t o t t u p t u O a t a D C P S 4 6 1 e h t n i s e s a c 0 1 o t p u s t l u s e r t n e m e r u s a e m s e v a S y r o m e m n i t l i u b s t l u s e r t n e m e r u s a e m g n i v a S 1 2 6 2 s t i n u d n a s t l u s e r t n e m e r u s a e m a t a d C P S s t u p t u O t n e m e r u s a e m s e v a s d n a c t e r o s s e c o r p a t a d e h t o t y r o m e m n i t l i u b e h t n i s e s ...

Page 100: ... key several times in the measurement mode until DAK measurement result output setting mode is displayed The output setting value of the measurement results will flash on the LCD 0 SPC data output 1 Saving in the built in memory 2 Outputting SPC data and saving in the built in memory 3 Printing on the printer Press the CUTOFF key or key several times until the value desired to be set is displayed ...

Page 101: ...same time the surplus existing measurement results are deleted from data number 1 1 2 3 9 10 1 2 Data No 1 is used again at the time the eleventh measurement result is saved TIP Even if measurement results have been saved all saved data is cleared in the following cases The SJ 201P power supply cannot be turned on due to low level power of the built in battery The SJ 201P is used with the built in...

Page 102: ... saved the number of the saved data is displayed for approximately two seconds as shown in the following figure When the data has been saved the display changes to the calculated results POWER DATA key POWER DATA START STOP PARA METER Ra Number of the saved data ...

Page 103: ...red in the following cases The SJ 201P power supply cannot be turned on due to low level power of the built in battery The SJ 201P is used with the built in battery switch being off or the built in battery switch is turned off All saved data has been deleted Refer to 6 2 3 Deleting the Saved Data Display and operation keys POWER DATA START STOP PARA METER CAL STD RANGE CURVE FILTER TOL CUST CUTOFF...

Page 104: ...data number to be called is displayed When the data number to be called has been displayed press the n ENT key The contents of the saved data are displayed The displayed parameter will flash on the screen where the contents of the saved data are displayed TIP Each time the PARAMETER key is pressed a displayed parameter of the called measurement results is switched Press the n ENT key once more to ...

Page 105: ... cases of saved data number 7 and greater data numbers are changed from 7 to 6 from 8 to 7 from 9 to 8 and from 10 to 9 respectively Deleting all the saved data To delete all the saved data press the POWER DATA key while holding down the MODE ESC key in the power off state All the data is deleted and the number of cases of saved data becomes zero Deleting one case of saved data Display and operati...

Page 106: ...ber to be deleted has been displayed press the CAL STD RANGE key The selected case of saved data is deleted The LCD shows the data number less by one than that of the deleted data TIP If either case of saved data is deleted the LCD shows the data number less by one than that of the deleted data For example if the number of the data to be deleted is 3 the displayed data number changes to 2 To termi...

Page 107: ... mode to Print 3 See 6 1 Setting the Measurement Result Output Connect the printer See 6 3 1 Connecting the SJ 201P and printer Set the print magnification See 6 3 4 Setting the print magnification Set the print language See 6 3 5 Setting the print language Perform measurement of a workpiece See Chapter 3 MEASUREMENT OPERATION Call the saved data to be printed See 6 2 2 Calling the saved data Prin...

Page 108: ...munication connector on the rear of the SJ 201P with the RS 232C port on the printer using the optional RS 232C printer cable RS 232C communication connector RS 232C port RS 232C printer cable Printer SJ 201P Setting the communication conditions on the printer side Set the communication conditions on the printer side Meet the setting contents with the following protocol d e e p s n o i s s i m s n...

Page 109: ...ate of the SJ 201P to 9600bps or 19200bps NOTE The baud rate to be set on the SJ 201P side must be identical to that on the printer side Display and operation keys POWER DATA START STOP PARA METER CAL STD RANGE CURVE FILTER TOL CUST CUTOFF REMOTE n ENT MODE ESC RS 232C baud rate setting mode RS 232C baud rate display n ENT Key CUTOFF Key Key MODE ESC Key ...

Page 110: ...ate setting mode is displayed The RS 232C baud rate setting will flash on the LCD Press the CUTOFF key or key Each time the key is pressed the flashing baud rate will be toggled between 9600 and 19200 When the required baud rate has been displayed press the n ENT keys to load the baud rate After loading the baud rate the SJ 201P returns to the measurement mode ...

Page 111: ...P and printer refer to 6 3 1 Connecting the SJ 201P and printer 2 Before performing measurement or calling the saved data set the measurement result output mode to Print 3 Set the measurement result output mode to Print 3 TIP For information about measurement result output setup refer to 6 1 Setting the Measurement Result Output NOTE The measurement result output mode has been factory set to SPC o...

Page 112: ... screen at the end of measurement screen in which measurement results are displayed Ra m μ When calling the saved data Enter the screen in which the contents of the saved data to be printed are displayed and the parameter display is flashing Ra m μ 5 Press the POWER DATA key The measurement results or saved data will be printed on the printer Ra CAL STD RANGE CURVE FILTER TOL CUST CUTOFF REMOTE n ...

Page 113: ...ted results Ra R PROFILE Rz Rq Rp Rmr 0 1μm 0 31μm 1 52μm 0 39μm 0 82μm 0 Measured profile VER HOR Note 1 Note 1 The Preliminary length ON OFF setup indicates the presence absence of pre travel and post travel length setup For information about the pre travel post travel length refer to 4 4 Setting the Pre travel Post travel to OFF BAC DEPTH 100 0 Note 2 Note 2 appended to a numeric value indicate...

Page 114: ...T CUTOFF REMOTE n ENT MODE ESC n ENT key MODE ESC key Print item setting mode REMOTE key CUTOFF key key In the print item setting mode the LCD shows a 4 digit number that indicates whether to print each of the four print items The following shows the meaning of each digit number Measurement conditions 0 Not printed 1 Printed Calculated results 0 Not printed 1 Printed Measured profile 0 Not printed...

Page 115: ...igit rightmost of measurement conditions flashes on the LCD 0 Not printed 1 Printed Press the CUTOFF key or key if necessary to change the number then press the REMOTE key The digit second from the rightmost of calculated results flashes 0 Not printed 1 Printed Press the CUTOFF key or key if necessary to change the number then press the REMOTE key The digit third from the rightmost of a measured p...

Page 116: ...0 0 5 0 2 0 2 3 E 1 0 0 0 1 0 5 0 5 3 E 2 0 0 0 2 0 0 1 0 0 1 3 E 5 0 0 0 5 0 0 2 0 0 2 4 E 1 0 0 0 0 1 0 0 5 0 0 5 4 E 2 0 0 0 0 2 3 E 1 0 0 0 1 4 E 5 0 0 0 0 5 o t u A e h t f o p u t e s c i t a m o t u A n o i t a c i f i n g a m l a m i t p o 5 E 1 0 0 0 0 0 1 o t u A e h t f o p u t e s c i t a m o t u A n o i t a c i f i n g a m l a m i t p o NOTE Each vertical and horizontal magnification ...

Page 117: ... MODE ESC key several times in the measurement mode until VER vertical magnification setting mode is displayed The vertical magnification setting will flash on the LCD Press the CUTOFF key or key several times until the value desired to be set is displayed When the value to be set has been displayed press the n ENT key to load it After loading the value the SJ 201P returns to the mea surement mode...

Page 118: ...urement mode until HOR horizontal magnification setting mode is displayed The horizontal magnification setting will flash on the LCD Press the CUTOFF key or key several times until the value desired to be set is displayed When the value to be set has been displayed press the n ENT key to load it After loading the value the SJ 201P returns to the mea surement mode ...

Page 119: ...01P can use English or Japanese for the print language at the print of measurement results on the printer Display and operation keys POWER DATA START STOP PARA METER CAL STD RANGE CURVE FILTER TOL CUST CUTOFF REMOTE n ENT MODE ESC n ENT key MODE ESC key CUTOFF Key Print language setting Key Print language setting mode ...

Page 120: ... mode is displayed The print language setting will flash on the LCD 0 English 1 Japanese Press the CUTOFF key or key Each time the key is pressed the displayed setting will be toggled between 0 and 1 When the required print language setting has been displayed press the n ENT keys to load the setting After loading the print language the SJ 201P returns to the measurement mode ...

Page 121: ...with data of different parameters An error occurs if multiple pieces of parameter data having different number of decimal places and units are mixed during sampling of SPC data The operation flow of outputting SPC data is described below Perform measurement of a workpiece See Chapter 3 MEASUREMENT OPERATION Call the saved data to be printed See 6 2 2 Calling the saved data Select the parameter to ...

Page 122: ...ar cover of the SJ 201P then remove the rear cover 2 Use the dedicated connection cable to link the SJ 201P and DP 1HS OUTPUT INPUT FEED DATA STAT TOL LIMIT PRINTER ON OFF CE CL Data processor DP 1HS Connect to the INPUT connector SPC cable SPC connector SJ 201P 3 Turn on the DP 1HS FEED DATA STAT TOL LIMIT PRINTER ON OFF CE CL ON OFF ADAPTER Data processor DP 1HS Turn to ON position ...

Page 123: ...n on the DP 1HS and then the measurement results or saved data will be output Procedure for outputting SPC data 1 Connect the SJ 201P and DP 1HS TIP For information about the connection of the SJ 201P and DP 1HS refer to 6 4 1 Connecting the SJ 201P and DP 1HS 2 Before performing measurement or calling the saved data set the measurement result output to SPC output 0 or SPC output and save 2 Set th...

Page 124: ... performing measurement Enter the screen at the end of measurement screen in which measurement results are displayed Ra m μ When calling the saved data Enter the screen in which the contents of the saved data to be printed are displayed and the parameter display is flashing Ra m μ 4 Press the PARAMETER key of the SJ 201P until the objective parameter for output is displayed POWER DATA START STOP P...

Page 125: ... on the DP 1HS POWER DATA START STOP PARA METER Ra POWER DATA Key FEED DATA STAT TOL LIMIT PRINTER ON OFF CE CL Data processor DP 1HS DATA Key m μ The measurement result or saved data will be outputted from the SJ 201P to the DP 1HS TIP For the statistical processing operation of the measurement result see also the DP 1HS User s Manual ...

Page 126: ...cable Set the communication conditions at the personal computer side Set the baud rate at the SJ 201P side Switch the SJ 201P to the RS 232C communication mode NOTE For mm inch model determine the unit of measurement before connecting to a personal computer Once the SJ 201P is connected to a personal computer with the RS 232C cable the unit of measurement can not be switched with the key or comman...

Page 127: ...computer side Set the communication conditions at the personal computer side as follows d o h t e m n o i t a c i n u m m o C d o h t e m p o t s t r a t S e t a r d u a B s p b 0 0 2 9 1 s p b 0 0 6 9 s t i b a t a D s t i b 8 y t i r a P N E V E t i b p o t S t i b 1 r e t e m a r a p X N O Setting the baud rate at the SJ 201P side Set the RS 232C baud rate at the SJ 201P side to either 9600 bps...

Page 128: ...mes in the measurement mode until SPD is displayed This enters the RS 232C baud rate setup mode Press the CUTOFF key or key Each time the key is pressed the display toggles between 9600 and 19200 Press the n ENT key This accepts the selected baud rate After it has been accepted the measurement mode is restored ...

Page 129: ...ep mode press the POWER DATA key while holding down the REMOTE key This enters the RS 232C communication mode NOTE While in the RS 232C communication mode the SJ 201P can be turned off by pressing the REMOTE key TIP For information about the communication commands refer to 9 10 RS 232C Commu nication Specifications A sample program list in VB Basic is given in the following pages ...

Page 130: ...op bit 19200bps EVEN 8bit 1bit Sample program list using the VB Basic Option Explicit Start Measurement Private Sub Command2_Click Dim sts As String If MSComm1 PortOpen False Then MSComm1 PortOpen True open the line Call CMD_SEND WRSTA Send the command Call STS_RD sts Receive the status If sts OK Then Text1 Text Start Measurement Nomal status End Sub Interrupt Measurement Private Sub Command3_Clic...

Page 131: ...MSComm1 PortOpen True Call CMD_SEND WRCAN0000101 Call STS_RD sts Specify the data call starting as the first point If sts NG02 Then Text1 Text Under measurement Else Call CMD_SEND WRNUM00001 Call STS_RD sts Specify one time transfer size of the data call command as one point If sts NG02 Then Text1 Text Under measurement Else Open CURV CSV For Output As 1 Data save file CURV CSV Do Call CMD_SEND RD...

Page 132: ... STS_RD ByRef status As String Dim a b d Dim L As Integer Do DoEvents a MSComm1 Input b Right a 1 d d a Loop Until b Chr 13 L Len d status Mid d 1 L 1 End Sub Receive the Calculated Results Private Sub RES_RD Dim a b d Dim L As Integer Dim i As Integer Dim j As Integer Dim RES 0 To 30 As String Do DoEvents a MSComm1 Input b Right a 1 d d a Loop Until b Chr 13 ...

Page 133: ...2 Then Text1 Text Under measurement If Mid d 1 2 OK Then Open RES TXT For Output As 1 d Mid d 3 j 0 RES j i 0 Text1 Text Do i i 1 a Mid d i 1 If a Or a Chr 13 Then RES j RES j Chr 13 Chr 10 Text1 Text Text1 Text RES j Print 1 RES j j j 1 Else RES j RES j a End If Loop Until a Chr 13 Close 1 End If End Sub End Private Sub Command1_Click End End Sub ...

Page 134: ...6 36 No 99MBB079A MEMO ...

Page 135: ...e In other words the hours of service it can provide per recharge will become less and less each time it is fully recharged If this maximum hours of service reaches a level at which the measuring operation may not be performed properly then the battery pack must be replaced To purchase a replacement battery pack Part No 12BAA240 contact the sales representa tive from which your SJ 201P was purchas...

Page 136: ...care so that dust or oil mist does not penetrate the display unit During the battery pack replacement the circuit board in the SJ 201P is temporarily exposed A malfunction may result if dust or shop contaminations soil the circuit board 1 Separate the drive detector unit from the display unit 2 Remove the two tapping screws at the bottom of the display unit using a Phillips screwdriver Do not lose...

Page 137: ... which including the connectors may be damaged if excessively strained 3 Gently remove the bottom section of the display unit U N L O C K Top section of the display unit Bottom section of the display unit 4 Disconnect the two connectors from the circuit board inside the display unit One connects the top and bottom sections of the display unit and the other is connected to the battery pack UNLOCK C...

Page 138: ...ide the display unit NOTE When re connecting the two connectors note their location and orientation pin positions Firmly connect them If the connectors are not firmly connected the instrument may not operate properly 7 Reconnect the two connectors to their original connections on the circuit board UNLOCK Circuit board ...

Page 139: ...e or display unit breakage may result 8 Couple the bottom section of the display unit with the top section NOTE The tapping screws must not be tightened to more than 29 4 N cm 3 kgf cm Otherwise the display unit may be damaged 9 While confirming that the hooks on the drive detector unit retaining plate are correctly aligned tighten the two tapping screws on the bottom face of the display unit UNLO...

Page 140: ...7 6 No 99MBB079A MEMO ...

Page 141: ... d e t c e n n o c y l r e p o r p t o n s i r o t c e t e D d e m r o f r e p t o n s a w t n e m e r u s a e m n o i t a r b i l a C P 1 0 2 J S e h t f o p u t e s r e p o r p m i o t e u d y l t c e r r o c n r o w s i s u l y t S e v o b a e h t n a h t r e h t O t i n u e v i r d e h t o t r o t c e t e d e h t t c e n n o c y l r e p o r P P 1 0 2 J S e h t e t a r b i l a c e R s e l a s o...

Page 142: ...a c C P S f f o d e n r u t s i r o s s e c o r p a t a d c i t a m i g i D e l b a c C P S e h t t c e n n o c y l r e p o r P r o s s e c o r p a t a d c i t a m i g i D e h t n o n r u T e h t s d e e c x e t n e m e r u s a e m n o i t a r b i l a c f o t l u s e R n o i t a r b i l a c f o e g n a r e l b i s s o p s s e n h g u o r n o i s i c e r p e h t f o e u l a v e h t k c e h C e u l ...

Page 143: ...i l p p u s s a w r e w o p l a m r o n b A P 1 0 2 J S e h t h t i w y l r e p o r p r e t n i r p e h t t c e n n o C r e t n i r p e h t n o r e p a p g n i d r o c e r e h t d a o L y l r e p o r p t i n u d a e h r e t n i r p e h t n o i t i s o P e u l a v c i r e m u n e m a s e h t o t e t a r d n a b r e t n i r p e h t t e S e h t f f o n r u t t x e N e t a r d n a b P 1 0 2 J S e h t ...

Page 144: ...8 4 No 99MBB079A MEMO ...

Page 145: ...s material Diamond Tip radius 5μm 200μin 2μm 80μin 0 75mN measuring force type Measuring force 4mN 0 4gf 0 75mN 0 075gf 0 75mN measuring force type Radius of skid curvature 40mm 1 57in 9 2 Drive Unit Detector drive range 21mm 82in Traversing speed Measurement 0 25mm s 0 5mm s 01in s 02in s Return 0 8mm s 03in s Detector retraction function Stylus UP Bottom configuration V way ...

Page 146: ... a s f o r e b m u N s h t g n e l g n i l p m a s n i 1 0 m m 5 2 0 n i 1 0 m m 5 2 0 5 2 μ 4 8 9 m μ n i 5 2 0 μ 4 8 9 m μ n i 0 0 0 1 5 3 1 n i 3 0 m m 8 0 n i 3 0 m m 8 0 5 2 μ 4 8 9 m μ n i 5 0 μ 9 6 9 1 m μ n i 0 0 6 1 5 3 1 n i 1 m m 5 2 n i 1 m m 5 2 8μ 5 1 3 m μ n i 5 1 μ 1 9 5 m μ n i 6 6 6 1 5 3 1 L h t g n e l n o i t a u l a v e y r a r t i b r A h t g n e l f f o t u C λc 1 λs l a v ...

Page 147: ... M 2 r M 1 A 0 0 0 5 1 o t 0 2 A o V m m 0 3 m c 2 m m 0 0 0 0 1 o t 3 m c 2 9 3 5 Evaluation length e l i f o r p d e r u s a e M h t g n e l n o i t a u l a v E e l i f o r p R λ 5 r o 3 1 n n x c e l i f o r p P h t g n e l g n i l p m a S ᐉ 9 3 6 Measurement range and resolution e g n a r t n e m e r u s a e M n o i t u l o s e R o t u A 1 0 0 μ 4 0 o t m μ e g n a r t n e m e r u s a e m e h ...

Page 148: ...re 5 C to 35 C Auto sleep function Display turns off if not operated for 30 seconds 9 5 Temperature Humidity Range Operation temperature 5 C to 40 C Storage temperature 10 C to 40 C 9 6 External Dimensions and Mass P O W E R D A T A S T A R T S T O P P A R A M E T E R 13 7 539 4 8 190 S J 2 0 1 P 115 4 527 62 2 441 26 1 024 50 1 969 23 906 156 5 6 161 71 5 2 815 16 4 646 φ6 6 φ 260 Mass 190 g Unit...

Page 149: ...No 12AAA233 SPC cable 1m No 936937 SPC cable 2m No 965014 RS 232C communication cable No 12AAA208 for DOS V Printer No 178 420A Printer No 178 420D Printer No 178 420E Recording paper 20 rolls No 12AAC243 71 5 2 815 61 2 402 59 5 2 343 16 4 646 ø9 ø 354 10 394 ø6 6 ø 260 4 8 190 2 079 3 5 138 3 5 138 10 5 413 Deep groove detector 178 394 71 5 2 815 Unit mm inch 61 2 402 59 5 2 343 16 4 646 ø9 ø 35...

Page 150: ...ADY 5 REQUEST Pull up to VDD 5V 6 to 10 N C to N C Pin No Signal name Description Timing chart POWER DATA key output RDY 0 6s max 20ms min T1 T 200ms T1 2s 200μs T2 400μs 200μs T3 400μs 200μs T4 400μs 2 T3 T4 REQ CK DATA Output request interrupt by external device RDY 2ms min T1 REQ CK DATA T 2ms T1 2s 200μs T2 400μs 200μs T3 400μs 200μs T4 400μs 2 T3 T4 ...

Page 151: ...ts digit The data is output serially starting from the LSB 20 of d1 and up to the MSB 23 of d13 d1 20 d1 21 d1 23 d1 22 d13 20 d13 21 d13 22 d13 23 d12 d11 d10 d9 d8 d7 d6 Digits 12 11 10 1 13 9 8 7 6 5 4 3 2 All F Sign 0 0000 8 0001 Measured data 6 digits Decimal point X X X X XX d5 d4 d3 d2 mm 0 inch 1 5 2 4 3 ...

Page 152: ... o r g l a n g i S 2 D X R a t a d e v i e c e R n I 3 S T C d n e s o t r a e l C n I 4 D X T a t a d d n e S t u O 5 S T R d n e s o t t s e u q e R t u O 6 G F d n u o r g e m a r F Communication flow control and transmission reception processing between the SJ 201P and a per sonal computer Here communication is performed by a hardware control method using two RTS and CTS lines If the RTS at th...

Page 153: ... 0 y l a m o n a d n a m m o C 9 0 y l a m o n a e r a w d r a H 2 0 s s e r g o r p n i g n i s s e c o r P 0 1 r o r r e n o i t a c i n u m m o C 3 0 r o r r e t u o e m i T 1 1 e g n a r e h t f o t u O 4 0 a t a d g n i d n o p s e r r o c o N 2 1 y d a e r t o n s i a t a D 5 0 e g n a r r e v O 6 1 r o r r e g n i t t e s d e t i b i h o r P 7 0 g n i s s i m s i t i n u r o t c e t e d e v...

Page 154: ... T N R C The contents of the sub field column shown above follows d l e i f b u S g n i n a e M e g n a r a t a D U T S n o i t a m r o f n i s u t a t S 1 0 o t 0 0 G L F g a l f d i l a v a t a d d e v a S N O C s n o i t i d n o c t n e m e r u s a e m d e v a S a t a d t n e m e r u s a e M 0 0 a t a d d e v a S 0 1 o t 1 0 A T D a t a d e l i f o r p d e r u s a e m d e v a S a t a d t n e m ...

Page 155: ... h t g n e l g n i l p m a s f o r e b m u N 2 1 L L 5 x 5 3 x 3 1 x 1 e l i f o r P 3 1 6 7 7 4 N I D 4 R 2 P 1 r e t l i F 4 1 e n o N 4 0 5 C P 3 5 7 C P 2 5 7 C R 2 1 d r a d n a t S 5 1 I S N A 5 O S I 4 N I D 3 S I J w e N 2 S I J d l O 1 e g n a R 6 1 0 5 3 1 μ 0 0 0 4 1 m μ n i 0 0 1 2 μ 0 0 0 4 m μ n i 0 5 3 μ 0 0 0 2 m μ n i 0 1 4 μ 0 0 4 m μ n i o t u A A n o i t c e r r o c a t a D 7 1...

Page 156: ... a e c a p s A Return data to RDRES command r e d a e H a t a D O K R a _ u m M E P P c c m R C 1 0 3 a R e l p m a x E μ 5 2 1 y R m μ 2 1 f o t i m i l r e p p u h t i w t n e m g d u j G N O G m μ m 1 0 3 a R K O μ 5 2 1 U y R m μ R C m Calculation results of all set parameters are transmitted Communication format Calculation result is transmitted immediately after the parameter name Each of th...

Page 157: ...m r o f n i d e z i m o t s u C A R T h t g n e l g n i s r e v a r T M U N s e c e i p a t a d f o r e b m u n d e r i u q e r e h t s t e S N A C d e r r e f s n a r t e b o t a t a d f o d a e h e h t s e i f i c e p S s e i f i c e p s d n a d n a m m o c A T D D R e h t h t i w n o i t c e l e s e l i f o r p d e r u s a e m e h t Data 1 r e d a e H d l e i f b u S a t a D M E W R C U T 9 9 8...

Page 158: ...e data column follows a t a D s e t y B g n i n a e M t i n U 9 9 1 n i 2 m m 1 Data 5 r e d a e H d l e i f b u S a t a D M E W R S T D 9 9 R C The content of 99 in the above data column follows a t a D s e t y B g n i n a e M d r a d n a t S 9 9 1 I S N A 5 O S I 4 N I D 3 S I J w e N 2 S I J d l O 1 Data 6 r e d a e H d l e i f b u S a t a D M E W R R A N 9 9 R C The content of 99 in the above ...

Page 159: ...s of 99 and 98 in the above data column follow a t a D s e t y B g n i n a e M t i n U 9 9 1 n i 2 m m 1 l e v e l t n u o C 8 9 8 t i n U t i n u e u l a v c i r e m u n μ m μ n i t h g i r e h t m o r f H 0 2 s e d o c e c a p s h t i w d e d d a p d n a d e i f i t s u j t f e L t n i o p l a m i c e d a s e d u l c n i n o i t c e s c i r e m u n e h T 0 1 e l p m a x E μ 0 1 1 m μ m Data 11 r...

Page 160: ... 9 R C The content of 99 in the above data column follows a t a D s e t y B g n i n a e M s e c e i p a t a d f o r e b m u n d e r i u q e R 9 9 5 Data 15 r e d a e H d l e i f b u S a t a D M E W R C A N 8 9 9 9 R C The contents of 98 and 99 in the above data column are listed in the following table a t a D s e t y B g n i n a e M t n i o p a t a d t r a t S 8 9 5 e b o t a t a d f o d a e h e h...

Page 161: ...g n e l n o i t a u l a v E ᐉ n m m a R 5 2 1 8 0 r e t a e r g r o 4 2 5 2 1 a R 0 0 1 5 2 r e t a e r g r o 5 7 Standard sampling length for Ry y R f o e g n a R μ m h t g n e l g n i l p m a S ᐉ m m y R 8 0 5 2 0 8 0 y R 3 6 8 0 3 6 y R 5 2 5 2 5 2 y R 0 0 1 8 0 0 1 y R 0 0 4 5 2 Standard sampling length for Rz z R f o e g n a R μ m h t g n e l g n i l p m a S ᐉ m m z R 8 0 5 2 0 8 0 z R 3 6 8 ...

Page 162: ... R 0 0 1 8 0 8 0 4 0 0 1 z R 0 0 5 5 2 5 2 5 2 1 0 0 5 z R 0 0 0 2 8 8 0 4 Standard cutoff length sampling length and evaluation length for Ry y R f o e g n a R μ m h t g n e l f f o t u C λ c m m h t g n e l g n i l p m a S ᐉ m m h t g n e l n o i t a u l a v E ᐉ n m m 5 2 0 0 y R 0 1 0 8 0 0 8 0 0 4 0 0 1 0 y R 0 5 0 5 2 0 5 2 0 5 2 1 0 5 0 y R 0 0 1 8 0 8 0 4 0 0 1 y R 0 0 5 5 2 5 2 5 2 1 0 0 5...

Page 163: ...8 0 4 4 0 m S 3 1 5 2 5 2 5 2 1 3 1 m S 4 8 8 0 4 N I D O S I S I J m S s t n e m e l e e l i f o r p e h t f o h t d i w n a e M 9 5 0 1 o s l a e e S Standard cutoff length and evaluation length for Ra from non periodic roughness profile a R f o e g n a R μ m h t g n e l f f o t u C λ c m m h t g n e l n o i t a u l a v E ᐉ n m m a R 2 0 0 8 0 0 4 0 2 0 0 a R 1 0 5 2 0 5 2 1 1 0 a R 2 8 0 4 2 a ...

Page 164: ...8 0 4 4 0 m S R 3 1 5 2 5 2 1 3 1 m S R 4 8 0 4 Standard sampling length and evaluation length for the measurement of Ra and Rq from non periodic roughness profiles a R μ m h t g n e l g n i l p m a S ᐉ m m h t g n e l n o i t a u l a v E ᐉ n m m 6 0 0 0 a R 2 0 0 8 0 0 4 0 2 0 0 a R 1 0 5 2 0 5 2 1 1 0 a R 2 8 0 4 2 a R 0 1 5 2 5 2 1 0 1 a R 0 8 8 0 4 Standard sampling length and evaluation lengt...

Page 165: ...n i 0 4 0 m S 3 1 m m 5 2 m m 5 2 1 m m 6 1 0 0 m S 5 0 0 n i 0 1 0 n i 5 0 n i 3 1 m S 0 4 m m 0 8 m m 0 0 4 m m 5 0 0 m S 6 1 0 n i 3 0 n i 6 1 n i For selection of profile filter cutoff among from the table estimate the roughness parameter Sm graphically from an unfiltered profile trace Standard cutoff length and evaluation length for R parameters from non periodic profiles a R h t g n e l f f ...

Page 166: ...th a plane normal to the nominal surface It is a representation of the real profile a profile of the real surface obtained by a surface roughness measuring instrument Roughness profile R A profile obtained by filtering the primary profile with a long wavelength cutoff filter high pass filter to remove the waviness components long wavelength components ...

Page 167: ...the position shifted from the position where it is supposed to be for surface roughness evaluation However by this procedure those negative effect can be avoided to a certain extent The actual procedure is shown below 1 The first mean line is obtained with respect to the input data 2 Valleys below the mean line are removed 3 The second mean line is obtained with respect to the data obtained in the...

Page 168: ...data is compensated with reference to the second mean line TIP The filters specified in DIN4777 are used for calculating both the first and second mean lines For information about this refer to section 10 1 3 Evaluation according to DIN ...

Page 169: ...i t a s n e p m o c e s a h P 0 5 Each of the filter characteristics will be explained below The transmission characteristic of each filter will be represented by that of a high pass filter 2RC 75 This has the same transmission characteristic as that of two R C circuits having identical time constants connected in series The transmission characteristic is 12dB oct and the amplitude transmittance a...

Page 170: ... 3 7 10 30 5 25 15 10 5 0 20 λ λc Amplitude transmittance Amplitude transmittance dB Transmission characteristic of PC50 Gaussian 2 3 10 7 5 20 30 100 70 80 50 x λ λc H λ 1 e ᐉn2 π 2 1 Transmission characteristic 0 4697 where 2 The use of this filter results in a simple formula of addition Primary profile Roughness profile Waviness profile Therefore the low pass filter is characterized by x λ λc H...

Page 171: ...velength Figure shows the response of a low pass filter to square wave input and figure shows that of a high pass filter Input signal square wave 500 00 μm cm x 20 0 20 μm cm x 50000 LPF PC 500 00 μm cm x 20 500 00 μm cm x 20 0 20 μm cm x 50000 0 20 μm cm x 50000 LPF 2RC Low pass filter HPF PC 500 00 μm cm x 20 500 00 μm cm x 20 0 50 μm cm x 20000 HPF 2RC 0 50 μm cm x 20000 High pass filter ...

Page 172: ...xcept with different cutoff lengths The difference between the two is shown in figures 0 1 75 50 0 2 0 3 0 7 1 0 5 2 3 7 10 5 λ λc Amplitude transmittance Difference in cutoff lengths of the filters 2 3 10 7 5 20 30 100 70 80 50 0 1 75 50 0 2 0 3 0 7 1 0 5 2 3 7 10 5 λ λc Amplitude transmittance Comparison of two filters at the same cutoff length 2 3 10 7 5 20 30 100 70 80 50 ...

Page 173: ...wn in figures 0 1 0 2 0 3 0 7 1 0 5 2 3 7 10 5 λ λc Amplitude transmittance PC50 Gaussian 2RC 75 2 3 10 7 5 20 30 100 70 80 50 2RC 75 PC50 Gaussian Standards of filters Table lists the correspondence between the filter types and their standards S I J O S I E M S A I S N A N I D 5 7 C R 2 2 8 9 1 1 0 6 0 B 7 8 9 1 0 1 6 0 B 6 7 9 1 1 5 6 0 B 4 7 2 3 5 7 9 1 5 8 9 1 1 6 4 B 2 6 7 4 5 7 C P 0 5 C P 4...

Page 174: ... r o f d o h t e m e r a u q s t s a e l e h t h g u o r h t d e n i a t b o s e n i L h t g n e l g n i l p m a s e l i f o r p s s e n h g u o R 5 7 C R 2 h t g n e l n o i t a u l a v e e h t r e v o d o h t e m e r a u q s t s a e l e h t h g u o r h t d e n i a t b o e n i l A 5 7 C P h t g n e l n o i t a u l a v e e h t r e v o d o h t e m e r a u q s t s a e l e h t h g u o r h t d e n i a...

Page 175: ...the post travel length Measuring operation 1 reciprocal movement cycle 0 5mm s 02in s 0 8mm s 03in s Measurement starts from the origin limit position If measurement has been completed the detector returns to the origin limit If the 2RC75 filter is selected Approach length 0 5mm 02 ᐉ ᐉ n ᐉ λc Pre travel length Evaluation length Origin Normal measuring position Traversing length If the PC50 filter ...

Page 176: ... L Approach length Evaluation length Origin Normal measuring position Traversing length TIP If measuring the roughness profile without pre travel and post travel lengths is selected the data corresponding to the cutoff length λc are virtually obtained from the measured profile and added on both ends of the evaluation length This also applies to the measurement with roughness profile for an arbitra...

Page 177: ... a sampling length Specific parameters to be obtained over the evaluation length will be noted as required 10 5 1 Arithmetic mean deviation of the profile Ra Ra is the arithmetic mean of the absolute values of the profile deviations Yi from the mean line N i 1 Ra 1 N Yi For ANSI Ra is defined over the entire evaluation length 10 5 2 Root mean square deviation of the profile Rq Rq is the square roo...

Page 178: ...18 No 99MBB079A 10 5 3 Maximum height of the profile Ry JIS Ry JIS is the sum of height Yp of the highest peak from the mean line and depth Yv of the deepest valley from the mean line Ry JIS Yp Yv Yp Ry Yv ...

Page 179: ...portion that projects upward convex from the mean line of the assessed profile is called the profile peak and that which projects downward concave is called the profile valley The highest point of each profile peak is called the highest peak and the deepest point of each profile valley is called the deepest valley However if the profile peak height or the profile valley depth is less than 10 of th...

Page 180: ... A portion that projects upward convex from the mean line of the assessed profile is called the profile peak and that which projects downward concave is called the profile valley The highest point of each profile peak is called the highest peak and the deepest point of each profile valley is called the deepest valley 10 5 7 Maximum profile peak height Rp DIN ISO New JIS Obtain profile peak height ...

Page 181: ... line The following restrictions are provided to determine a profile element Peaks and valleys must appear alternately The intersection of the assessed profile with the mean line immediately before the profile element is the start point of it and is the end point of the previous profile element At the start point of the sampling length however if either the peak or valley is missing the profile el...

Page 182: ...hird deepest profile valley is determined within each sampling length The arithmetic mean of the 3 Zi s over the evaluation length is R3z Sampling length Evaluation length 3z1 3zi 3zn Profile peak highest peak and profile valley deepest valley of assessed profiles A portion that projects upward convex from the mean line of the assessed profile is called the profile peak and that which projects dow...

Page 183: ...n upward convex portion of an assessed profile has concavities on both sides the highest point of the convexity is called a local peak However if the lateral distance between the adjacent convexities is less than 1 of the sampling length ᐉ or if the depth of the concavities is less than 10 of Ry the convex portion is not regarded as a local peak Ry 10 or more Ry 10 or more ᐉ 100 or more ᐉ 100 or m...

Page 184: ...ve of the profile Abbott Firestone curve BAC A curve representing the material ratio of the profile as a function of slice level where the mr values are plotted on the abscissa while the slice levels are on the ordinate 0 50 mr 100 100 50 DEPTH 0 ...

Page 185: ...points A and B different in the material ratio by 40 and having the smallest gradient The core roughness depth Rk is the vertical distance between the ordinate values i e slice levels of the straight line intersecting two lines at mr 0 position C and mr 100 position D respectively Parameters Rpk and Rvk are calculated as the height of the right angle triangle CHJ or DEG which is constructed to hav...

Page 186: ...erial ratio curve and upper than the BAC Vo Mr2 Rvk m 2000 100 Mr2 Rvk This parameter is a value that is converted from the volume mm3 of the concave portion lower than the slice level to a volume per area cm2 when viewed from the top of a workpiece if the measured profile and slice level are assumed as a plane in a 3 dimensional space Rvk Mr2 a slice level S 100 0 mr DEPTH μm ...

Page 187: ...Mitutoyo Corporation 20 1 Sakado 1 chome Takatsu ku Kawasaki Kanagawa 213 0012 Japan Cable MITUTOYO Kawasaki Phone 044 813 8230 Fax 044 813 8231 Printed in Japan ...

Reviews: