45
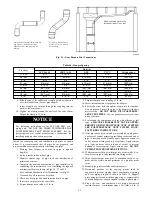
Near Furnace Vent Connections
Offsets in the vertical portion of the vent pipe should be made with
45 deg. elbows instead of 90 deg. elbows. Short horizontal runs of
vent pipe are difficult to pitch correctly and may trap water in the
vent pipe.
Trapped water in the vent pipe may result in nuisance pressure
switch tripping.
Install the Vent and Combustion Air Pipes
With the furnace installed in the required position, remove the
desired knockouts from the casing. It will be necessary to remove
one knockout for the vent pipe and the other knockout for the
combustion air connection. See Fig. 13.
Use a flat blade screwdriver and tap on the knockout on opposite
sides, where the knockout meets the casing. Fold the knockout
down with duct pliers and work the knockout back and forth until
it is removed. Trim any excess metal from the knockout with tin
snips.
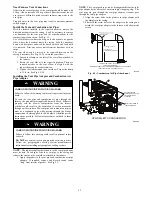
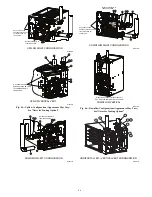
The vent elbow can be rotated to the required location on the
casing if necessary. See Fig. 50. To rotate the vent elbow:
1. Loosen the clamp on the inlet of the vent elbow attached to
the inducer.
2. Rotate the vent elbow to the required position. There are
rounded notches on the vent elbow to align it with the
inducer housing for each orientation.
3. Tighten the clamp around the vent elbow. Torque the clamp
to 15 lb--in. See Fig. 45--48.
Installing the Vent Pipe Adapter and Combustion Air
Pipe Adapter
CARBON MONOXIDE POISONING HAZARD
Failure to follow this warning could result in personal injury or
death.
To route the vent pipe and combustion air pipe through the
furnace, the manufacturer supplied kit must be used. Failure to
properly seal the blower compartment from the furnace
vestibule could result in the circulation of carbon monoxide
throughout the structure. The vent pipe and combustion air pipe
must be a continuous pipe while passing through the blower
compartment. Seals supplied in this kit must be installed per the
instructions provided. Follow all procedures outlined in these
instructions.
WARNING
!
CARBON MONOXIDE POISONING HAZARD
Failure to follow this warning could result in personal injury
or death.
DO NOT
use cement to join polypropylene venting systems.
Follow the polypropylene venting system manufacturer’s
instructions for installing polypropylene venting systems.
!
WARNING
NOTE
: The rubber coupling that attaches to the vent pipe adapter
must be used. The adapter seals the vent pipe to the casing and
reduces the strain on the vent elbow attached to the inducer.
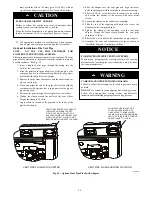
1. Apply the gaskets to the vent pipe and combustion air pipe
adapters. If supplied, remove and discard round center
“slug” from interior of gasket. See Fig. 49.
NOTE
: The vent pipe adapter can be distinguished from the inlet
pipe adapter by the absence of an internal pipe--stopping ring. The
vent pipe can pass through the vent pipe adapter; it cannot pass
through the inlet pipe adapter.
2. Align the screw holes in the plastic vent pipe adapter with
the dimples in the casing.
3. Pilot drill the screw holes for the adapter in the casing and
attach the vent pipe adapter to the furnace with sheet metal
screws
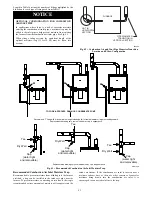
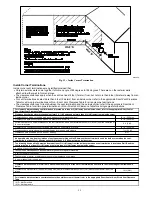
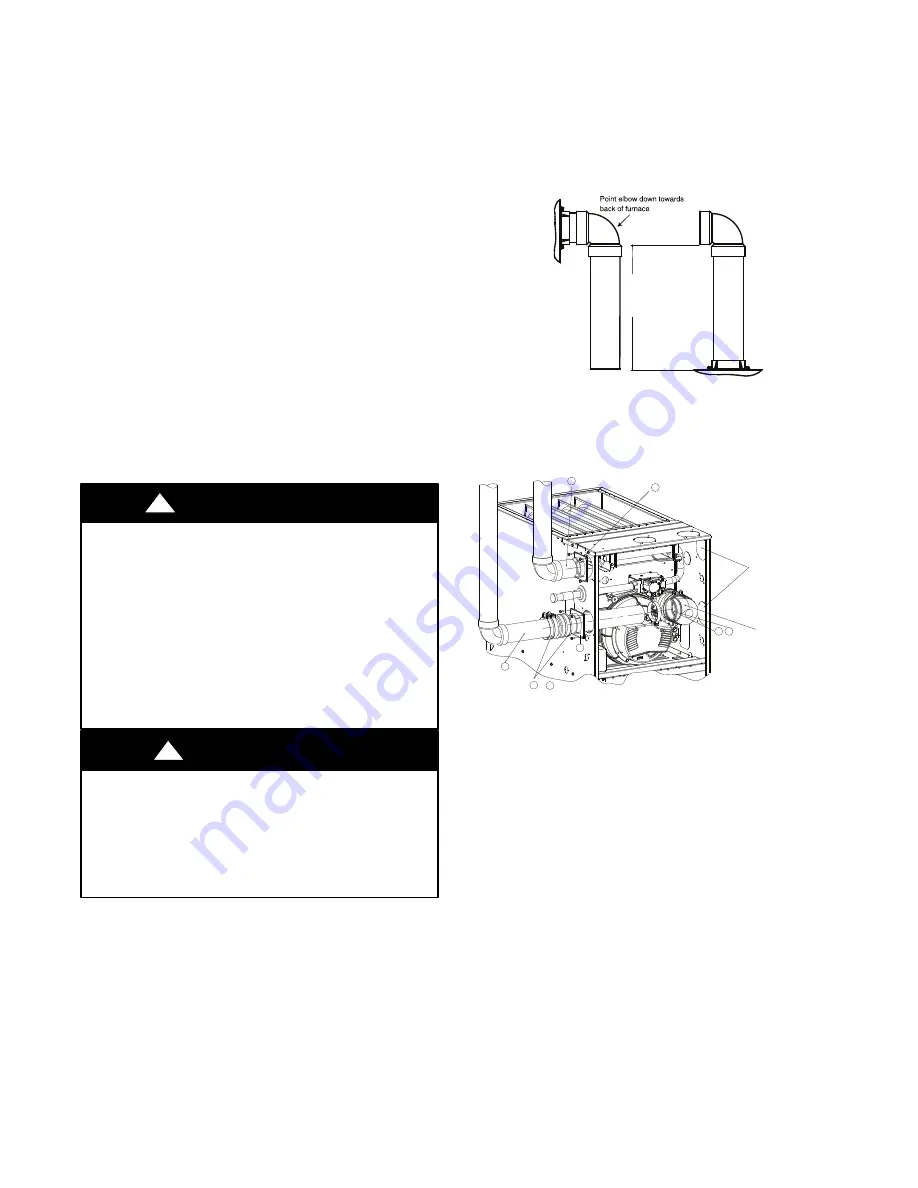
12" (256mm) minimum
to
60”(1524 mm) or
1 additional elbow maximum
CASING SIDE OR TOP ATTACHMENT
COMBUSTION AIR PIPE
(NON-DIRECT VENT FOR ALL MODELS EXCEPT MODULATING UNLESS
INSTALLED IN ATTIC OR CRAWL SPACE)
A13406
Fig. 44 -- Combustion Air Pipe Attachment
1
2
3
4
6
7
5
5
Rotate vent elbow to
required position.
Any other unused
knockout may be used
for combustion air
connection.
&
UPFLOW LEFT CONFIGURATION
A11309A

