3
A07617
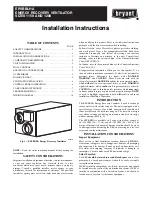
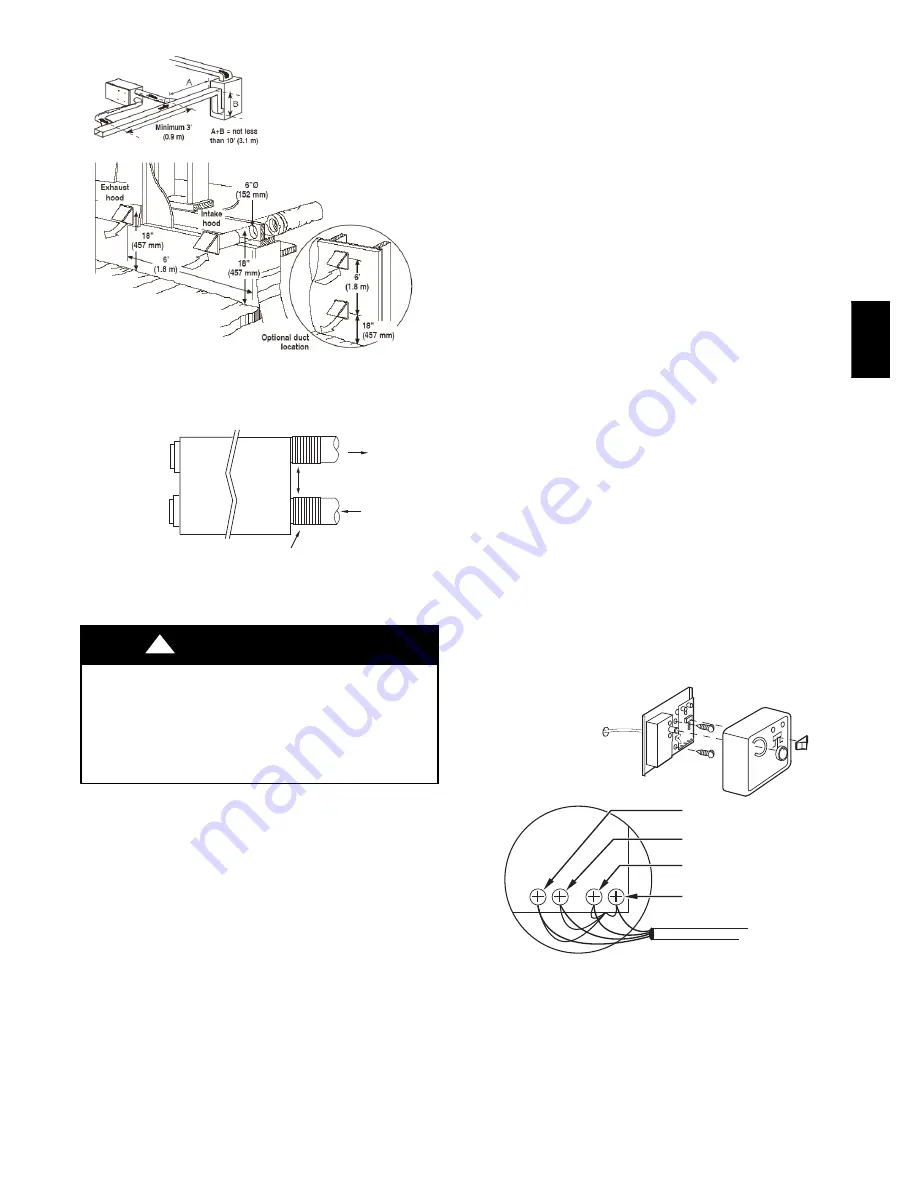
Fig. 5 -- Exhaust Ventilation
FLEXIBLE
DUCT
FRESH-AIR
SUPPLY
STALE-AIR
RETURN
DUCTS CONNECTING TO
RETURN-AIR DUCT SYSTEM
A07610
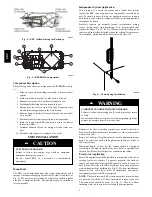
Fig. 6 -- Flexible Duct Fit--Up
Connect Ducts to ERV
PROPERTY DAMAGE HAZARD
Failure to follow this caution may result in minor property
damage from sweating duct or loss of unit efficiency and
capacity.
ERV should be installed in a conditioned space with insulated
flex duct for supply and exhaust air to the outdoor ambient.
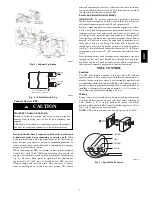
CAUTION
!
Insulated flexible duct is required on both fresh--air inlet and
exhaust--air outlet ducts connecting to exterior wall.
When
using insulated flexible duct, the vapor barrier of the flexible ducts
must be taped very tightly to prevent condensation problems. To
reduce pressure drop, stretch the flex duct and support it in a proper
manner to avoid reduced airflow.
When connecting the ERV to a return--air duct system, insulated
flexible duct can be used. When using metal duct from fresh--air
supply to system duct work, the metal duct should be insulated (see
Fig. 6). However, when metal or rigid ducts are applied use
approximately 18” (457 mm) of flexible duct at ERV ports for
fresh--air supply and stale--air return. This can act as a silencer
when connecting ducts to return--air duct system. This should
eliminate transmission of noise or vibration from unit to main duct
system. In addition, there are four 30” (762 mm) duct ties provided
to help fasten flexible duct to port on ERV.
Locate and Install Exterior Hoods
IMPORTANT
: To prevent condensation problems, insulated
flexible ducts are required on both fresh--air inlet and exhaust--air
outlet ducts connecting between ERV and exterior wall.
Fresh--air intake and stale--air exhaust must be separated by at least
6 ft (1.8 m). Fresh--air intake must be positioned at least 10 ft (3 m)
from nearest dryer vent, furnace exhaust, driveway, gas meter, or
oil fill pipe. Fresh--air intake must be positioned as far as possible
from garbage containers and potential chemical fumes. When
possible, it is advised to locate the intake and exhaust hoods on
same side of house or building. The intake and exhaust hoods
should never be located on interior corners or in dead air pockets
(see Fig. 5). Both intake and exhaust hoods must be 18” (457 mm)
from ground and at least 12” (305 mm) above anticipated snow
level.
After selecting proper hood locations, make appropriate size hole
through exterior wall, pass flexible duct through hole and insert
hood tube into duct. Tape duct vapor barrier tightly around hood
tube and insert assembly back into wall and fasten securely.
WALL CONTROL
Location
The ERV wall control is unique to this unit. The ERV will not
operate without it. This control senses humidity not temperature. It
must be located in an area where it will continually monitor fresh
air circulating within the home. Install ERV wall control as close as
possible to main system thermostat and follow same guidelines as
installing a thermostat (locate approximately 5 ft (1.5 m) above
floor, mount on an inside partitioning wall, etc.).
Wiring
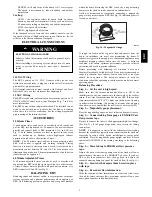
Remove top cover assembly from wall control and pass thermostat
wire through hole located on back of control before attaching to
wall. Connect Y, R, G, and B (yellow, red, green, and black)
between wall control and ERV connector following color code (see
Fig. 7 and 8). Replace top cover assembly.
NOTE
: ERV wall control and circuit board operate on 12 VDC.
YELLOW
Y
R
GB
RED
GREEN
BLACK
A00112
Fig. 7 -- Typical Wall Control
ER
V

