background image

II.

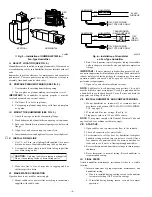
SELECT LOCATION (SEE FIG. 14.)

Humidifier may be installed on either supply or return plenum. If
furnace has air conditioning coil, be sure humidifier does not
interfere with coil ends. Remember to provide clearance for
maintenance and evaporator pad removal.

III.

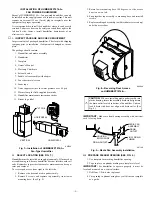
PREPARE PLENUM OPENING (SEE FIG. 2.)

1. Use template for marking humidifier opening.

2. Tape in place on plenum making sure template is level.

IMPORTANT:

For humidifier to operate properly it must be

level and mounted on a vertical surface.

3. Drill four 1/8-in. holes in plenum.

4. Cut opening in plenum using heavy solid lines on template

as a guide.

IV.

MOUNT THE HUMIDIFIER

Supply or return plenum mounting:

1. Remove unit access door by turning 2 pawl latches 1/2 turn

and pulling door forward.

2. Determine whether unit is to be used for right- or left-hand

installation and apply gasket tape (supplied) to unit flange
intended to seat against duct.

3. Remove media assembly from cabinet by lifting bearing

end of assembly out of bearing retainer and pulling assem-
bly toward outlet duct, thus disengaging media from motor.
Remove media through unit access opening.

4. Remove pin from float assembly and remove float and arm.

Remove drain plug and water pan.

NOTE:

Water pan must be tilted for removal.

5. Mount unit to duct using pre-drilled holes and four 1/2-in.

long screws found in parts bag.

6. Level unit and attach support bracket to unit using 1/4-in.

blunt point screw. Attach other end of support bracket to
duct by drilling a hole and using remaining 1/4-in. long
screw.

7. Re-install water pan and drain plug. Re-attach float arm to

valve body by aligning holes in both parts and re-inserting
pin.

NOTE:

Pin may be re-inserted from either direction.

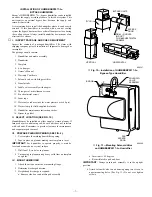
8. Re-install media assembly. Ensure that square shaft of

media assembly is located inside mating opening of motor
coupling. Ensure that bearing washer is located on interior
side of bearing retainer. (See Fig. 15.)

V.

INSTALL BYPASS DUCT

Attach field-supplied 6-in. diameter duct, elbow, or starting collar
with field-supplied 1/4-in. zip screws. Install supplied 6-in. damper
in 6-in. duct connector.

IMPORTANT:

On systems with central cooling, the damper

should be closed during cooling season to prevent bypass air.

CAUTION:

Do not support weight of duct from humidi-

fier — damage could result.

VI.

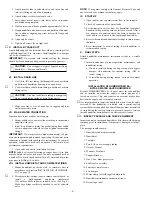
INSTALL DRAIN LINE

1. Use 1/2-in. ID field-supplied vinyl tubing or equivalent

tubing to connect overflow drain connection on unit water
pan to drain. (See Fig. 16.)

2. Use worm clamp to hold tubing in position over overflow

drain connection.

IMPORTANT:

Make sure that line is free of traps due to sagging

and has sufficient pitch to drain.

3. Unit must be level to provide proper drainage.

VII.

MAKE WATER CONNECTION

1. Mount saddle valve on cold water line according to local

codes.

2. For plastic tube installations: run 1/4-in. OD tubing (sup-

plied) from saddle valve to float valve. Prepare tubing ends
with plastic compression sleeves and brass inserts, and
tighten compression fittings. Plastic compression nut sup-
plied with float valve should not be torqued greater than 25
in.-lb. For copper tubing installations: copper tubing may be
connected to float valve by using a field-supplied 1/4 to 1/4
in. straight-through compression union. Run copper tubing
to 1 side of compression union and use a standard compres-
sion sleeve. Tighten compression nut to torque recom-
mended by manufacturer. Attach approximately 6 in. of
polyethylene supply tubing (supplied) between compres-
sion union and float valve. Prepare polyethylene tubing on
both ends with brass inserts to prevent tubing collapse. Use
compression nut at union to manufacturer’s recommended
torque, tighten plastic nut on float valve to maximum of 25
in.-lb.

3. Open valve and check installation for leaks.

NOTE:

Valve is self piercing on copper lines; 1/4-in. hole must

be drilled in steel or iron pipes. Use only a grounded drill or a hand
drill to avoid shock hazard. Turn off water and drain the pipe prior
to drilling 1/4-in. hole.

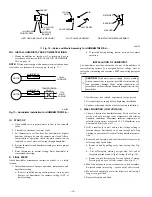
Fig. 14—Installation of HUMBBWTR2019-A--

Water Saver Humidifier

A98369

VERTICAL

HORIZONTAL

BYPASS UNITS

DRILL (2) HOLES
IN DUCT
FOR #8 SHEETMETAL
SCREWS

"N" COIL

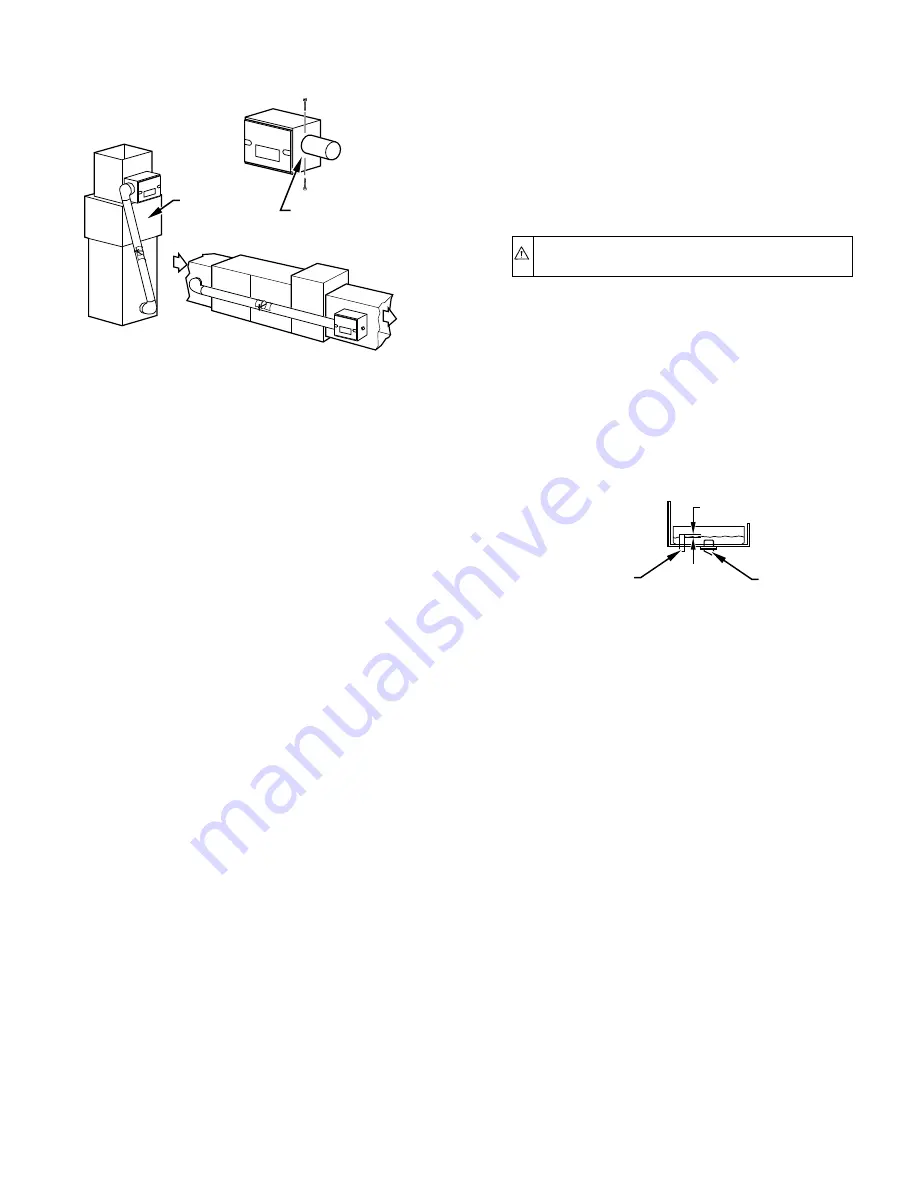
Fig. 16—Water Level in HUMBBWTR2019-A--

A96013

DRAIN PLUG

OVERFLOW TUBE

1

4

—9—

Summary of Contents for HUM

Page 1: ... signifies hazards which could result in personal injury or death CAUTION is used to identify unsafe practices which would result in minor personal injury or product and property damage WARNING Before installing or servicing system al ways turn off main power to system There may be more than 1 disconnect switch Turn off accessory heater power if applicable Electrical shock can cause personal injur...

Page 2: ...PORTANT For humidifier to operate properly it must be level and mounted on a vertical surface 3 Drill four 1 8 in holes in plenum 4 Cut opening in plenum using heavy solid lines on template as a guide IV MOUNT THE HUMIDIFIER SEE FIG 3 1 Attach foam tape on inside of mounting flange 2 Hook bottom notch of humidifier on opening cut in plenum 3 Push top of humidifier to plenum aligning screw holes wi...

Page 3: ...eck all connections for water leaks 3 Set thermostat to call for heat Set humidistat for highest humidity setting making sure contacts are closed After a few minutes of operation check the drain connection for leaks and to see if water is flowing through humidifier 4 Reverse thermostat and humidistat settings to insure proper shutdown 5 Reset thermostat to normal setting Reset humidistat to recomm...

Page 4: ...rts bag Read water noise reducer note located inside package for instructions For normal operation saddle valve need only be opened 1 full turn to meet performance requirements 3 Open valve and check installation for leaks NOTE Saddle valve is self piercing on copper lines 1 4 in hole must be drilled in steel or iron pipes Use only a grounded drill or a hand drill to avoid shock hazard Turn off wa...

Page 5: ...nds Remember to provide clearance for maintenance and evapo rator pad removal To reverse pad access from right to the left side 1 Remove side door and media pad assembly 2 Remove 4 screws and separate top assembly from lower mounting base See Fig 8 3 Rotate lower mounting base 180 degrees so side access door is now on left 4 Snap together top assembly to mounting base and reinstall screws 5 Replac...

Page 6: ...uctions For normal operation saddle valve need only be opened 1 full turn to meet performance requirements 3 Open valve and check installation for leaks NOTE Saddle valve is self piercing on copper lines 1 4 in hole must be drilled in steel or iron pipes Use only a grounded drill or a hand drill to avoid shock hazard Turn off water and drain the pipe prior to drilling 1 4 in hole VIII INSTALL HUMI...

Page 7: ...enance instruction sticker 16 Bryant logo label II SELECT LOCATION SEE FIG 12 Humidifier may be installed on either supply or return plenum If furnace has air conditioning coil be sure unit does not interfere with coil ends Remember to provide clearance for maintenance and evaporator pad removal III PREPARE PLENUM OPENING SEE FIG 2 1 Use template for marking humidifier opening 2 Tape in place on p...

Page 8: ...accordance with section INSTALLATION OF HUMIDIS TAT on page 10 2 Wire brown low voltage leads to furnace control board or install a field supplied step down transformer 115vac 24vac 60Hz to power solenoid valve See Fig 4 Make sure bridge rectifier is attached to coil of solenoid valve NOTE Wiring must comply with National Electrical Code and any local codes or ordinances that may apply IX START UP...

Page 9: ...ollar with field supplied 1 4 in zip screws Install supplied 6 in damper in 6 in duct connector IMPORTANT On systems with central cooling the damper should be closed during cooling season to prevent bypass air CAUTION Do not support weight of duct from humidi fier damage could result VI INSTALL DRAIN LINE 1 Use 1 2 in ID field supplied vinyl tubing or equivalent tubing to connect overflow drain co...

Page 10: ...ns in accordance with Installation Instruction supplied with the humidifier 1 Installer must be a trained experienced service person 2 Disconnect power supply before beginning installation 3 Conduct a thorough checkout before leaving installation I WALL MOUNTING LOW VOLTAGE 1 Choose a location for humidistat about 5 ft above floor on inside wall with average room temperature and relative humidity ...

Page 11: ...nob by pulling away from casing See Fig 18 b Lift off faceplate starting at right side Left end of faceplate protrudes under lip on casing See Fig 18 c Remove switch by removing 2 screws in back of casing Pressing tab on case Lift out control See Fig 19 6 Make connections to screw terminals on switch assembly Re install switch into casing secure with 2 short screws 7 While holding wire in place Mo...

Page 12: ... at least 1 complete cycle to make certain that all components are functioning properly Fig 21 Humidistat Installation Schematic A97105 CASE MOUNTING TEMPLATE MOUNTING SCREWS 2 FOAM GASKET MAKE OPENING IN DUCT MOUNT HUMIDISTAT CASE ALTERNATE PROCEDURE DRILL SIX 1 4 IN DIAMETER HOLES RECOMMENDED HUMIDISTAT SETTING OUTSIDE TEMPERATURES RECOMMENDED HUMIDISTAT SETTING 20 F 15 10 F 20 LO 0 F 25 10 F 30...

Reviews: