background image

8

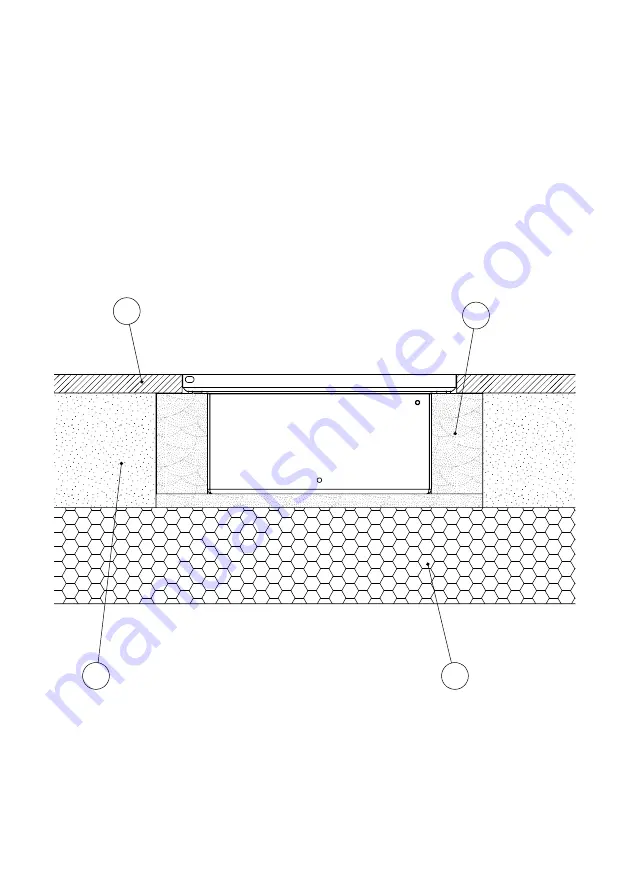
Schritt 5

Nach dem Aushärten die Steckdosen 
anschließen, den Geräteträger   
wieder in das Gehäuse  einschrauben, 
sowie den Deckel  an den Rahmen �  
Danach erst den Belag (B) im Raum  
verlegen� Der Bodentank ist nun erfolgreich  
eingebaut� (Siehe Querschnitt unten)

E

P

B

M

Summary of Contents for 20 A Series

Page 1: ...Bedienungsanleitung Instruction Manual 20er A Q Serie 20 A Q Series...

Page 2: ...2 Inhalt Contents Produktbeschreibung 3 Technische Daten 4 Montageanleitung 5 Gebrauchshinweise 13 Product description 3 Technical data 4 Assembly instructions 9 Instructions for use 13...

Page 3: ...s Exemplarisch ist der Bodentank 2003A abgebildet Das Montageprinzip gilt f r alle Bodentanks der 20er A Serie 2003A 2004A 2008A und der 20er Q Serie 2003Q 2004Q 2008Q The 2003A floor tank is shown as...

Page 4: ...load max 900kg Fl chenlast Area load max 900kg Fl chenlast Area load max 900kgg Art Nr Item No 2003Q 2004Q 2008Q Einbauma e Instl dim 200x203x92mm 250x253x92mm 250x253x92mm Zuleitungen Supply line 4...

Page 5: ...Gie en des Estrichs einen Polystyrol Block PB der in seiner u eren Abmessung umlaufend ca 40mm gr er ist als die Dose als Platzhalter auf die ausgelegte D mmschicht P kleben Danach die Leerrohre L ver...

Page 6: ...re Belagsst rke Zudem muss das M rtelbett f r die entsprechende Belastung der Bodensteckdose ausgelegt sein 3 E W t Schritt 3 Nach dem Gie en des Estrichs den Polystyrol Block PB aus dem Estrich entfe...

Page 7: ...abdichten Tipp die Geh use ffnung beispielsweise mit Pappe abdecken wie abgebildet Die Aussparung um das Geh use nun mit M rtel M auff llen Die Position des Geh uses vor dem Aush rten des M rtels mit...

Page 8: ...n die Steckdosen anschlie en den Ger tetr ger wieder in das Geh use einschrauben sowie den Deckel an den Rahmen Danach erst den Belag B im Raum verlegen Der Bodentank ist nun erfolgreich eingebaut Sie...

Page 9: ...he screed a polystyrene block PB with a circumference of approx 40 mm larger than the box in its outer dimension must be glued to the insulation layer P as a placeholder Then lay the conduits L and fi...

Page 10: ...a mortar bed M and install the conduits into the openings of the housing Attention The height of the mortar bed must be measured so that the distance t between the spirit level W and the screed E is a...

Page 11: ...eal the housing Tip cover the box ope ning for example with cardboard as shown Now fill the recess around the housing with mortar M Check the position of the housing with the spirit level W before cur...

Page 12: ...er curing connect the sockets screw the device carrier back into the housing and screw the lid onto the frame Lay the remaining covering B in the room The floor socket is now successfully installed Se...

Page 13: ...n M ngeln technisch elektrisch darf das Produkt nicht in Betrieb genommen werden Das Produkt ist unter Beachtung der nationalen Vorschriften zu entsorgen Irrt mer und technische nderungen vorbehalten...

Page 14: ...ject to errors and technical changes by BS Bodensteckdosen Systemtechnik GmbH BS Bodensteckdosen Systemtechnik GmbH Dingerdisser Str 36 33699 Bielefeld Germany Tel 49 521 9892780 Fax 49 521 989278 30...

Reviews: