background image

38

PCATX-R9 User’s Guide

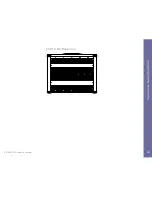
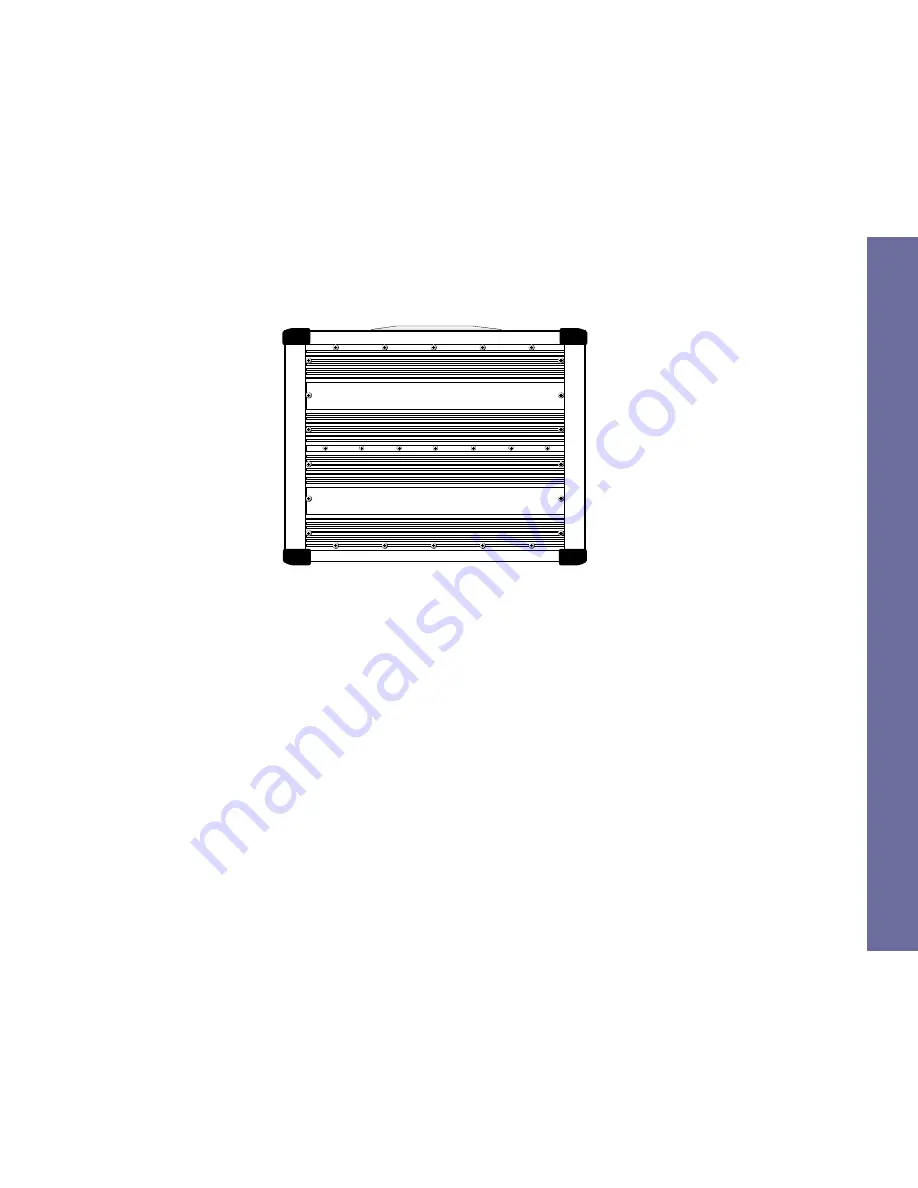
PCATX-R9 Back View

T

echnical Specifications

Summary of Contents for FieldGo PCATX-R9

Page 1: ... size and weight of a portable PC while retaining all the expansion capacities of a desktop computer Since then BSI has continued to expand to the current lines we now have Your FieldGo PCATX R9 workstation is designed to provide the full power of a desktop computer and the ability to use standard add on cards in a rugged portable package suitable for use in harsh environments It features five dri...

Page 2: ...l drives Refer to the setup information for those devices to complete your installation Your FieldGo PCATX R9 workstation can be configured with a dual processor capable main board If you initially purchased a single processor in a dual processor capable system BSI recommends that when you decide to add a second processor you do so with professional assistance from BSI Any updates to this user s g...

Page 3: ...ned OFF Disconnect the power cord from the workstation Sudden surges of power could damage sensitive components w Before installing internal add on cards or components always ground yourself first to prevent static electricity from damaging the components You can touch the metal housing of the power supply to discharge any Important Always verify that your portable power supply voltage matches you...

Page 4: ... is made of glass that can easily crack if dropped w Occasionally you may want to clean or dust off the external chassis and the LCD panel Turn OFF the system power and disconnect the power cord before cleaning Clean the chassis using a cloth only Do not spray any liquid cleaner directly onto the screen w Do not open the system s back cover except for adding or removing expansion cards or drives E...

Page 5: ...owing lists contact information Corporate Headquarters Contact Information Broadax Systems Inc 17539 E Rowland St City Of Industry CA 91748 626 964 2600 626 964 2665 fax 1 800 872 4547 E mail info bsicomputer com On the web www bsicomputer com Technical Support Contact Information 626 964 2750 626 964 2661 fax E mail support bsicomputer com Getting Started ...

Page 6: ...o let our support staff quickly identify the exact item you have If you have your invoice with you write down the invoice number too w Write down exactly what occurred including the configuration of your system and exact nature of the problem Have this information ready when you call tech support Getting Started ...

Page 7: ...s from the workstation w Check for damage during shipping while unpacking the workstation If you notice any damage notify the shipper to report the damage Then notify BSI customer service You should find the following items w PCATX R9 portable workstation w Carrying case with telescopic handle and wheels Figure 2 1 Unpacking FieldGo PCATX R9 FieldGo PCATX R9 workstation Carrying case Getting Start...

Page 8: ...uals for installed components w Any software that you may have purchased with the system The LCD panel is covered with a clear plastic protective film Peel it off before you start your workstation Save all packing materials in case you want to transport it in the future Getting Started ...

Page 9: ...The Components Take a moment to familiarize yourself with the components and external controls connectors of your workstation with the help of the following illustra tions PCATX R9 Front View Drive bay cover release screw Keyboard Keyboard tilt up feet Getting Started ...

Page 10: ...5 Power ON OFF push button switch 6 Touchpad pointing device depending on the keyboard you selected your pointing device may differ from that shown in the illustration 7 Primary and secondary pointing device buttons on a standard keyboard Keyboard release latches slide both latches up to release keyboard Figure 2 3 PCATX R9 front view showing components and controls Getting Started 1 3 4 5 6 2 7 ...

Page 11: ... bay cooling fans 4 Two 3 5 shock mounted drive bays Open drive bay cover plate to access drives Figure 2 4 PCATX R9 drive bay side view Tip You don t have to remove the metal cover unless to access the drives The metal cover has ventilation holes to allow air flow during system operation Getting Started 1 2 3 4 ...

Page 12: ...nnector 4 Video adpater connector 5 Input output ports 6 Fan speed switch 7 Keyboard and pointing device connectors Figure 2 5 PCATX R9 left side view Important If you find an INPUT VOLTAGE selector switch near the power supply fan be sure it s correctly set for your local AC supply voltage Getting Started 1 2 3 4 5 6 7 ...

Page 13: ...l fashion A filtered intake fan and two drive bay fans are located on the right hand side of the chassis to draw air into the chassis On the left hand side the power supply has a built in exhaust fan Leave enough space around your workstation to allow adequate airflow through the system Starting Your System Your PCATX R9 is a self contained portable computer with a flat panel LCD and a detachable ...

Page 14: ... confirm otherwise align the notches on the keyboard and pointing device connectors to their respective sockets and firmly push them into place 4 Plug in the AC power cord You are now ready to turn on your system 5 Press the AC power ON OFF switch to the ON position and then press the front power ON OFF button to start your system If an operating system is already installed your workstation should...

Page 15: ...nd an AGP video card This configuration offers compatibility with standard off the shelf analog video cards The LCD image is already optimized for many display modes However four push button controls located on the right side of the LCD panel are available to adjust the following characteristics of your LCD through an OSD on screen display menu w Horizontal H Posi and vertical V Posi screen positi...

Page 16: ...zontal and vertical sync Unlike CRTs regular desktop monitors which benefit from high refresh rates LCDs are inherently flicker free There is little difference between 45Hz 60Hz or 75Hz refresh rates for your LCD These values are factory set and are not user adjustable w AutoReset Resets all parameters to factory optimized setting w Luminance Luminance affects the brightness of the display This is...

Page 17: ...ton once in creases or decreases the nu merical setting by a single digit Holding down a button for more than two seconds increases the rate of change 5 After you ve made your ad justments release the button and wait a few seconds for the on screen menu to auto matically disengage Figure 2 7 OSD menu controls Using Your Workstation 1 2 VESA 1024x768 H POSI CONTRAST CONTRAST CONTRAST CONTRAST V POS...

Page 18: ...on Using The Standard Keyboard To move the pointer lightly glide your finger across the surface of the touchpad It responds best to a light touch no pressure is required To click do one of the following 1 Press the left button Button function is dependent on how the touchpad is configured The default setting configures the left button as the pri mary button similar to how your left mouse button wo...

Page 19: ...ve the pointer gently rock the with your finger To click press the left button Button function is dependent on how the touchpad is configured The default setting configures the left button as the primary button similar to how your left mouse button works To drag or highlight move the pointer to the object you want to drag or to the location you want to highlight Press and hold down the left button...

Page 20: ...dia drives in any open drive bay There is also an internal drive bay for a 3 5 half height hard drive This section provides you with procedures and illustrations to help you install add on cards and drives Before you start shut down the system ground yourself and disconnect the AC power cord Opening The System Chassis Follow these steps to remove the back cover 1 Place your workstation on a stable...

Page 21: ...ing figure 1 Drive housing retaining screws 2 Drive housing 3 Expansion slot cover 4 System board 5 Add on card stabilizer 6 Power supply To take off the back cover first remove all of these screws Figure 3 1 PCATX R9 open back view of key components Adding Components 1 3 4 5 6 7 2 ...

Page 22: ...that your system has the slot type for your add on card follow these steps to install it 1 Remove the card stabilizer The stabilizer consists of a metal bars with adjustable plastic hold down clamps The clamps helps to keep the add on cards securely installed in their slots The stabilizer is attached to the chassis by screws located at both ends of the metal bars Remove the screws and then the car...

Page 23: ...holds the slot cover and then remove and set aside the metal slot cover 4 Hold your card by its edges taking care not to touch the gold plated edge connectors Insert the card firmly into the expansion slot 5 Reinstall the slot cover screw Figure 3 3 Adding expansion card Align card with slot and firmly push it into the slot socket ...

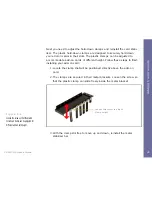
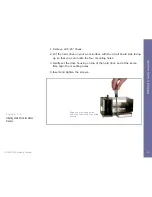
Page 24: ...t Follow these steps to finish installing your add on card 1 Locate the clamp that will be positioned directly above the add on card 2 The clamps are secured in their metal brackets Loosen the screw so that the plastic clamp can slide freely inside the metal bracket 3 With the clamp still free to move up and down reinstall the metal stabilizer bar Figure 3 4 Loosen the screw so that the plastic ho...

Page 25: ...R9 User s Guide 4 Push down on the clamp so that it comes in contact with the add on card 5 Set the clamp by tightening the metal bracket screw 6 Cut off any excessive part of the plastic clamp Adding Components ...

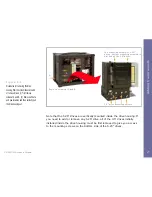
Page 26: ...kstation in its upright position with the back cover facing you 3 Refer to Figure 3 1 to first remove the back cover 4 Internal space is tight You ll need to pull out the drive housing to add or remove a drive Carefully unplug data and power cables attached to drives already installed in the system Make a note of how they were originally connected Especially note the orientation of the flat ribbon...

Page 27: ... access to the mounting screws on the bottom side of the 5 25 drives Figure 3 5 Procedures for removing the drive housing from the system chassis to add or remove drives 1 First remove screws at A and B 2 Remove all data and power cables and then carefully pull the drive housing out Top mounting screws for 5 25 drives Bottom mounting screws are blocked by the 3 5 drives A B 3 5 drive mounting scre...

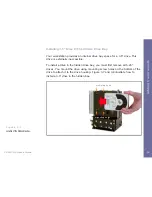
Page 28: ...his gives you access to the bottom side panel of the 5 25 drive bay bracket that would otherwise be blocked by the 3 5 drives Follow these steps to add or remove a 5 25 drive 1 Assuming that your system already has a 3 5 floppy drive and a 3 5 hard drive installed first remove all 3 5 drive mounting screws 2 Slide the 3 5 drives out of the drive bay Avoid touching the circuit boards 3 Now that you...

Page 29: ...age back into the chassis and reinstall all mounting screws 7 Plug in the power connector and signal cable Figure 3 6 Procedures for adding or removing 5 25 drives The metal plate is used only for fastening the drive housing to the chassis Removing the top mounting screws also loosens this metal plate 5 25 drive bottom side mounting screws Adding Components ...

Page 30: ...naccessible To install a drive in the hidden drive bay you must first remove all 5 25 drives You mount the drive using mounting screw holes on the bottom of the drive to attach it to the drive housing Figure 3 7 and 3 8 illustrate how to install a 3 5 drive in the hidden bay Figure 3 7 Location of the hidden drive bay mounting holes mounting holes Adding Components ...

Page 31: ...ing up so that you can locate the four mounting holes 3 Gently set the drive housing on top of the hard drive and at the same time align the mounting holes 4 Insert and tighten the screws Figure 3 8 Installing a hard drive in the hidden drive bay Align the mounting holes and then insert the mounting screws Adding Components ...

Page 32: ...mulate on the filter and block air flow Follow these steps to clean the fan filter 1 Remove the filter cover by pinching the top and bottom sides of the plastic filter cover as shown in Figure 3 9 and gently pull it away from the chassis 2 Take out the filter and clean it by rinsing it under cold water 3 Let the filter dry and then reinstall the filter and the cover plate Adding Components Figure ...

Page 33: ...m is accidentally dropped If the LCD panel is soiled or if occasionally you want to wipe off any dust or finger prints from the LCD surface do so with a damp cloth Never spray cleaning fluids directly onto the LCD surface Never use solvents or abrasives Long contact with water may cause discoloration or spots on the LCD sur face Wipe off water drops immediately Adding Components ...

Page 34: ...igation and Purchaser s remedy in the event of breach of war ranty shall be the repair or replacement of defective goods In no event shall BSI be liable to purchaser or any other party for loss damage or injury of any kind arising out of or in connection with these terms and conditions or any performance or nonperformance under these terms and conditions by Seller its employees or agents in excess...

Page 35: ...ose is hereby excluded Disclaimer Of Warranties On All Software BSI makes no warranties express or implied with respect to all software and accompanying manuals and materials regardless of their source their qual ity performance merchantability or fitness for any particular purpose All such items are sold or licensed to Purchaser by BSI on an AS IS basis The entire risk as to their quality and per...

Page 36: ...e at BSI on or before date of invoice BSI is not responsible for service items abandoned for more than 90 days Out Of Warranty Service BSI warrants that the parts installed will perform satisfactorily under normal conditions for a period of ninety 90 days Parts replaced by BSI that become defective during this period shall be repaired or at BSI s option replaced free of charge at BSI s service cen...

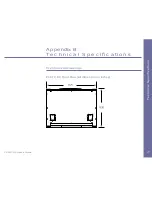
Page 37: ...37 PCATX R9 User s Guide Appendix B Technical Specifications Mechanical Drawings PCATX R9 Front View all dimension in inches Technical Specifications ...

Page 38: ...38 PCATX R9 User s Guide PCATX R9 Back View Technical Specifications ...

Page 39: ...39 PCATX R9 User s Guide PCATX R9 Side Views Technical Specifications ...

Page 40: ...40 PCATX R9 User s Guide PCATX R9 Standard Keyboard PCATX R9 Optional NEMA 4 12 Keyboard Technical Specifications ...

Reviews: