background image

- 17 -

PS-8810

DIGITAL SIGNAL PROCESSOR

e:  Digital  Display

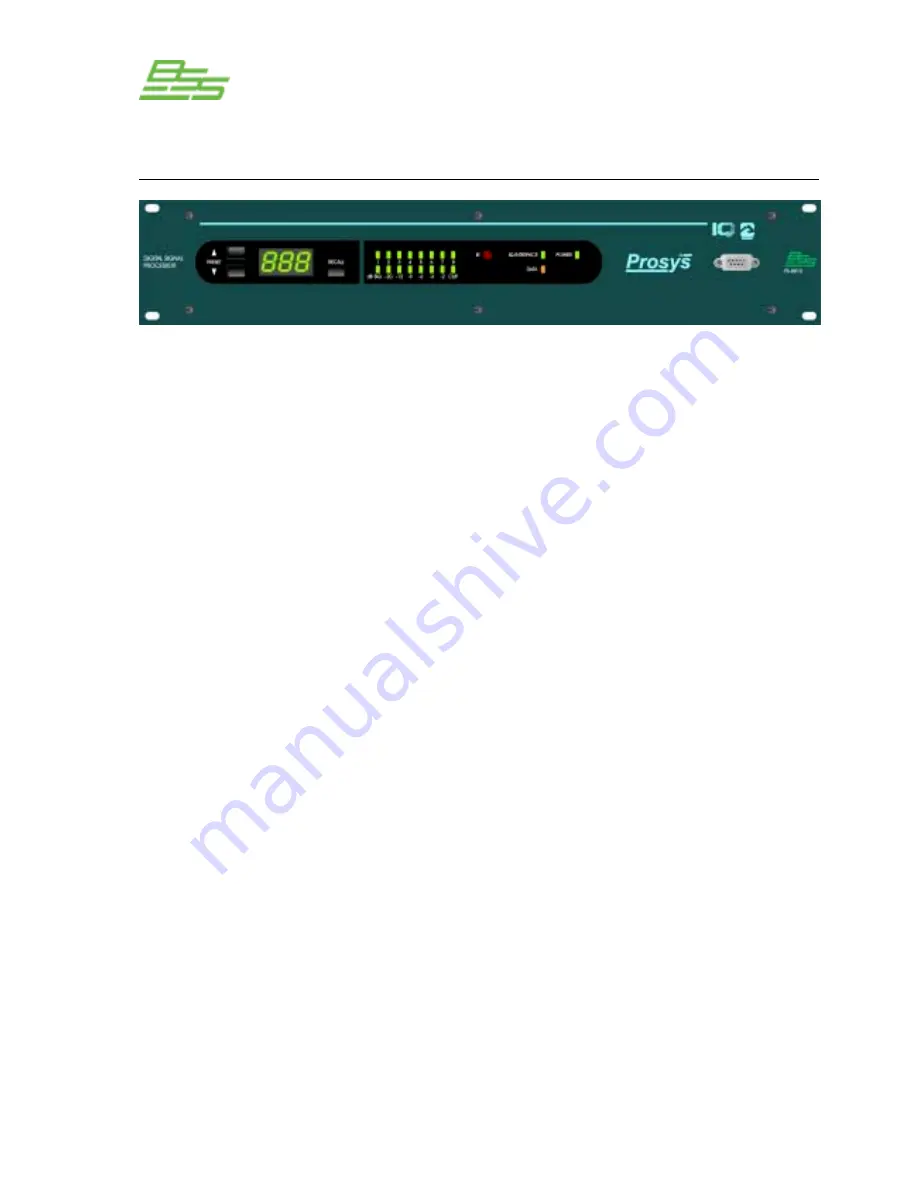
A green front panel 'Power' indicator lights to show that AC power
is being supplied.  In addition, the light will blink when an input IR
command has been received.

An amber front panel data signal presence indicator ('DATA')
flashes whenever commands addressed to the BSS PS-8810 are
received. To assist with troubleshooting, an option that forces the
DATA indicator to remain lit is available through IQ for Windows
software.

This green front panel 'Interface' led indicates that the BSS PS-
8810 is the master unit in an IQ loop. The control to set this is
found in the IQ for Windows software.

A sixteen-segment LED display matrix is provided on the front
panel. The LEDs are separated into two rows of eight. The display
can be set to three different operating modes: 'Level Meter', 'Gate
Status', and 'Infinity Pattern'.

'Level Meter mode' - each row can be set to display the
signal level of any input or output meter.

'Gate Status mode' - each LED represents a corresponding
input gate, and remains lit while the gate is open.

'Infinity Pattern mode' - the LED’s constantly flash in a
'figure of eight' pattern (LED test mode).

The three-digit digital display serves several useful functions.
When power is first applied, it displays an initialization
sequence. Once the unit is initialized, the display changes to
Preset Mode, indicating the presently selected Preset. The display
also indicates Scene select, IQ address, and RS232 baud rate
when those parameters are being adjusted.

6.0

Front Panel

a: Power Indicator

b: DATA Indicator

c: IQ Interface

Indicator

d: Input Gate

Status  Display

a

b

c

d

e

f

g

h

i

Summary of Contents for Prosys PS-8810

Page 1: ...PS 8810 Digital Signal Processor Connect here first User Manual ...

Page 2: ... EU EN55103 1 1997 RF Immunity EU EN55103 2 1997 Electrical Safety EU EN60065 1998 Electrical Safety US UL6500 2nd Edition 1999 Electrical Safety CAN CAN CSA E60065 00 Radiated Emissions US FCC part 15 Class B This manual will help you successfully install your unit and describes the capabilities of the BSS PS 8810 Please read all the instructions warnings and cautions contained within it Also for...

Page 3: ...oes not fit into your outlet consult an electrician for replacement of the obsolete outlet Protect the power cord from being walked on or pinched particularly at plugs convenience receptacles and the point where they exit from the apparatus Only use attachments accessories specified by the manufacturer Use only with a cart stand bracket or table specified by the manufacturer or sold with the appar...

Page 4: ...ctor 18 7 0 Rear panel 19 A Audio Inputs 19 B Audio Outputs 19 C CobraNet Connectors 20 E RS232 Serial Port 20 D IQ Loop Connectors 20 F Control Port 21 G Mains Power Inlet 21 Using the PS 8810 8 0 Quick Install Procedure 23 9 0 Hardware Installation Connections 25 Connecting to a Host Computer 26 RS232 Computer Connection 26 Set the Baud Rate 27 Comms Problems 28 Connecting the IQ Loop 29 Set the...

Page 5: ...resets and Scenes 44 IQ Win Notes 45 Quick Set Up 47 11 0 Processing Functions 48 Metering Status 48 Output Level Meters 48 Output Dynamic Cut Boost Meters 48 Input Level Meters 48 Input Dynamic Cut Boost Meters 49 Preset Information 49 Status Window 49 CPU Utilisation 49 DSP 50 General 51 Real Time Clock 51 Front Panel Control Lock Out 51 Data 51 Interface 52 LED Display Mode 52 Front Panel Acces...

Page 6: ... 61 Release Time 61 Side chain Filter 61 Auto Leveler 62 On Off 62 Target Level 63 Max Gain 63 Idle Gain 63 Open to 63 Threshold 63 Attack Time 63 Release Time 63 Input Compressor 64 On Off 64 Compression Ratio 64 Threshold 64 Soft Knee Width 65 Attack Time 65 Release Time 65 Side chain Filter 65 Priority Ducking 66 Automixer 66 Automixing Group Controls 67 Priority Mix Enable 67 Max Number of Ope...

Page 7: ... 76 Output Section 77 Output Delay 77 Output Filters 77 Ambient Leveler 78 On Off 78 Sense Input 78 Sense Threshold 78 Program Level Dependent Mode 79 Expansion Ratio 79 Max Added Gain 79 Attack Time 79 Release Time 79 Program Level Threshold 79 Sense Delay 79 Output Limiter 80 On Off 80 Threshold 80 Attack Time 80 Release Time 80 Output Select 81 12 0 Presets 82 Preset Segue 82 13 0 Scenes 83 Sce...

Page 8: ...ode Editor 98 PS8810 IR Code Format 102 17 0 Control Port 103 Digital Inputs 104 Set Object s 104 Room Combine 105 Bump Object s 105 Bump Object s Continuously 105 Recall Preset 105 Recall Scene 105 Digital Outputs 107 Analogue Inputs AIN 1 8 109 Analogue Outputs 110 Reference Section 18 0 Technical Information 112 Audio 112 Input Section 112 DSP Processing Section 112 Output Section 113 Control a...

Page 9: ...sical damage and retain the shipping carton and ALL relevant packing materials for use should the unit need returning In the event that damage has occurred please notify your dealer immediately so that a written claim to cover the damages can be initiated Please fill in the warranty details on the form opposite for future reference 1 0 Primary Checks 2 0 Installation 482 6mm 19ins 412mm 16 25ins 9...

Page 10: ...ul if a warranty repair becomes necessary Unit Serial Number Dealer Name Dealer Address Post Zip Code Dealer Phone Number Dealer Contact Name Invoice Receipt Number Date of Purchase Comments or questions regarding the PS 8810 or other BSS products Contact BSS Audio Cranborne House Cranborne Road Potters Bar Hertfordshire EN6 3JN England Phone 44 0 1707 660667 Fax 44 0 1707 660755 Web site www bss ...

Page 11: ...any other BSS distributor in the European Union You should include a statement listing the faults found The unit s serial number must be quoted in all correspondence relating to a claim United States US Warranty Coverage BSS Audio Products are warranted to be free from defects of material and workmanship for a period of one year from the date of delivery to the original user Repair will be made at...

Page 12: ... 12 PS 8810 DIGITAL SIGNAL PROCESSOR ...

Page 13: ...nally The 16 Input Processing Sections include a fader advanced algorithms for gating auto levelling filtering compression and automixing Automixing functions include NOM Number of Open Mic s Attenuation Priority Ducking and Adaptive Gating processing Each of the Input Processing Sections is further processed by a full 24x10 Matrix Mixer with CobraNet fitted that allows any combination of routing ...

Page 14: ...ng using simple potentiometers switch wall controllers and indicator panels Infra red remote control is built in as standard and almost any parameter can be programmed using Philips Pronto for example Control is also available to third party system controllers from companies such as AMX and Crestron PS 8810C The BSS PS 8810C includes a CobraNet network interface card that allows an additional eigh...

Page 15: ...tput Limiters 10 Output Delays 10 Output Filter Sections Up to 256 Filters 32 Auto Mix Groups 32 Presets 32 User Programmable Scenes Dual 8x10 Matrix Mixers 10 Ambient Levellers BSS PS 8810C The PS 8810C includes all of the features listed for the PS 8810 and also adds factory installed CobraNet network interface with 8 digital audio Inputs via CobraNet 8 digital audio Outputs via CobraNet CobraNe...

Page 16: ... 16 PS 8810 DIGITAL SIGNAL PROCESSOR Controls Connectors Indicators ...

Page 17: ...he LEDs are separated into two rows of eight The display can be set to three different operating modes Level Meter Gate Status and Infinity Pattern Level Meter mode each row can be set to display the signal level of any input or output meter Gate Status mode each LED represents a corresponding input gate and remains lit while the gate is open Infinity Pattern mode the LED s constantly flash in a f...

Page 18: ...t to Scene select mode then Address select mode Baud rate select mode and finally back to Preset select mode For more information about these features please refer to the Hardware Installation Connections section chapter 9 0 Once the RECALL button is released the PRESET UP and DOWN arrow buttons are used to adjust the parameter On releasing the RECALL button the user has two seconds to begin using...

Page 19: ...vel signals up to 32dBu Select the P position for mic inputs that require 24VDC phantom power Audio Input Gain Control Each analogue audio input channel has a screwdriver set calibrated gain potentiometer for adjusting the input gain to the input signal level These can be used to compensate for different microphone sensitivities Control range is from 12dB to 20dB Main and AUX Audio Outputs A 3 pin...

Page 20: ...e Primary but is active only in case of a fault in the CobraNet network attached to the PRIMARY The secondary LEDs work in the same way as the primary ones IQ Loop Input Output Connector The upper rear panel RJ 45 connector provides the input from the IQ bus Dropout relays maintain loop integrity in the event power is removed from the BSS PS 8810 IQ Loop Output Connector The lower rear panel RJ 45...

Page 21: ...he BSS PS 8810 There are eight digital outputs eight analogue outputs eight digital inputs and eight analogue inputs available as well as 5V and 10V for powering external circuits AC Line Connector A rear panel IEC320 connector is provided for attaching the power cord The BSS PS 8810 has a universal power supply and may be operated on AC line voltages from 100VAC to 240VAC at 50Hz or 60Hz ...

Page 22: ...ssed via controls located on the unit itself however most of the features are configured and controlled using IQ for Windows software If you are unfamiliar with IQ for Windows software please refer to the IQ for Windows Help files visit the BSS Audio website www bss co uk or the IQ website www iqaudiosystems com or contact your BSS representative or BSS Technical Support ...

Page 23: ...or further information regarding suggested settings 4 Turn off all amplifiers or other equipment that will either feed or be connected to the unit 5 Connect the audio wiring to the BSS PS 8810 inputs and outputs The wiring should follow the standards as described in the Audio Connections section 6 Connect directly to the host computer using either of the RS232 connectors front or rear if the unit ...

Page 24: ...es 9 Connect any circuits to be used with the Control Port connector to the unit 10 Connect the unit to the AC power supply 11 Set the IQ address on the BSS PS 8810 to an unused IQ address 12 If the unit is to be used as a system interface set the baud rate and set the unit to act as system interface green Interface LED on using IQ for Windows software 13 Set all equipment that will be in the sign...

Page 25: ...rts from section 10 0 of this manual Refer also to the IQ for Windows on line Help files for instructions in setting up and operating your IQ software The hardware installation can be seen as these steps 1 Connecting to a host computer 2 Connecting to the IQ Loop 3 Connecting the audio inputs and outputs 4 Connecting to the CobraNet Network PS 8810C 5 Connecting auxiliary devices 6 Connecting a mo...

Page 26: ... host computer can be disconnected If the BSS PS 8810 is to be configured before it is installed into an IQ System it must be connected directly to a host computer for configuration The onboard memory of the unit will maintain its configuration without it being plugged into an AC source If the BSS PS 8810 is to be used as an IQ interface for other IQ System components it will need to be connected ...

Page 27: ...he front panel RECALL button until the display changes from the Preset mode i e P01 to the Scene select mode i e S01 then Address select mode i e 001 then to Baud rate select mode i e 115 2 Push the UP or DOWN arrow buttons to select the desired baud rate The highest baud rate supported by the unit is 115K baud In most cases 115K baud is the best setting and is also the default setting Adjust to a...

Page 28: ...descending bps order 115200 57600 38400 19200 Here are some steps to follow if you are having difficulty establishing serial communication 1 If the host computer fails to communicate with the unit and the communication standard and parameters are set correctly try reducing the baud rate 2 Check the serial cable for improper wiring or possible shorted or broken wires 3 If communication problems per...

Page 29: ...s select mode i e 001 2 Press the UP or DOWN buttons to select the desired address number 3 Press the RECALL button again to store the address The display will automatically return to Preset mode in a few seconds No two IQ components of the same type which are connected to the same IQ Loop can have the same address Suppose for example an IQ System has two IQ loops 1 and 2 and a BSS PS 8810 is to b...

Page 30: ...th the IQ loop the IQNET server software must be used please refer to the IQNET Server help for more information The IQ components in a IQ Loop are wired sequentially The loop begins and ends with the IQ interface The output of one IQ component loops to the input of the next and so on as shown below IQ Loop wiring Loop from Output to Input of each IQ component Connections IQ Loop PS 8810 in an IQ ...

Page 31: ... 45 connectors it is good practice to follow the EIA TIA 568B protocol for RJ 45 connector cable This protocol assigns wire colours as follows 1 white orange 5 white blue 2 orange 6 green 3 white green 7 white brown 4 blue 8 brown RJ 45 Pin Numbers When attaching RJ 45 connectors to cable be sure to use the appropriate crimping tool and verify that the connector is properly seated into the tool or...

Page 32: ... 32 PS 8810 DIGITAL SIGNAL PROCESSOR RJ 45 Output to Din Input Barrier Block Output to RJ 45 Input Din Output to RJ 45 Input RJ 45 Output to RJ 45 Input Connections IQ Loop ...

Page 33: ...or a IQ Loop should be less than 30 nF To calculate this allow approximately 60 pF for each IQ component in a loop This accounts for a slight signal degradation which occurs as data signals pass through a component Add an IQ Repeater for very long loops greater than 1 000 feet 305 m or when required by high capacitance wire Although BSS recommends adding a repeater for loops longer than 1 000 feet...

Page 34: ...e 24VDC to mics requiring phantom power An Audio Input Section Each input has a screwdriver set calibrated gain control to compensate for different input source levels The slot on the control shaft points to the gain setting The settings are labelled for line level input Add 25 dB to the scale if the inputs are switched for microphone level signals Use a screwdriver to adjust the gain pot so that ...

Page 35: ...be wired as shown below Notice that the shield is not connected to the chassis ground of the source if the source is also connected to the AC ground that is it has a grounded AC plug This prevents unwanted ground loops Balanced Audio Input Wiring Connections Audio Suggested Audio Input Gain Control Settings Balanced Input Wiring ...

Page 36: ...alanced sources should be wired as shown below The examples are grouped according to whether twin lead shielded wire or single conductor coax or twisted pair wire is used Unbalanced Audio Input Wiring Connections Audio Unbalanced Input Wiring ...

Page 37: ... a 24x10 matrix mixer The sixteen Input Processing Sections along with the eight CobraNet Inputs PS 8810C only allow full mixing of any of the inputs to any of the 10 outputs Back Panel Output Connectors Balanced output wiring is shown below Notice that if the load is connected to AC ground the shield should not be connected to the output ground terminal This will prevent unwanted ground loops Bal...

Page 38: ... 38 PS 8810 DIGITAL SIGNAL PROCESSOR Unbalanced Audio Output Connections Connections Audio Unbalanced Output Wiring ...

Page 39: ... Ethernet network In the event of a failure in the cabling or hardware connected to the PRIMARY system the PS 8810 will switch to the SECONDARY network in a matter of seconds There are two LEDs built in to the RJ45 sockets on the back of the unit these indicators represent the network status The left hand LED should light green when a cable that is connected to an active CobraNet network is plugge...

Page 40: ...ions CobraNet In order for the system to conform to the stated regulatory requirements clamp on ferrites that are shipped with the unit must be attached to the PRIMARY and SECONDARY CobraNet cables Be sure to double loop the cable in the ferrite ...

Page 41: ... 15 D IN 4 24 A OUT 13 33 A IN 4 7 D OUT 7 16 D IN 5 25 A OUT 14 34 A IN 5 8 D OUT 8 17 D IN 6 26 A OUT 15 35 A IN 6 9 5V 18 D IN 7 27 A OUT 16 36 A IN 7 37 A IN 8 Control Port Pin Assignment Pins 1 through 8 are assignable to manually select a binary on off value chosen Preset status or status of any logical binary control or sensor most likely gate and Preset Pins 20 through 27 provide an analog...

Page 42: ...RS232 connector on the back of the interface should NOT be connected This configuration is not compatible with some 232 null modem applications When using a modem it may be necessary to set the front panel baud rate at a level lower than the modem data speed e g 192 19200bps for a 56kbps modem true upload speed is only 33600bps This is to ensure clean data transfer between the PS 8810 and remote c...

Page 43: ...810 DIGITAL SIGNAL PROCESSOR This section describes how to set up the PS 8810 from within IQ Win software and includes an overview of the various processing functions and associated windows F o r W i n d o w s ...

Page 44: ...hs A B denoted by the colours green for A and blue for B that can be processed independently allowing a sub or monitor mix to be set up easily i e there are 16 input processing sections available With the addition of CobraNet a further 8 channels can be routed through the unit The basic premise in setting up the PS 8810 is that the unit should be configured for a particular use and this setup then...

Page 45: ...ettings in the unit can be printed in list format using the File menu Print command This is useful to assess the configuration of the device on paper although note that for a standard PS 8810 the printout will run to over 20 pages Use the Select button to choose for which unit s you wish to print the settings The Upload and Engage options in the Dataframe menu enable a manual connection to be made...

Page 46: ... Scenes Access to the current Dataframe Operation editing of component controls Setup of Scene sequences The Administrator mode gives access to all passwords with one single password Some passwords are program based e g run program create new Dataframe Scene and Administrator The current Dataframe Component controls and Scene sequence passwords are saved with the Dataframe in the WIQ file itself T...

Page 47: ...s by scanning all the PC s com ports The correct com port setting is stored in the IQ Win ini file for quicker detection on the next application launch The baud rate should also be automatically set Once the process is finished and if a unit is detected IQ Win will then upload its settings If it isn t or the PS 8810 isn t powered up yet then press the Abort button and you will be taken into the IQ...

Page 48: ...ocessing features that affect output gain including Ambient Leveler and Output Limiter Meter range is from 60 to 20dBu with 0 5dB resolution Input Level Meters Audio level peak program meters are provided for each of the sixteen Input Processing Sections The meters sense the digital audio signal and respond with 1 7 millisecond attack and 350 millisecond release Calibration is in dBu when the inpu...

Page 49: ...atus Window This window shows the current status of the unit and has three modes Active green Indicates that the settings of the unit agree with the displayed Preset Modified yellow Indicates that the settings of the unit are different from the displayed Preset Offline red Indicates that IQ Win is not currently in communication with the unit CPU Utilisation The PS 8810 has a substantial amount of ...

Page 50: ...sible for output processing of Main 1 and AUX 1 through 4 DSP3 has Main 2 and AUX 5 through 8 Each processing requirement is monitored by the CPU utilisation meters and additional processing is not allowed after the DSP is 95 utilized To conserve CPU usage turn off any processing on unused input and output processing sections Also each output s matrix mixing requires about 6 processing so solo unu...

Page 51: ... run for up to 45 days without power being applied to the BSS PS 8810 Front Panel Control Lock Out Activation of this control prevents access to the front panel controls When active the front panel display will indicate Lxx to show that the front panel is not accessible If a front panel control is pressed the display will show Loc reminding the user that the front panel is locked Data This control...

Page 52: ...s can indicate the input gate status of the sixteen Input Processing Sections lighting when the gate is open The meters can also provide an infinity pattern that can be used to provide diagnostic information not all that useful but it does look cool Front Panel Access The mock front panel allows monitor and control of the unit just as if you are pushing the front panel controls Preset switching ac...

Page 53: ... eight pairs A B that share a common rear panel analogue input or CobraNet input For example Input Processing Sections 1A and 1B can have either Analogue Input 1 or CobraNet Input 1 as their input All sixteen Input Processing Sections are identical The outputs of the Input Processing Sections are fed to the 24 x 10 Matrix Mixer In addition the output of the B Input Processing Sections are availabl...

Page 54: ...pick an input from the drop down box Input Meter The switched input signal is sampled and displayed Input Select Switch The signal that is input to each of the Input Processing Sections can be either the associated analogue audio signal from the rear panel or the associated CobraNet input Input Processing Selection Displays the DSP processes available to the selected input path if the icons are co...

Page 55: ...Output Overview This area enables routing of the selected input to the 10 analogue output channels A fader and meter is provided for each routing Inputs Window Link This button opens a further window that displays all the input gain faders with level meters mute polarity and input select switches It all provides an overview of the Input Processing Section DSP processes that are enabled disabled fo...

Page 56: ...ter types for any processing need Low pass High pass Low pass Shelf High pass Shelf Low pass EQ High pass EQ Parametric EQ All filters are frequency adjustable from 20 20KHz Gain is adjustable from 24dB to 24dB Processing Functions Input Filters Type Gain Frequency Input Filters ...

Page 57: ...essing filter section can be turned on or bypassed For those who wish to use a more standard Band EQ filter the Display function allows a 2 band or 4 band EQ with knobs on Low pass and High pass shapes can be selected from Butterworth 1 4 Bessel 2 4 or Linkwitz Riley 4 Shelving filters allow low pass or high pass filtering with adjustable shelf gain Equalization filters Low pass High pass and Para...

Page 58: ...y clicking on the filter nodes and moving them The responses of the preprocessing filters and post processing filters are displayed in the smaller Input Response graph to the right of the main curve display The Input Combined Response graph shows the summed total of the two filter sections an actual frequency composite of the filter networks for that input Additional filtering is available after a...

Page 59: ...d allow very precise alignment of audio signals Delay elements are available in each Input Processing Section to ensure that audio alignment is attained The processing time delays of each of the various components in the PS 8810 and CobraNet network need to be taken into account in this alignment process These are fixed latencies in order to keep filter alignment together The various delays in the...

Page 60: ...le Gate Switches the gate on or off Depth Sets the closed gain of the Gate Control range is from 100dB to 0dB in 0 5dB steps Static Threshold Specifies the peak signal level after side chain processing above which the gate will open Control range is from 80 to 20dB in 0 5dB steps Hysteresis Sets a range in dB above and below the Threshold which separates the levels at which the Input Gate opens an...

Page 61: ...100 milliseconds Hold Time Determines how long the Input Gate will remain open after the control key signal falls below the Threshold Control range is from 0 01 seconds to 10 seconds Release Time Sets the time required for the Input Gate to decrease its gain by 20dB Control range is from 0 01 seconds to 10 seconds Side chain Filter The Side chain Filter processes the Control Key signal used to tri...

Page 62: ...ller s affect on input gain is metered by the Input Dynamic Cut Boost Meter In the example above the Threshold is set to 20db and the autoleveller allows the input signal to pass unaffected at levels below the Threshold At input signals above the Threshold the autoleveller adds gain to try and adjust the signal to the 0db Target Level At input signal levels above 0db the signal is clamped to 0db E...

Page 63: ...oother transition from very soft to very loud input program Control range is from 100 to 20dB in 0 5dB steps Open to When set to Last Gain the Gate opens to the last gain computed by the Auto Leveler In Idle Gain position the Gate opens to a potentially safer Idle Gain setting Threshold Sets the input level below which the Auto Leveler action will be inhibited This allows the Auto Leveler to suspe...

Page 64: ...ol this feature On Off Turns this feature on or off Compression Ratio Determines how many dB the input level must change for a 1dB change in output level Dynamic variations in the input signal will be reduced by a factor equal to the compression ratio Control range is 2 1 to 32 1 Threshold Specifies the average signal level after side chain processing above which the compressor will begin to reduc...

Page 65: ...rol range is from 1 0 to 100 milliseconds in 1 millisecond increments Release Time Sets the time required for the Compressor to increase its gain by 20 dB Control range is from 0 1 to 10 seconds in 10 millisecond increments Side chain Filter The Compressor Key Filter operates as a side chain processor to filter the Control Key signal used to trigger the compressor Its output is not directly in the...

Page 66: ...roup Automixing controls and individual Input Processing Section controls Automixing s effect on input gain is metered by the Input Dynamic Cut Boost Meter Enforces a priority order of open microphones such that high priority inputs duck attenuate lower priority inputs Additionally a maximum number of equal priority open microphones may be specified Each input can be assigned a Priority from 1 hig...

Page 67: ... number of open mics within the automix group A last in first out algorithm is used to determine which mics are ducked Highest Open Mic Priority Indicator Shows the highest priority level for all open mics within the automix group Total Number of Open Mics Indicator Indicates the total number of presently open mics within the automix group Processing Functions Auto Mixer 1 2 3 4 Automixing Group C...

Page 68: ...lows each individual mic to use a higher nominal gain by more aggressively attenuating as more mics open Step Size With NOM Attenuation mode determines the attenuation as a function of the number of open mics in the auto mix group In linear mode each open mic beyond one increases the attenuation by this amount Control range is from 0 5 to 3dB in 0 5dB steps Adaptive Gating dynamically modifies the...

Page 69: ...ors between zero and one the offset is expanded prior to adding it to the calculated ambient level the smaller the weighting factor the larger the expansion Control range is from 0 to 20dB in 0 5dB steps Individual Control Ambience Weighting The weighting factor used in the ambient level calculation for each input This control should be set to 1 with the following two exceptions 1 To exclude the m...

Page 70: ...are in the group and Adaptive Gating moves the threshold of the gate based upon an external source Colours denote the type of function assigned from the input to the automix group Blue Ducking Yellow NOM and Green Adaptive Gating Assignments set up in the matrix take on the colour of the active function and if two or more functions are set up then the colour will change to red If the individual in...

Page 71: ...Control range is from 100 to 0 in 0 5dB steps Attack Time Sets the time required for Priority Ducking to attenuate the mic gain by 20dB Control range is from 10 milliseconds to 10 seconds in 10 millisecond steps Release Time Sets the time required for Priority Ducking to increase the mic gain by 20dB Control range is from 10 milliseconds to 10 seconds in 10 millisecond steps b c d e 1 2 3 4 Proces...

Page 72: ... Output channel mutes and solos can all be monitored by pressing the Solo Mute button above the main Signal Path window From here individual channels can be soloed for preview purposes and muted equally all solos and mutes can be switched in or out for the Inputs and Outputs separately Solo Mute ...

Page 73: ...signal integrity level and furthermore any input channel can be soloed together with any output channel for source destination assessment Alternatively routing can be handed back to the 24 1 matrix by pressing the Mix button associated with the output channel that has had an exclusive assignment applied this disconnects the exclusive routing The fact that the same signal input is routed to the two...

Page 74: ...s slider alters the ratio of analogue channels green that are displayed to the number of CobraNet channels pink If the window is in its full size mode then this control is not available and the scrollbar for the analogue channels changes to a green bar and a pink bar for the CobraNet channels The top row controls are for the output channels The first two blue topped columns are the Main outputs an...

Page 75: ...ese inputs The crosspoint controls in the Matrix itself enable an amount of signal to be routed using the black level control control range is from Off to 20dB Exclusive assignment of a particular input to output is attained by pressing the button at the crosspoint between the required channels In this situation the level controls for all inputs in that output channel become greyed out and are ina...

Page 76: ...Each of the ten Output Processing Sections has independent fader control of all of the inputs to the selected output i e a 24 1 mixer as shown above The Mix Mode drop down box is used for selecting exclusive assignments between a particular input and output This function is repeated with the Single Input Mix Mode Buttons or the routing can be reassigned to the 24 1 mixer The selected output channe...

Page 77: ...ignals should be corrected by the delay in the Input Processing Section Delay is displayed by IQ for Windows software in milliseconds feet and meters Available delay for each Output Processing Section is up to 2 seconds in 20 microsecond steps 1 4 inch These filters are identical to the Input Filters please read the section on Input Filters for more information As was the case with the Input Filte...

Page 78: ...splays the gain function with line meters underneath the graph displaying the Input Ambient Sense level green and the Output Signal Level blue Seven parameters control this feature On Off Turns this feature on or off Sense Input Determines the source for the ambient level that will do the adjustment Sense Threshold Sets a level for the ambient sensor input threshold The Ambient Leveler expansion w...

Page 79: ...to 60 seconds in 0 1 second steps Release Time Sets the time required for the Auto Leveler to compress its gain by 20 dB Control range is from 0 1 to 60 seconds in 0 1 second steps Allows the Ambient Leveler expansion to be inhibited when the actual output Program level is above a prescribed level This mode prevents program material feed through from artificially increasing the apparent ambient le...

Page 80: ... parameters control this feature On Off Turns this feature on or off Threshold Used to set the peak signal level above which compression occurs Control range is from 80 to 20dB in 0 5dB steps Attack Time Sets the time required for the Limiter to decrease its gain by 20dB Control range is from 1 to 100 milliseconds in 1 millisecond steps Release Time Determines how long it takes for the gain to ret...

Page 81: ...r be the output of an Output Processing Section or they can be fed from a CobraNet Output The output of the two Main Output Processing Sections goes directly to the analogue output drivers that provide the signal on the rear panel of the unit Clicking on one of the Aux output representations displays an overview of that channels current output processing configuration The Main Outputs graphics hav...

Page 82: ...tings are not inadvertently lost due to selection of a Preset instead of storage of a Preset the Prompt to recall or store checkbox allows a query window to display whenever a Preset button is pressed in order to ensure the intent of the user Each Preset has a 32 character user definable label Preset Segue This enables smooth level transitions between Presets When a Preset is selected all of the f...

Page 83: ...single command Like Presets Scenes can be changed from the front panel a Control Port Input an IR command or a scheduled Event Each Scene has a 32 character label associated with it and the Scene Editor allows the objects to be selected and configured for each Scene Note These unit Scenes should not be confused with the IQ Win equivalents that are saved as SIQ files and are handled quite different...

Page 84: ... start again to bring back the complete listing The Add and Remove buttons allow you to choose which parameters are to be included in the Scene Select one of the parameters in the bottom box and its settings will become available to change The Save current unit settings to selected scene settings enables the chosen parameters to have their settings taken from the actual settings for those paramete...

Page 85: ...ed in a variety of different ways The internal clock has a keep alive capacitor that allows the unit to be unpowered for up to 45 days without losing the current date and time Each Event can be enabled individually and the entire Event Scheduler can be enabled allowing the scheduler to be turned off without having to switch individual Events off Each Event has its own label and the 32 Events can b...

Page 86: ...t rate the Event editor allows the programming the Event at periodic intervals Each Event can have its own repetition rate and starting time independent of any other The Event schedule window shows the next 10 occurrences of the Event By using multiple Events that are interleaved a pattern of Events can allow switching between several setups in a regular timed fashion Events Scheduler One Time Eve...

Page 87: ...ESSOR The main Event View Schedule button allows viewing of all of the enabled Events for a defined period of time This ensures that the desired sequence of periodic Events are occurring at the desired times Events Scheduler Schedule ...

Page 88: ... 88 PS 8810 DIGITAL SIGNAL PROCESSOR CobraNet ...

Page 89: ...es while unicast bundles are sent to one and only one CobraNet network device Through the use of Fast Ethernet switches unicast transmission of bundles can greatly increase the number of bundles that can be present on a CobraNet network since the bundles only go to the device that is addressed Since each device can send and receive four bundles i e up to 32 channels great flexibility is allowed in...

Page 90: ...er hub networks and these need to be limited to 8 bundles per network On the other hand switches are much more efficient in that they examine the destination address of each packet of data received on each port then switch that data to the particular recipient of that packet Unicast bundles exploit this feature to minimize the audio traffic on the CobraNet network The result is that an almost limi...

Page 91: ... This label is embedded in the CobraNode and indicates the manufacturer and description of the CobraNet device System Location Used to describe the location of the CobraNet device System Contact A label that tells who to contact in the event of a problem Firmware Version Indicates the CobraNode s firmware Protocol Version Major Version and Minor Version MAC Address The CobraNode s unique manufactu...

Page 92: ...ng the lowest priority and 255 being the highest priority A light indicates when the CobraNet device is the Conductor of the system The PS 8810 defaults to 32 Status indicators There are a number of status and error indicators for the CobraNet network The Ethernet Status tells if the physical network is connected to the unit The Rx Activity and Tx Activity lights tell if there is incoming or outgo...

Page 93: ...ght CobraNet Inputs to the PS 8810C Once the eight CobraNet Inputs have been assigned Bundles and Slots they can be used by the unit for routing and processing The CobraNet Inputs each have a unique label for identification and can be routed into the processor in several ways The Input Processing Sections can accept either the analogue input or the CobraNet Input In addition a CobraNet Input can b...

Page 94: ...lot assignments to be disconnected while the Default Link Button allows assignment of CobraNet Output 1 to Slot 1 of each Bundle CobraNet Output 2 to Slot 2 of each Bundle and so forth Each Slot can be assigned either none 16bit 20bit or 24bit resolution Each Bundle is limited in the number of audio bits that can be placed in a single Bundle and is a function of the maximum Ethernet data payload T...

Page 95: ... in the network based upon that Bundle s Priority At the start of a synchronous cycle the Conductor tells the highest priority Bundle to transmit then each successive Bundle transmits based upon its assigned Position The Receiver Count for each Bundle tells how many receivers i e other devices on the network are listening to that Bundle synchronous cycle the Conductor tells the highest priority Bu...

Page 96: ... 96 PS 8810 DIGITAL SIGNAL PROCESSOR External Control ...

Page 97: ...remote control such as a programmable remote control device like the Philips Pronto to remotely control the unit The front panel of the PS 8810 has an IR receiver that can detect IR signals and switch objects based upon a particular received code 64 available IR commands allow a variety of objects to be selected ...

Page 98: ... IR Code Editor window allows selection of objects for inclusion in that IR code Each selected object can be edited for particular usage The IR code can also be configured to recall a Preset or a Scene As a setup tool the Try button allows the IR code configuration to be simulated to ensure that it acts as expected IR Code Editor ...

Page 99: ...htm Please refer to the Pronto User s Manual for more detailed information After installing Pronto Edit open the file PS 8810 IR CCF The file is available at the IQ website http www IQAudioSystems com software PS8810 IR Control zip This provides a good place to start The screen will look like the screen shot below The HOME folder contains the buttons located on the home page Double clicking on Hom...

Page 100: ... by right clicking on the button and selecting properties The following window will appear Under the Action tab the RC5x command is displayed In this case it is 19 1 0 this command will select a PS 8810 device at IQ Address 1 and send code 0 With this code highlighted press the delete button Now a new code can be entered It is also possible to enter more than one command In this case pressing the ...

Page 101: ...19 for System 19 defines a PS 8810 Enter the IQ address 0 63 for Command Enter the code 0 63 for Data Once all of the buttons and windows are set up save the program as a ccf file type Download the program into the pronto and try it out Infrared Remote Control Philips Pronto ...

Page 102: ... 102 PS 8810 DIGITAL SIGNAL PROCESSOR PS8810 IR Code Format ...

Page 103: ...ignals from other components and indicate status of the input gates The Control Port implements sixteen outputs and sixteen inputs along with power supply outputs and common grounds Eight of the outputs are digital logic outs while the other eight are analogue outputs that are capable of digital logic outs Eight of the inputs AIN1 8 are capable of monitoring digital and analogue external signals T...

Page 104: ...s buttons allow filtering of the objects to allow only certain objects to be displayed The Named window allows input of text to narrow the search Once the desired object has been found highlighting and pressing of the Add button adds it to the object list on the bottom of the window By highlighting a particular object in the bottom window the attributes of the object can be edited Binary objects c...

Page 105: ...ously at second intervals Recall Preset Enables the input to recall one of the 32 user Presets Separate Presets can be recalled for low to high and high to low transitions Recall Scene Enables the input to recall one of the 32 user Scenes Separate Scenes can be recalled for low to high and high to low transitions Enables the digital inputs to be used in a binary combination of digital inputs to re...

Page 106: ...iven and will accept 5V or 10V inputs and are well suited for sensing contact closure One particularly useful way to use the Logic Input Control Mode is to sense the opening and closing of switches in a room combining system Switches are mounted in retractable partitions between rooms When a partition is opened the signal at the digital input will be interpreted as a logic low and when the partiti...

Page 107: ...ontrols the output state of the corresponding pin when in Manual mode Polarity changes the polarity of the digital output regardless of the pin control mode Reflect Manual causes the output to directly reflect the state of its Manual control Reflect Object causes the output to reflect the state of the selected binary object within the BSS PS 8810 Only a single object may be specified Reflect Prese...

Page 108: ... the fans on or off A Sample Control Port Output Circuit By monitoring the operating condition of amplifiers with the IQ System software the need for additional cooling would be apparent The software could then be used to turn on the appropriate Control Port input Another use for the Control Port outputs might be to light an LED on an annunciator panel to indicate Preset status input channel mute ...

Page 109: ... Digital Inputs These inputs can be used to sense the presence of an analogue input signal level such as ordinary 10kOhm linear potentiometers for level control Analogue inputs can alternately be set to sense simple contact closure Sample Control Port Digital Input Circuit A screw terminal board with barrier block to DB37M connections makes it easy to interface external circuitry to the Control Po...

Page 110: ...controls for each output Pin State Indicator indicates the logical Pin High or Pin Low status of the actual hardware output Manual directly controls the binary output state of the corresponding pin when in Manual mode Polarity changes the polarity of the analogue output regardless of the pin control mode Reflect Manual causes the output to directly reflect the state of its Manual control Reflect B...

Page 111: ... 111 PS 8810 DIGITAL SIGNAL PROCESSOR Reference Section ...

Page 112: ...ain adjustable by a rear panel potentiometer The preamp output provides a single ended voltage output that is then coupled to a single ended to differential amplifier that also provides the bias offset needed by the A D converter A 24 bit high resolution A D converter samples the input audio at 48 kHz The audio processing is set to provide 20dBu as full scale allowing full utilization of the dynam...

Page 113: ... on board Output Section Output serial digital audio from the DSP board is sent to the output board for conversion and analogue processing The serial digital audio is comprised of two channels of 24 bit signals Each DAC converts the audio data stream into two differential output channels A differential amplifier filters the DAC s audio output and provides single ended audio to a gain stage that se...

Page 114: ...h this port DSP Interface The control processor boots all of the DSP processors via this interface Additionally the control processor sets all audio processing controls and receives all meter data over this port Real Time Clock An internal real time clock allows Presets to be called based upon a real time The event scheduler works independently of the computer and can recall a specific Preset eith...

Page 115: ... of the input channels Analogue Outputs These eight 0 to 10VDC inputs can be mapped to any object in the box for control Fader objects can be mapped to allow remote control of a particular fader Digital Inputs Eight switched inputs can be linked to specific functions such as muters in the unit These inputs can also be used to select a particular Preset based upon a desired switch combination on th...

Page 116: ... 116 PS 8810 DIGITAL SIGNAL PROCESSOR 19 0 Block Diagram ...

Page 117: ...plied An amber front panel Data Signal Presence Indicator DATA flashes whenever commands addressed to the BSS PS 8810 are received A green front panel IQ Interface indicator lights when the BSS PS 8810 is being used as system interface A three character segmented digital display indicates the BSS PS8810 s initialization sequence by displaying each processor s name as it comes on line Also indicate...

Page 118: ... larger Can be extended with an IQ Repeater 24VDC at 10mA 20 dBu to 12dBu additional 25 dB for mic setting 24 bit 48kHz 20kOhms balanced 10kohms unbalanced Greater than 100dB A weighted 20 Hz 20KHz 20Hz 20kHz 0 5dB 50dB typical Greater than 80dB at 10kHz Less than 0 05 THD N 1kHz 0dBu 100 Ohms balanced 50 Ohms unbalanced 32dBu line or 7dBu mic 20dBu Specifications Audio Phantom power voltage Input...

Page 119: ...max per pin greater than 50kOhm less than 0 5V greater than 5V 0 to 10V for inputs 9 16 only 25V 13 pounds 4 ounces 6 1 kg Width 19 inch 483 cm standard rack mount EIA RS 310 B Depth 16 inch 40 6 cm behind mounting surface Height 3 5 inches 8 9 cm ControlPort Power Supply Outputs Logic Low Logic High Inputs Input Impedance Logic Low Logic High Analogue Range Max Input Voltage Weight Dimensions Mec...

Page 120: ... 120 PS 8810 DIGITAL SIGNAL PROCESSOR 21 0 User Notes ...

Page 121: ... 121 PS 8810 DIGITAL SIGNAL PROCESSOR User Notes ...

Reviews: