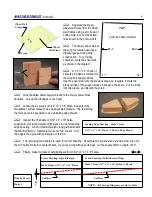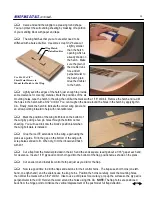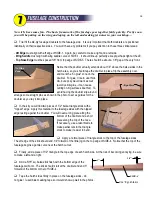
Select one of the leading edge sheets you assembled earlier, and trim it to fit. Start at the wingtip end, cutting
away a wedge that matches the angle of W-14. Now, hold the rear edge of the sheet flush with the rear edge of the
spar, mark the sheet at each end where it contacts the LE,
and make the cut using the marks as a guide. Finally, trim
the rear edge of the sheet so it will overlap halfway (1/4")
onto the main spar. Glue the LE sheeting in place and
allow to dry (see sidebar for details on a good method).
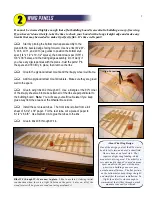
Optional:
If you are building a fully-
sheeted wing, add a 3/32" x 3/8" capstrip to
the top of rib W-13.
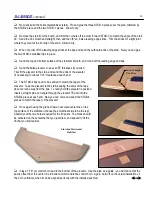
Trim a piece of wingtip sheeting to fit
and glue it in place. Thick CA works well for
this step. You will need a tiny scrap of 3/32"
balsa to finish off the rear, inboard edge of
the sheeting.
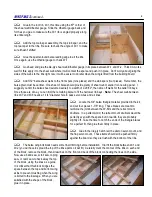
Prepare a piece of 3/32" x 3" x 36"
balsa to be used for trailing edge sheeting by
roughly trimming it to shape, then glue it in
place. Use yellow glue on the tops of the ribs
and thick CA along the rear spar and TE.
The sheeting should overlap 1/4" onto the
rear spar, leaving about 1/8" of the spar
exposed.
Add 3/32" x 3/8" balsa capstrips to
ribs W-10, W-11, and W-12 (skip this step if
you are building a fully-sheeted wing).
Even though there is no photo, this is a critical step. Remove the wing from your building board and go over
every glue joint with medium CA. That means every joint on both sides, if possible. I like to use just enough glue so
you can see a small fillet formed between the parts. Use accelerator sparingly; it weakens the cured strength of CA.
First Cut Second Cut Final Cut
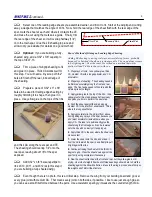
Bruce's Method of Gluing on Leading Edge Sheeting
Adding LE sheeting to a wing is always a stressful step for me, probably
because I've botched it badly on previous models. The wood always seems
to be fighting me! Over the years I've settled on a method that works
pretty well and I'd like to share it with you.
1.
Prepare your tools. I use yellow glue, thick
CA, medium CA with a long applicator, and CA
accelerator.
2.
Prepare your sheeting. The sheeting needs to
be trimmed accurately along the front and rear
edge. The front edge needs to fit solidly with the
LE along its entire length.
3.
Apply yellow glue to the top of the ribs. I like
yellow glue for this step because it dries slowly
and gives you time to perform the next step.
4.
Push the sheet against the LE and apply
medium CA to the joint from underneath. This is
where the long spout helps.
5.
Apply accelerator to the LE joint from above.
Avoid getting any spray on the spar, because you
don't want accelerator residue there when you
apply CA. The idea is to permanently glue the
sheet along the front edge so it can be lowered
onto the ribs with no worry of it popping up.
6.
Apply thick CA to the spar where the sheet will
make contact.
7.
Lower the sheet onto the ribs, and stroke it
from the LE towards the spar in an attempt to pull
it tight against the ribs.
8.
Continue stroking the sheet until the thick CA
begins to grip. Press the sheet down against the
spar firmly, using accelerator if necessary.
9.
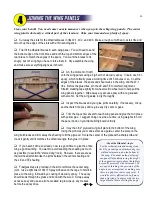
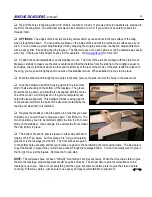
Now the sheet is attached at the front and rear, but the yellow glue is still
drying. Use lots of weights like the shot-filled bean bags shown here to hold the
sheeting against the ribs while it dries. Be sure the wing is pinned down firmly so
the weights don't distort the structure.
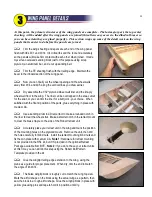
WING PANELS
,
continued...
9
Summary of Contents for Reaction 54
Page 1: ...INSTRUCTION BOOK...

