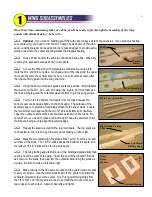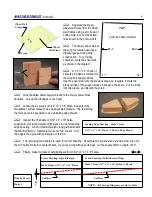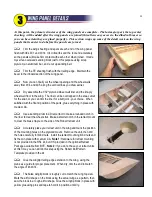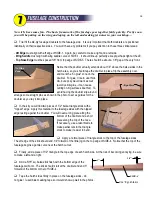
Block sand any irregularities off the bottom of the wing, then pin it upside-down to the building board. Pin it
firmly at the trailing edge so the TE sheeting is flat against the building board. The front portion of the wing needs to
be supported near the main spar. I suggest using two pieces of 1/4" balsa sheet (provided in the kit). Stack the
sheets then slide them rearward until they contact the balsa LE sheeting. The idea is to support the wing without
causing any twists or distortions. Pin the supports in place so they won't
shift around later.
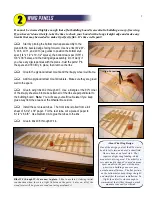
Use thick CA to glue the wing dowel support assembly in place.
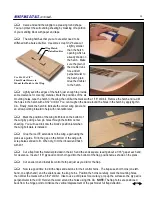
Add LE sheeting, wingtip sheeting, TE sheeting, and capstrips to
the bottom of the wing just as you did for the top of the wing.
Carefully trim the bottom center sheeting to fit snugly between the
LE and TE sheeting. Temporarily tape the center sheeting in place, then
remove the wing from the building board. Working from the top, mark the
outline of the hatch opening, the flap servo opening, and the aileron servo
opening. Also mark the retract mount area (don't worry about the wheel well
- you will cut it out later). Remove the center sheeting.
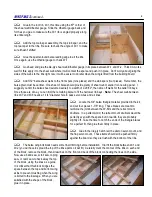
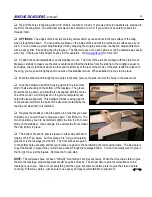
Let's start with the servo cutouts. The actual cutouts in the sheeting
need to extend an extra 1/4" at both the front and the back to make room for
the servo mounting flanges. Ultimately, the servos must sit on the lite-ply
mounts, not the balsa sheeting. Draw the extended outlines on the sheeting,
then neatly make the cutouts.
The wing hatch is actually larger than the opening that's drawn on
the sheeting. Carefully draw a hatch outline that is 3/8" wider on each side
and 1/4" wider at the rear. The front edge of the hatch is the front edge of
the sheeting, so no cut is required there. Cut the hatch out carefully,
keeping in mind that the cutout is not scrap - it will be used later as the
hatch cover.
Cut the retract mount area away using the lines that are
on the sheeting. Place the sheeting back on the wing and use
an actual retract unit (or the paper template included with the
kit) to mark the cutout area for the mounting flanges. Position
the retract with the mounting holes equally spaced on either
side of W-6. Remove the sheeting, then make the cutouts so
that there will be about 1/32" clearance all around the mounting
flanges.
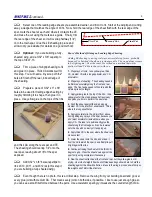
Trial fit the center sheeting one last time, and mark the wing
structure through the cutouts you just made. The marked areas will indicate
"no-glue" zones. Remove the sheeting, then apply yellow glue to the wing
structure, being careful to avoid the no-glue zones. Put the sheeting in
place, then weight down the wing on your building board (use wax paper!)
right-side up so that the center sheeting is flat against the board.
R54
3"
8
1"
4
1"
4
Cut
Here
Cut
Here
Wing Bottom Center Sheeting
WING PANELS
,
continued...
10
1/4” Sheets
for Support
Summary of Contents for Reaction 54
Page 1: ...INSTRUCTION BOOK...

