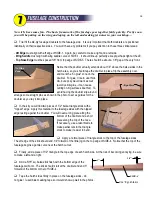
Clear your bench! You need some room to maneuver when you join these big wing panels. The center
wing joint is obviously a critical part of the structure. Take your time and use plenty of epoxy.
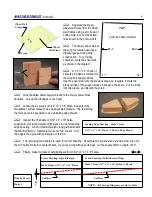
Cut away the slots for the dihedral braces in ribs W-1, W-2, and W-3. Make a rough cut with an X-Acto knife and
smooth up the edges of the slots with a thin sanding stick.
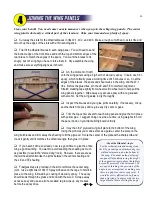
Trial fit the dihedral braces in each wing panel. You will need to sand
the bottom edge of the front brace and both the top and bottom edges of the
rear brace to match the angles of the spars. You want the braces to fit
snugly, but not so tight you have to force them in. Dry assemble the wing
and make sure everything aligns as it should.
Ah, the moment of truth!
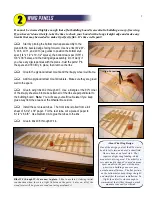
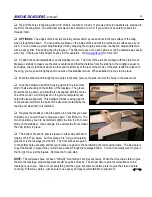
Join the wing panels using a big batch of slow-dry epoxy. I like to use 3-hr.
epoxy, which normally gives a working time of 45 minutes or so. Coat the
edges of the braces, the spars and shear webs in the wing, and the W-1
ribs. Before the glue dries, pin the LE and TE to maintain alignment.
Stretch masking tape tightly from wheel well to wheel well to help pull the
wing panels together. Wipe away any excess epoxy with a rag soaked
with alcohol. Set the wing aside to dry thoroughly.
Inspect the braces and your glue joints carefully. If necessary, mix up
another batch of epoxy and re-glue any dry spots or gaps.
Trim the top center sheets for each wing panel and glue them in place
with yellow glue. I suggest doing one side at a time, using weights to hold
the panel down on your flat building board until dry.
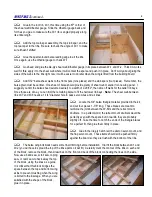
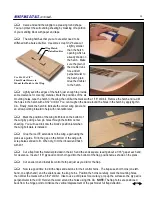
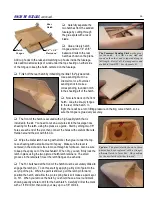
Inlay the 3/32" plywood wing bolt plate in the bottom of the wing.
Using the pinholes you made earlier as a guide, center the plate on the
wing bolt blocks and trim away the sheeting to fit the plywood. Score the center of the plate with a sharp knife and
crack it gently until it matches the dihedral angle, then glue it in place.
If you haven't done so already, now is a good time to give the entire
wing a good sanding. You want to avoid sanding the sheeting as much
as possible (to avoid the "starved dog" look). However, there are areas
that will need attention like the joints between the center sheeting and
the LE and TE sheeting.
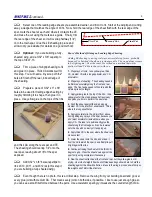
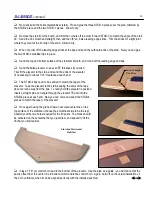
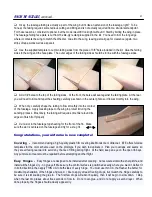
Fiberglass tape is provided in the kit to reinforce the center wing
joint. I use a light mist of 3M 77 Spray Adhesive on the tape to hold it in
place on the wing, followed by a coating of slow-dry epoxy. The epoxy
should soak through the glass and bond with the wood. Scrape away
excess epoxy and use an alcohol-soaked rag to wipe up any messes
before the epoxy dries.
R54
13
About the Dihedral Angle
For the technical-minded amongst you,
the R54 was designed with three degrees
of dihedral measured on the bottom of
the wing. The usual method of laying
one panel flat and measuring the height
of the opposite wingtip above the table is
not really necessary with this model. To
my way of thinking, the precision of the
angle is not as important as making sure
there is a gap-free center wing joint. It
would be pretty difficult to be off more
than a fraction of a degree with the two
large dihedral braces setting the angle.
Summary of Contents for Reaction 54
Page 1: ...INSTRUCTION BOOK...

