Now let's have some fun. The basic framework of the fuselage goes together fairly quickly. Pretty soon
you will be putting on the wing and taping on the tail and making jet noises in your workshop…
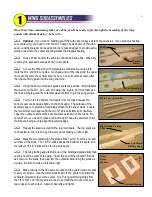
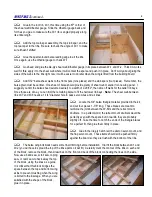
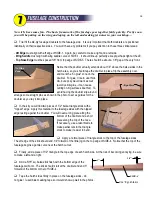
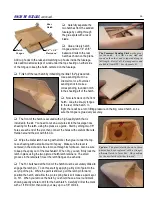
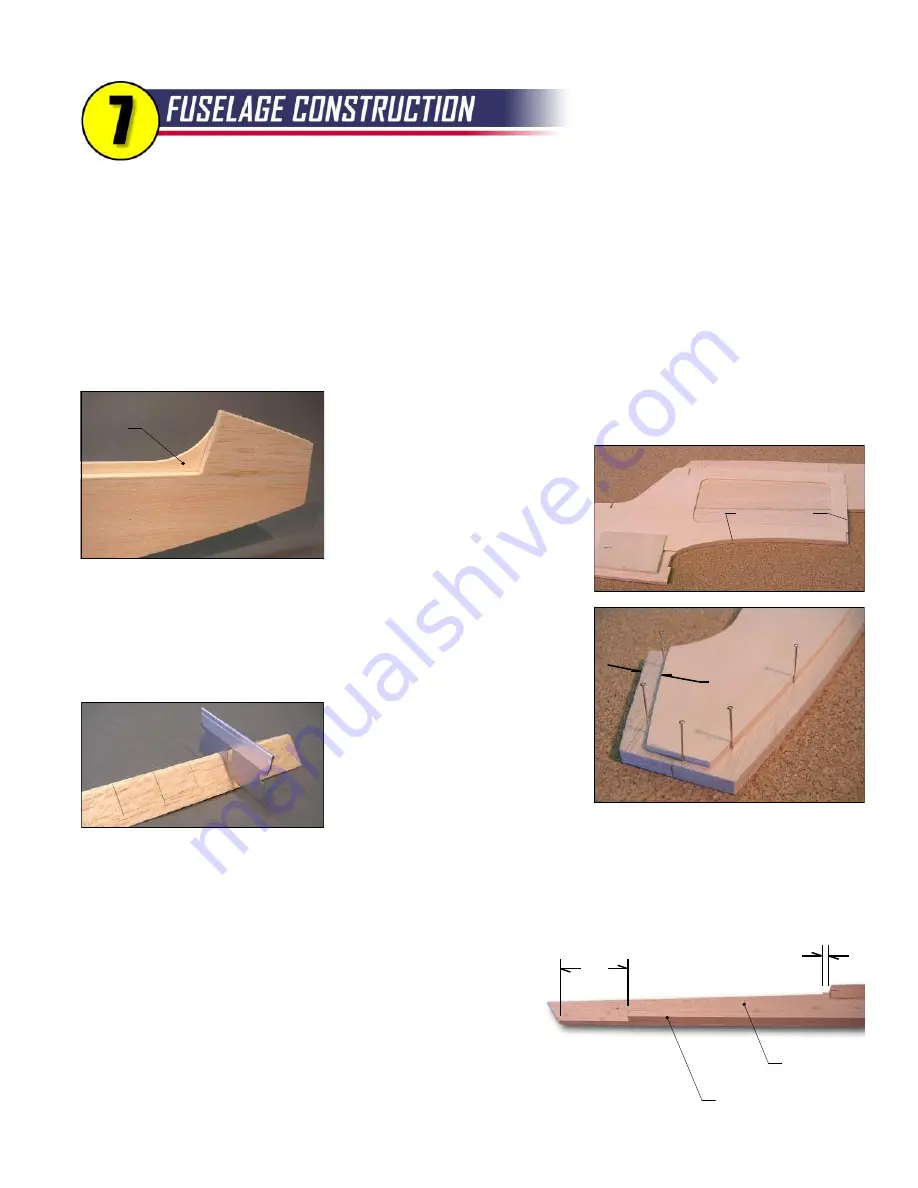
Trial fit the lite-ply fuselage doublers to the fuselage side. It is very important that both doublers are positioned
identically on their respective sides. You won't have any problems if you pay attention to these three critical areas:
-
Aft Edge
must align with aft edge of SIDE-1. Again, be careful to make a right and a left side.
-
Wing Saddle
must align with wing saddle curve of SIDE-1. It should line up perfectly except perhaps right at the LE.
-
Top Nose Edge
must be spaced 3/8" from top edge of SIDE-5. There should be about a 1/8" gap at the very front.
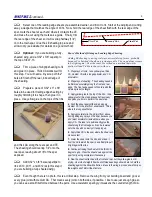
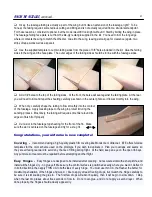
Notice that the doubler actually extends about 1/4" above the balsa sides in the
hatch area, so you should tape the doubler in place, flip the assembly over,
and mark the "no glue" zone on the
doubler. For glue, I like to use thick
CA, but epoxy would work as well
(avoid yellow glue - it can cause
curling on big surfaces like this). To
avoid having the doubler slip around,
arrange some straight pins as shown in the photo to act as guides for the
doubler as you lay it into place.
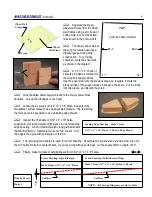
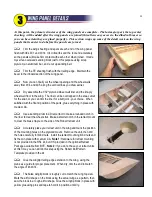
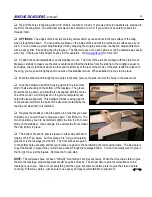
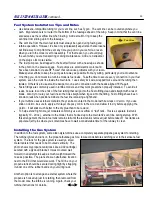
In the kit you will find two pieces of 1/2" balsa triangle stock with a
"nipped" edge. Apply this material to the fuselage sides with the nipped
edge resting against the doubler. You will need a long piece along the
bottom of the doubler and a short
piece along the top of the nose.
If necessary, use a razor blade to
make partial cuts in the triangle
stock to make it easier to bend.
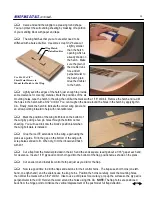
Apply a normal piece of triangle stock to the top of the fuselage sides.
The aft edge of the stick should end 1/4" forward of the little jog on the top edge of SIDE-4. Notice that the top of the
fuselage begins a gentle curve near the hatch cutout.
Finally, add a piece of 1/2" triangle to the top edge of each hatch side. At the risk of becoming annoying, be sure
to make a left and a right.
Add a 5/16" sq. balsa stick flush with the bottom edge of the
fuselage tail boom. The stick should start at the doubler and end 3"
forward of the bottom corner of SIDE-4.
Tape the hatch sides firmly in place on the fuselage sides - do
not glue! I used blue masking tape so it would show up well in the photos.
18
3/8
"
Align Here
No Glue
Zone
3"
1/4"
SIDE-4
5/16"
SQ. BALSA
Summary of Contents for Reaction 54
Page 1: ...INSTRUCTION BOOK...

