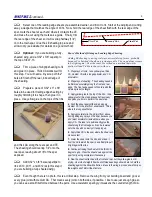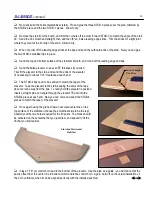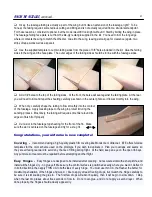
Tack glue F-5 and F-6 to one of the fuselage sides, using a triangle to
make sure they are perpendicular. Now add the lite-ply fuel tank
compartment top (big rectangle) along with the opposite fuselage side.
Tack glue the parts, check the fuselage alignment over the plans, then glue
them all firmly. These parts will form a self-aligning box that is the core
section of the fuselage.
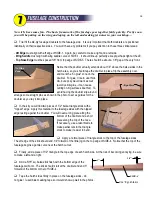
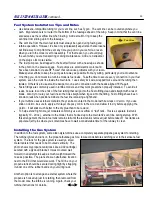
Dry assemble F-1 through F-4 in the nose of the fuselage, using tape
at the nose to hold everything together. You can check the overall
alignment over the plans, but it's difficult. This is where a trained eyeball
will come in handy. Stand a few feet in front of the nose and look for any
hint of twists or one side bending more than the other (the banana effect).
When you are satisfied that it's straight, start spot gluing the parts with
medium CA.
CAUTION!
Be very careful to keep the glue away from the
joints between the hatch sides and the fuselage sides.
Glue in the lite-ply receiver shelf and ECU shelf.
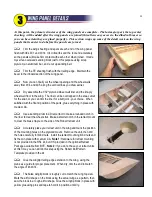
At this point there is a lot of bending pressure that might be fighting you, particularly near the nose. Apply tape or
temporary spreader sticks as necessary to hold things in their proper
position. Trial fit the 1/4" plywood H-1 to make sure it fits, then glue it in
place on the hatch.
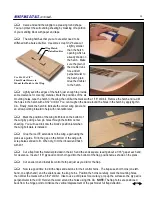
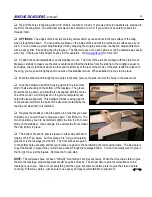
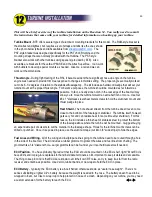
Slide H-2 into position on the hatch. The final position is not critical,
you just want to slide it far enough forward that it causes the hatch sides to
bulge just a tiny bit
away from the lip of the
fuselage doubler. You
want just enough of a
gap to give the hatch a little wiggle room so it's easy to put in place
on the fuselage later on. Make sure the top edge of H-2 is even
with the top of the hatch sides and glue it in place.
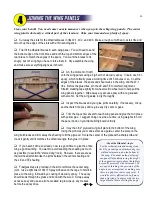
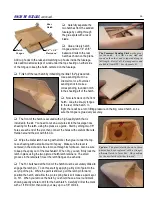
Dry assemble F-7, F-8, and the 1/4" balsa stabilizer mount on
the aft end of the fuselage, again using tape and pins as necessary
to hold things in place. The fuselage top view on the plans is very
helpful for checking alignment during this step. When satisfied that
everything is positioned properly, glue with thin or medium CA.
Glue the 3/32" plywood turbine mount to the bottom of the tail boom.
Add the 3/16" plywood turbine mount doubler to the center of the turbine
mount on the inside of the fuselage.
Sheet the bottom of the fuselage between F-6 and the turbine mount
with 3/32" balsa applied cross-grain.
FUSELAGE CONSTRUCTION
,
continued...
19
Turbine Mount
Doubler
F-8
F-7
Temporary Balsa Spacer
Receiver Shelf
H-2
H-3
H-1
Summary of Contents for Reaction 54
Page 1: ...INSTRUCTION BOOK...

