background image

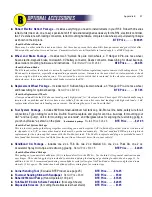
Robart  Electric  Retract  Package


– Includes everything you need to install retracts in your R54:  Robart 500-series 

retract units (two main, one nose), special-bent 3/16” wire struts designed exclusively for the R54, electronic controller, 
two 12” extensions with locking connectors, retract mounting hardware, complete nose wheel pull-pull steering linkage 
as shown on the kit plans.  


BTE Price . . . . . . $399.95


About the Robart Retracts 

There  may  be  other suitable  retracts out there, but these  have proven their durability  from  pavement and grass fields alike..  
Robart quality and value is second to none.  Pneumatic retracts are still available in limited supply - call BTE for price.


Wheel  and  Brake  Package


– Includes two 3” Sullivan Sky-Lite main wheels, a 3” Hangar 9 Pro-Lite nose wheel, 

Kavan electro-magnetic brake, microswitch, 9V battery connector, Deans connector, brass tubing for wheel bearings, 
wheel collars, mounting hardware, and instructions.  

Total Retail Price $108.67


BTE Price . . . . . . $89.95


About the Kavan Brake 

The R54 lands so slow that a brake is not really required, but AMA turbine regulations require some sort of braking device.  The 
Kavan unit is inexpensive, especially compared to a pneumatic system.  It mounts on the nose wheel, so it also provides a chunk 
of nose weight, which is needed anyway.  It is activated by a micro switch that is contacted by the elevator servo arm at full 
down elevator.  In my mind, this is the ideal brake system for the R54. 


Replacement  Wheel  Package


– Includes two 3” Sullivan Sky-Lite main wheels, a 3” Hangar 9 Pro-Lite nose wheel, 

and brass tubing for optional bearings.  

Retail Price $27.60


BTE Price . . . . . . $17.95


About the Replacement Wheels 

A low-speed model like the R54 does not need special, high-priced “jet” wheels and tires. These sport R/C wheels handle rough 
terrain with no problem and the tires have never rolled off the rim even after some bad landings with high side loads.  I did 
replace mine after about sixty landings on pavement.  Considering the price, I can live with that! 


Fuel  System  Package


– Includes SWB machined-aluminum fuel tank cap, Du-Bro fuel line barbs, safety wire for all 

connections, Tygon tubing for vent line, Du-Bro Fuel-It receptacle and plug for vent line, tie-wraps for mounting your 
UAT* and fuel pump*, Velcro for mounting your solenoids*, and fiberglass tubes for aligning the fuel tubing going to 
your shut-off valve* as shown on the plans.   

* Not included in package. 


Retail Price $28.46            

BTE Price . . . . . . $21.95 


About the Fuel System Package 

This is a low-cost package that brings together everything you need (except the UAT) to finish off your fuel system.  As discussed 
in  Appendix  A,  a  UAT  or  some  other  header  tank  must  be  purchased  separately.    The  red  anodized  SWB  cap  is  a high-tech 
replacement for the nylon cap that comes with the Du-Bro fuel tank.  The Fuel-It receptacle and plug are provided because I 
have found that kerosene loves to dribble from the vent line at the worst times, like in your vehicle! 


Handibond  CA  Package


–  Includes  one  2  oz.  Thin  CA,  two  2  oz.  Medium  CA,  one  2  oz.  Thick  CA,  one  2  oz. 

Accelerator Spray, micro-tips, and extra-long glue tip.  

Retail Price $34.76                             

BTE Price . . . . . . $29.95


About the Handibond Package 

This package of cyanoacrylate adhesives (CA) is tailored directly to the R54 kit.  Use the thin CA for general construction and 
easy hinges.  The extra-long glue tip is included to use when applying the leading edge sheeting (as described on page 9).  In 
addition to the CA, I recommend purchasing some aliphatic resin (yellow glue like Tite-Bond or Elmers wood glue) and some 
slow-dry (3 hr.) epoxy.  The instruction book often specifies certain glues for certain steps. 


Corner Sanding Tool


(Exclusive BTE Product, see page 25)


BTE Price . . . . . $14.95 

Fourmost Sanding Stick with Sandpaper   

Retail Price $6.90     

BTE Price . . . . . . $5.00 

Robart #164G Air Pump  

(Hand-Operated, 100 psi +)


BTE Price . . . . . $35.95 

Full-Size BTE Color Scheme Templates

  (Six Large Sheets) 


BTE Price . . . . . $29.95 

Disposable Scissors  

(for cutting the stainless steel heat shield)   

BTE Price . . . . . . $1.95


Appendix B        37


Summary of Contents for Reaction 54

Page 1: ...INSTRUCTION BOOK...

Page 2: ...ES 5 WING PANELS 7 WING PANEL DETAILS 11 JOINING THE WING PANELS 13 TAIL SURFACES 14 FUSELAGE SUBASSEMBLIES 16 OPTIONAL ACCESSORIES 37 COMPLETE PARTS LIST 39 2 VIEW DRAWING AND SPECS 38 Proudly Manufa...

Page 3: ...it s not about the speed it s about the spirit My Background I came to the world of turbines in a different fashion than most My previous jet experience came from designing building and flying sport...

Page 4: ...turbine designs by using low cost off the shelf hardware items like the Du Bro fuel tank wire struts and regular wheels The R54 blurs the line between your everyday sport model and what has become the...

Page 5: ...There are times when a good aliphatic resin like Elmer s Wood Glue or Tite Bond referred to as yellow glue in the book will be the best choice Slow dry epoxy 30 minute or longer is recommended for hi...

Page 6: ...to provide a flat gluing surface for the shear webs Locate the two bottom main spars and the two 12 spruce bottom spar doublers Taper the outboard ends of the spar doublers as shown on the plans Be c...

Page 7: ...ces can be set aside to use as trailing edge sheets Inspect the 18 sheets of 3 32 x 4 x 36 balsa supplied in your kit and select eight pieces to use for leading edge sheeting Look for medium weight lo...

Page 8: ...are perpendicular to the building board Note You will save yourself trouble later if you keep glue away from the area near the dihedral brace slots Install the servo lead tubes The front tube is rolle...

Page 9: ...ays Note The shear web between ribs W 7 and W 8 needs a 1 1 4 diameter hole to pass servo wires and air lines Locate the 3 4 balsa triangle material provided in the kit and cut four pieces 1 7 8 long...

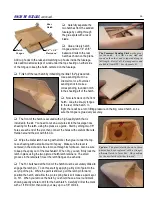
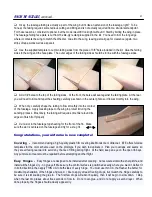
Page 10: ...Final Cut Bruce s Method of Gluing on Leading Edge Sheeting Adding LE sheeting to a wing is always a stressful step for me probably because I ve botched it badly on previous models The wood always se...

Page 11: ...o mounting flanges Ultimately the servos must sit on the lite ply mounts not the balsa sheeting Draw the extended outlines on the sheeting then neatly make the cutouts The wing hatch is actually large...

Page 12: ...liner for a butt joint your choice When satisfied with the fit and position of the parts glue everything in place with medium CA Use a sanding drum in a Dremel tool to make a rounded notch in the line...

Page 13: ...r sheeting You will need to know the block s position later when the wing bolt plate is installed Glue the root TE extensions to the wing again using the plans as a guide Fill in the gap on the bottom...

Page 14: ...ide at a time using weights to hold the panel down on your flat building board until dry Inlay the 3 32 plywood wing bolt plate in the bottom of the wing Using the pinholes you made earlier as a guide...

Page 15: ...7 You will also need to add a tiny scrap of balsa at the front point of FIN 6 Sand both sides of the fin smooth I like to attack this with an 80 grit sanding block until the glue joints are virtually...

Page 16: ...he STAB 4 tips need to be sanded to match the taper of the elevator Tape the elevator to the stab keeping the ends of the tape about an inch away from the tips To really hold the elevator in position...

Page 17: ...ed into the fuselage as a unit Prepare the F 5 bulkhead by adding two F 5D doublers Drill through the two wing dowel holes with a 1 4 drill bit Connect the drilled holes at the top of F 5 to make two...

Page 18: ...dge and add an arrow pointing forward on each D 2 to aid in positioning The fuselage plans are printed in two pieces Cut one or both accurately along the join line then tape the two pieces together Us...

Page 19: ...o avoid having the doubler slip around arrange some straight pins as shown in the photo to act as guides for the doubler as you lay it into place In the kit you will find two pieces of 1 2 balsa trian...

Page 20: ...ry spreader sticks as necessary to hold things in their proper position Trial fit the 1 4 plywood H 1 to make sure it fits then glue it in place on the hatch Slide H 2 into position on the hatch The f...

Page 21: ...ides in place The front edge of the boat tail side sits in the notch in SIDE 1 The rear edge of the boat tail side will have to be trimmed to match the angle of the formers and jig Glue on the second...

Page 22: ...isting it by hand A short piece of fuel tubing slipped over the end gave a better grip After drilling about an inch on each side I removed the wing and finished the holes with a power drill Epoxy the...

Page 23: ...of balsa sheeting on the bottom of the fuselage The groove should be facing down and should also be aligned with the center line of the model A drill bit placed in the groove temporarily will help wit...

Page 24: ...nd is cut cleanly and the cable slides in without binding Insert the 50 elevator cable into the 50 tube then thread a 4 40 jam nut and gold clevis onto the threaded coupler Route the tube through the...

Page 25: ...F 5 F 6 and the stabilizer mount hole Again route the tubing as smoothly as possible and glue it to the fuselage as you did with the elevator tube When you get to the aft end carefully glue the tube t...

Page 26: ...lied cross grain Leave a tiny gap between the sheeting and the hatches to allow some clearance after the covering is applied Two layers of masking tape works well as a spacer The aft end of the sheeti...

Page 27: ...etal latch housing with alcohol then glue it under the top nose sheeting with a small amount of epoxy Make sure the lever is centered in the slot and is free to move through its full travel Also be su...

Page 28: ...the fairing will require some filler around its edges to finish it off properly Cut a slot in the fuselage top sheeting for the front of the fin Make sure the slot is centered on the fuselage and try...

Page 29: ...wo 1 4 x 1 balsa sticks as shown on the plans The balsa sticks are wedged above the cutouts in the fuselage doublers and can be left unglued A neoprene rubber pad is also provided in the kit to provid...

Page 30: ...oute your fuel line so that it is straight when it goes into the fitting Festo fittings have been known to leak when positioned where the fuel line is making a tight bend If your turbine uses external...

Page 31: ...eat Shield The hot exhaust stream from the turbine doesn t even come close to the bottom of the fuselage or stabilizer The turbine itself however gets very hot and can radiate heat for some time after...

Page 32: ...hem out of the way so they don t get tangled up with the wheel and strut Some modelers use rubber bands looped around cables and fastened to hooks on the fuselage sides I used nylon tubes instead The...

Page 33: ...ns and flaps are shown in detail on the plans Note the position of the servo arms for each control surface The steering and retract servos can be mounted to basswood rails aft of F 3 Try to get the ra...

Page 34: ...radios PRE FLIGHT INSPECTION Be sure to perform radio range checks both with the turbine off AND with it running If there is a significant decrease in the range with the engine running you may need t...

Page 35: ...rongly suggest that you find a nice long runway for your initial flights even if you have to drive an extra hour or two Once you get a feel for the model s handling characteristics you will be ready t...

Page 36: ...s used in the prototypes so I will use their specifications as minimum requirements as follows Ailerons 2 servos and Rudder 1 servo Hitec HS 5625MG 110 oz in 4 8V Dual BB Metal Gears Flaps 2 servos an...

Page 37: ...established turbine Smaller diameter than typical 54 Gas or kero start BTE Combo Deal KingTech K 60G Taiwan 13 22 lb 50 000 162 000 3 22 1 88 lb Comments Tight light unit features kero start Great pr...

Page 38: ...oads I did replace mine after about sixty landings on pavement Considering the price I can live with that Fuel System Package Includes SWB machined aluminum fuel tank cap Du Bro fuel line barbs safety...

Page 39: ...actable Tricycle 17 pounds BRUCE THARPE ENGINEERING 8622 E EVANS CREEK ROAD ROGUE RIVER OR 97537 541 582 1708 www btemodels com Designed by Bruce Tharpe Wingspan Wing Area Root Chord Tip Chord Mean Ae...

Page 40: ...1 2 x 1 AC Ply Rear Hatch Tab 2 1 4 x 1 2 x 12 Spruce Bottom Main Spar Doubler beveled edge 1 3 32 x 4 1 4 x 5 AC Ply Turbine Mount 2 3 16 x 5 8 x 1 1 4 AC Ply Latch Retainers grooved edge BALSA SHEE...

Page 41: ...at fuselage 2 3 8 x 2 1 4 x 5 Balsa STAB 1 20 10 Rubber Rubber Bands wire rack rear hatch 1 3 8 x 2 3 4 x 22 Balsa STAB 2 32 3 4 x 1 Secret 3 3 8 x 2 3 4 x 26 Balsa STAB 3 2 3 8 x 2 2 4 x 9 1 2 Balsa...

Reviews: