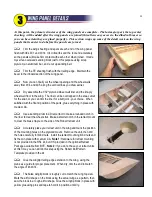
Once these time-consuming tasks are done, you'll be ready to fly through the assembly of the wing
panels with minimal delay. Let's roll...
Optional
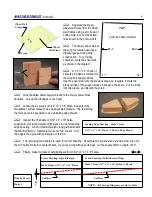
- If you plan on building your R54 with open rib bays, skip to the next step. If you plan on sheeting
your entire wing, you need to trim the W-13 wing ribs as shown on the plan.
Later, capstrip material will be added to the recessed edges to provide extra
gluing area where the center sheeting meets the wingtip sheeting.
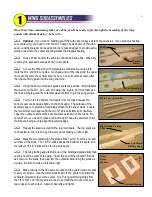
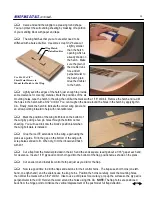
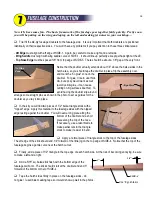
Glue a W-6D doubler to each side of both W-6 wing ribs. When dry,
cut away the exposed balsa as shown in the photo.
Cut out the Wheel Well Template (blue card stock) and use it to
mark the W-4 and W-5 wing ribs. Go ahead and cut the ribs along the upper
line, but only score the vertical lines for now. You will cut those later, after
the ribs are firmly glued into the wing structure.
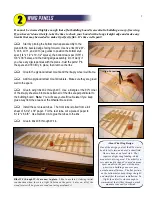
Using the short notches as guides, mark the position of the dihedral
brace slots on the W-1, W-2, and W-3 wing ribs. Again, don't cut them yet -
the lines will help guide the cuts later when it's time to join the wing panels.
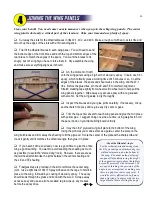
You can tell the bottom main spars from the tops because the
bottom spars are beveled slightly on the front edge. The purpose of the
beveled edge is to provide a flat gluing surface for the shear webs. Locate
the two bottom main spars and the two 12" spruce bottom spar doublers.
Taper the outboard ends of the spar doublers as shown on the plans. Be
careful here - you need to make a left and a right! Glue the doublers to the
main spars, being sure to align the beveled edges.
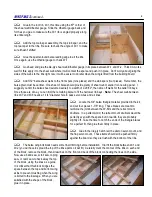
Repeat the previous step for the top main spars. The top spars are
not beveled, so there is no need to worry about making a right or left.
Mark the two remaining 36" spruce sticks 19-1/2" from the end, and
cut them at the mark. The 19-1/2" sticks will be the bottom stub spars, and
the leftover 16-1/2" sticks will be the top stub spars.
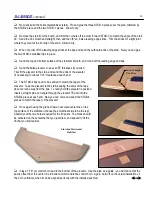
The wing trailing edge is made up of two machined balsa sticks that
overlap near the center of the wing. Taper the end of the inboard TE stick
as shown on the plans, then glue it to the outboard stick using the plans as
a guide. Be sure to make a left and a right.
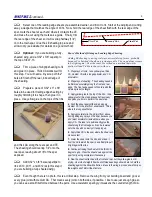
Make cutouts in the flap servo mounts and the aileron servo mounts
to suit your servos. Use the dimensions shown in the photo to position the
outboard, forward corner of the cutout. Cut 2"-long reinforcing strips from
the 1/8" x 3/8" x 12" lite-ply strips in the kit, and add them to the front and
rear edges of each cutout. Again, make lefts and rights.
Cutout
Balsa
W-6D
Cut Here Only
1/2"
3"
4
Main Spar Assemblies
Right-Hand Trailing
Edge
Left-Hand
Trailing Edge
Flap
Servo
Mounts
Finished Mount
5
Summary of Contents for Reaction 54
Page 1: ...INSTRUCTION BOOK...

