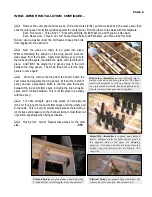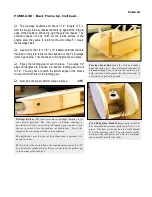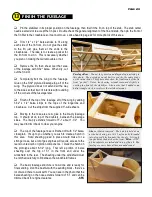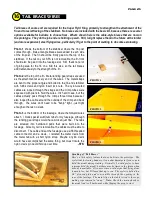
Center Wing Panel, Right-Side Up -
with the
shear webs and spruce reinforcing sticks in place.
Be careful working around those ribs hanging off
the table - they're easy to bump into.
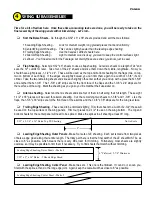
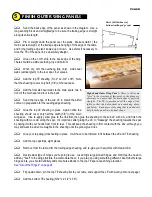
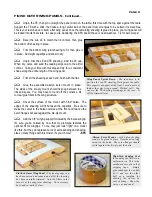
1 FINISH CENTER WING PANEL >
Check for excess epoxy near the aluminum channels and sand it away so it won't interfere with sheeting.
Sand the back edge of the panel on each side of the long ribs, just like in the figure in Section 5.
Sand the bottom trailing edge spar, just like the previous step, in the two outermost rib bays between the W-1
ribs. This is where the laminated balsa filler blocks will go later - they need to make good contact with the spars.
Once again, plan ahead for your hinge installation and add any reinforcing blocks if necessary.
Pin or weight down the panel over the plans. Make certain 1) the main spar is straight, 2) the trailing edge is
hanging off the edge of the table, and 3) the trailing edge isn't bowed up or down. Use shims if necessary to force
the TE of the panel to be absolutely straight.
Glue on the 1-3/8" strips to the back edge of the wing.
When dry, trim the overhang (top only). Add shear webs
(vertical grain) to the front face of the rear spars, 14 places.
Add the two 1/4" x 1/2" x 5" spruce reinforcement sticks to
the W-1 ribs as shown on the plans and in the photo.
Add the 3/32" plywood wing bolt plate. The front edge of
the plate should overlap 1/8" onto the top trailing edge spar.
CAUTION! I had to sand nearly a full ply off to make the plate
match the thickness of the balsa sheeting. Check yours before
gluing and take steps to be sure it will be flush with the trailing
edge sheeting to be installed next.
Add the top TE sheeting (3/32" x 2-3/4"). You will have to notch the sheeting to fit around the wing bolt plate.
Add the final 16 shear webs to the main spars, two in front of the main spar and 14 in the back.
Sand the top edge of the sub LE to match the airfoil contour in preparation for the leading edge sheeting.
Trim and fit the 1/2" balsa laminates to fit between the W-1 ribs at the leading edge, two places. It's important
that these fit well and match the contour of the ribs so that they will bond securely to the wing sheeting. These blocks
will take the brunt of the load from the wing dowels holding the wing to the fuselage. Glue the blocks firmly in place.
Glue the top LE sheeting in place using the same technique as before. This is a big sheet of wood and it could
be easy to get it misaligned from one end to the other. Tack glue it at a few spots along the leading edge to hold it in
position. Once you are satisfied that it's positioned properly, go ahead and finish gluing it with CA along the leading
edge. Smooth the sheeting down and glue it to the main spar starting at the center and work your way outboard.
Glue on your top wing joint sheeting (two places), the top center sheeting (not the portion aft of the wing bolt
plate), and the top capstrips (six places).
Remove from the table, trim the trailing edge sheeting, and re-glue your new joints with medium CA.
6
PAGE 10
Summary of Contents for SUPER FLYIN' KING
Page 2: ...TABLE OF CONTENTS 0 1 2 0 3 4 5 4 4 2 22 0 2 0 0 0 6 0 7 1 0 2 2 8 9 6 7 5 2 1...
Page 22: ...0 1 2 3 4 1 5 6 7 PHOTO 1 PHOTO 2 PHOTO 3 PHOTO 4...
Page 23: ...0 1 2 3 PHOTO 1 PHOTO 2 PHOTO 3 PHOTO 4...
Page 24: ...4 5 4 6 4 0 7 0 8 0 0 9 4 1 PHOTO 5 PHOTO 6 PHOTO 7 PHOTO 8 PHOTO 9...
Page 25: ...1 0 1 9 5 9 7 6 A PHOTO 10 PHOTO 11 PHOTO 12...
Page 28: ...0 12 3 4 5 6 7 6 8 3 9 7 9...
Page 31: ......


