FUSELAGE DECISIONS, Continued...
Landing Gear Mount -
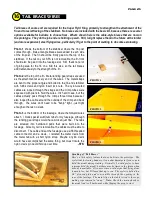
The aluminum landing gear is designed to simply bolt to the bottom of the fuselage.
That's fine, but I got fancy and inset the mount 3/8" so the bottom of the gear would be flush with the bottom of the
fuselage. It's a little extra work and you lose a bit of prop clearance, but it looks good to my eye. You also need to
decide on mounting hardware. I bolted my gear in place using six 10-32 x 1" button-head socket screws threaded
into blind nuts.
Note:
Mounting hardware and axle bolts are included with the optional Main Wheel Package.
Wheels and Axles -
Du-Bro 6" wheels will probably work okay, but I sure like the looks of the Sullivan 7" wheels
on the prototype. The axle holes in the aluminum gear are 5/16". I used hardened-steel 5/16"-18 x 2-1/2" socket-
head cap screw for axles. The nice part about these axles is that the wheels actually ride on the smooth part of the
shank, and the socket head fits neatly into a recess in the wheel. Simple and strong. I've had a tendency to design
landing gear a little light in the past - this one's not going to have that problem!
Tailwheel -
There are several good tailwheel assemblies on the market. My prototype uses a Sig extra-large
tailwheel assembly with a 1-3/4" Du-Bro tailwheel. The Graph Tech #304 assembly is a high-quality alternative
(available from BTE). If you choose something else, be sure it's rated for at least a 35 lb. model.
Tailwheel and Rudder Cables -
I used Du-Bro 4-40 pull-pull cables on both the rudder and the tailwheel. Both
sets of cables are attached to a Sig tiller bar, which in turn is driven by a single servo. Give some thought to the
routing of any cables, including the installation of guide tubes.
Servo Positioning -
Lots of room to play with! My elevator servos are in the rear fuselage, under the stabilizer,
to keep the pushrods short and stiff. I used Hitec 700BB servos on all of the control surfaces. These are big and
heavy, but they have a lot of torque (133 oz.-in. @ 4.8V, 161 oz.-in. @ 6.0V) and they are inexpensive. You will need
a variety of servo extension wires, Y-harnesses, and possibly servo reversers. I've had real good luck with the
products from Electrodynamics; they use heavy-gauge wire on all their extensions. They also offer connectors in
different colors, which is great for color-coding those aileron and flap leads with the connectors from the receiver.
Electrodynamics, 31091 Schoolcraft, Livonia, MI 48150. Phone: 734-422-5420. www.electrodynam.com
Radio System -
This is a catch-all category, but you need to think about things like where you want to mount
your switch or switches, how many batteries you're going to install, and how to route your antenna. Actually, much of
this can wait until the model is framed up, because you might want to position your battery (or batteries) to help with
balance. After reading several articles on large model radio installations, I decided to go with two receivers, two
batteries, and two switches. The batteries are each 4-cell, 1400mAh and the switches are Super Switches from
Cermark (they have a built-in charge jack). The dual Hitec Supreme receivers aren't so much for redundancy, but
more to split up the servo load. The left receiver controls the left-hand aileron, flap, and elevator, while the right
receiver runs the right-hand aileron, flap, and elevator. My throttle servo is on the left receiver, rudder on the right.
At the very least, I recommend using dual batteries and switches for redundancy. If you go with one receiver, you
should probably use a servo isolator, like the Pow'R Bus Pro from Electrodynamics.
Color Scheme -
Think about it now because if you plan to use a plastic film covering, you may want to add
support sticks where the colors meet and overlap. Also consider that you will probably want to paint the inside of the
cabin area to match your trim scheme. It took nearly ten rolls of Monokote to cover the BTE prototype.
Structural Modifications and Additions -
The Super Flyin' King is a natural for hauling cargo, dropping candy,
or towing gliders. Maybe you're thinking about adding floats later. Plan ahead for these things and install hard points
or whatever equipment you may need during construction.
-SFK
PAGE 15
Summary of Contents for SUPER FLYIN' KING
Page 2: ...TABLE OF CONTENTS 0 1 2 0 3 4 5 4 4 2 22 0 2 0 0 0 6 0 7 1 0 2 2 8 9 6 7 5 2 1...
Page 22: ...0 1 2 3 4 1 5 6 7 PHOTO 1 PHOTO 2 PHOTO 3 PHOTO 4...
Page 23: ...0 1 2 3 PHOTO 1 PHOTO 2 PHOTO 3 PHOTO 4...
Page 24: ...4 5 4 6 4 0 7 0 8 0 0 9 4 1 PHOTO 5 PHOTO 6 PHOTO 7 PHOTO 8 PHOTO 9...
Page 25: ...1 0 1 9 5 9 7 6 A PHOTO 10 PHOTO 11 PHOTO 12...
Page 28: ...0 12 3 4 5 6 7 6 8 3 9 7 9...
Page 31: ......


