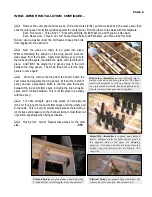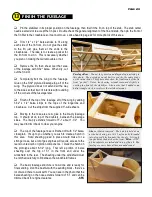
Both Joiner Assemblies
are now bolted in place,
but the webs have not been glued yet. The front
joiner/web assembly is still in position, but the
rear joiner/web assembly has been pulled away
from the spars so that glue can be applied.
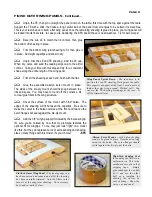
Joiner/Web Assemblies
are glued and clamped
firmly. Temporary pieces of plywood are used on
the opposite side of the spars for clamping
purposes. Use epoxy, but keep it away from the
actual wing joint between the two lite-ply W-2
wing ribs.
Plywood Scraps
are glued above and below the
C-channels for extra strength. Rear channel too!
Plywood Scraps
are glued above and below the
joiners for extra strength. Rear joiners too!
WING JOINER INSTALLATION, CONTINUED...
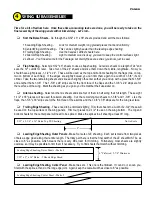
Remove the outer panel and the webs. Drill at the marks (9/64’), put the webs back in the outer panel, then
slide the outer panel into its final position against the center panel. Bolt the joiners to the webs with this hardware:
Each Front Joiner - Three 6-32 x 1" Socket-Head Bolts, Six #6 Washers, and Three 6-32 Hex Nuts
Each Rear Joiner - Three 6-32 x 3/4" Socket-Head Bolts, Six #6 Washers, and Three 6-32 Hex Nuts
Notice I used a washer under the bolt heads to keep the bolts
from digging into the aluminum.
Now the webs are ready to be glued into place.
Without disturbing the position of the wing panels, work the
webs away from their spars. Apply slow-drying epoxy to both
the webs and the spars, reposition the webs, and clamp them in
place. CAUTION! Be careful not to get any glue in the joint
between the wing panels. The whole idea here is for the wing
panels to come apart!
When dry, remove the wing from the board, loosen the
set screws and separate the wing panels. Mix another batch of
epoxy and use a disposable brush to coat the area thoroughly
between the top and bottom spars, including the internal webs,
spars, and mounting hardware. This is not the place to be stingy
with the epoxy!
For extra strength, glue scrap pieces of hard plywood
(3/32 or 1/8) along the top and bottom edges of all the joiners and
C-channels. This is a very important step because there will be a
lot of stress and pressure on the channels trying to twist them out
of position, especially when flying aerobatics.
Having fun? Good! Repeat these steps for the other
side....
-SFK
PAGE 5
Summary of Contents for SUPER FLYIN' KING
Page 2: ...TABLE OF CONTENTS 0 1 2 0 3 4 5 4 4 2 22 0 2 0 0 0 6 0 7 1 0 2 2 8 9 6 7 5 2 1...
Page 22: ...0 1 2 3 4 1 5 6 7 PHOTO 1 PHOTO 2 PHOTO 3 PHOTO 4...
Page 23: ...0 1 2 3 PHOTO 1 PHOTO 2 PHOTO 3 PHOTO 4...
Page 24: ...4 5 4 6 4 0 7 0 8 0 0 9 4 1 PHOTO 5 PHOTO 6 PHOTO 7 PHOTO 8 PHOTO 9...
Page 25: ...1 0 1 9 5 9 7 6 A PHOTO 10 PHOTO 11 PHOTO 12...
Page 28: ...0 12 3 4 5 6 7 6 8 3 9 7 9...
Page 31: ......


