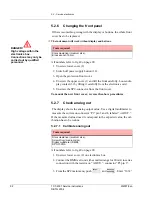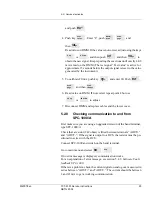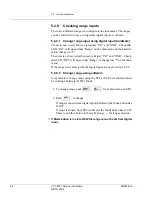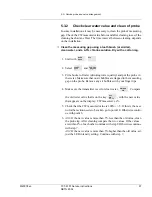
background image

5.2 - Service electronics

86

TCT-2301 Service instructions 

M2007/3en

©BTG 2004

5.2.2

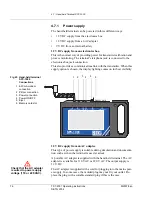
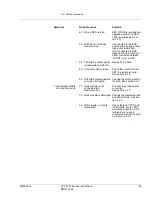
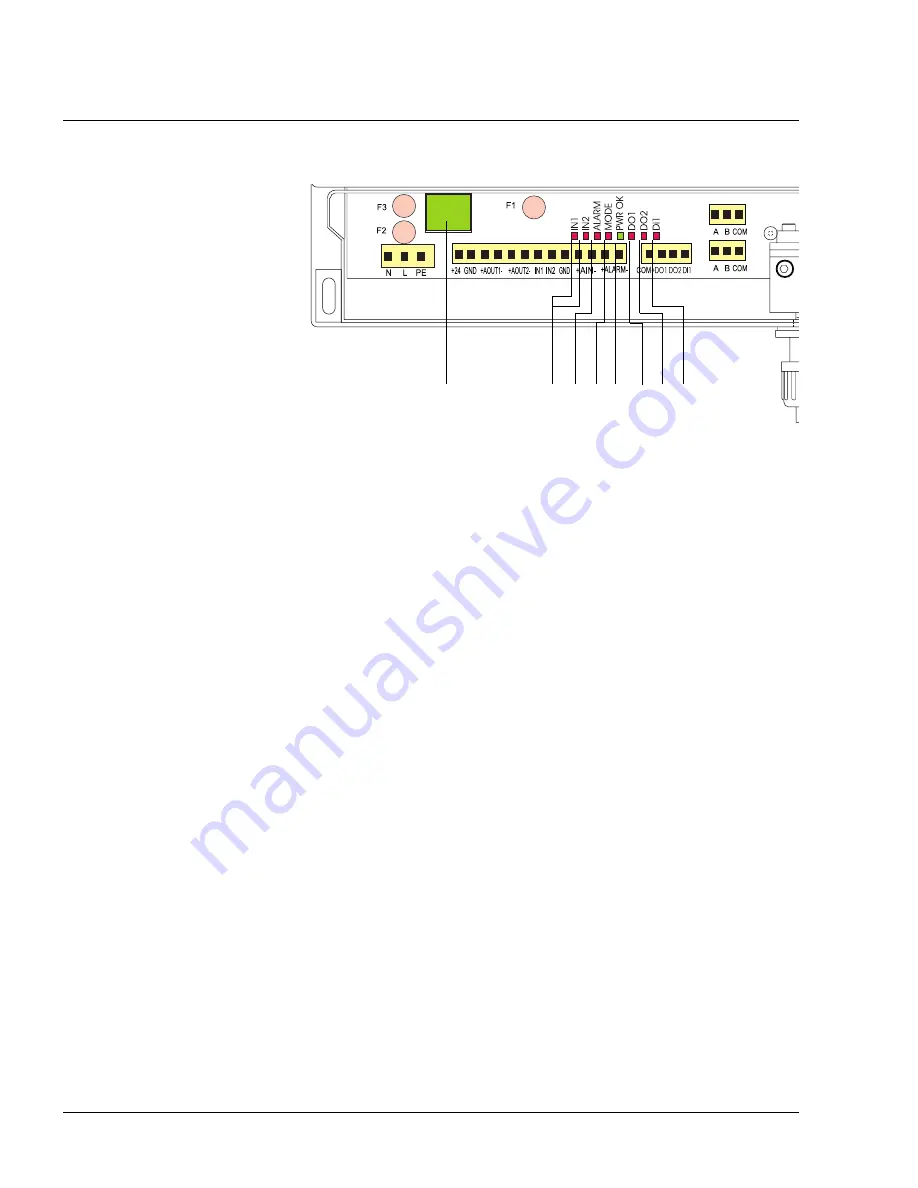
Electronics card LED functions 

1. DI1

Digital in 1 (not used)

2. DO2

Digital out 2 (not used)

3. DO1

Digital out 1. Lit when PCD-1000 function is activated. (Option)

4. PWR OK. 

Lit when power to the card is on

5. MODE. 

Indicate program function. 
– Slow flash (approx. 2 second interval). The program is running 
normal. 
– Fast flash (approx. 2 second interval). Indicates that the processor 
is running but doesn't have any software. Contact your BTG office. 
– No flash (lit or dark). Processor or program is not running. 

6. ALARM. 

Lit when alarm function is activated.

7. IN2 and IN1 

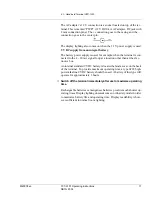
Indicates selected range, see below. (Lit=1 Dark=0) 

8. Power switch on incoming power supply. Lit when 24 V DC is sup-

plied to the card (before fuse F1).

7

5 4

Fig 47 LEDs on the 

electronics card

1 DI1
2 DO2
3 DO1
4 PWR OK
5 MODE
6 ALARM
7 IN2 and IN1 
8 Power switch

8

2 1

6

3

IN1

IN2

Range

0

0

1

1

0

2

0

1

3

1

1

4

Summary of Contents for TCT-2301

Page 1: ...Enter Sample Total Consistency Transmitter TCT 2300 User Manual TCT 2301 Smart optical low consistency transmitter BTG 2004 M2007 3en ...

Page 2: ... due to continued progress in methodology design and manufacturing BTG shall have no liability for any error or damages of any kind resulting from the use of this document BTG 2004 BTG Pulp Paper Sensors AB P O Box 602 SE 661 29 Säffle Sweden Phone 46 533 426 00 www btg group com ...

Page 3: ...2 2 3 Installing mounting details 14 2 2 4 Installing the transmitter 14 2 2 5 Installing the electronics box 15 2 2 6 Starting up and servicing the transmitter 15 3 Installation instructions 17 3 1 Before you start 17 3 1 1 Visual inspection 18 3 1 2 Installation and operating conditions 18 3 2 Installing the transmitter 19 3 2 1 Positioning the transmitter 19 3 2 2 Probe clearance requirements 2...

Page 4: ... 1 Adjusting TAG Serial no 44 4 1 2 Measuring range 44 4 1 3 Select measuring unit 45 4 1 4 Setting measuring span 45 4 2 Clear water adjustment 46 4 2 1 At start up 46 4 2 2 Selecting the correct mode 48 4 2 3 Adjustment of measuring gap angle 49 4 3 Calibration 51 4 3 1 General remarks on calibration 51 4 3 1 1 Criteria for calibration 51 4 3 2 General remarks on sampling 51 4 3 3 Calibration pr...

Page 5: ... 1 2 Calibration recommendations 82 5 1 3 Maintenance of the transmitter 82 5 1 4 Functional description 83 5 2 Service electronics 84 5 2 1 Electronics troubleshooting 84 5 2 2 Electronics card LED functions 86 5 2 3 Function and testpoints of electronics card 87 5 2 4 Changing the electronics card 89 5 2 5 Change of power supply 91 5 2 6 Changing the front panel 92 5 2 7 Check analog out 92 5 2 ...

Page 6: ...hooting functions 102 5 4 2 1 Alarm diagnostics 102 5 4 3 Software Fault feedback SPC 1000 104 5 5 Evaluating calibrations 106 5 6 Troubleshooting general 108 5 7 Maintenance of the cleaning system 109 6 Parts list 111 6 1 Probe 111 6 2 Valve arrangement 113 6 3 TCT 2301 114 6 4 Cleaning device 116 6 5 Accessories 117 ...

Page 7: ... of pulp suspensions in the range 0 01 3 5 Based on BTG s patented Peak Method see section 1 3 of optical anal ysis the TCT 2301 is virtually insensitive to variations in filler and fines content making it particularly suitable for use with recycled and me chanical pulp suspensions The transmitter is mounted in line without any special bypass arrange ment for optimized functioning of the control l...

Page 8: ...rd Hart protocol In addition the unit is prepared for fieldbus digital communication BTG has adopted the OPC communication standard which enables any OPC equipped system direct access to TCT 2301 transmitters 1 2 Technical data Enter Sample Terminal Total Consistency Transmitter TCT 2300 Fig 1 Smart optical low consistency transmitter TCT 2301 with SPC 1000 hand held terminal Type TCT 2301 in line...

Page 9: ... temperature Min 20ºC 70 F Standardization Standardization Quality assured in accordance with ISO 9001 Designed in accordance with relevant CE standards See section 1 8 CE declaration of conformity Probe Mounting Mounted through a ball valve assembly Material Stainless steel to SS 2343 equiv to ANSI 316 DIN X5 CrNiMo 18 22 B S 316 S16 En 58J Connection Optical connection to electronics box Weight ...

Page 10: ...nput signal analog 0 4 20 mA Output signal digital Superimposed signal over 4 20 mA current loop according to standard HART protocol and BELL 202 modem Follows HART universal commands Power consumption Max 600 mA incl hand held terminal excl 200 mA at 24 VDC Measuring ranges analog Four separate individually programmable externally connectable with binary coded switch Also accessible via the commu...

Page 11: ...Fieldbus Foundation Signal transmission 10 m 33 ft quartz glass optic fibers included protected in a flexible conduit On request 20 66 ft 30 98 ft and 40 m 131 ft Accessories Hand held terminal SPC 1000 See data sheet D218 55 Smart Lab Sampler SLS 1000 See data sheet D218 62 Documentation program for PC Probe cleaning device PCD 1000 See data sheet D2020 PCD 1000 cleaning device option Weight 9 5k...

Page 12: ...y transparent network within which the small particles move freely A narrow light beam directed through the suspension is generally affected by both the large and small particles There is however an interval when only small particles affect the light beam and this is know as the Peak period During the other time periods the light beam is affected by both the large and small particles Fig 2 and fig...

Page 13: ...k value VP and the AC component VAC Typical time graph showing the detector signal is displayed in fig 3 The total consistency is obtained by adding the further treated VP and the VDC values Fig 3 Output signal VCW Clear water VP Peak value VDC Direct current signals VAC Alternating current signals TC Total Consistency Light transmission Volts TC Time ...

Page 14: ... The hand held terminal allows the operator to set up and monitor the sys tem It includes a liquid crystal display LCD with a touchscreen key pad 1 5 Typical applications Control of flotation systems or wash stages for de inking of recycled fibers Control of screening and cyclone cleaning processes Monitoring of TMP CTMP steam and hot water recovery systems CRC 1 3 5 2 8 4 9 7 6 Enter Sample Termi...

Page 15: ...M2007 3en TCT 2301 Product introduction 9 BTG 2004 1 6 Dimensions 300 12 469 18 5 53 2 1 121 4 8 121 4 8 Ø50 2 251 9 9 108 4 3 Min Ø100 4 Fig 5 TCT 2301 Dimensions 1 Electronics box 2 Probe with retraction system 1 2 ...

Page 16: ...y trained and authorized personnel and ac cording to relevant standards Read the manual for detailed information and pay special attention to the warning signs BTG Pulp Paper Sensors AB Box 602 661 29 Säffle SWEDEN N1619 TYPE www btg group com VOLTAGE APPARENT POWER NO FREQUENCY INSTALLATION CATEGORY FACTORY IDENTIFICATION Fig 6 Type sign 1 Manufacturer 2 CE marking 3 C TIC marking 4 ETL marking 5...

Page 17: ...ically adjustable between 100 240V AC 8 Apparent power According to CE directive Max continuous output 9 Installation category According to CE directive Resistant to transients 10 Frequency The unit operates both 50 and 60 Hz 11 Manufacturing number BTG internal product identification number 12 Factory identification ...

Page 18: ...th FCI 1000 complies with the amendments and requirements of the Machinery Directive 89 392 EEC Low Voltage Directive 73 23 EEC EMC Directive 89 336 EEC PED Directive 97 23 EEC and conforms with the following product standards and PED conformity assessment procedure Safety EN 292 1 2 LVD EN 61010 1 PED Pressure equipment for piping In accordance to Article 1 Table 9 art 3 3 Annex II Sound eng prac...

Page 19: ...ave to be taken 1 All wiring has to be shielded Power supply electronics shielded coverage 80 Interface cable coverage 100 aluminum 2 All units are tested as a complete system to conform with rele vant CE directives and their standards When using the unit in other combinations BTG cannot guarantee the CE directive conformity The unit in combination with customer installed external devices may conf...

Page 20: ...ds are dealt with in accordance with the pressure vessel standards of the respec tive countries For good personal and functional safety Use only parts which have been manufactured or approved by BTG 2 2 2 Selecting a transmitter model and assembly parts Pressurized parts must be suited to the current maximum pipe pressure in relation to temperature Select a material for the parts that are in conta...

Page 21: ...c cable fittings with shield connection for the electronics box 2 2 6 Starting up and servicing the transmitter Read through the following points before starting up and servicing the transmitter Bear also in mind that the points mentioned above contain important information for these operations Before removing the probe from the valve assembly check carefully that the valve is closed Hot or corros...

Page 22: ...2 2 Product specific safety recommendations 16 TCT 2301 Safety recommendations M2007 3en BTG 2004 ...

Page 23: ...on please turn to sec tion 3 5 Checklist before start Double check items in the list before powering up This list can help en sure a trouble free initialization of your system This section introduces the essential components of the system This introductory section is followed by section 3 2 Installing the transmitter This section contains detailed instructions for installing the trans mitter secti...

Page 24: ...ge Look for loose screws wires or electronic components 3 1 2 Installation and operating conditions The Consistency Transmitter is a precision tool and must be properly in stalled to ensure reliable service Please read the following instructions and user information before installing the transmitter The transmitter is manufactured to provide accurate and reliable mea surements over a long period o...

Page 25: ...ol strategy Minimum recommended flow velocity 1 m s 3 3 ft s To minimize time lag locate the probe close to the dilution point Warning To avoid personnel injuries burning injuries aggressive chemical injuries etc it is extremely important that the pipe is depressurized and empty before opening it for installation or removal of the equipment Fig 7 Recommended distance between pump and consistency t...

Page 26: ...install the probe where the flow rates exceeds 1 m s 3 3 ft sec This applies particularly to long fiber pulp suspensions 3 Install the probe so that it is protected from direct mechanical dam age 4 Protect the probe from heavy vibration such as cavitation or unbal anced pumps One method is to install a rubber bellows in the line A B C 0 90 0 Flow Direction TCT 2300 Fig 9 Installation of the probe ...

Page 27: ...mber the clearance requirements so that the probe can be mounted in the ball valve arrangement 5 The ball valve assembly should be mounted at a 90 angle to the pipe line 6 The ball valve assembly should be mounted on the side of the pipe line A small angle downwards makes it possible for the pulp to evac uate when the probe is retracted and also makes the insertion of the probe easier See fig 10 b...

Page 28: ... lbs Remember to provide access room for an operator as well as the full depth of the probe assembly and the electronics box 3 2 3 Sampling valve The sampling valve should be installed close to the transmitter This helps to ensure that the laboratory sample is representative of the sample measured by the transmitter Installing an appropriate BTG sampling valve will ensure reliable re sults Install...

Page 29: ...Adjust length according to fig 12 4 Make sure the weld in stud is aligned to the pipe See fig 12 5 Weld the stud to the pipe A full penetration weld must be used If the probe is delivered with a PCD 1000 refer to section 3 4 Probe cleaning system option 6 Mount the ball valve arrangement The slot for the crank handle must be located upwards since there is a scale on the probe that must be adjusted...

Page 30: ... three screws that hold the probe flange and adjust the probe so that the punch mark on the probe is at the 45 line on the scale Tighten the three screws properly A suit able allen key is included in the delivery Angles other than 45 can be used in some installations See section 4 2 3 Adjustment of measuring gap angle 45 2 2 1 45 2d 2c 1 0 90 45 45 0 TCT 2 3 0 0 2b 2a 1 0 90 45 45 0 TCT 2 3 0 0 Fi...

Page 31: ... enter the o ring Place the flexible insertion screw in the correct position and make sure the hook with its locking device is in the correct po sition and secured 5 Open the ball valve and insert the probe by cranking the handle 6 Secure the probe in inserted position with the two security screws Secure the two security screws properly 7 When removing the probe reverse the above procedures Fig 16...

Page 32: ...pling valve to achieve a correct and convenient connection of the SPC 1000 hand held terminal for calibration and monitoring The hand terminal SPC 1000 can be positioned in a holder located close to the electronics box See fig 20 Install the box in a position where it will be protected from mechanical damage Fig 17 Dimensions of the electronics box Fig 18 Electronics box clearances 50 2 300 12 50 ...

Page 33: ...a roof will protect the unit from direct sunlight which can cause excessive operating temperatures If possible the SPC 1000 mounted in its holder should also be protected The electronics box is equipped with three attachment lugs and should be bolted to a wall 200 8 300 12 75 Fig 19 Protecting roof for Electronics box Fig 20 Wall mounted brackets positioning the SPC 1000 for easier operation Fig 2...

Page 34: ...al screw caps for attaching connection cable shield are an im portant part of the interference suppression system The electronics box is supplied with an external jack connection for the hand terminal SPC 1000 A and the Smart Lab Sampler SLS 1000 Terminal Total Consistency Transmitter TCT 2300 1 30 12 53mA Sample Enter ALARM F3 F2 F1 24 GND AOUT1 AOUT2 IN1 IN2 GND AIN N L PE ALARM MODE PWR OK DO1 ...

Page 35: ...erly with the plastic nut Coil the extra optical fiber and secure it under the electronics box in order to avoid the risk of mechanical damage Make sure the optical connector from the probe is positioned correctly and pushed all the way in before securing it with the plastic nut The optical fiber must not be coiled with a radius smaller than 50mm 2 in Locate it so that is protected and not subject...

Page 36: ...box with built in power supply unit Shielded 80 3 x 0 75 mm2 3 x AWG18 with PE Cable diameter 7 5 13 mm In accordance with the IEC 227 245 standard Output signal cables Shielded 80 twisted pair Min 2 x 0 3 mm2 2 x AWG24 The size typically used is 2 x 0 75 mm2 2 x AWG18 Cable diameter 6 11 mm Range select cable Shielded 80 twisted pair Min 2 x 0 3 2 x 0 3 mm2 2 x AWG24 2 x AWG24 Cable diameter 6 11...

Page 37: ...length of the connection wires Unshielded long looped wires may cause interference This can interfere with the signal 4 Once the wires are inserted tighten the screws to secure them Mount the connector in its position 5 To ensure interference free operation a shielded cable should be used Make sure the shield is correctly connected fig 24 6 Turn on the main power supply DANGER High voltage within ...

Page 38: ...s the communication an additional circuit card is required Terminal Total Consistency Transmitter TCT 2300 Sample Enter ALARM F3 F2 F1 24 GND AOUT1 AOUT2 IN1 IN2 GND AIN N L PE ALARM MODE PWR OK DO1 DO2 Di1 IN1 IN2 GND A B COM DO1DO2DI1 GND A B Fig 25 Power connections electronics box 1 Fuses 2 Power connection 100 240 V AC 3 Power switch 4 24 VDC out 4 20mA output signals Range setting 0 20 mA in...

Page 39: ... optional PCD 1000 GND Ground 0V DC to optional PCD 1000 AOUT 1 Output signal 4 20mA AOUT 1 Output signal 4 20mA AOUT 2 Not used AOUT 2 Not used IN1 Range A for external range setting IN2 Range B for external range setting GND Ground Common for range A and B AIN Input signal 0 20mA from external equipment AIN Input signal 0 20mA from external equipment ALARM Alarm from TCT ALARM Alarm from TCT COM...

Page 40: ...rt them The wires are connected according to fig 26 on page 32 Once the wires are inserted tighten the screws to secure them 5 Tighten the nut fully to ensure a good contact for the shield 6 Turn on the power and test the functionality 3 3 7 Digital communication using the Hart protocol Certain functions are available as a digital signal under the Hart proto col and BELL 202 modem standard The tra...

Page 41: ...l be mounted in the cleaning device at the BTG factory The installation method is de scribed for both cases 3 4 1 Dimensions and installation clearance Ensure that there is sufficient clearance to remove the probe and cleaning device from the valve assembly The installed device is approx 700 mm 28 in long You will need at least 300 mm 12 in to remove the device from the valve arrangement The clean...

Page 42: ...nnection from the TCT 2301 electronics box Protect the optical connection with a plastic tube or similar 3 Remove the handle and the flange with the angle scale 4 Place the cleaning device on a workbench with the valve facing downwards To keep all O rings in position during disassembly assembly always place the cleaning device in a upright position with the valve facing downwards 5 Unscrew and rem...

Page 43: ...14 from the guiding rod 10 Loosen the screws 16 and separate the piston 15 and guiding rod 17 from each other 11 Insert the probe 18 in the piston 15 and the fiber cable in the guid ing rod 17 12 Make sure that the screw hole on the edge of the guiding rod is aligned with the measuring gap on the probe Then join the piston and the guiding rod with the screws 16 Do not forget the O rings 19 13 Put ...

Page 44: ...and 11 are in their proper positions and that the nipple 21 on the rear cylinder flanged end are posi tioned on the same side of the cylinder as the nipple 20 on the front cylinder flanged end The parts must be pulled over the optic cable 16 Mount the nuts 4 and washers 5 but do not tighten them fully 17 Connect the air tube 9 to the nipple 21 on the rear cylinder flanged end 18 Loosen the screws ...

Page 45: ... at this stage have its quadratic ex ternal cross section turned the same way as the flanged ends of the ball valve 24 Tighten the screws 23 and the nuts 5 25 If the existing TCT 2301 is mounted with a threaded weld in stud be tween the ball valve assembly and pipe the new flanged weld in stud 22 must be used Weld the new flanged weld in stud to the pipe in a new position ac cording to section 3 2...

Page 46: ... The slot 3 on the protective sleeve is aligned with the measuring gap Use the angle scale on the rear cylinder flanged end for assistance 4 Tighten the screws 3 to fasten the protective sleeve 4 and to fix the angle of the probe 5 Loosen the screws 1 6 Turn the flushing valve 6 so that the inlet faces the measuring gap of the probe The air cylinder shall at this stage have its quadratic ex ternal...

Page 47: ...water to the membrane valve The connection is 8 5mm 0 33 in 2 Connect air to the solenoid valve by 6 4 1 4 in hose 3 Connect the control signal and 24V DC supply from the TCT 2301 electronics box See section 3 3 5 Main power supply connections 3 4 4 Controlling the cleaning device All settings to control the cleaning device are made from the TCT 2301 electronics box Instructions can be found in se...

Page 48: ...ent before installing the probe in the ball valve arrangement See TCT 2301 operating instructions section 4 2 2 Check that the measuring gap on the probe is at the correct angle to the pulp flow 3 Check that the transmitter is fully inserted and the two security screws are properly tightened 4 Ensure that the optical fiber is protected from mechanical dam age and attached securely to the transmitt...

Page 49: ...ions and settings See section 4 7 Hand held Terminal SPC 1000 for further information Connect the SPC 1000 to the front of the electronics box Switch on the hand terminal Select from the menu Before making any changes always read all transmitter data Should a failure message appear on the screen see section 5 4 3 Soft ware Fault feedback SPC 1000 for action if necessary All changes made must be do...

Page 50: ...smitter input and output measuring range connections Range 1 is always active if nothing is connected to the binary inputs Make sure changes are made in correct range select using The active range is shown on the main menu lower right Range X Confi gure Tag no 25NT1237 4 20mA MODEMPRINTER PWR EJECT ON OFF MEMORY CARD SPC 1000 Communication Terminal Read data Edit Range 1 Confi gure Cali brate 4 mA...

Page 51: ... Specify the consistency values represented by output signals of 4 mA and 20 mA respectively Confi gure Tx Spec Unit xxx Send page Tag 25NT1237 Range x 0 53 3 100 Cons 1 30 TCT 2301 4 20mA MODEMPRINTER PWR EJECT ON OFF MEMORY CARD SPC 1000 Communication Terminal Read data Edit Range x Confi gure Cali brate 4 mA 1 00 20 mA 3 00 Damp 1s Offset 0 00 Misc Print Note Trend Calib ration curve Send data ...

Page 52: ...For LED intensity adjustment select The following menu appears see fig 34 Then press Fig 35 shows the following menu 1 Fill a bucket of drinking water and put the probe in the water Make Confi gure Led int adjust 4 20mA MODEMPRINTER PWR EJECT ON OFF MEMORY CARD SPC 1000 Communication Terminal Led int adjust Tag 25NT1237 Tx Spec Mode 1 Menu Devive TCT 2301 version 1 xx Boot version 1 xx DSP version...

Page 53: ...ge the LED intensity in steps by 2 Send the setting to the trans mitter by pressing and 5 Check that the CW measured value is close to 100 2 If not repeat step 4 6 When the CW measured value is stable press to store the value Send the setting to the transmitter by pressing and 7 Install the probe in the valve arrangement and lock it properly using the two screws Check that the measuring gap on the...

Page 54: ...rength pulp long fiber This setting is located under See fig 34 on page 46 Press the key to select the correct preset calibration curve de pending on the actual fiber type This mode is for short fiber pulps such as recycled and groundwood This mode is for pulp types such as kraft pulp TMP CTMP etc This mode contains a linear curve and is not normally used Please contact BTG for further information...

Page 55: ...pears to be unstable despite using the angles above make the following quick test to see if can be improved Remove the probe from the line see section 3 2 5 Mounting the probe in the valve assembly and adjust the angle in 15 increments 15 30 45 60 75 Install the probe and observe the signal from the transmit ter Contact BTG for further technical information Never go under a 15 or over a 75 angle t...

Page 56: ...n At 0 the measuring gap points directly towards the flow At 90 the measuring gap points towards the pipe wall The transmitter is now ready for calibration against pulp samples Fig 36 Probe angles relative to the measuring gap Pulp Flow Pulp Flow Pulp Flow Pulp Flow Pulp Flow Normal position ...

Page 57: ...have been made as per section 4 2 Clear water adjustment 3 The hand held terminal must be connected to the electronics box and switched on and the transmitter data read into the terminal as per section 4 1 Starting the transmitter 4 The correct mode must be selected as per section 4 2 2 Selecting the correct mode 5 The pulp must have representative consistency and flow values 4 3 2 General remarks...

Page 58: ...mplify and improve the regular follow up routines the BTG Smart lab sampler SLS 1000 is a useful aid 4 3 3 Calibration procedure Normal calibration is very simple only one sample needs to be taken The functionality of the TCT 2301 means that a single point calibration or even the preprogrammed curve is often fully adequate Since only one sample is taken it is very important that it is correct Ther...

Page 59: ...o correct position for the sample using 3 Press to active the value ON 4 Press and enter the lab value Return to the main menu and Take sample 4 20mA MODEMPRINTER PWR EJECT ON OFF MEMORY CARD SPC 1000 Communication Terminal Take sample menu Load lab cons Calc new calibr Special func Menu Action 1 Do configure before calibration 2 Push take sample and collect sample 3 After lab evaluation push Load...

Page 60: ... within the measuring span the more accurate the calibration will be Perform sampling as in single point calibration but take more samples and activate more than one sample in the Load lab menu Calculate new K0 and K1 4 3 5 Calibration with given constants The two calibration constants K0 and K1 define the calibration curve It is a simple matter to enter new constants under Step down through the m...

Page 61: ...an affect the correlation The two calibration constants K0 and K1 and the special correlation fac tor r2 provide a guide Note that the displayed probe signal and the mea suring span are the same 4 20mA MODEMPRINTER PWR EJECT ON OFF MEMORY CARD SPC 1000 Communication Terminal Sample Probe Lab Active No signal cons 11 52 1 66 ON 21 77 1 86 ON 31 30 1 34 ON 41 09 1 10 ON 50 00 0 00 OFF 60 00 0 00 OFF...

Page 62: ...ilution water etc If the time constant is too long the high precision level of the transmitter is reduced Contact BTG for further advice Procedure 1 Study the stability of the signal under MAIN MENU op tion 2 Go to MAIN MENU option Enter a suitable time con stant e g 5 seconds Press 3 Return to and study the result 4 If necessary adjust the time constant Do not set a time constant that is too long...

Page 63: ...n detected from laboratory samples The entire calibration curve is moved on the basis of a single point so it is most important that the laboratory sample value for that point is correct The offset adjustment which is a zero point displacement can be made on all types of calibrations A Offset adjustment based on a laboratory sample Procedure 1 Go to MAIN MENU option Misc Alarm diag nostics Set ala...

Page 64: ...can be cancelled at if you enter the value Ø zero B Offset adjustment based on a detected deviation A deviation can be entered directly if a deviation from the laboratory val ues is detected during regular monitoring of a transmitter s display Note however that the deviation should be verified by several laboratory sam ples before carrying out zero point adjustment Procedure 1 Go to the main menu ...

Page 65: ... Menu Action 1 Do configure before calibration 2 Push take sample and collect sample 3 After lab evaluation push Load lab cons and enter your lab cons value 3 Push Calc new calibr to calculate the new calibration Special func Set or adjust sample values and lab values manually Cali brate Special func Cali brate Special func SPC 1000 Communication Terminal 4 20mA MODEMPRINTER PWR EJECT ON OFF MEMOR...

Page 66: ...e scale of the display is changed by pressing It starts from the point at which the button is pressed The 4 20 mA output signal is displayed as 0 100 This means that the resolution is relatively low approximately 1 0 16 mA but the display is still a useful tool when setting parameters such as the time con stant 4 20mA MODEMPRINTER PWR EJECT ON OFF MEMORY CARD SPC 1000 Communication Terminal 4 20mA...

Page 67: ...nd draw a cali bration graph Actual data is also available at 1 Plug the printer into the hand held terminal socket marked PRINT ER Switch on the printer 2 Select the measuring range to be printed 3 In the MAIN MENU press Then select preferred printer type and a printout is made If the display reads Reply time out check that the printer is correctly plugged in that the battery is charged or the pr...

Page 68: ...ns Active 1 1 52 1 66 ON 2 1 77 1 86 ON 3 1 30 1 34 ON 4 1 09 1 10 ON 5 0 00 OFF 6 0 00 OFF 7 0 00 OFF 8 0 00 OFF 9 0 00 OFF Events Alarms Fig 37 Sample of calibration documentation printout from printer or PC 11 8 7 4 3 1 9 5 13 12 Note The probe signal values shown in this diagram diagram are not printed on a normal printout 15 0 00 1 00 3 00 2 00 0 00 1 00 2 00 3 00 Lab cons Probe signal 14 10 ...

Page 69: ...ation and documentation of calibration M2007 3en TCT 2301 Operating instructions 63 BTG 2004 Fig 38 Calibration diagram for TCT 5 4 5 0 0 5 1 1 5 2 2 5 3 3 5 4 0 0 5 1 1 5 2 2 5 3 3 5 Consistency Probe signal 4 ...

Page 70: ...d terminal and replace the sensor card with the back up card 3 Switch on the hand held terminal Press The message for this function is displayed only in English 4 Select the relevant storage position Data can be stored on every fifth position e g 5 10 15 20 up to 125 with a total of 25 po sitions For example in the case of storage position No 30 press one time 25 in each step 25 and one time 5 in ...

Page 71: ...the write protect switch to block input B Retrieving transmitter data stored on the back up card 1 With sensor card inserted select 2 Switch off the hand held terminal and replace the sensor card with the back up card 3 Switch on the hand held terminal Press The message for this function is displayed only in English 4 Select the relevant storage position For example in the case of storage position...

Page 72: ...s this is a practical way of storing all transmitter data within the same file Installation Document PC The SPC 1000 Documentation program for Windows comes with an automated installation program called setup SPC 1000 Documentation Version 1 21 or later must be used Installing the SPC 1000 Documentation program 1 Start Windows Insert the installation diskette marked SPC 1000 Documentation into dri...

Page 73: ...in or a 9 pin and into the hand held terminal marked PRINTER 2 Double click on the BTG icon 3 Double click on the SPC 1000 terminal icon 4 Click on CommPort Settings and select the connected comm port normally selected automatically 5 For more help click on the menu choice Help 6 Switch on the handheld terminal and press 7 Send data to PC Main menu option 8 Press option and values as well as calib...

Page 74: ...omplete calibration or other major settings the SPC 1000 must be used Settings made using the elec tronics box can be read from the SPC 1000 for documentation and print out Fig 42 Electronics box front panel with buttons and display 1 Display 1 row 16 characters 2 Sample button to store probe signal for calibration or consistency value for offset adjustment 3 Arrow up button to scroll in the menu ...

Page 75: ...y Result display 2 12 53mA TCONS Result display shows consistency output signal Range setting RANGE 1 Current measuring range can be changed to feed in values for other ranges range 1 2 3 and 4 Span setting SPAN Measuring span low limit 4mA high limit 20mA Offset adjustment OFFSET Consistency offset if required Damping setting DAMPING Damping on output signal Calibration setting CALIBRATION Calibr...

Page 76: ...ab sample with this number Value X will be counted down for each signal stored An average will then be calculated NO 5 1 30 OK Save the sample by pressing enter discard the sample by pressing or SAMPLE SAVED Enter NOT SAVED or SAMPLE TAB FULL If all nine samples in the calibration table are already used select the sample to be replaced with a new probe signal value 9 Press enter and select which c...

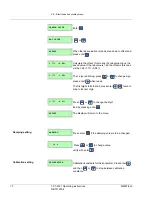
Page 77: ...ing on the range set by the external switch Span setting SPAN Press enter to change span 0 50 2 00 The first number is blinking press or to change the number press enter when ready and go to next number and repeat the procedure 1 00 2 50 When the last number is blinking press or to change and enter when ready SPAN The result will be stored in the transmitter and the display will return to the menu...

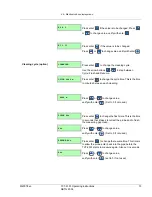
Page 78: ... 1 69 1 77 0 08 1 77 0 00 The sign is blinking press or to change sign press enter when ready The first digit starts to blink press enter twice to step to the last digit 1 77 0 08 Press or to change the digit End by pressing enter OFFSET The display will return to the menu Damping setting DAMPING Press enter if the damping value is to be changed 00 s Press or to change value verify with enter Cali...

Page 79: ...00 m Press enter to change the cycle time This is the time in minutes between each cleaning 0000 m Press or to change value verify with enter Set to 0 if not used FLUSH 00s Press enter to change the flush time This is the time in seconds that it takes to retract the probe and to flush the measuring gap clean 00s Press or to change value verify with enter Set to 0 if not used RESUME 00s Press enter...

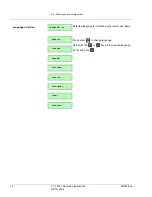
Page 80: ...M2007 3en BTG 2004 Language selection LANGUAGE en Selected language is indicated by the lower case letters English Press enter to change language Scroll with the or keys to the desired language Verify with enter Svenska Español Italiano Deutsch Português Suomi Français ...

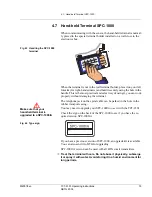
Page 81: ...to upgrade your SPC 1000 to use it with the TCT 2301 Check the sign on the back of the SPC 1000 to see if you have the re quired version SPC 1000 A If you have a previous version of SPC 1000 an upgrade kit is available You can also send it to BTG for upgrading SPC 1000 A version can be used with all BTG smart transmitters Treat the terminal with care Do not abuse it physically submerge it or spray...

Page 82: ...12 V DC supply from an AC adapter This type of power supply is suitable during simulation and documenta tion such as when the terminal is used at a desk A portable AC adapter is supplied with the hand held terminal The AC adapter is available for 110 V AC or 220 V AC The output supply is 12 V DC The AC adapter is supplied with a cord for plugging in to the mains pow er supply In some cases the mol...

Page 83: ...the terminal is con nected to the 4 20 mA signal loop at a location other than at the elec tronics box An internal standard 9 V DC battery is located behind a cover on the back of the terminal To provide maximum operating time a type 6F22 high power alkaline 9 V DC battery should be used A battery of this type will operate for approximately 3 hours Switch off the terminal immediately after use to ...

Page 84: ...f the security code input of a personal code 1 This should be done at the first opportunity during installation Go to in the main menu Press followed by Load code will be displayed Enter 42600 applies only on this occasion Press 2 Enter your personal code New value will appear Enter your personal code e g 123 max 8 digits and press 3 Press to get Your new code is now activated Finish by pressing D...

Page 85: ...r the general BTG code New value will then be displayed Enter your new code Press Enter C Deactivating the code you have entered Press Press the button and enter your per sonal code D Activating the code you have entered Press Press the button so that it displays code on Send data Turn code ON OFF Change code Send data Turn code on off Code on off Send data Turn code on off Code on off ...

Page 86: ...ELL 202 modem standard The transmitter complies to Hart protocol standard requirements To set and calibrate the transmitter the BTG hand held terminal is required Since additional functions are not covered by the Hart protocol a standard Hart competitive terminal can only be used for certain functions Communication takes place as a superimposed signal over the 4 20 mA output signal loop For detail...

Page 87: ... sample only can cause error The sample can be extracted from the pipe in a number of ways Dif ferent types of sampling valves respectively common ball valves result in a various number of serious sources of error which will not be dis cussed here The guiding rule for good sampling is generally that the samples shall be extracted from the pipe in a uniform repeatable way in accordance with the ori...

Page 88: ... change of process variables Transmitters used for measuring control function of vital impor tance to the process or used for debiting purposes The above recommendations are intended as a general guide and should be adapted based on actual experience 5 1 3 Maintenance of the transmitter Maintenance needs will depend on the transmitter position media influ ence and ambient conditions Regular mainte...

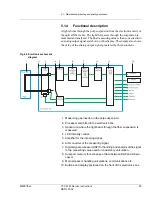
Page 89: ...nerated by the instrument Fig 46 Electronicsschematic diagram 1 Measuring gap inserted in the pulp suspension 2 Processor card fitted in the electronics box 3 Optical unit where the light beam through the fiber suspension is measured 4 LED intensity control 5 Amplifier for the incoming signal 6 A D converter of the measuring signal 7 Digital signal processor DSP for handling and analysis of the si...

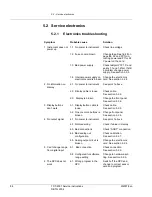
Page 90: ...lay cable is loose Check cable See section 5 2 6 2 3 Display is broken Change the front panel See section 5 2 6 3 Display buttons don t work 3 1 Display button cable is loose Check cable See section 5 2 6 3 2 One ore more buttons is broken Change front panel See section 5 2 6 4 No output signal 4 1 No power to instrument See point 1 above 4 2 Not measuring Check if value in display 4 3 Bad connect...

Page 91: ... 6 5 Connector bad or loose Check the connector from SPC to electronics card See section 5 2 6 6 6 SPC Hart communication circuit is interrupted Change the whole electron ics card See section 5 2 4 7 Clear water calibra tion can t be made 7 1 Optical cable is not connected into electronics box Connect the probe optical connector See section 3 3 3 7 2 Optical cable is damaged Change the complete pr...

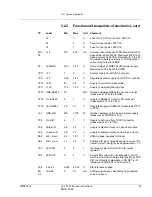
Page 92: ...unning normal Fast flash approx 2 second interval Indicates that the processor is running but doesn t have any software Contact your BTG office No flash lit or dark Processor or program is not running 6 ALARM Lit when alarm function is activated 7 IN2 and IN1 Indicates selected range see below Lit 1 Dark 0 8 Power switch on incoming power supply Lit when 24 V DC is sup plied to the card before fus...

Page 93: ...asured at TP13 to P3 GND TP12 Vin RS485 6 7 V Supply to RS485 IF from DC DC converter measured at TP13 to TP12 TP14 5V RS485 4 9 5 1 V Regulated supply to RS485 IF measured at TP13 to TP14 J3 1 GND A D 990 1010 W Isolation between optronics and system supply measured at P3 GND to J3 1 TP5 Vin A D 6 7 V Supply to optronics from DC DC converter measured at J3 1 to TP5 TP6 Vdig A D 4 9 5 1 V Supply t...

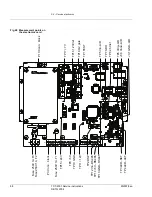
Page 94: ...Fuse 250V 1A F3 TP14 5V RS485 TP13 GND RS485 TP9 5V TP12 Vin RS485 TP4 LED ACT TP10 GND TP3 LED SET TP11 12V TP2 DSP P3 P13 P6 P10 P8 P5 COM DO1 DO2 DI1 TP17 7V TP16 1 23Vref TP18 Q2 gate TP1 TEST P10 Conn block TP5 Vin A D TP7 SDO TP8 2 5Vref J3 6 Vana A D J3 1 GND A D TP6 Vdig A D Fig 48 Measurement points on the electronics card ...

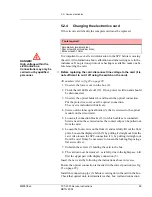
Page 95: ...al module on the circuit card 5 Loosen all connection blocks 13 to which cables are connected Screws need not be screwed out as the contact strip can be pulled out from the card 6 Loosen the four screws on the front 1 and carefully lift out the front plate Loosen the display switch 5 by pulling it straight out from the card Also loosen the SPC connection 11 by pulling it straight out from the card...

Page 96: ... for upper cover 4x 2 Screws for lower cover 2x 3 Connection pipe 4 Plastic nut 5 Display connection 6 12 V DC connection 7 Screws for electronics card 13x 8 Power supply 9 Screws for power supply 4x 10 85 240 V AC connection 11 SPC 1000 connection 12 LEDs 13 External connection blocks 4 5 7 11 12 13 2 3 1 8 6 10 9 Connect the optical connection pipe carefully as the card can easily be damaged Hol...

Page 97: ...e switch on the card 1 Unscrew lower cover 2 2 Check that all LEDs are switched off 12 If not the power is still on and should be disconnected 3 Open the protection front cover 4 Loosen the four screws on the front 1 and carefully lift out the front plate Loosen the display switch 5 by pulling it straight out from the card Also loosen the SPC connection 11 by pulling it straight out from the card ...

Page 98: ...ures 5 2 7 Check analog out The display shows the analog output value Use a digital multimeter to measure the current on connector P3 pin 3 and 4 labeled AOUT If the measured value doesn t correspond to the expected value the cal ibration has to be redone 5 2 7 1 Calibrate analog out All numbers refer to fig 49 on page 90 1 Unscrew lower cover 2 on electronics box 2 Connect the DMM set to mA the s...

Page 99: ...ing communication to and from SPC 1000 A First make sure you are using an upgraded version of the hand terminal type SPC 1000 A Check that a resistor 249 ohms is fitted between terminals AOUT and AOUT If the signal is output to a DCS the resistor must be po sitioned in series with the DCS Connect SPC 1000 and switch on the hand terminal Go to main menu and select If no error message is displayed c...

Page 100: ...tween terminal IN2 and GND Check that LED IN2 is lit up and that Range is changed to 3 on the main menu If the range not is affected by the digital input see next section 5 2 9 2 5 2 9 2 Change range using software It is possible to change range using the SPC 1000 The instrument must be in Range Software R SW Mode 1 To change range push from main menu on SPC 2 Push to change If range is chosen fro...

Page 101: ... than Low 5 To download new limit values to the transmitter push the flashing key and then 6 Check diode meas using the DMM between terminal Alarm and Alarm It should be less than 1V 7 Check that LED ALARM lights up when the alarm is activated 8 Push until it shows Push and then and check that LED ALARM goes out and that the DMM measures OL overload Tools required Digital multimeter DMM SPC 1000 A...

Page 102: ...the flange 3 Unscrew the probe 4 Close the valve 5 Loosen the locking device on the flexible insertion screw at the probe flange 6 Pull out the probe Tools required Block wrench 17 mm 19 mm Small brush Consumables required Lubricant for sealings use MOLYKOTE 111 or equivalent for EPDM or Viton O rings Spare parts required O ring 27014000 O ring 27014018 To avoid personnel injuries burning injuries...

Page 103: ...hat no air bubbles are trapped in the measuring gap on the probe Remove any air bubbles with your finger tips 4 Make sure the transmitter is set for clear water Compare the old water value that is on the key with the new value that appears on the display CW measured xx 5 Check that the CW measured value is 100 5 If this is the case no further action needs to be taken go to point 10 Otherwise conti...

Page 104: ...s close to 100 2 If not repeat step 7 9 When the CW measured value is stable press to store the value Send the setting to the transmitter by pressing and The new clear water value is now stored in the trans mitter 10 Install the probe in the valve arrangement again Lock it properly us ing the two screws Check the clear water CW value on a regular base to ensure a high quality measurement Led inten...

Page 105: ... optical fiber and secure it under the electronics box in order to avoid risk of mechanical damage The optical fiber must not be coiled with a radius less than 50mm 2 in Locate the fiber so it is protected and not likely to incur mechanical damage 3 Turn on the instrument at the electronics box 4 Before inserting the probe into the pipe a clear water calibration should be performed See section 5 3...

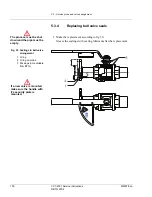
Page 106: ... must be shut down and the pipe must be empty 1 Make the replacement according to fig 50 Grease the sealings with sealing lubricant after the replacement Fig 50 Sealings in ball valve arrangement 1 O ring 2 O ring on probe 3 Packings not available from BTG If a new valve is mounted make sure the handle with it s security plate is mounted ...

Page 107: ...o the o ring in the ball valve housing 3 Make sure the o ring on the probe flange is mounted See fig 50 pos 2 4 Insert the probe using a twisting motion to get the probe tip to enter the o ring Place the flexible insertion screw in the correct position and make sure the hook with its locking device is in the correct po sition and secured 5 Open the ball valve and insert the probe by cranking the h...

Page 108: ... version X XX 5 4 2 Troubleshooting functions There are a number of important functions in relation to trouble shooting on the transmitter These functions can be found under MAIN MENU op tion as well as on the printout and are not further explained in here 5 4 2 1 Alarm diagnostics The instrument has an alarm and error log Here you can find information about changes that have been made and observa...

Page 109: ... 0 Range Range in force when the event occurred Event Description Text Description System start Started When the system is started up again after a power failure Normal start up New program version New progr When a new program has been downloaded in the instru ment same or a new version all settings will be reset to default Change of settings New config When a setting has been altered from SPC or ...

Page 110: ...ror parity er ror Can be due to surrounding heavy disturbances or poor cables Should the error re main check all connec tions Wrong slave ID Response from slave other than the one the SPC sent message to Normally this error does not occur since there should be only one slave Disconnect the other slaves Wrong reply cmd Erroneous reply to a command the instrument answers to a question other than the...

Page 111: ...rument TCT 2300 is the expected type of instrument that is it is controlled from the application started in SPC Select the correct program in SPC or the correct instru ment to connect it to TCT 2300 rev err Correct type of instrument in this case a TCT 2300 is ex pected but the protocol ver sion is not compatible Update the software in SPC or the instrument so that they can understand one another ...

Page 112: ...stency can vary for example due to other changes in operating conditions we recommend that you make a multi point calibration Symptom 3 Wide scatter of calibration points around calibration line low correlation factor Action Check the sampling equipment and quality of sampling methods This is the most common cause of lack of precision in calibration You can also try deactivating the most likely de...

Page 113: ...Service instructions 107 BTG 2004 Symptom 4 Poor precision outside normal working range Calibration points are too few or too closely grouped Action Enter more calibration points making sure that they cover as much as possible of the measuring span ...

Page 114: ...1 2 The transmitter is not mounted according to instructions It may be installed at a point where the pulp suspension is layered and the layering may vary with the rate of flow Check the installation with reference to the installation instructions Note the length of the turbulence damping zone after the pump 2 Abnormally un steady output signal 2 1 Chosen time constant for damping is too short Inc...

Page 115: ... ber Protect the fiber probe with the accompanying plastic sleeve A Dismantling 1 Place the transmitter in a vertical position on a workbench with the tip pointing downwards 2 Loosen the air tube and the four nuts at the rear cylinder flanged end of the transmitter 3 Remove the rear cylinder ends one quadratic and one cylindrical Then carefully pull off the outer cylinder pipe Pull out the probe 4...

Page 116: ... C Mount the cylinder pipe 1 Mount the probe Compress the piston ring while guiding the probe into the cylinder pipe Take care that neither sealing ring nor piston ring are dislocated 2 Turn the probe until the measuring gap faces the water inlet 3 Carefully lift the cylinder pipe and check that the sealing ring is in its proper position 4 Mount a new X ring to the rear round end and place the end...

Page 117: ...90 Outer probe flange SS steel 2343 02 9 1 A0006429 Protractor SS steel 2343 02 10 1 A0005314 Probe with optical fiber Specify opt fib length 10 20 30 or 40m 11 1 27014000 O ring 36 2x3 EPDM 12 1 A0006288 Inner probe flange complete 13 1 A0005207 Rod holder SS steel 2343 02 14 3 15005366 Screw MF6S M8x16 SS steel 2343 15 2 15001548 Screw MC6S 5x12 SS steel 2343 16 1 17002593 Washer 10 5x20x2 SS st...

Page 118: ...6 1 Probe 112 TCT 2301 Parts list M2007 3en BTG 2004 ...

Page 119: ...Spare Part Description 1 2 15005663 Screw M6S 6x10 A4 70 2 1 A0005462 Security plate SS steel 2343 02 3 1 A0005066 Ball valve complete AISI 316 Valpres 4 1 A0005454 Weld in stud threaded type SS steel 2343 A0043901 Weld in stud flanged type SS steel 2343 5 1 A0005918 Warning label 6 1 27014018 O ring 37 47x5 EPDM 1 5 2 4 3 6 ...

Page 120: ...6 3 TCT 2301 114 TCT 2301 Parts list M2007 3en BTG 2004 6 3 TCT 2301 ...

Page 121: ...d complete 8 1 A0007039 Cable to display 9 1 A0038935 Plate 10 1 46028221 Cable fitting M20x1 5 11 2 46028213 Cable fitting M16x1 5 12 2 46028130 Blind plug M12x1 5 13 1 A0006528 Plastic connection PVC 14 1 27008507 O ring 13 1x1 6 Viton 15 1 A0008342 Plug PVC 16 1 37009743 Plastic nut G5 8 PVC 17 1 A0006486 Connection pipe SS al 4212 06 18 1 A0006551 Rubber washer Rubber 1722 19 1 17002767 Distan...

Page 122: ...ril 6 2 27014422 O ring Ø43 0x1 6 Nitril 7 1 27014828 X ring 69 22 x 5 34 Nitril 8 1 27001494 X ring Ø20 22x3 53 Nitril 9 1 26004895 Guide 10 1 A0016436 Cylinder end 11 1 A0086082 Guiding rod 12 1 A0085209 Solenoid valve 13 1 35008358 Diaphragm valve 14 1 A0043901 Weld in stud flanged type 15 1 A0051763 Connection box complete 16 1 A0053124 Circuit card 1 A0037705 Sealing kit Consist of item 1 8 a...

Page 123: ...59 Adapter for terminal connection 7 1 46019873 Alkaline battery 9V 6LR61 8 1 84437508 Installation disk for backup data on PC 9 1 84437516 PC Cable to SPC 1000 10 1 83340372 Smart Lab Sampler complete 11 1 37016128 Blind flange For threaded stud 12 1 A0054460 Blind flange complete For flanged stud 13 1 56015787 Allen key 5mm SLS 1000 Lab Software Copyright 1996 BTG Backup card SPC 1000 74414152 C...

Page 124: ...ess acid proof steel to SS 2343 Strength 8 8 is standard All symbols are according to Swedish standards Notes Recommended spare parts marked are typical for two years operation Recommended spare parts marked are less likely to fail but are recommended when a large number of transmitters are to be maintained ...

Reviews: