7
ES
EN
Safe installation
For proper security of the safe we recommend installation by qualified personnel,
however DIY installation is simple if the correct procedures are followed.
•Use gloves when handling the safe until it is completely installed in the correct
position to avoid marks and scratches to the safe.
•Take care not to drop or dent the product as this could cause distortion of the
safe.
•Take care when removing the door especially before installation as there is no
hinge or anchoring system, to allow better access to the interior of the safe. The
door is completely separate.
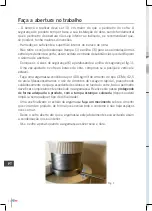
• To open the door turn the key to its end, being secured AND DOES NOT
PRODUCE RETURN. Always keep the key in this position to open and close the
door, this ensures that the door does not detach from the key and prevents its free
fall.
• While making the hole for the installation keep the door and safe away from the
work to prevent dust and dirt from damaging the lock.
• Site the safe in a position where it can be disguised or hidden. Do not install the
safe in damp areas or insecure constructions, as the security of the safe depends
on its installation in a solid foundation.
• The safe can be installed slightly below ground level to allow for camouflage by
a vent, tile, furniture or any other decorative object.
• Before installation remove the door to avoid damaging the lock system and to
allow the telescopic adjustment to be set correctly
Keep the key code card in a safe place - never inside the Aarum Curve strongbox.
In case of breakage or loss of keys this code is required to request another copy of
the key. This will be sent by registered mail. To request a copy of your key, contact
the technical service closest to your location. Search our nearest Technical Service
on our website: www.btv.es.
Attention: When opening the safe, take the utmost care not to drop the door. It
is completely separate from it, there being no hinge or anchoring system to allow
better access to the interior of the box.
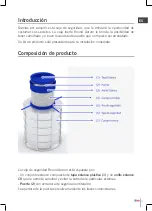
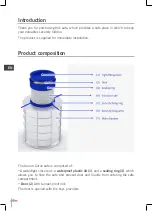
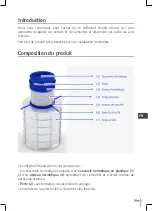
• Entrance Tube (4). Houses the door to the safe and ensures the security of the
contents in the main body.
• Security Fixing Ring (5), supplied ready-mounted in its correct position and is
pre-drilled for the Security Fixing Arms.
• Security Fixing Arms (6), Supplied with 4 rods to screw into the Security Fixing
Ring, see Fig.1
• Main Chamber (7), houses the main storage area.


