2002 Buell P3: Fuel System
4-9
HOME
ROLLOVER VALVE
Removal
1
1
WARNING
1
WARNING
Gasoline is extremely flammable and highly explosive.
When servicing the fuel system, do not smoke or allow
open flame or sparks in the vicinity. Inadequate safety
precautions could result in death or serious injury.
1.
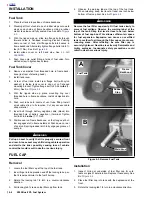
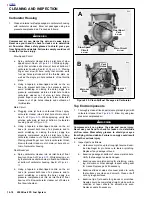
Remove seat. Depress latch at bottom and pull seat up
and back to remove. See
Figure 4-1.
1
1
WARNING
1
WARNING
To protect against shock and accidental start-up of vehi-
cle, disconnect the negative battery cable before pro-
ceeding. Inadequate safety precautions could result in
death or serious injury.
2.
Unthread bolt and remove battery negative cable (black)
from battery negative (-) terminal.
3.
Drain fuel tank as follows:
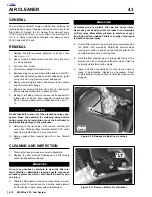
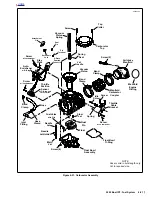
a. Rotate handle on the fuel supply valve to the fully
vertical position to shut the gasoline supply to the
carburetor OFF. See A of
Figure 4-5.
1
1
WARNING
1
WARNING
Some gasoline will drain from the outlet hose when dis-
connected from the fuel valve. Thoroughly wipe up any
spilt fuel immediately. Dispose of rags in a suitable man-
ner. Gasoline is extremely flammable and highly explo-
sive. Inadequate safety precautions could result in death
or serious injury.
b.
Turn slotted screw to loosen band clamp on outlet
fitting at side of fuel valve. Pull hose from fitting.
c. Attach length of spare hose to outlet fitting. Place
free end of hose into a suitable container.
d.
Rotate handle of fuel supply valve to RES(ERVE) to
start the flow of fuel. See C of
Figure 4-5.
e.
Once the fuel tank is completely drained, rotate han-
dle of fuel supply valve to OFF. Remove spare hose
from outlet fitting.
4.
Insert finger into depression at top of fuel filler cap and
lift the locking tab up. Rotate tab 1/4 turn in a counter-
clockwise direction, and then pull to remove fuel filler cap
from tank.
5.
Carefully cut small cable strap and pull vent tube from fit-
ting at front of fuel cap flange.
6.
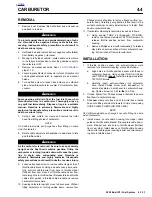
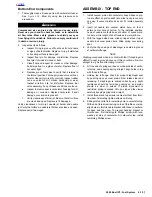
Alternately loosen and remove eight fuel cap flange
screws in a crosswise pattern. See
Figure 4-7.
7.
Insert fingers into filler neck and under fuel cap boot to
hold bottom of rollover valve. Rotate hex on vent tube fit-
ting in a counter-clockwise direction and remove.
8.
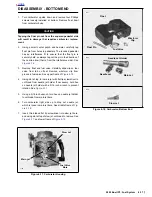
Keeping fingers at bottom of rollover valve, push on
threaded end to remove from holes in fuel cap flange
and boot. See A of
Figure 4-8.
Remove fuel cap flange
and boot from fuel tank.
9.
Maintaining hold of rollover valve, remove from hole in
fuel tank. See B of
Figure 4-8.
Exercise caution to avoid
dropping valve into fuel tank.
10. Remove O-ring from groove in vent tube fitting. Discard
O-ring.
11. Clean old HYLOMAR material from both sides of fuel
cap boot, top of fuel tank, and bottom of fuel cap flange.
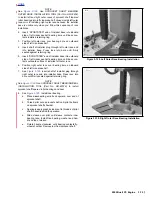
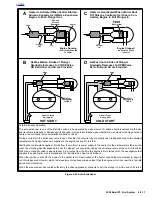
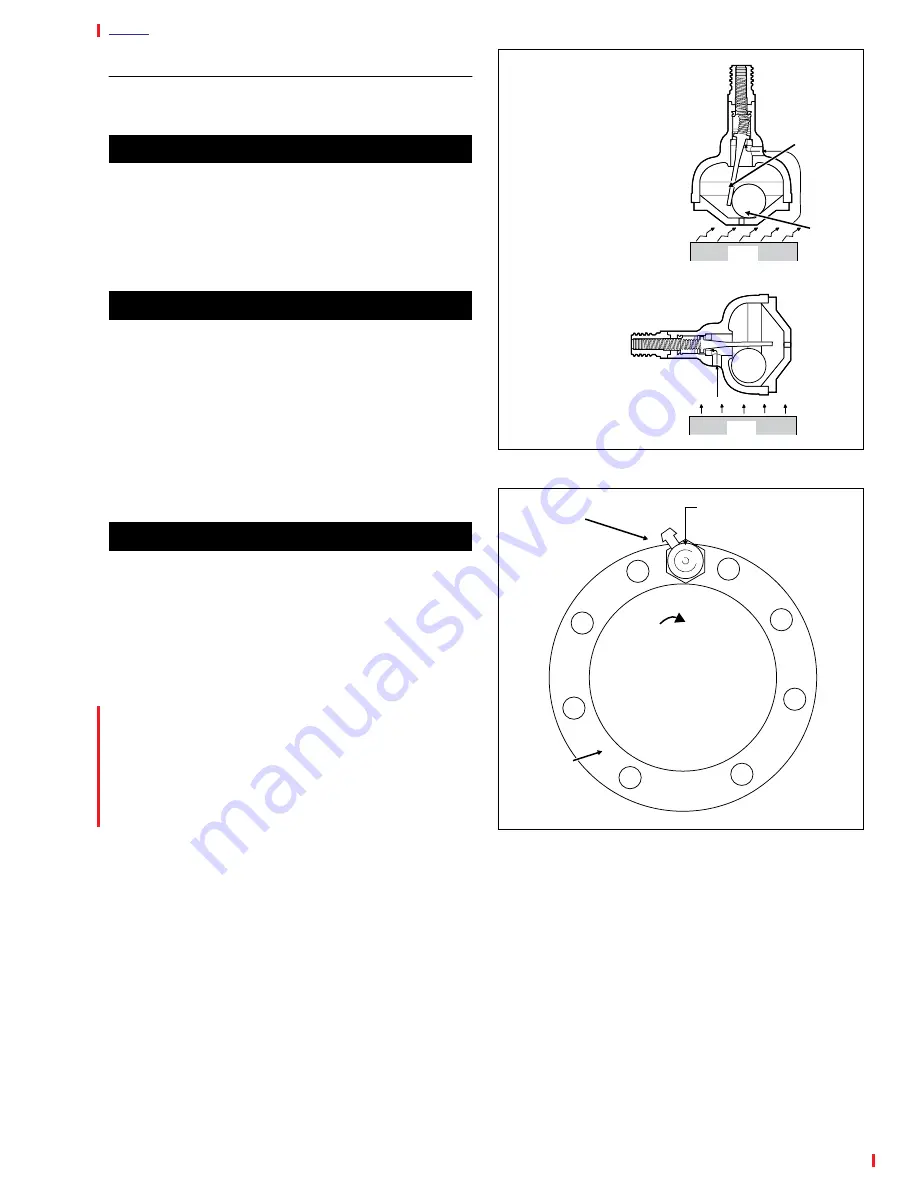
Figure 4-6. Rollover Valve
Figure 4-7. Filler Cap Flange Torque Sequence
and Vent Tube Fitting Orientation
VEHICLE UPRIGHT
Check ball holds post
to one side allowing
hydrocarbon vapors to
be released to the
atmosphere or charcoal
canister (California
VEHICLE TIPPED
Without influence of
check ball,
spring forces
post to seal
opening
preventing loss of
gasoline through
the vent tube.
Check
Post
Gas
Gas
Ball
a0177x4x
Nozzle should be at
Hex point right of nozzle will be
at the 12 o’clock position.
11 o’clock position
when hex is final
tightened to 40-60
in-lbs (5-7 Nm).
Nozzle
Fuel Cap
Flange
a0178x4x
Summary of Contents for 2002 P3
Page 2: ......
Page 17: ...A 15 Appendix A Tools HOME ...
Page 32: ...C 3 Appendix C Metric Conversions HOME ...
Page 41: ...1 8 2002 Buell P3 Maintenance HOME NOTES ...
Page 75: ......
Page 111: ...2 36 2002 Buell P3 Chassis HOME NOTES ...
Page 143: ...2 68 2002 Buell P3 Chassis HOME NOTES ...
Page 144: ...2002 Buell P3 Chassis 2 69 HOME ...
Page 146: ......
Page 147: ......
Page 223: ...3 76 2002 Buell P3 Engine HOME NOTES ...
Page 225: ......
Page 256: ...2002 Buell P3 Fuel System 4 31 HOME ...
Page 258: ......
Page 259: ......
Page 279: ...5 20 2002 Buell P3 Electric Starter HOME NOTES ...
Page 281: ......
Page 327: ......
Page 398: ...2002 Buell P3 Electrical 7 71 HOME ...
Page 400: ...Product 1 2 ...

