2-24
2002 Buell P3: Chassis
HOME
FRONT BRAKE CALIPER
2.11
REMOVAL
NOTE
Steps 1 and 2 are not required for detaching caliper from
rotor. Drain fluid only when disassembling caliper.
1.
Drain and discard brake fluid.
CAUTION
Damaged banjo bolt seating surfaces will leak when
reassembled. Prevent damage to seating surfaces by
carefully removing brake line components.
2.
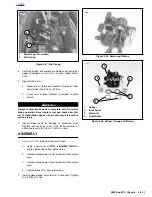
See
Figure 2-36.
Remove banjo bolt (2) (metric) and two
banjo washers (3) to disconnect brake line (1) from cali-
per. Discard banjo washers.
3.
Remove brake pads.
a.
Remove pin plug (4).
b.
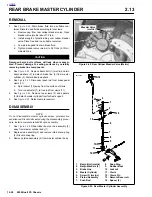
See
Figure 2-37.
Remove pad hanger pin (1) (met-
ric).
c.
Remove brake pads from caliper.
4.
See
Figure 2-36.
Detach caliper from mounts.
a.
Remove lower mounting screw (5).
b.
Remove upper mounting screw (5) and brake line
wireform (7) while supporting caliper above brake
rotor.
c. Slowly remove caliper by tilting away from wheel
and then pulling away from rotor.
d.
Separate carrier and caliper.
DISASSEMBLY
1.
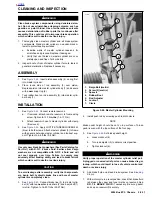
See
Figure 2-38.
Use BRAKE CALIPER PISTON
REMOVER (Part No. B-42887) to pull the two pistons
from caliper bores.
2.
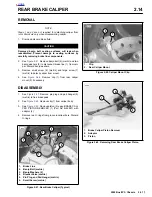
See
Figure 2-39.
Remove piston outer seals (4) and
inner seals (2) from their respective grooves in caliper.
Discard seals.
3.
Check bleeder valve (metric). Remove and replace if
damaged.
CLEANING AND INSPECTION
1
1
WARNING
1
WARNING
Clean brake system components using denatured alco-
hol. Do not use mineral-base cleaning solvents, such as
gasoline or paint thinner. Use of mineral-base solvents
causes deterioration of rubber parts that continues after
assembly. This could result in improper brake operation
which could result in death or serious injury.
1.
Clean all parts with denatured alcohol or
D.O.T. 4
BRAKE FLUID
. Do not contaminate with mineral oil or
other solvents. Wipe dry with a clean, lint free cloth. Blow
out drilled passages and bore with a clean air supply. Do
not use a wire or similar instrument to clean drilled pas-
sages.
Figure 2-36. Front Brake Caliper
5
2
1
3
4
1.
Brake Line
2.
Banjo Bolt (metric)
3.
Banjo Washers (2)
4.
Pin Plug
5.
Mounting Screws (2)
6.
Bleeder Valve
7.
Wireform
8273
6
7
Summary of Contents for 2002 P3
Page 2: ......
Page 17: ...A 15 Appendix A Tools HOME ...
Page 32: ...C 3 Appendix C Metric Conversions HOME ...
Page 41: ...1 8 2002 Buell P3 Maintenance HOME NOTES ...
Page 75: ......
Page 111: ...2 36 2002 Buell P3 Chassis HOME NOTES ...
Page 143: ...2 68 2002 Buell P3 Chassis HOME NOTES ...
Page 144: ...2002 Buell P3 Chassis 2 69 HOME ...
Page 146: ......
Page 147: ......
Page 223: ...3 76 2002 Buell P3 Engine HOME NOTES ...
Page 225: ......
Page 256: ...2002 Buell P3 Fuel System 4 31 HOME ...
Page 258: ......
Page 259: ......
Page 279: ...5 20 2002 Buell P3 Electric Starter HOME NOTES ...
Page 281: ......
Page 327: ......
Page 398: ...2002 Buell P3 Electrical 7 71 HOME ...
Page 400: ...Product 1 2 ...


