2-90
2004 Buell Lightning: Chassis
HOME
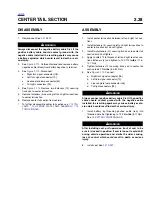
RIGHT TAIL SECTION
2.39
DISASSEMBLY
1.
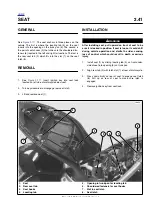
Remove seat. See
2.41 SEAT
.
1
1
WARNING
1
WARNING
Always disconnect the negative battery cable first. If the
positive battery cable should contact ground with the
negative cable installed, the resulting sparks may cause
a battery explosion which could result in death or seri-
ous injury.
2.
See
Figure 2-115.
Unthread fastener and remove battery
negative cable (black) from battery negative (-) terminal.
3.
Pull back terminal cover boot on battery positive cable
(red).
4.
Unthread fastener and remove battery positive cable
from battery positive (+) terminal.
5.
Remove battery.
6.
See
Figure 2-1.
Disconnect:
a.
Right side ground terminals (3) [GRD1] & [GRD 3]
b.
Rear brake light switch connector (4) [121]
7.
Remove right side passenger footrest assembly. See
2.30 FOOTPEG, HEEL GUARD AND MOUNT
.
8.
Remove master cylinder remote reservoir. See
2.13
REAR BRAKE MASTER CYLINDER
.
9.
See
Figure 2-115.
Remove right front trunk pan fastener
(1).
10. Remove fasteners (15) securing center tail section to
right tail section.
11. See
Figure 2-114.
Remove fasteners (1) securing right
tail section to main frame/fuel tank assembly.
12. Remove right tail section.
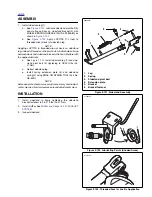
ASSEMBLY
1.
See
Figure 2-115.
Install right tail section (6) onto vehi-
cle.
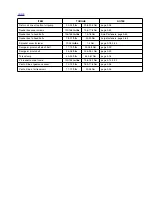
a. Install fastener (1) attaching right front trunk pan to
right side tail section and tighten to 48-72 in-lbs
(5.4-8.1 Nm).
b.
Install fasteners (5) attaching left rear tail section to
center tail section and tighten to 102-112 in-lbs
(11.5-12.7 Nm).
c. Install fasteners attaching left tail section to main
frame/fuel tank assembly and tighten to 21-23 ft-lbs
(28.5-31.2 Nm).
2.
Install master cylinder remote reservoir. See
2.13 REAR
BRAKE MASTER CYLINDER
.
3.
Install right side passenger footrest support assembly.
See
2.30 FOOTPEG, HEEL GUARD AND MOUNT
.
4.
See
Figure 2-1.
Connect:
a.
Right side ground terminals (3) [GRD1] & [GRD 3]
b.
Rear brake light switch connector (4) [121]
1
1
WARNING
1
WARNING
Always connect positive battery cable first. If the positive
cable should contact ground with the negative cable
installed, the resulting sparks may cause a battery explo-
sion which could result in death or serious injury.
5.
Install battery by threading positive cable (red) into
threaded hole first tightening to 72-96 in-lbs (8-11 Nm).
See
1.5 BATTERY MAINTENANCE
.
1
1
WARNING
1
WARNING
After installing seat, pull upward on front of seat to be
sure it is locked in position. If seat is loose, it could shift
during vehicle operation and startle the rider, causing
loss of control which could result in death or serious
injury.
6.
Install seat. See
2.41 SEAT
.
Summary of Contents for 2004 XB9S
Page 2: ......
Page 35: ...D 2 2004 Buell Lightning Appendix D HOME Rear Brake Systems Top View b1115xbsx ...
Page 36: ...2004 Buell Lightning Appendix D D 3 HOME Rear Brake Systems Left Side View b1116xcsx ...
Page 44: ...2004 Buell Lightning Appendix D D 11 HOME Clutch Cable Right Side View b1124xasx ...
Page 47: ...HOME NOTES ...
Page 49: ......
Page 103: ......
Page 201: ...HOME NOTES ...
Page 203: ......
Page 275: ...HOME NOTES ...
Page 307: ...HOME NOTES ...
Page 311: ...HOME NOTES ...
Page 351: ...HOME NOTES ...
Page 441: ......
Page 463: ...HOME NOTES ...
Page 465: ......
Page 517: ...HOME NOTES ...
Page 519: ......
Page 595: ...HOME NOTES ...
Page 597: ......


