6-48
2004 Buell Lightning: Drive/Transmission
HOME
SHIFTER SHAFT
6.15
INSTALLATION
1.
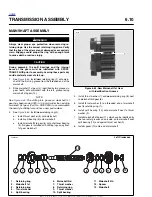
See
Figure 6-88.
Correctly install shifter return spring
onto the reverse side of the shifter shaft assembly before
placing shaft in left crankcase half.
CAUTION
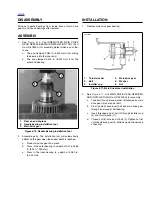
See
Figure 6-89.
The shifter shaft return spring can be
installed incorrectly and then assembled in the left
crankcase half. Failure to install the spring properly will
result in improper shifting.
2.
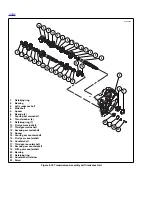
See
Figure 6-90.
Depress ratchet arms and insert shaft
assembly into the bushing in the left case half and
release. Ratchet arms should now be inside the end
plate of the shifter drum contacting the shifter drum pins.
3.
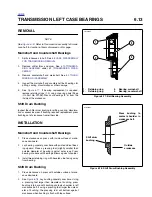
See
Figure 6-91.
Position retention collar (2) next to end
of countershaft with beveled side facing outward.
a. Apply several drops of LOCTITE 243 (blue) to last
few threads.
b.
Insert screw (1) through retention collar (2) and
thread into end of shaft.
c.
Place transmission in gear and tighten TORX screw
(1) to 13-17 ft-lbs (18-23 Nm).
Figure 6-88. Shifter Shaft Return Spring
(Correctly Installed)
Figure 6-89. Shifter Shaft Return Spring
(Incorrectly Installed)
b0950x6x
b0951x6x
Figure 6-90. Installing Shifter Shaft Assembly
Figure 6-91. Countershaft Retainer
8617
1.
TORX screw
2.
Retention collar
1
2
8615
Summary of Contents for 2004 XB9S
Page 2: ......
Page 35: ...D 2 2004 Buell Lightning Appendix D HOME Rear Brake Systems Top View b1115xbsx ...
Page 36: ...2004 Buell Lightning Appendix D D 3 HOME Rear Brake Systems Left Side View b1116xcsx ...
Page 44: ...2004 Buell Lightning Appendix D D 11 HOME Clutch Cable Right Side View b1124xasx ...
Page 47: ...HOME NOTES ...
Page 49: ......
Page 103: ......
Page 201: ...HOME NOTES ...
Page 203: ......
Page 275: ...HOME NOTES ...
Page 307: ...HOME NOTES ...
Page 311: ...HOME NOTES ...
Page 351: ...HOME NOTES ...
Page 441: ......
Page 463: ...HOME NOTES ...
Page 465: ......
Page 517: ...HOME NOTES ...
Page 519: ......
Page 595: ...HOME NOTES ...
Page 597: ......


