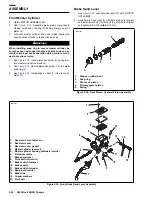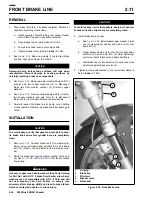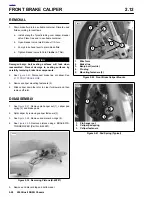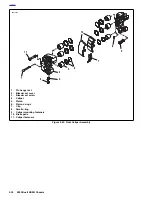
2003 Buell XB9R: Chassis
2-19
HOME
TIRES
2.8
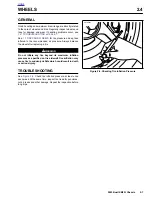
GENERAL
Inspect tires for punctures, cuts, breaks and wear at least
weekly.
1
1
WARNING
1
WARNING
●
Always check both tire sidewalls for arrows indicat-
ing forward rotation. Some tires require different tire
rotation depending on whether tire is used on front
or rear wheel. Installing a tire with the wrong rotation
could result in death or serious injury.
●
Dunlop front and rear tires for Buell motorcycles are
not the same. They are not interchangeable. Use
front tire ONLY for a front tire. DO NOT put a rear tire
on the front of a vehicle. Failure to follow this warn-
ing could result in death or serious injury.
1
CAUTION
Some tires have arrows molded into the tire sidewall.
These tires should be mounted on the rim with the arrow
pointing in the direction of forward rotation. The yellow
circle on the sidewall is a balance mark and should be
aligned 180 degrees from the balance mark (blue dot) on
inside of rim.
REMOVAL
1.
Remove wheel from motorcycle. See
2.5 FRONT
WHEEL
or
2.6 REAR WHEEL
.
2.
Deflate tire.
3.
See
Figure 2-26.
Loosen both tire beads from rim flange.
1
1
WARNING
1
WARNING
Do not use excessive force when starting bead over rim.
Excessive force may damage tire or rim and adversely
affect handling which could result in death or serious
injury.
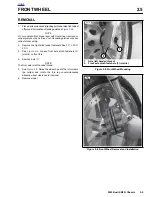
4.
If a bead breaker machine is not available, attach RIM
PROTECTORS (Part No. HD-01289) to the rim. Using
tire tools (not sharp instruments), start upper bead over
edge of rim at valve. Repeat all around rim until first bead
is over rim.
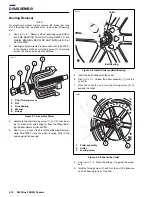
5.
See
Figure 2-27.
Push lower bead into rim well on one
side and insert tire tool underneath bead from opposite
side. Pry bead over rim edge. Remove tire from rim.
6.
Remove valve stem if it is damaged or leaks.
7.
Mount tire on
TIRE SPREADER (Part No. HD-21000) for
inspection and repair procedures.
Figure 2-26. Loosening Beads from Rim Flange
Figure 2-27. Starting Tire Off Rim
Figure 2-28. Starting Bead on Rim
b0198x2x
Pry bead over rim edge and
remove tire from rim
b0199x2x
Lubricate rim flange and both
beads before installation
b0200x2x
Summary of Contents for XB9R 2003
Page 2: ...1 2 Edit Me Printed June 5 2002 12 26 pm ...
Page 35: ...D 2 2003 Buell XB9R Appendix D HOME Figure D 2 Rear Brake Systems Top View b1115xbx ...
Page 36: ...2003 Buell XB9R Appendix D D 3 HOME Figure D 3 Rear Brake Systems Left Side View b1116xcx ...
Page 47: ...D 14 2003 Buell XB9R Appendix D HOME NOTES ...
Page 49: ......
Page 77: ...1 28 2003 Buell XB9R Maintenance HOME NOTES ...
Page 103: ...1 54 2003 Buell XB9R Maintenance HOME NOTES ...
Page 105: ... 2 ...
Page 191: ......
Page 263: ...3 72 2003 Buell XB9R Engine HOME NOTES ...
Page 299: ...4 2 2003 Buell XB9R Fuel System HOME NOTES ...
Page 385: ...4 88 2003 Buell XB9R Fuel System HOME NOTES ...
Page 421: ...4 124 2003 Buell XB9R Fuel System HOME NOTES ...
Page 423: ......
Page 445: ...5 22 2003 Buell XB9R Starter HOME NOTES ...
Page 447: ......
Page 469: ...6 22 2003 Buell XB9R Drive Transmission HOME NOTES ...
Page 497: ...6 50 2003 Buell XB9R Drive Transmission HOME NOTES ...
Page 499: ......


