2003 Buell XB9R: Maintenance
1-9
HOME
CHANGING ENGINE OIL
AND FILTER
Ride motorcycle for approximately 10 minutes to ensure the
oil is hot and the engine is at normal operating temperature.
Turn engine off.
NOTE
Secure rear wheel on lift or place scissor jack under jacking
point.
Draining Oil
1.
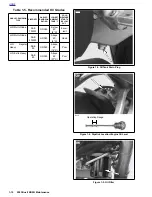
See
Figure 1-3.
Place a suitable container under the
drain plug.
2.
Using a 5/8 in. wrench, remove drain plug from under oil
tank/swingarm. Wipe any accumulated debris from mag-
netic tip on drain plug.
3.
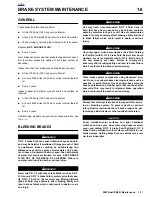
See
Figure 1-4.
Unscrew and remove dipstick from oil fill
hole on top of oil tank/swingarm.
Changing Filter
1.
Remove chin fairing See
2.33 CHIN FAIRING
.
2.
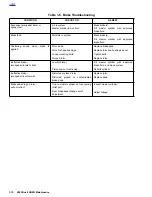
See
Figure 1-5.
Remove oil filter using pliers or belt type
OIL FILTER WRENCH.
3.
Clean filter gasket contact surface on crankcase. Surface
should be smooth and free of any debris or old gasket
material.
4.
Apply a thin film of clean engine oil to filter gasket.
5.
Pour 4.0 ounces (0.12 liter) of clean engine oil into new fil-
ter when changing oil (until filter is approximately 1/2 full).
6.
Screw filter onto adapter until filter gasket touches crank-
case surface. Rotate filter another 1/2-3/4 turn by hand.
1
WARNING
1
WARNING
Be sure no oil gets on tires when changing oil and filter.
Traction will be adversely affected which may lead to loss
of control which could result in death or serious injury.
Replacing Oil
1.
Install drain plug.
2.
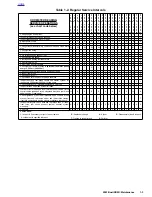
Fill oil tank through filler (dipstick) hole with recom-
mended oil from
Table 1-5.
Oil tank capacity with filter
change is approximately 2.5 quarts (2.4 liters) and
includes the 4.0 ounces (0.12 liter) poured into the filter.
Always verify proper hot oil level on dipstick. Do not over-
fill.
3.
Inspect o-ring on dipstick for rips or tears. Replace as
required.
NOTE
For ease of installation, apply a light film of clean engine oil to
the dipstick o-ring.
4.
Install dipstick into oil tank/swingarm fill hole. Make sure
dipstick is installed completely. DO NOT OVER
TIGHTEN
5.
Remove left side oil cooler scoop. See
2.35 AIR
SCOOPS
.
6.
Inspect oil cooler fins for debris or damage. Blow out any
debris from fins with compressed air from the inside of
the cooler outward.
7.
Wipe up any spilled oil on muffler.
8.
Start engine. Verify that oil pressure signal light on instru-
ment support turns off after a few seconds when engine
speed is 1000 RPM or above.
9.
Check for oil leaks at oil filter, drain plug, hoses and oil
cooler.
10. Install chin spoiler. See
2.33 CHIN FAIRING
.
11. Install air scoop
2.35 AIR SCOOPS.
12. Check (hot) oil level. See
CHECKING ENGINE OIL
LEVEL
.
Summary of Contents for XB9R 2003
Page 2: ...1 2 Edit Me Printed June 5 2002 12 26 pm ...
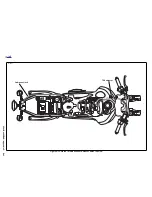
Page 35: ...D 2 2003 Buell XB9R Appendix D HOME Figure D 2 Rear Brake Systems Top View b1115xbx ...
Page 36: ...2003 Buell XB9R Appendix D D 3 HOME Figure D 3 Rear Brake Systems Left Side View b1116xcx ...
Page 47: ...D 14 2003 Buell XB9R Appendix D HOME NOTES ...
Page 49: ......
Page 77: ...1 28 2003 Buell XB9R Maintenance HOME NOTES ...
Page 103: ...1 54 2003 Buell XB9R Maintenance HOME NOTES ...
Page 105: ... 2 ...
Page 191: ......
Page 263: ...3 72 2003 Buell XB9R Engine HOME NOTES ...
Page 299: ...4 2 2003 Buell XB9R Fuel System HOME NOTES ...
Page 385: ...4 88 2003 Buell XB9R Fuel System HOME NOTES ...
Page 421: ...4 124 2003 Buell XB9R Fuel System HOME NOTES ...
Page 423: ......
Page 445: ...5 22 2003 Buell XB9R Starter HOME NOTES ...
Page 447: ......
Page 469: ...6 22 2003 Buell XB9R Drive Transmission HOME NOTES ...
Page 497: ...6 50 2003 Buell XB9R Drive Transmission HOME NOTES ...
Page 499: ......


