1-24
2003 Buell XB9R: Maintenance
HOME
DRIVE BELT REMOVAL
1.
Place a scissor jack under jacking point and raise rear
wheel off ground. For location of jacking point see
Figure
2-98.
2.
Remove right side rider footpeg support bracket. See
2.29 FOOTPEG, HEEL GUARD AND MOUNT
.
3.
Remove right passenger footpeg support bracket.
4.
See
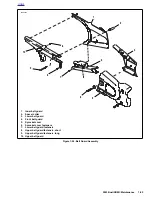
Figure 1-24.
Remove front sprocket cover (5) by
removing fasteners. See
2.30 SPROCKET COVER
.
NOTE
The rear chin fairing fasteners must be removed to access
the front sprocket cover. Front belt guard (4) will dangle but
can not be removed at this time.
5.
See
Figure 1-23.
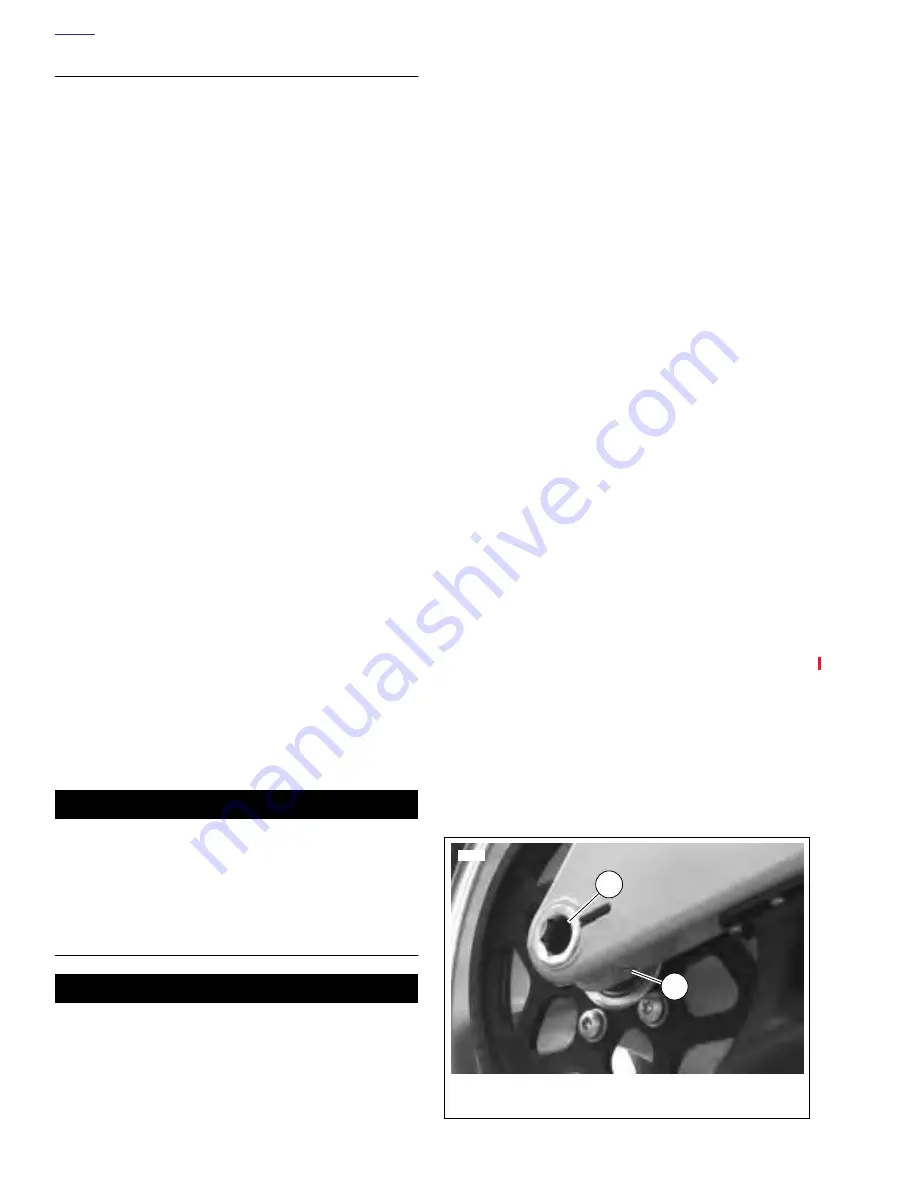
Loosen rear axle pinch fastener (2).
6.
Loosen rear axle (1) approximately 15 rotations to allow
partial tension to be removed from rear drive system.
7.
Remove idler pulley assembly by removing nuts and
washers. See
IDLER PULLEY REMOVAL
in
1.9 DRIVE
BELT SYSTEM
.
8.
See
Figure 1-24.
Remove lower belt guard (3) by remov-
ing fasteners (6).
9.
Remove upper belt guard (10) by removing fasteners (7).
NOTE
The upper belt guard is attached to the swingarm brace and
can not be removed from vehicle at this time.
10. Remove swingarm brace. See
2.19 SWINGARM AND
BRACE
.
a. Remove fastener (8) and spacer collar (2) between
upper belt guard (10), inner belt guard (1) and swin-
garm brace.
b.
Allow inner belt guard (1) to drape.
NOTE
Inner belt guard does not have to be removed to remove belt
or rear wheel.
11. Remove upper belt guard (10) by removing fasteners (9)
from swingarm brace.
CAUTION
When removing or installing belt, do not bend or twist
belt, partially slide belt onto sprocket and "roll" wheel or
belt damage will occur.
12. Slide belt from sprocket and remove.
DRIVE BELT INSTALLATION
CAUTION
When removing or installing belt, do not bend or twist
belt, partially slide belt onto sprocket and "roll" wheel or
belt damage will occur.
1.
Slide belt onto sprocket.
2.
See
Figure 1-24.
Install upper belt guard (10) to swing-
arm brace tightening fasteners (9) to 12-36 in-lbs (1-
4 Nm).
3.
Loosely install swingarm brace. See
2.19 SWINGARM
AND BRACE
.
a. Position the inner belt guard (1) and upper belt
guard (10) onto swingarm.
b. Install fastener (8) and spacer collar (2) between
upper belt guard (10), inner belt guard (1) and swin-
garm brace.
4.
Install upper belt guard (10) and tighten fasteners (7) to
12-36 in-lbs (1-4 Nm).
5.
Tighten swingarm brace fasteners to 25-27 ft-lbs (34-
37 Nm).
6.
Install lower belt guard (3) and tighten fasteners (6) to
12-36 in-lbs (1-4 Nm).
7.
Install idler pulley assembly tightening washers and nuts
to 33-35
ft-lbs (45-47
Nm). See
IDLER PULLEY
INSTALLATION
in
1.9 DRIVE BELT SYSTEM
.
8.
See
Figure 1-23.
Tighten rear axle (1) to 48-52 ft-lbs (65-
70 Nm).
9.
Tighten rear axle pinch fastener (2) to 40-45 ft-lbs (54-
61 Nm).
10. Rotate rear wheel to ensure the belt does not make visi-
ble or audible contact. It may be necessary to loosen belt
guard(s) to adjust for proper clearance.
11. See
Figure 1-24.
Install front sprocket cover (5) by tight-
ening fasteners to 12-36 in-lbs (1-4 Nm). See
2.30
SPROCKET COVER
.
12. Install chin fairing fasteners and tighten to 36-48 in-lbs
(4-5 Nm). See
2.33 CHIN FAIRING
.
13. Install right side rider footpeg mount and tighten fasten-
ers to 108-132 in-lbs (12-15 Nm). See
2.29 FOOTPEG,
HEEL GUARD AND MOUNT
.
14. Install right passenger footpeg mount. use LOCTITE 272
and tighten fasteners to 25-28 ft-lbs (34-38 Nm).
15. Remove scissor jack from motorcycle.
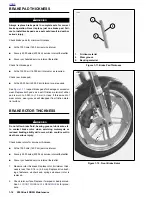
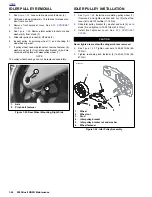
Figure 1-23. Rear Wheel Mounting, Right Side
8420
2
1.
Axle
2.
Pinch bolt fastener
1
Summary of Contents for XB9R 2003
Page 2: ...1 2 Edit Me Printed June 5 2002 12 26 pm ...
Page 35: ...D 2 2003 Buell XB9R Appendix D HOME Figure D 2 Rear Brake Systems Top View b1115xbx ...
Page 36: ...2003 Buell XB9R Appendix D D 3 HOME Figure D 3 Rear Brake Systems Left Side View b1116xcx ...
Page 47: ...D 14 2003 Buell XB9R Appendix D HOME NOTES ...
Page 49: ......
Page 77: ...1 28 2003 Buell XB9R Maintenance HOME NOTES ...
Page 103: ...1 54 2003 Buell XB9R Maintenance HOME NOTES ...
Page 105: ... 2 ...
Page 191: ......
Page 263: ...3 72 2003 Buell XB9R Engine HOME NOTES ...
Page 299: ...4 2 2003 Buell XB9R Fuel System HOME NOTES ...
Page 385: ...4 88 2003 Buell XB9R Fuel System HOME NOTES ...
Page 421: ...4 124 2003 Buell XB9R Fuel System HOME NOTES ...
Page 423: ......
Page 445: ...5 22 2003 Buell XB9R Starter HOME NOTES ...
Page 447: ......
Page 469: ...6 22 2003 Buell XB9R Drive Transmission HOME NOTES ...
Page 497: ...6 50 2003 Buell XB9R Drive Transmission HOME NOTES ...
Page 499: ......

