User Guide
209
www.bull.com
4.
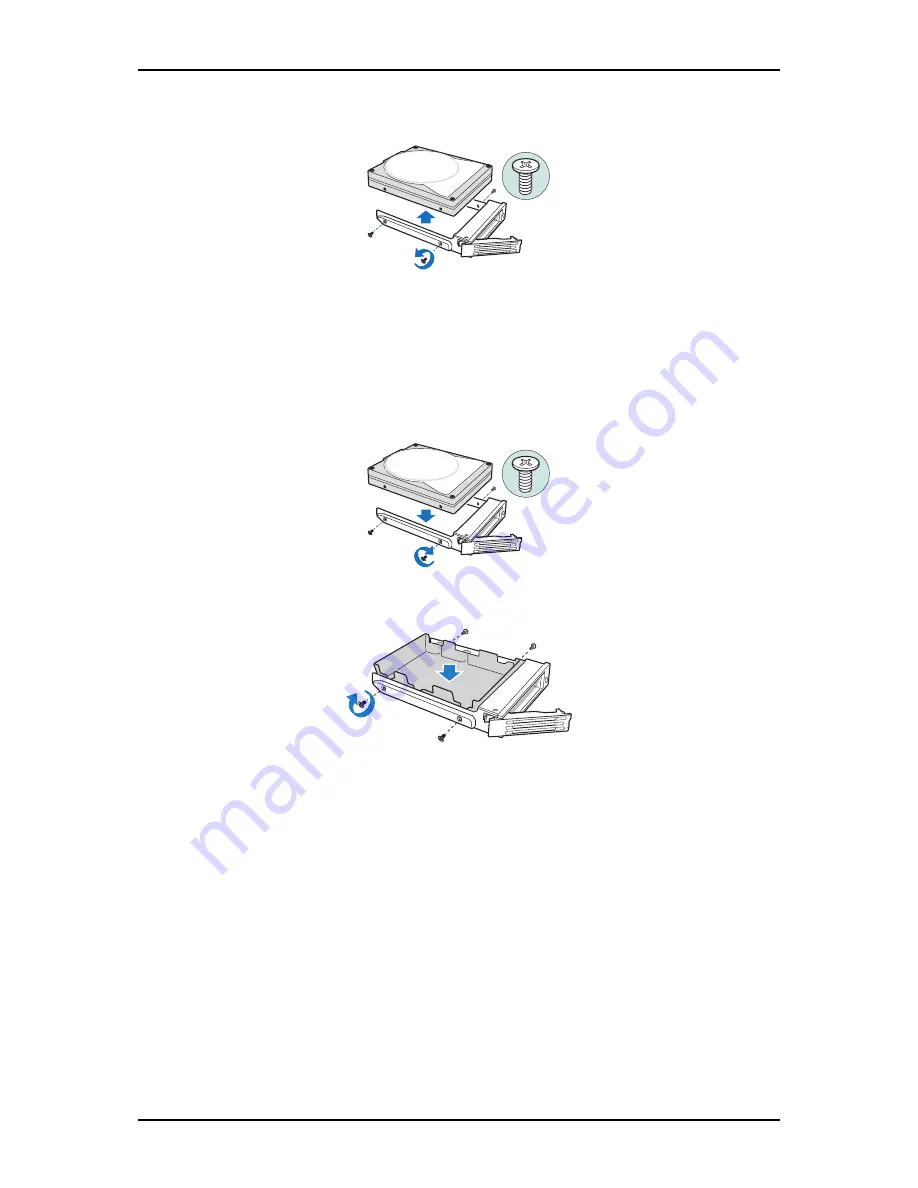
Remove the four screws that attach the hard drive to the drive carrier. Lift the
drive from the carrier. Store the old drive in an anti-static bag.
Figure 158: Removing the Hard Drive from the Drive Carrier
5.
Remove the new drive from its anti-static bag and place in the drive carrier.
With the drive circuit-side down, position the connector end of the drive so that
it is facing the rear of the drive carrier.
Align the holes in the drive to the holes in the drive carrier and attach the drive
to the carrier with the screws removed in the previous step.
Figure 159: Installing the Hard Drive in the Drive Carrier
Figure 160: Installing the Plastic Retention Device in the Drive Carrier
6.
With the black lever in the fully open position, slide the drive carrier into the
chassis. The green latch must be to the left. Do not push on the black lever
until the lever begins to close by itself.
When the black lever begins to close by itself, push on it to lock the drive
carrier into place.
TP01714
TP00929
TP01713
Summary of Contents for NovaScale R410 E1
Page 1: ...NovaScale T810 E1 T830 E1 R410 E1 User s Guide NOVASCALE REFERENCE 86 A1 15FA 00 ...
Page 2: ......
Page 34: ...User Guide 34 www bull com Motherboard Motherboard Layout Figure 14 Motherboard Layout ...
Page 53: ...User Guide 53 www bull com SAS Hard Disk Drive Capacity 73GB minimum 15000 RPM RAID support ...
Page 318: ......
Page 319: ...BULL CEDOC 357 AVENUE PATTON B P 20845 49008 ANGERS CEDEX 01 FRANCE REFERENCE 86 A1 15FA 00 ...


