


Respirator Assembly
Before assembling this respirator, read the warning labels
on the inside of the respirator cape and the helmet shell and
this manual in full.
Remove and read the warning card inserted between the
respirator’s two lenses.
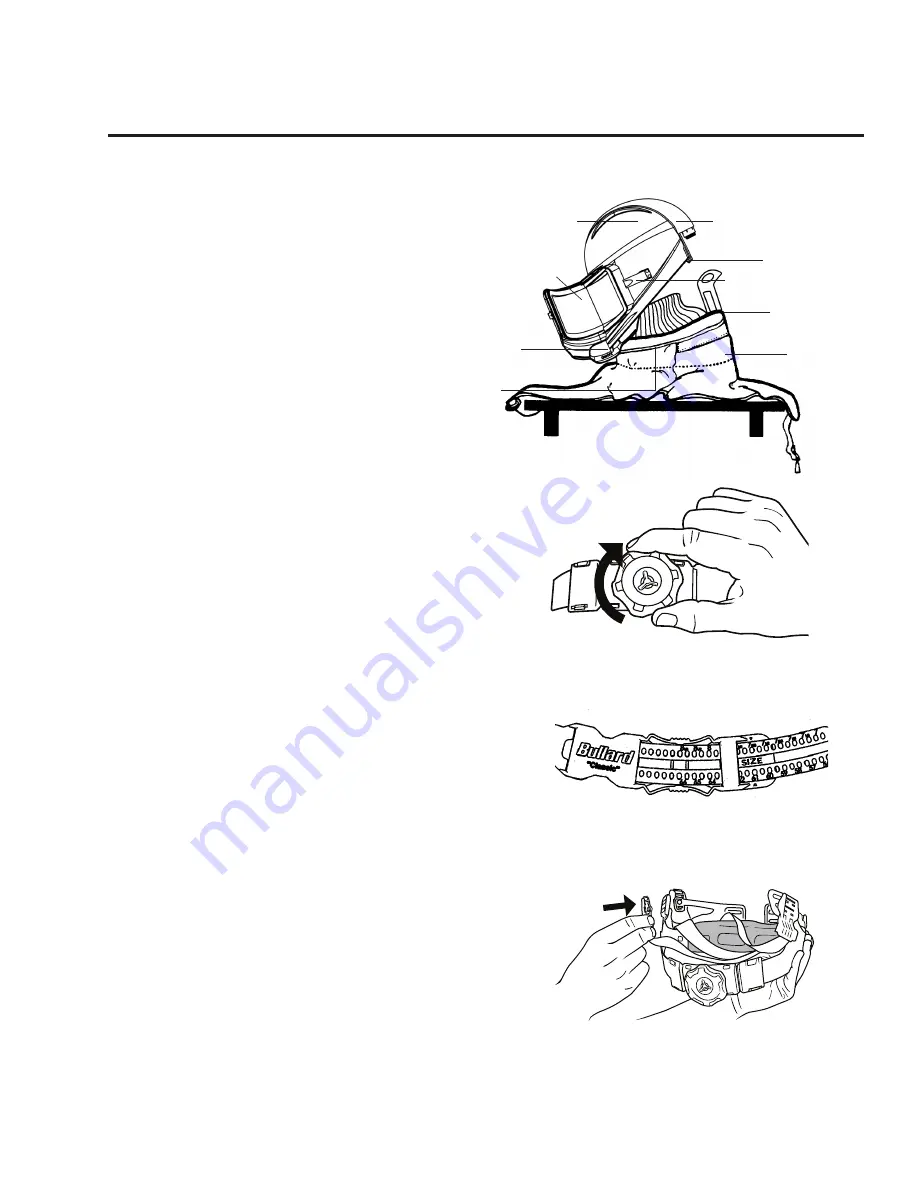
Sizing the Headband
Before you can size the headband suspension, the cape must
be removed from the helmet using the following steps:
1. Open hinged window frame by lifting up on window latch.
2. Remove cape from helmet by lifting up on clamp and
disengaging cape from helmet groove (Figure 4).
3. Adjust the suspension size: Flex-Gear
®
Ratchet-style
suspension: Turn ratchet knob counter clockwise until
headband opens to largest size. Place helmet on head and
turn ratchet knob clockwise until it fits comfortably. DO
NOT OVERTIGHTEN (Figure 5).
4. Remove from your head and replace the cape according to
Bullard’s instructions.
Optional Pinlock Suspension
Instructions
For pinlock headbands, unlock the four pins from the
sizing holes. Place the headband on your head. Pull down,
allowing headband to expand until it feels comfortable.
The headband will automatically adjust to your size. Lock
into place by pushing the four pins into the sizing holes
(Figure 6).
Adjust Crown Straps for Vertical Fit
To improve suspension comfort, adjust crown straps
vertically by repositioning the crown strap posts in the crown
straps. Vertical adjustment makes the headband ride higher
or lower on the wearer’s head. To adjust, push crown strap
post from slot, move to new slot, and snap in to secure.
Move key to desired vertical position. Repeat for other
crown strap post (Figure 7).
Respirator
Assembly
19
Figure 7
Helmet
Back of helmet
Helmet groove
Cape with
neck cuff
Window latch
Top rim of cape
Window latch strike
Window frame
Cape cable
Table or workbench
Figure 4
Figure 5
TIGHTEN
SNAP
GenVX Series Airline Respirator
User Manual
Figure 6


