4
SEt Up
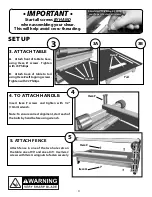
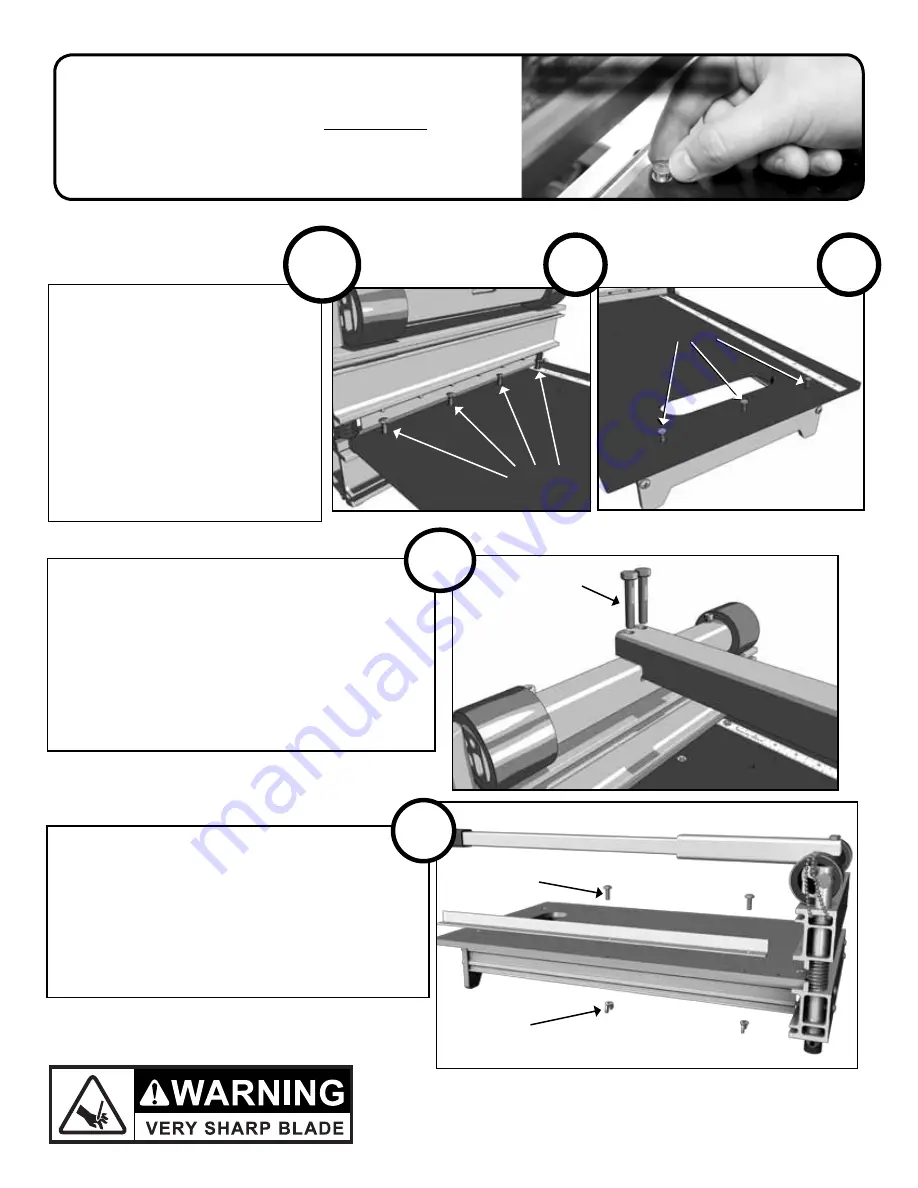
3. ATTAcH TAbLE
A
. Attach front of table to base,
using
Item D
screws. Tighten
with #3 Phillips.
B
. Attach back of table to tail
using
Item E
self
tapping screws.
Tighten with #2 Phillips.
4. TO ATTAcH HAnDLE:
Insert
Item F
screws and tighten with 1/2”
(13mm) wrench.
Note: To ensure correct alignment, start each of
the bolts by hand before using wrench.
5.
ATTAcH FEncE
Attach fence in one of the two hole sets on
the table: one at 90° and one at 45°. Use
Item C
screws with
Item G
wingnuts to fasten securely.
3
3b
4
5
3A
Item E
Item D
Item F
Item C
Item G
Tail
• IMPORTANT •
Start all screws By hAnD
when assembling your shear.
This will help avoid cross-threading.
Avoid cross-threading by using
your fingers to start all screws

